For Those About To Cook

  • Home
  • About Us
  • All Recipes
  • Subscribe
menu icon
go to homepage
  • Home
  • About Us
  • All Recipes
  • Subscribe
    • Facebook
    • Instagram
    • Pinterest
  • search icon
    Homepage link
    • Home
    • About Us
    • All Recipes
    • Subscribe
    • Facebook
    • Instagram
    • Pinterest
  • ×
    Home

    Wet Burger (Islak Burger)

    April 19, 2025 By Dan

    Finished wet burger wrapped in burger paper

    An Islak burger—also known as a Turkish wet burger—is a legendary late-night street food from Istanbul, and it’s exactly as messy and satisfying as it sounds.

    I have to admit that when I first saw them on sale at a kiosk in Taksim Square, I didn't think I would like the famous wet burger but I did! Below, I'll show you how to get the islak burger experience at home.

    Finished wet burger wrapped in burger paper

    What is an Islak burger?

    The Islak burger is a small beef burger drenched in a garlicky, spicy, tomato-based sauce and kept warm and steamy in a glass cabinet until served. The name “islak” literally means “wet” in Turkish, and the burger lives up to its name: soft, saucy, and dripping with umami.

    Although you could serve these with a side dish like fries, they are meant to be eaten on the go or at the end of the evening when you just want a quick snack to soak up all the beer.

    [feast_advanced_jump_to]

    What makes it special?

    There are quite a few different versions in and around Istanbul and some aren't special at all. They are just wet with little flavor. There are ingredients some vendors add that take them up a few notches which is what I do when I make wet burgers.

    • The sauce: A rich blend of tomato paste, garlic, butter or oil, and chili flakes, sometimes with a hint of vinegar or sugar. It's slathered over the bun and the patty.
    • The steam: After being sauced, the whole burger is steamed in a hot cabinet, giving it that soft, soaked texture—almost like a savoury sponge of flavour.
    • The size: They’re usually small and cheap, which means most people don’t stop at just one.

    Ingredients

    Islak burgers are simple. They're aren't many ingredients. The star is the steamed burger and bun covered in the tomato sauce. That's it really.

    Ingredients for wet burger
    • brioche buns
    • butter
    • ground beef
    • light olive oil
    • garlic
    • Aleppo chilli flakes
    • Passata
    • white wine vinegar
    • American burger cheese
    • Salt and pepper to taste
    • Water

    See recipe card for quantities.

    Instructions

    You’re only a few steps away from making this delicious Islak burger! Check out my step by step photos below and see just how easy it is!

    Burger buns toasting in butter
    1. Step 1: Heat a deep frying pan over a medium-high heat. Butter your buns and toast them until nicely browned. Set aside.
    Beef patties cooked and seasoned in a pan
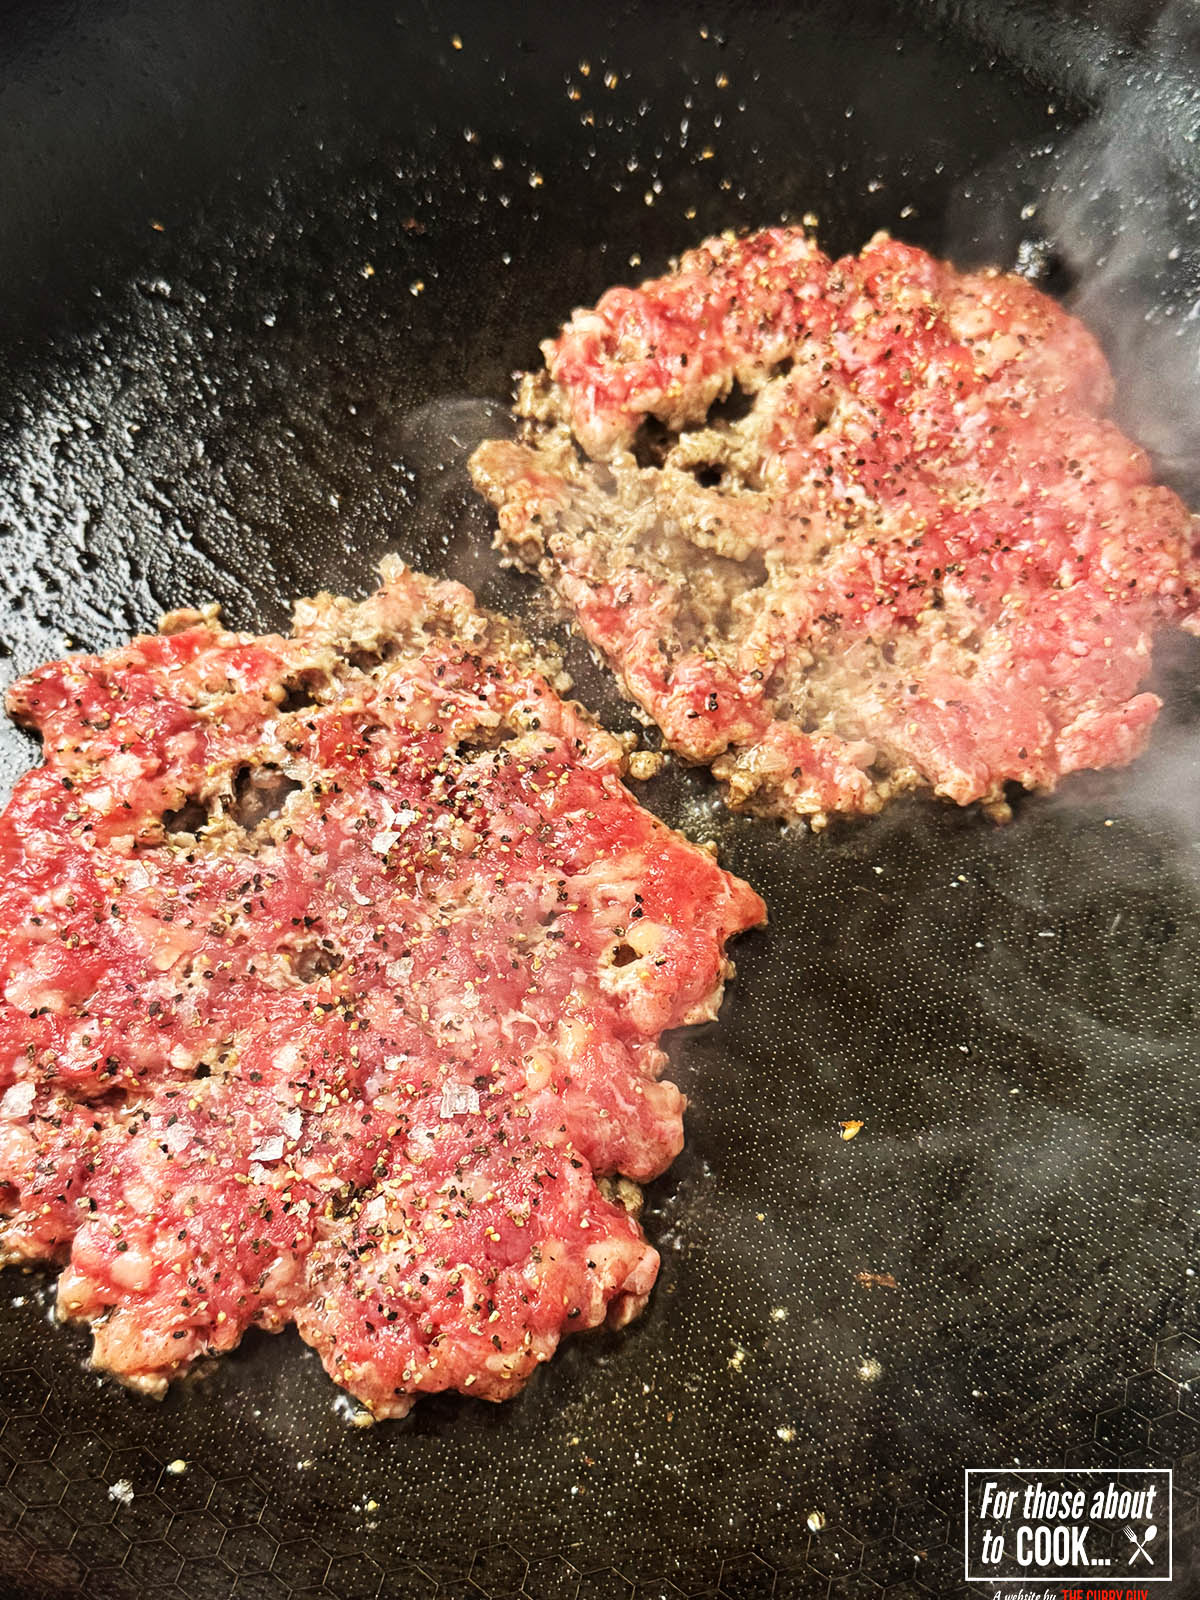
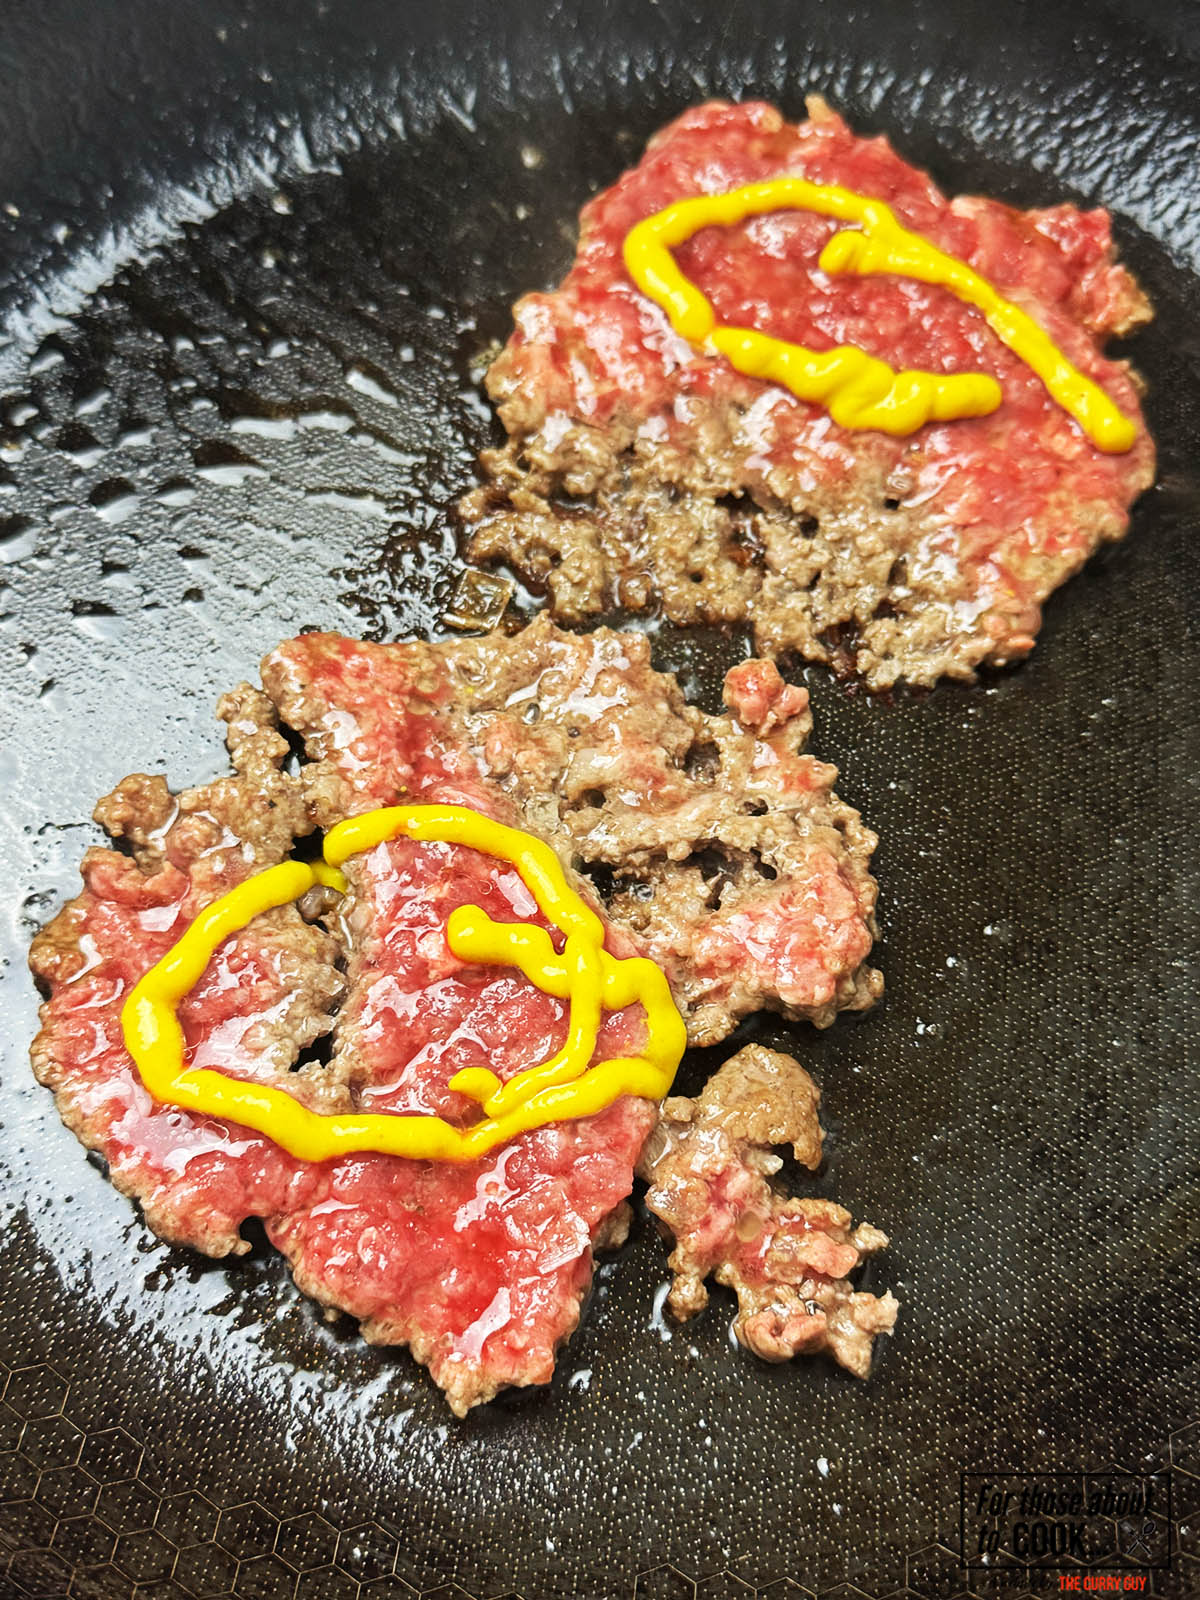
    1. Step 2: Add the beef balls and press into patties, add to the pan and cook on one side for a minute. Then flip the burger over to cook the other side. Season with salt and pepper to taste and then transfer to the plate with the toasted buns.
    Wet burger sauce simmering in deep pan
    1. Step 3: Add the olive oil to the pan and stir in the minced garlic. Fry for about 30 seconds and then pour in the Aleppo chilli flakes, pasatta, vinegar and water. Bring to a simmer and then take off the heat.
    Constructing the burger with the sauce and cheese
    1. Step 4: Generously top the bottom and top bun halves with the tomato sauce. Place a burger and a slice of cheese on each of the bottom buns. Then place the top bun over the cheese.
    Adding the burgers to the pan and covering with sauces
    1. Step 5: Put both burgers in the sauce in the pan and spoon some of the sauce, generously over the top bun. You want these burgers wet so get them wet with the sauce.
    Covering the pan with a lid
    1. Step 6: Cover the pan and steam the burgers over a low heat for about 10 minutes. You can spoon more sauce over the burgers from time to time as they steam. Add more tablespoons of water to your sauce if it's looking too thick to allow the burgers to steam.
    Adding more sauce to the steamed wet buns
    1. Step 7: When the meat is cooked through to your liking and the cheese has melted, remove the lid and again spoon as much tomato sauce as you can over the burgers.
    Finished wet burger wrapped in burger paper
    1. Step 8: Cover the pan again and keep warm until ready to serve or eat imedately.
    Wet burgers being served at a kiosk in Istanbul.
    Wet burgers on display at at a kiosk.
    Me eating a wet burger in Istanbul.

    Photos of wet burgers in Istanbul. I liked my Islak burger! It was different and a nice surprise.

    Substitutions

    I developed this recipe to be as close to the Islak burgers you find in Istanbul. You can substitute a few ingredients if you like.

    • Cheese - You will be lucky to find a vendor that adds American cheese to their Islak burger but some do. This really is simple food. Go ahead and leave the cheese off or add your favorite melty cheese to the burger.
    • Gluten Free - use gluten free buns instead of white bread buns to make this gluten free.
    • Vegetarian - the beef hamburger can be replaced with a plant-based burger to make this vegetarian. You won't find that in Istanbul though.

    Variations

    There really are few variations except for the amount of ingredients that go into the sauce and whether you add cheese. That said, you might want to add some of the following to make a westernised version.

    • Spicy - Try adding pickled jalapeño chillies when you add the cheese for a bit more kick.
    • Crunchy - This is a burger so top it with lettuce, tomato, pickles and or onion slices if you like. This is best done after you steam the burger and just before serving.
    • Saucy - If you like mustard, mayonnaise or ketchup on your burger, there really is not reason why you should hold back when you make your wet burger.

    All of the above suggestions are not authentic but if you like them, add them.

    Equipment

    A deep frying pan: Using a deep frying pan with a lid is the easiest way to make a wet burger. It makes this recipe into an easy one pan meal.

    A spatula: Get a good spatula for flipping the burgers and buns.

    Storage

    Your wet burger will be best right out of the pan. You can, however store them in an airtight container in the fridge for up to two days. To reheat, place them in your microwave where they will steam up when they reheat. You can also steam them in a steamer or in a pan with a little more sauce.

    Top Tip

    Don't overcook the burgers! Sear the outside and cook to a minimum internal temperature. They will continue to cook and steam in the sauce

    FAQ

    What kind of meat should you use for the patties?

    Use ground beef with a good fat content—ideally around 75/25 (25% fat). The fat helps keep the burgers juicy and rich, which is key since they'll soak up all that sauce without drying out.

    Can you prepare Islak burgers in advance?

    Yes. Cook the patties and make the sauce ahead of time. Store everything separately in the fridge. When you're ready to serve, reheat the sauce, coat the buns and patties, and steam the assembled burgers for that signature softness.

    Related

    Looking for other recipes like this? Try these:

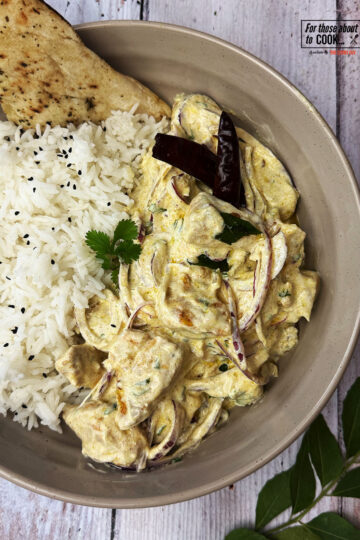
    • Chicken Chukauni served with rice and naan in a bowl
      Chicken Chukauni
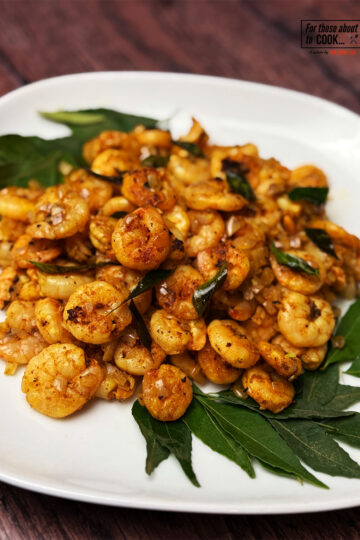
    • Kerala tawa prawns on a bed of curry leaves
      Kerala Tawa Prawn Fry
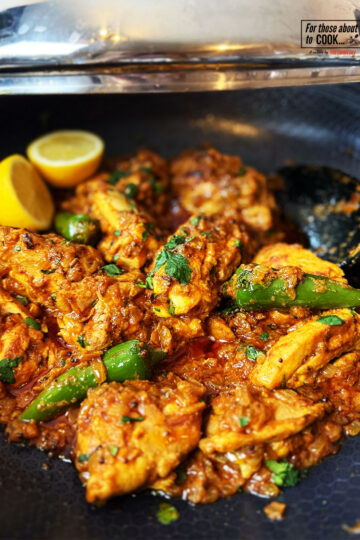
    • Chicken Achaar finished in the pan
      Chicken Achaar
    • Cottage pie served with garden peas
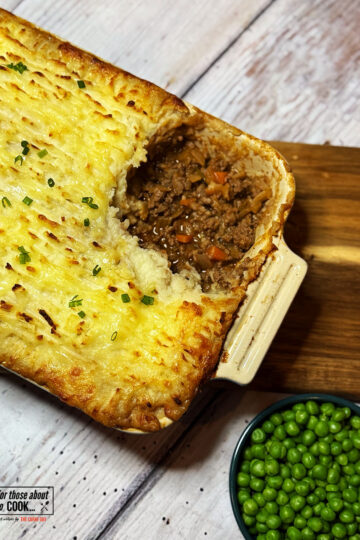
      Cottage Pie Recipe

    Recipe

    Finished wet burger wrapped in burger paper

    Wet Burger

    Yield: 2

    Ingredients

    • 2 brioche buns, sliced
    • 1 tablespoon butter
    • 7 oz ground beef
    • 1 tablespoon light olive oil
    • 1 garlic clove, minced
    • 1 teaspoon Aleppo chilli flakes
    • 1 cup Passata
    • 1 tablespoon white wine vinegar
    • 2 slices American burger cheese
    • ¼ cup water
    • Salt and pepper to taste

    Instructions

    1. Heat a pan over a medium-high heat. Spread the butter over the bun slices and toast them in the pan until golden brown. This should only take a couple of minutes. Transfer the browned buns to a plate and set aside.
    2. Place the burger patties in the pan and fry on one side for about a minute. Then flip it over and cook for another minute and season with salt and pepper to taste. The meat may not be completely cooked at this stage which is fine. Transfer the burger patties to the plate with the buns
    3. Pour the olive oil into the pan and add the minced garlic. Fry the garlic over a medium heat for about a minute and then pour in the passata. Bring it to a simmer over the low heat.
    4. Now spread some of this sauce generously over both halves of each of the buns. Place the burger patties on the bottom buns and top with the American cheese slices. Cover this with the top buns.
    5. Place the stacked burger in the pan and top with some of the sauce so that the bun is completely covered with the sauce.
    6. Move the burgers around in the remaining sauce and cover the pan. Let them steam over a low heat until the cheese has melted and the bun is wet and soft. This will take about 3 to 5 minutes.
    Nutrition Information:
    Yield: 2 Serving Size: 1
    Amount Per Serving: Calories: 700Total Fat: 73gSaturated Fat: 33gTrans Fat: 1gUnsaturated Fat: 35gCholesterol: 308mgSodium: 1779mgCarbohydrates: 74gFiber: 4gSugar: 13gProtein: 64g
    © Dan
    Cuisine: Turkish / Category: Burger Recipes

    The All Italian Burger

    April 18, 2025 By Shannon

    All Italian burger finished

    A Mediterranean twist on a classic burger! Creamy mozzarella, ripe tomato, vibrant pesto and juicy beef on a soft burger bun. You will love this All Italian Burger!

    All Italian burger finished

    About this All Italian Burger

    If you love a classic cheese burger, you’ll love this All Italian Burger as it has every ingredient but with a slight twist. Forget about cheddar, this burger swaps it for oozing, creamy mozzarella cheese. Lettuce not your thing? This burger is layered with peppery arugula. Burger sauce just not hitting the spot? This All Italian Burger is dripping with nutty, fresh pesto! You just have to try this Mediterranean twist on a classic burger!

    [feast_advanced_jump_to]

    Ingredients

    Ingredients for all Italian burger
    • Ground beef (Pressed into a burger patty)
    • Burger buns
    • Handful of arugula (rocket)
    • Salt & pepper
    • Tomato slice
    • Slice of fresh Mozzarella
    • Fresh Pesto
    • Butter

    See recipe card for quantities.

    Step by step photographs:

    Buns toasting in a pan with butter
    1. Step 1: In a pan on medium heat, toast your burger buns with a tablespoon of butter.
    Frying in a pan seasoned with salt
    1. Step 2: Season both sides of your burger patty with salt. Turn up the heat to high then once smoking hot, add your burger patties and fry for 5 minutes. Then flip over.
    Mozzarella cheese melting on patty
    1. Step 3: Once you have flipped your burger, add the sliced mozzarella and cover with a burger dome or pan lid to allow the cheese to melt.
    Burger patty topped with mozzarella, pesto and burger bun
    1. Step 4: On your top bun, spread a healthy layer of your pesto, place it onto your burger patty and cover again with the burger dome. This allows the bun to steam.
    Bottom burger bun topped with arugula and tomato
    1. Step 5: On your bottom bun, add a layer of pesto, top with arugula and add your tomato slice.
    Burger finished
    1. Step 6: Finally, place the top of the burger from the pan and on-top of the tomato. Dig in!

    Which buns can I use for this recipe?

    I have paired this burger with a brioche bun, the easy recipe can be found here: Brioche Hamburger Buns recipe.

    Alternatively, you can definitely use a simple burger bun, the recipe can be found here: Homemade Hamburger Buns.

    Substitutions

    The flavors of this All Italian Burger are so perfectly balanced, with the gooey mozzarella complementing the nutty pesto perfectly. However, if you want to use up other items that you have in your refrigerator then here are some ideas:

    • Pesto - Instead of garlicky green pesto, why not try a Red Pesto if you enjoy a tomato base more? Fancy a bit of spice, why not keep the flavors Mediterranean by using a ‘Nduja spread?
    • Bun - use gluten free buns instead of brioche buns to make this gluten free.
    • Cheese - If you want to stick to Italian cheese then Provolone will work perfectly and melt just as well. If you have some Gouda in your refrigerator then that will melt perfectly as well!

    Equipment

    All you need to make this recipe perfect is a pan and pan lid. Instead of using a burger dome, simply use the lid for your pan to perfectly steam your buns and melt your cheese to perfection. You can easily fry your burgers in a pan, or be a star chef and grill on an iron skillet or griddle.

    Storage

    Store the wet ingredients (lettuce, tomato, onion) separately from the dry ingredients (buns) in the fridge, and recombine when ready. Good for 2-3 days.

    Refrigeration: You can store your burger patties raw in the fridge for up to 2-3 days before you want to cook them. Make sure to store them in an airtight container, away from non-meat products. You can store cooked patties for 3-4 days in an airtight container, keep away from any raw meat in your fridge.

    Frozen: You can freeze your raw or cooked patties for up to 3 months, ensure they are separated by parchment paper so they don’t stick together and store in freezer bags.

    Reheating: To reheat your raw patties, simply thaw out overnight in the refrigerator and fry as instructed above. If you’re reheating cooked patties, heat them in a pan or skillet until they are heated through.

    Top Tip

    When forming your patties, make sure to simply shape them to your desired thickness and don’t overwork the meat. You’ll end up with a dense burger otherwise. Also, don’t skip steaming the buns and cheese, the cheese will melt perfectly through the steam heat and the buns will become delectably soft.

    FAQ

    What type of meat is best for this All Italian Burger?

    Ground beef is perfect for burgers patties. It contains the perfect amount of fat to keep your burger juicy and flavorful.

    How thick should my burger patty be?

    I recommend the patties for this burger should be around 1 inch thick as I don’t recommend smash burgers for this recipe.

    Should I season my All Italian Burgers?

    Like stated in this recipe, I recommend only using salt to season your patties as if you add pepper it might burn and leave a bitter taste. Add pepper after the second flip to avoid this!

    Related

    Looking for other burger recipes? Try these:

    • Finished mac and cheese burger
      Mac and Cheese Burger
    • Finished bacon jam burger
      Bacon Jam Double Cheeseburger
    • Lettuce Wrap burger
      How To Make A Lettuce Wrap Burger In-n-Out Style
    • homemade big mac recipe
      How To Make A Homemade Big Mac
    • Oklahoma Onion Burger
      Oklahoma Onion Burger
    • Bob’s Big Boy Double Decker burger, homemade.
      Bob's Big Boy Double Decker
    • Finished wet burger wrapped in burger paper
      Wet Burger (Islak Burger)
    • Finished blue cheese cheeseburger
      Blue Cheese Burger
    • Finished chili cheese burger
      Chili Cheeseburger
    • Making a 5 Guys Burger
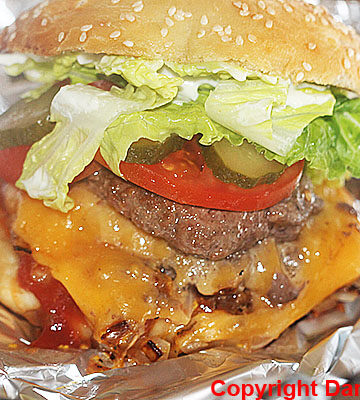
      5 Guys Burger Recipe - Authentic Copycat
    • Homemade Burger King Double Whopper With Cheese
      How To Make A Double Whopper With Cheese CopyCat Recipe
    • Finished guacamole burger
      Mexican Burger

    Pairing

    Love the Italian twist to this hamburger? Try these other Italian recipes:

    • Finished plate of marry me chicken orzo
      Marry Me Chicken Orzo
    • Finished Italian chicken in a bowl with garlic bread
      Italian Chicken (Pollo allo Scarpariello)
    • Veal Scallopini served in the pan it was cooked in.
      Veal Scallopini
    • Finished chicken fettuccini Alfredo
      Chicken Fettuccini Alfredo

    Recipe

    All Italian burger finished

    All Italian Burger

    Yield: 1

    Discover this All Italian Burger with juicy beef, fresh mozzarella, and vibrant pesto. A delicious twist on a classic favorite!

    Ingredients

    • 7oz (200G) Ground beef (Pressed into a burger patty)
    • Burger buns
    • Handful of argula (rocket
    • Salt & pepper
    • Large tomato slice
    • Slices of Mozzarella
    • 2 tablespoon Pesto
    • 1 tablespoon butter

    Instructions

      1. In a pan on medium heat, toast your burger buns with a tablespoon of butter.

      2. Season both sides of your patties with salt. In the same pan on a high heat, fry your burgers on both sides for 5 minutes each side.

      3. Once your burgers have cooked, add your sliced mozzarella and cover with a burger dome or pan lid. Allow the cheese to melt.

      4.. On your top bun, spread a healthy layer of pesto, place it onto your burger and place the burger dome onto again. Allow the bun to steam.

      5. On your bottom bun, add a layer of pesto, top with arugula and add your tomato slice.

      6. Finally, place the top of the burger from the pan and place it on-top of the tomato. Dig in!

    Nutrition Information:
    Yield: 1 Serving Size: 1
    Amount Per Serving: Calories: 700Total Fat: 46gSaturated Fat: 19gTrans Fat: 1gUnsaturated Fat: 23gCholesterol: 127mgSodium: 1036mgCarbohydrates: 34gFiber: 4gSugar: 10gProtein: 38g
    © Shannon
    Cuisine: Italian/American / Category: Burger Recipes

    Brioche Hamburger Buns

    April 18, 2025 By Joe

    Brioche hamburger buns

    These brioche hamburger buns are buttery, light and utterly irresistible. These golden buns almost melt in your mouth. Unlike the standard white hamburger bun, brioche buns are made using a dough enriched with eggs, butter and a touch of sugar.

    Brioche hamburger buns

    Once you have made these brioche hamburger buns, there is no going back. Love hamburgers? The ultimate hamburger is a brioche burger bun recipe away.

    These brioche burger buns pair perfectly with homemade smash burgers so be sure to give that one a try. Alternatively, they're incredibly versatile and can be filled with literally any sandwich filling. You're sure to enjoy this recipe!

    [feast_advanced_jump_to]

    Ingredients

    It will be easy to source the ingredients for this recipe. Some grocery stores don't stock 00 flour but most do so you won't need to look far. Here is what you will need.

    Ingredients for brioche hamburger buns
    • Strong bread flour
    • All purpose flour
    • Sugar
    • butter
    • Milk
    • Water
    • Dried yeast
    • Eggs
    • Fine salt
    • Olive oil

    See recipe card for quantities.

    Instructions for brioche hamburger buns

    Follow each step to this brioche hamburger bun recipe and you will not fail. Here's what you need to do...

    Activating the yeast
    1. Step 1: To start, combine the warm milk and warm water with the yeast and 1 tablespoon of the sugar. Cover with a cloth/towel and leave for 15 minutes to get frothy like you see in the photograph.
    Mixing together the wet and dry ingredients
    1. Step 2: In a large mixing bowl, combine the remaining dry ingredients then add the yeast mixture along with the eggs (whisked before adding).
    Mixing the brioche hamburger buns ingredients together
    1. Step 3: Mix the ingredients together to form a dough then knead for 10-15 minutes, adding 1 tablespoon of butter at a time combining thoroughly. If you’re not using an electric mixer, try handle the dough without adding extra flour. If needed, only add enough for it to be workable and be careful not to add to much.
    Dough rising
    1. Step 4: Cover the dough and leave in a warm place to rise and double in size for 1.5-2hours. The photograph shows the final result. When the dough is ready, knock it back using your fist.
    Portioning the dough for homemade hamburger buns
    1. Step 3: Portion into 12-16 dough balls. For a standard size burger bun, you are aiming for 3.5 ounces (100g). This recipe will make 12-13 that size. Cover loosely and allow to rise again for 45-60 minutes in warm place.
    Brushing with egg yolk
    1. Step 4: Pre-heat your oven to 400F/200C. Brush each bun evenly with egg wash (1 egg with 1tbsp milk.
    Cooling the brioche hamburger buns
    1. Step 3: Bake for 15-20 minutes until they are golden
    Brioche hamburger buns
    1. Step 4: Cook in oven for x minutes at 400 degrees

    Hint: Make sure you follow each step and allow for two rises. The first after you have kneaded the dough and a second after you have shaped the buns.

    Variations

    This recipe guides you on how to make the perfect brioche hamburger buns. However, there are many variations of hamburger buns.

    • Seeded brioche - Top each bun with a generous amount of sesame seeds after you have evenly coated with egg wash
    • Wholemeal - To make this recipe more wholemeal, switch out the plain flour for wholemeal flour. I recommend still using the strong bread flour.
    • Classic white buns (with or without sesame seeds)- Once you have mastered this brioche hamburger bun recipe, you will feel like you're an expert baker. It's time to learn a variety of different ways of making homemade hamburger buns that re sure to impress your friends and family and this recipe shows you how to make the classic white burger bun. Give it a try.

    Equipment

    This section highlights equipments that is either essential or especially helpful the more common kitchen equipment.

    Electric Mixer and dough hook - I highly recommend using an electric mixer for this recipe. Although it is not needed, it helps make the mixing and kneading easier with the sticky dough required for this recipe. In each step I guide you through using a mixer, or by hand, so there's no 'knead' to worry!

    Measuring scales - Very important for accuracy.

    Large flat pan baking tray - This is important to make sure you leave enough room between each bun so that they do not merge together. You will see better (rounder) results.

    Storage

    For short term storage, you can leave these buns out at room temperature, in an airtight container or a resealable plastic bag for 2-3 days. If you're storing for longer, I recommend freezing.

    Freezing - store individually wrapped or in a ziplock bag for up to 3 months. I recommend freezing them as soon as possible after baking and cooling.

    Top Tip

    After the first rise, knock the dough back with your fist, then leave in the fridge for a minimum of 4 hours or up to 24. This helps improve flavour and makes it a lot easier to handle when you're ready for the second rise.

    FAQ

    Why are my burger buns dense?

    This is likely because there was not enough kneading or they were not left to rise long enough. Make sure you knead for at least 10 minutes to develop gluten. If the dough is stiff, add a little more water and make sure you let the dough rise in a warm place.

    Can I make the dough the night before?

    Yes! I recommend this. Leaving the dough in the refrigerator after the first rise develops flavour and makes it easier to work with when shaping.

    Now time for the perfect hamburger?

    You've made the brioche hamburger buns, now time to fill them. Try these delicious recipes.

    • Lasagne served on a plate with rocket salad
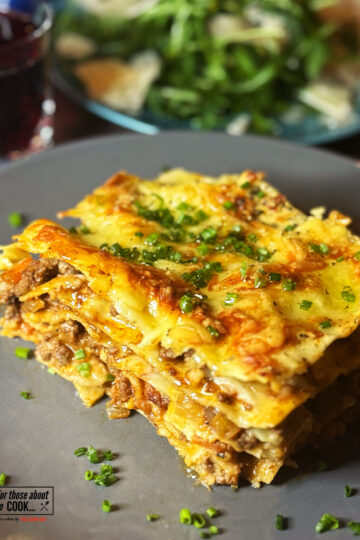
      Lasagne
    • Salsa verde tacos topped with salsa and cheese
      Salsa Verde Tacos
    • Curried brussels sprouts served in a side dish
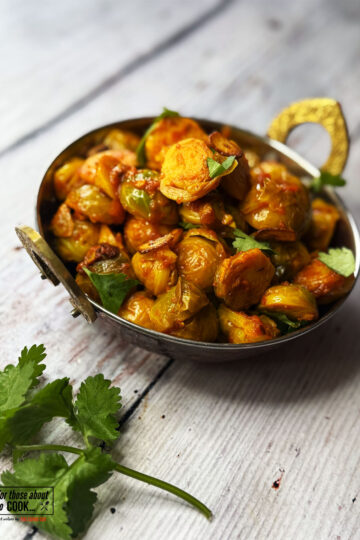
      Curried Brussels Sprouts
    • Honey harissa chicken served on a bed of mashed potato with harissa chicken gravy
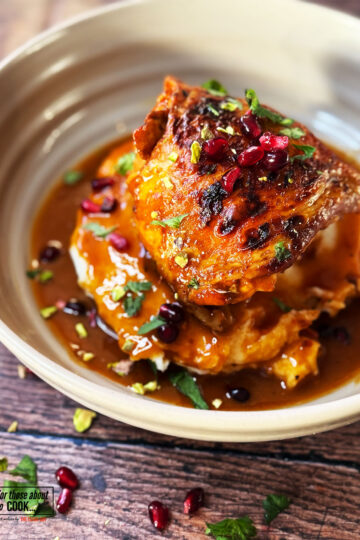
      Honey Harissa Chicken

    Pairing

    If you love hamburgers, then these American recipes will have your tastebuds dancing!

    • Refried bean taquitos served with chipotle dip
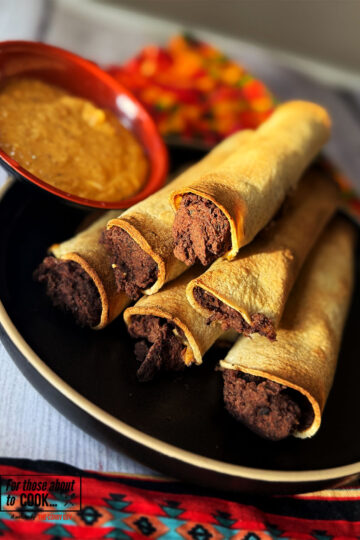
      Refried Bean Taquitos
    • Philly Cheesesteak Recipe
      Philly Cheesesteak Recipe
    • Chipotle mayo served in a bowl
      Chipotle Mayo
    • Cheeseburger tacos topped with big mac sauce
      Smash Burger Tacos
    See more American →

    Recipe

    Brioche hamburger buns

    Brioche Hamburger Buns

    Yield: 12-16 buns
    Prep Time: 30 minutes
    Cook Time: 20 minutes
    Additional Time: 3 hours
    Total Time: 3 hours 50 minutes

    Make irresistible brioche hamburger buns at home. These buttery buns elevate any burger experience to the next level.

    Ingredients

    • 6 cups (780g) strong bread flour
    • 1 ⅓ cup (165g) plain flour
    • 6 tablespoons sugar
    • ⅔ cup (150ml) tablespoons warm milk
    • 1 ¼ cups (300ml) warm water (not too hot)
    • 4 ½ teaspoon (14g or two packets) dried yeast
    • 3 eggs
    • 3 tablespoon unsalted butter
    • 3 teaspoons fine salt
    • Sesame seeds (optional)

    Instructions

    1. Start by combining the warm milk and warm water with the yeast and 1 tablespoon of the sugar. Cover and set in a warm place for about 20 minutes. The yeast will begin to foam.
    2. Now combine the flour, salt and remaining sugar in a large mixing bowl. Whisk the eggs and add these to the dry ingredients along with the yeast mixture.
    3. Combine and form into a sticky dough, then knead for 10-15 minutes, preferably with an electric mixer and a dough hook. If you are doing this by hand, add only a touch more flour, if needed, so that it is manageable.
    4. During the kneading process, gradually add 1 tablespoon of butter at a time and knead it into the dough, combining thoroughly.
    5. You will know when the dough is ready when you take a golf ball sized piece of dough out of the bowl and stretch it until you can see through the stretched dough.
    6. Cover the bowl and allow to rise for 1.5 -2 hours in a warm place. It should double in size.
    7. Punch it down and divide the dough into 12-16 hamburger buns shapes. Stretch and fold the dough underneath. You are aiming for super smooth dough balls.
    8. Place the burger buns on one or two baking paper lined baking trays and cover with a towel to rise for another 45 minutes to 1 hour.
    9. When you are ready to bake your hamburger buns, pre-heat your oven to 400F/200F.
    10. Whisk 1 egg with 1 tablespoon milk to create an egg wash. Brush each bun evenly with egg wash.
    11. If making sesame seed brioche buns, sprinkle the buns just before placing in the oven.
    12. Bake for 15-20 minutes until the top of the buns are nicely browned and the bottom of the buns sound hallow when tapped.
    13. Place the cooked hamburger buns on a rack to cool slightly before slicing.
    Nutrition Information:
    Yield: 12 Serving Size: 1
    Amount Per Serving: Calories: 390Total Fat: 7gSaturated Fat: 3gTrans Fat: 0gUnsaturated Fat: 3gCholesterol: 55mgSodium: 557mgCarbohydrates: 68gFiber: 3gSugar: 7gProtein: 13g
    © Joe
    Cuisine: American / Category: Burger Recipes

    Easy French Onion Soup Recipe

    April 16, 2025 By Shannon

    French onion soup finished with golden cheese

    This easy French onion soup recipe is the ultimate comfort meal , made with readily available ingredients. This recipe is rich, deeply flavorful and topped with golden melted Gruyere cheese. Whether you are serving this as a starter or main, it is guaranteed to impress your friends and family.

    French onion soup finished with golden cheese

    About this Easy French Onion Soup Recipe

    French onion soup (or Soupe à l'Oignon Gratinée) first became popular in the 19th century, curated by the French as a humble, inexpensive, warm and hearty meal for the working class during the French Revolution. It was not until the 20th century when it was adapted with a crusty bread and cheese topping, served in french restaurants.

    This recipe talks you through the whole process from caramelizing onions to toasting the bread topped with melted golden Gruyere. You are in for a treat!

    [feast_advanced_jump_to]

    Ingredients

    The ingredients for this easy French onion soup recipe are easily sourced in your local grocery store. Here is what you will need...

    ingredients for this easy french onion soup recipe

    • White onion
    • Red onion
    • Unsalted butter
    • Beef stock
    • Thyme and rosemary (tied together)
    • White wine
    • Worcester sauce
    • Baguette
    • Olive Oil
    • Gruyere cheese
    • Salt& pepper

    See recipe card for quantities.

    Step by step photographs:

    melting butter in a saucepan
    1. Step 1: In a large pot, melt the butter over medium-low heat.
    onions added to the saucepan
    1. Step 2: Add your onions and salt, leave to cook on low for up to 40 minutes (stirring occasionally)
    wine added to caramlized onions
    1. Step 3: When your onions are caramelized, deglaze your pan with the white wine (scrape round the sides)
    Beef stock and tied herbs added to the pot
    1. Step 4: Add your beef stock, tied sprigs of rosemary and thyme, Worcester sauce and salt and pepper. Remove your sprigs of rosemary and thyme after 10 minutes. Leave to simmer for 40 minutes.
    Baguette slices brushed with olive oil and grilled until golden
    1. Step 5: Brush your sliced baguette with olive oil, place on a baking tray and allow to broil until golden brown on both sides.
    French onion soup in oven proof dish topped with golden bread and Gruyere cheese
    1. Step 6: Now time to assemble, to an oven proof bowl, add a generous helping of your french onion soup, place your golden baguette pieces on-top and sprinkle with a generous helping of Gruyere.
    French onion soup finished with golden cheese
    1. Step 7: Place the oven proof dish into the oven and broil until the cheese is golden.
    spoon full of french onion soup
    1. Step 8: DIg in!

    Substitutions

    For the authentic French flavor to really come to life, I recommend using as many of the ingredients in this recipe as you can find. However, there are some easy substitutions you can make depending on you dietary requirements or what you have in your refrigerator.

    • Cheese - You should be able to source Gruyere from any convenience store, however if you're finding it tricky here are the perfect substitutions: Comte cheese, Emmental or Mozzarella will all give you the salty, gooey cheese pull that makes this recipe so comforting.
    • Onions - For a variety of flavor, I love using a mixture of white and red onion in my French Onion Soup. However, you could just use white onion if that's all you have to hand, or be adventurous and add even more depth of flavor by swapping a white onion for 2 shallots!
    • Stock - Good quality beef stock is what really makes this dish special, make your own if you can or source high quality store bought stock. Alternatively, if you would like to keep this dish vegetarian, vegetable stock can also be used instead! Make sure to check whether the cheese you are using is vegetarian friendly too!

    Variations

    If by some miracle you have any French Onion Soup left over, you can either simply reheat it using the storage instructions below or how about try these variations:

    • French onion pasta - A great way to use up any soup you may have left over. Simply reheat your soup with a splash of cream and stir into your favorite pasta shape.
    • French onion dip - Add your left over soup to a blender along with some sour cream and cream cheese and you'll have yourself a delicious, moreish dip!
    • French onion grilled cheese - Yes, you read that correctly! Why not add a delicious layer of french onion soup to your grilled cheese sandwiches? Or, if you're feeling extra adventurous, add a layer to this Croque Monsieur recipe.

    Equipment

    The only special equipment you will need to make your French Onion Soup extra indulgent is an oven proof pot/ soup dishes. This will allow you to broil your soup in the oven and add that delicious melted cheese on-top. If you don't have individual oven proof soup dishes, if you have cooked your soup in a large oven proof pot, you can simply top the soup with the toasted baguette and cheese and put the whole pot under the grill! Just be careful when taking it out the oven and when dishing it up into individual bowls!

    Storage

    • Refrigerating - If you have any soup left over that you would like to store in the refrigerator ready to reheat later, remove any topping such as bread and cheese as this will go soggy. Allow the soup to cool and add to an airtight container. Keep in the refrigerator for up to 4 days.
    • Freezing - Only freeze the soup base, allow to cool and add to an airtight container. Freeze for up to 3 months.
    • Reheating - If reheating from frozen, allow to thaw out completely and reheat on a stove or in the oven in an overproof dish. Then add your bread and cheese toppings and broil as per the instructions.

    Top Tip

    Go slow when caramalizing the onions! To really get the beautifully sweet, brown onions that you require, take your time, stirring occasionally. The whole process can take up to 45 minutes! If you're really strapped for time however, you can speed up the process by adding a teaspoon of brown sugar.

    FAQ

    Which onions are best for French Onion Soup?

    White onions are the best base for your soup as they add the perfect amount of sweetness when caramalized. However, you can add an extra depth of flavor by swapping a few white onions for red onions or even using a few shallots too!

    Do I have to use white wine?

    Not at all! If you're wanting to use a different alcohol, red wine works perfectly or even substituting for a splash of port or brandy!

    Related

    Looking for other French recipes like this? Try these:

    • Grilled rabbit on a serving plate with lemon wedges.
      Grilled Rabbit - French Style
    • Moules Mariniere on a serving plate.
      Moules Mariniere
    • Finished french onion burger
      French Onion Burger
    • Brioche hamburger buns
      Brioche Hamburger Buns
    See more French →

    Pairing

    French onion soup would be a perfect starter for these French recipes:

    • 40 clove garlic chicken in the bowl it was cooked in.
      40 Clove Garlic Chicken Recipe
    • cassoulet on a serving plate with crusty French bread and salad.
      Cassoulet
    • Spooning the chicken and asparagus onto a plate.
      Chicken and Asparagus
    • The cooked fish on a serving platter drizzled with the herb mixture.
      Mediterranean Fish - Grilled

    Recipe

    French onion soup finished with golden cheese

    Easy French Onion Soup

    Yield: 4
    Prep Time: 5 minutes
    Cook Time: 2 hours
    Additional Time: 10 minutes
    Total Time: 2 hours 15 minutes

    Savor the comfort of easy French onion soup made with simple ingredients and topped with melted Gruyere cheese.

    Ingredients

    • 4 White onion
    • 2 red onion
    • 2 tablespoon (30g) Unsalted butter
    • 6 cups (1.2 litres) Beef stock
    • 1 sprig thyme and 1 sprig rosemary tied together
    • 1 cup (200ml) dry white wine
    • 1 tablespoon Worcester sauce
    • 1 Baguette (sliced for serving)
    • 1 tablespoon Olive Oil
    • 1 cup (100g) grated gruyere cheese
    • Salt & pepper

    Instructions

    1. In a large pot, melt the butter over a medium-low heat.
    2. Add your onions and a sprinkle of salt, leave to cook and caramalize for 40 minutes. Stir occasionally.
    3. When your onions are caramalized, deglaze your pan with white wine (scrape around the bottom and sides of the pot).
    4. Add your beef stock, tied herbs. Worcester sauce and salt and pepper and simmer on a medium heat for 40 minutes. After 10 minutes, remove your tied herbs.
    5. Meanwhile, brush your sliced baguette with olive oil on both sides, place on a baking tray and broil until golden brown all over.
    6. After your soup has simmered and your baguette is toasted, its time to assemble. To oven proof bowls, portion our your soup, place your golden baguette pieces on-top and sprinkle with a generous helping of Gruyere.
    7. Place the oven proof dishes in the oven and broil until the cheese is golden.
    Nutrition Information:
    Yield: 4 Serving Size: 1
    Amount Per Serving: Calories: 639Total Fat: 24gSaturated Fat: 11gTrans Fat: 0gUnsaturated Fat: 12gCholesterol: 56mgSodium: 1363mgCarbohydrates: 71gFiber: 4gSugar: 17gProtein: 28g
    © Shannon
    Cuisine: French / Category: Soup

    Chicken and Asparagus

    April 15, 2025 By Caroline

    Spooning the chicken and asparagus onto a plate.

    Chicken and asparagus is big flavor. Minimal fuss. And that sauce? You'll want to drink it.

    You don’t have to be in Provence to enjoy rustic French flavours. You don’t need white tablecloths or fancy plating either. This French Chicken and Asparagus is all about good ingredients, cooked simply, and made to taste amazing.

    Chicken and asparagus in the pot it was cooked in.

    About this chicken and asparagus recipe.

    I love recipes like this—classic combos, no fluff, just solid technique and loads of flavor. It’s got juicy, golden chicken, crisp-tender asparagus, and a creamy, mustardy white wine sauce that’s pure comfort. Cook it all in one pan, and you’ve got a proper meal with restaurant-level results in under an hour.

    This dish is perfect for spring and summer when asparagus is fresh and sweet—but let’s be honest, it’s good any time of year.

    [feast_advanced_jump_to]

    Why This Recipe Works

    French cooking often gets a reputation for being complicated, but this one’s the opposite. It’s simple, honest food—nothing more than chicken, asparagus, shallots, garlic, olives, tomatoes, mustard, wine and herbs coming together to make something that tastes like a lot more work than it actually is.

    It’s also versatile. Serve it with crusty bread, mashed potatoes, rice, or even over pasta. That sauce? It goes with everything.

    Ingredients

    There aren't a lot of ingredients for this chicken and asparagus recipe. Get them all prepared and ready before you start cooking.

    Ingredients for the recipe on a counter top.
    • chicken thighs on the bone
    • salt
    • cracked black pepper
    • olive oil
    • shallots
    • garlic
    • thyme sprigs
    • dry white wine
    • Dijon mustard
    • cherry tomatoes
    • green olives, pitted
    • asparagus

    See recipe card for quantities.

    Step by step photos

    Use this section for process shots, alternating between the step and image showing the step. Users don't like seeing process shots cluttering up the recipe card, so include your process shots here.

    Seasoning the chicken with salt and pepper.
    1. Step 1: Season the chicken with the salt and pepper.
    Browning the chicken in olive oil.
    1. Step 2: Heat the olive oil in a pan over a medium-high heat. When it begins to shimmer but is not yet smoking, add the chicken skin side down. Brown on both sides for a few minutes and then transfer to a plate and set aside.

    Frying the shallots in olive oil.
    1. Step 3: In the same oil, fry the shallots for about 3 minutes to soften.
    Adding garlic and herbs to the shallots in the pan.
    1. Step 4: Then add the garlic and fry for another few minutes, stirring regularly. Be careful not to burn the garlic.

    Adding the wine and stock to the frying vegetables and herbs.
    1. Step 5: Add the herbs, wine and mustard and bring to a simmer.
    Returning the chicken and adding the asparagus and tomatoes to the pan.
    1. Step 6: Return the chicken to the pan and top with the asparagus.

    The roasted chicken and asparagus ready to serve.
    1. Step 7: Place in an oven preheated to 375°F/190°C and roast for about 10 to 15 minutes or until the chicken has cooked through. Be very careful not to overcook the asparagus. If it is ready before the chicken, take it out and then add again just before serving.
    Spooning the chicken and asparagus onto a plate.
    1. Step 8: Give it all a nice stir and check for seasoning, adding more salt and pepper as needed. Enjoy.

    Variations

    Over the years, I have tried a few variations of this dish. All are very good and worth a try.

    • Use other birds - You might like to try this with poussin, pheasant or another game bird you like.
    • Deluxe - Many people add cream to the sauce. Personally I don't think it needs it because the sauce is deliciously rich already. Still, you might want to add some.
    • White asparagus - Chicken and asparagus is often made with white asparagus when in season in Europe. If you can get it, it's definitely worth a try.
    • Cover the pan - You could cover the pan during the last 5 minutes or so of cooking and add the asparagus at that time to steam. I prefer to leave the lid off which give the chicken and asparagus a crispier exterior.

    Equipment

    Chicken and asparagus is the ultimate one pot dish. All you need is a good, heavy based pot and a spatula and your good to go.

    Storage

    You can store any leftovers, covered in the fridge for 3 to 4 days. As there is no cream in this version of the recipe, it also freezes very well. You can freeze it up to 6 months in an airtight container.

    I recommend labelling and dating the container before freezing.

    Top Tip

    I recommend using thick asparagus when in season. It cooks slower and you don't need to watch it as closely.

    FAQ

    When should you add the asparagus so it doesn't overcook?

    In this method, you add it when you place the dish in the oven to roast for 10 to 15 minutes. You can also add it about 5 minutes before serving. During the last 5 minutes of cooking, add the asparagus and cover the pan to steam it until cooked.

    How do you know if the chicken is cooked?

    Cut into the thickest part of a piece of chicken. The juices should run clear and it should be white and not at all translucent. If in doubt, use a meat thermometer. The chicken is cooked when it reaches an internal temperature of 165°F/75°C.

    Related

    Looking for other easy and delicious French recipes? Try these:

    • 40 clove garlic chicken in the bowl it was cooked in.
      40 Clove Garlic Chicken Recipe
    • cassoulet on a serving plate with crusty French bread and salad.
      Cassoulet
    • The cooked fish on a serving platter drizzled with the herb mixture.
      Mediterranean Fish - Grilled
    • homemade croque monsieur
      Croque Monsieur

    Recipe

    The roasted chicken and asparagus ready to serve.

    Chicken and Asparagus

    Yield: 2 to 4
    Prep Time: 8 minutes
    Cook Time: 20 minutes
    Total Time: 28 minutes

    This is French comfort food all cooked up in one pot. You can cook this delicious chicken and asparagus in about 30 minutes too.

    Ingredients

    • 2lb. (1 kg) chicken thighs on the bone
    • 1 teaspoon salt
    • ½ teaspoon cracked black pepper
    • 1 tablespoon olive oil
    • 6 medium shallots cut into quarters
    • 5 garlic cloves thinly sliced
    • Good handful thyme sprigs
    • 150 ml/ ⅔ cup dry white wine
    • 1 tablespoon Dijon mustard
    • 12 cherry tomatoes
    • 25 green olives, pitted
    • 1 lb. (500g) asparagus

    Instructions

    1. Preheat the oven to 375°F/190°C
    2. Pat the chicken dry and then season with some of the salt pepper.
    3. Heat the olive oil in a cast iron skillet over medium heat and fry the chicken skin side down in batches about 6 minutes. Don't overcrowd your pan.
    4. Flip them over and fry for another few minutes and then transfer the chicken to a plate and set aside.
    5. Using the same skillet add the shallots and fry for around 3 minutes until they start to soften. Add the garlic and cook for another minute and then stir in the thyme, wine and mustard.
    6. Simmer until the wine has reduced slightly. Season with salt and pepper to taste.
    7. Now add the asparagus to the skillet with the tomatoes and olives.
    8. Nestle the chicken into everything skin side up and bake for 15 to 20 minutes or until the chicken is golden brown, crispy and cooked through.
    9. Garnish with some more thyme and serve.
    Nutrition Information:
    Yield: 4 Serving Size: 1
    Amount Per Serving: Calories: 234Total Fat: 11gSaturated Fat: 2gTrans Fat: 0gUnsaturated Fat: 8gCholesterol: 42mgSodium: 1016mgCarbohydrates: 20gFiber: 6gSugar: 7gProtein: 11g
    © Caroline
    Cuisine: French / Category: One pot

    Mediterranean Fish - Grilled

    April 15, 2025 By Dan

    The cooked fish on a serving platter drizzled with the herb mixture.

    Whenever I am in the Med, which is not often enough, my first restaurant stop has to be to get some grilled Mediterranean fish. I love it and the which fish is on offer really isn't important. Bream, sea bass, snapper... they all taste amazing cooked over a fire!

    I’ve grilled a lot of things over the years, but fish on the barbecue? That’s a summer essential. And trust me, once you nail the technique, you’ll never go back to baking fish indoors again.

    Mediterranean fish grilled and served with grilled lemons.

    About this chargrilled Mediterranean fish recipe.

    There’s something incredibly satisfying about grilling whole fish over fire. Whether it’s a meaty sea bass or a delicate bream, you can’t beat the smoky, charred flavour you get when flame meets skin. It’s primal. It’s fast. And it’s one of the best things you can cook on the barbecue—especially when the sun’s out and you’ve got a cold drink in hand.

    I this recipe I will show you how to cook a whole fish over fire without leaving the delicious chargrilled skin behind. Once you've mastered that, you might like to whip up a good green goddess salad and/or smashed potatoes or loaded potatoes to go with it.

    [feast_advanced_jump_to]

    Why Bream, Snapper and Bass?

    Before we get to the flames, let’s talk fish. When grilling whole fish, you want something firm, meaty, and with skin that can crisp up without falling apart.

    My go-to choices:

    • Sea Bream – Mild, slightly sweet, holds together beautifully.
    • Sea Bass – A bit meatier, clean flavour, great with strong marinades.
    • Snapper – A bit of both worlds. This fish is kind of a mix between the meatier sea bass and less meaty bream. Snapper can be a bit flaky so you really need to be careful when flipping it.

    All of these are perfect sizes to serve whole—impressive on the plate, but easy enough to handle on the grill.

    Ingredients

    This is a simple recipe with few ingredients. The magic happens when you put them all together and grill the fish to perfection.

    The ingredients for the recipe laid out on a cutting board.
    • Sea Bream
    • Salt
    • Garlic
    • Lemon
    • Lemon zest
    • Oregano
    • Scallions (Spring onions)
    • Parsley
    • Capers
    • Lemon juice
    • Olive oil
    • Thyme
    • Capers
    • Black Pepper

    See recipe card for quantities.

    Step by step photos

    Study the below photos and you will get perfectly grilled Mediterranean fish every time.

    Scraping the excess moisture out of the fish skin with a knife.
    1. Step 1: Scrape a knife down the skin on both sides of the fish to remove any excess moisture.
    Removing the sharp fins with scissors.
    1. Step 2: Using scissors, cut off the sharp fins on the top, bottom and sides of the fish. You can also slice off part of the tail fin.
    The fish scored and seasoned with salt and garlic.
    1. Step 3: Score the fish a few times on each side. Then rub about two minced cloves of garlic into the slits and season with salt all over including inside the cavity. You can also add a little black pepper inside the cavity.
    The ingredients for the stuffing in a pestle and mortar.
    1. Step 4: Place the parsley, capers, lemon zest and thyme in a pestle and mortar.
    Pounding the ingredients in the pestle and mortar.
    1. Step 3: Add the olive oil and lemon juice and mash it all up.
    Stuffing the fish with lemon slices and the pounded herbs and other aromatics.
    1. Step 4: Leave a few tablespoons of this mixture in the mortar to drizzle over the fish later and stuff the rest with the sliced lemon inside the cavities of the fish.
    Placing the fish on the grill to cook for about 8 minutes.
    1. Step 3: Build a fire in your barbecue. The coals are hot enough to cook when it is uncomfortable to hold your hand 2 inches above the grate for longer than 2 seconds. Rub some oil onto the grill and place the fish on top.
    Turning the fish to cook the other side.
    1. Step 4: Let the fish cook on one side for at least 7 minutes and do not turn them if they are still sticking to the grill. The fish will naturally come off the grill when the underside is cooked. If you force the fish when turning, the skin will stick to the grill and you will lose a lot of flavor.
    Cooking the other side of the fish on the grill.
    1. Step 3: Grill the other side of the fish until it naturally comes away from the grill. Again... do not force this.
    A close up of the charred skin on the fish.
    1. Step 4: Continue cooking until you are happy with the char and the fish is completely cooked through. The meat should be white and flaky and not at all translucent. You can check for doneness without disturbing the fish too much by checking the meat between the head and body.
    The cooked fish on a serving platter drizzled with the herb mixture.
    1. Step 3: Carefully transfer the grilled fish to a serving platter.
    A fish plated up with bread, lemon and Padron peppers.
    1. Step 4: Enjoy!

    Substitutions

    Although I prefer to cook bream, sea bass and snapper for this Mediterranean fish recipe, other fish and seafood will work too. You can also vary the herbs and spices you use.

    • Use other fish - Chargrilling almost any fish is the perfect way to do it. Even if you use skinless fish such as cod fillets, you still need to stick to the recipe when it comes to flipping the fillets. The fish will naturally release from the hot grill when a charred crust has formed.
    • Herbs and spices - You can experiment with other herbs such as rosemary and cilantro (coriander). You might also like to use other spices other than salt and pepper. Dried chilli flakes are always a nice addition.
    • Citrus - In the recipe you use lemon slices, zest and juice. You can also use limes instead.

    Equipment

    A BBQ: This is perhaps obvious. In my opinion, it is best to use a barbecue that has a lid. You can then close the lid while the fish is cooking which speeds up the process and keeps that delicious smoke in for flavor.

    A sharp metal spatula: You do not want to force the fish to turn them or you will leave the skin behind on the grill. A good sharp metal spatula will help you move the fish around and test to see if the fish is ready to turn or not.

    Storing you Meditorannean Fish Leftovers

    You can store any leftovers in the fridge for up to 2 days. If you have large enough pieces, such as whole fish, you can reheat them in an air fryer or oven set to 400°F/200°C until heated through.

    If you only have small pieces of leftover fish, you could tear the meat off and stir it into pasta or mix it with some mayonnaise to make a sandwich.

    Final Thoughts...

    Chargrilling Mediterranean fish is one of the easiest and most rewarding things you can do on a barbecue. Once you’ve done it a few times, it becomes second nature.

    Whole bream, snapper and bass are perfect for this. They’re affordable, delicious, and look impressive when served up at the table. With just a few ingredients and a bit of flame, you can transform humble fish into something spectacular.

    So light the coals, crack open a beer or whatever you like, and get grilling.

    Top Tip

    Ask your fishmonger to gut, scale, and clean the fish for you. Saves you time and mess.

    FAQ

    Can you use a fish basket for this recipe?

    Yes but you don't need to rush out and buy one. Using my recipe below, you will get perfect chargrilled fish without a fish basket.

    Why is my fish tasteless?

    You won't have that problem with this recipe! Whole fish can take bold flavours. Don’t be shy with garlic, herbs, salt, citrus, and spice. Stuff the cavity and rub the skin.

    How do you know when the fish is ready?

    Never flip the fish before it is ready or you will lose the skin. Let it cook for at least 5 minutes and probably closer to 8 minutes before carefully flipping it over. As the fish continues to cook, the opaque flesh will become white and the juices will run clear. If you have a meat thermometer, the fish should be 140°F/60°C in the thickest part of the fish.

    You might also like to try some of these European dishes...

    • Chicken paella being served up on a plate.
      Chicken Paella
    • gnocchi with brown butter and sage
      Gnocchi With Brown Butter And Sage
    • Serving the Padron peppers on a serving plate.
      Padron Peppers
    • Homemade Tuscan chicken plated up
      Tuscan Chicken

    Recipe

    Mediterranean fish grilled and served with grilled lemons.

    Mediterranean Fish

    Yield: 4
    Prep Time: 15 minutes
    Cook Time: 20 minutes
    Total Time: 35 minutes

    You are going to love this chargrilled Mediterranean fish recipe. Once you get the skin right, you will never go back to baking your fish indoors!

    Ingredients

    • 4 x approx 1lb (500g) whole bream, bass or snapper
    • 2 teaspoon flaky salt
    • 6 cloves garlic, minced
    • 1 lemon, halved and thinly sliced
    • Zest of one lemon
    • 1 teaspoon dried oregano
    • 3 sprigs thyme leaves
    • 2 Scallions (spring onions), finely chopped
    • 1 handful flatleaf parsley, roughly chopped
    • 1 tablespoon capers
    • Juice of one lemon
    • 3 tablespoon extra virgin olive oil
    • Salt and pepper to taste

    Instructions

    1. Scrape a knife down the skin on both sides of the fish to remove any excess moisture.
    2. Using scissors, cut off the sharp fins on the top, bottom and sides of the fish. You can also slice off part of the tail fin.
    3. Score the fish a few times on each side. Then rub about two minced cloves of garlic into the slits and season with salt all over including inside the cavity. You can also add a little black pepper inside the cavity.
    4. Place the parsley, capers, lemon zest, the remaining minced garlic and thyme in a pestle and mortar.
      Add the olive oil and lemon juice and mash it all up.
    5. Leave a few tablespoons of this mixture in the mortar to drizzle over the fish later and stuff the rest with the sliced lemon inside the cavities of the fish.
    6. Build a fire in your barbecue. The coals are hot enough to cook when it is uncomfortable to hold your hand 2 inches above the grate for longer than 2 seconds. Rub some oil onto the grill and place the fish on top.
    7. Let the fish cook on one side for at least 7 minutes and do not turn them if they are still sticking to the grill. The fish will naturally come off the grill when the underside is cooked and develops a charred crust. If you force the fish when turning, the skin will stick to the grill and you will lose a lot of flavor.
    8. Grill the other side of the fish until it naturally comes away from the grill. Again... do not force this.
    9. Continue cooking until you are happy with the char and the fish is completely cooked through. The meat should be white and flaky and not at all translucent. You can check for doneness without disturbing the fish too much by checking the meat between the head and body.
    10. Carefully transfer the grilled fish to a serving platter and drizzle with the remaining herb mixture.
    Nutrition Information:
    Yield: 4 Serving Size: 1
    Amount Per Serving: Calories: 217Total Fat: 12gSaturated Fat: 2gTrans Fat: 0gUnsaturated Fat: 9gCholesterol: 41mgSodium: 1354mgCarbohydrates: 8gFiber: 2gSugar: 2gProtein: 21g
    © Dan
    Cuisine: Spanish / Category: European

    Gnocchi With Brown Butter And Sage

    April 14, 2025 By Shannon

    gnocchi with brown butter and sage

    This Gnocchi with brown butter and sage recipe is the ultimate comfort food. Nutty butter with crispy sage is so simple to prepare yet it feels like something special. Perfect for a cozy night in or impressing friends and family. You could even make your own gnocchi to elevate this dish even further.

    gnocchi with brown butter and sage

    About this Gnocchi with brown butter and sage recipe

    This is a classic Italian dish and takes only a handful of ingredients. The trick is to fry the gnocchi perfectly so that each Gnocchi has a crisp exterior with a soft, pillowy inside. I show you how to do this right here.

    The sauce is made up of butter, browned over a medium heat and later infused with crispy sage leaves and garlic. You cannot beat the result of this recipe and it is so simple to prepare. Proof that simple food can be the most satisfying.

    [feast_advanced_jump_to]

    Ingredients

    This recipe only takes a handful of ingredients which are easily sourced in your local grocery store. You may want to make your own gnocchi like I did here in this Italian Gnocchi Recipe.

    ingredients for gnocchi with brown butter and sage
    • Gnocchi
    • Fresh sage leaves
    • Unsalted Butter
    • Garlic
    • Olive oil
    • Salt & Pepper
    • Parmesan (to serve)

    See recipe card for quantities.

    Step by step photographs...

    The trick is to get the gnocchi perfectly crisp and tossed in a beautifully infused browned butter. See just how easy it is in these step by step photographs.

    cooking the gnocchi
    1. Step 1: Bring a pan of water to the boil, add the gnocchi until it rises to the top, use a slotted spoon remove. It is a good idea to do this in batches. You can actually skip this step if using fresh store-bough gnocchi.
    frying the gnocchi in olive oil
    1. Step 2: In a pan, over a medium heat, add your olive oil. When the oil is hot, toast the gnocchi on both sides until golden. Don't overcrowd the pan, I did this in two batches.
    fried gnocchi for the burnt butter and sage
    1. Step 3: Set aside in a bowl and season with salt and pepper.
    melting butter in a pan
    1. Step 4: Add the butter to the pan and allow to melt over a medium heat. Continue heating until it turns light brown in colour and has a nutty fragrance (roughly 5 minutes)
    sage and butter in a pan
    1. Step 5: Next add the sage leaves for five minutes until crisp,
    crispy sage in butter
    1. Step 6: Then add the garlic slices and cook for 5 extra minutes, make sure your pan isn't too hot to avoid burning.
    italian gnochi recipe with garlic butter and sage
    1. Step 7: Toss in the gnocchi, serve hot with a sprinkle of parmesan. Enjoy
    Italian gnocchi recipe with sage butter
    1. Step 8: Serve hot, topped with a sprinkle of parmesan. Enjoy!

    Hint: To make sure you get crisp, golden gnocchi, make sure the Gnocchi are as dry as possible after the boiling process. Use a non-stick or well seasoned pan and make sure not to overcrowd the pan.

    Substitutions and Variations

    To keep this Gnocchi with brown butter and sage recipe as authentic as possible, I recommend making your own gnocchi using this Italian Gnocchi recipe.

    However, you can substitute for store-bought gnocchi if you're short on time. Make sure you look for one made with real potato for the best texture.

    Swap sage for thyme or rosemary - They'll give a different flavour but still work beautifully with brown butter.

    Parmesan is optional for serving but you can swap this for a sprinkle of crushed nuts (like walnuts or hazelnuts) for texture.

    Equipment

    For browning the butter you ideally need a non-stick or well seasoned pan. A large frying pan or skillet works best.

    The easiest way to remove the gnocchi as and when they float to the top, meaning they are cooked, you want to be using either a slotted spoon or tongs.

    Storage

    In the refrigerator:

    you can store leftovers in an airtight container for up to 3 days. The gnocchi will soften slightly but they will still be delicious reheated.

    To freeze:

    If you are making your own gnocchi, freeze them uncooked in a single layer on a tray before transferring to freezer bags.

    Cooked Gnocchi with brown butter and sage doesn't freeze as well as the texture will go mushy once defrosted, eat them frezh!

    Top Tip

    Make sure you let the butter brown slowly over a medium heat, I mention roughly 5 minutes, but this can be as long as 10 minutes. Watch for it to turn golden with a nutty aroma.

    FAQ

    Do I need to boil the gnocchi before frying?

    If you are using homemade gnocch then yes, a quick boil first until they float with ensure they are soft inside. However, you can skip this step if you are using store bought gnocchi

    What should brown butter smell and taste like?

    You are looking for golden specs in the butter at the bottom of the pan. It should smell nutty and toasty.

    Can I make this Gnocchi recipe ahead of time?

    Yes! You can brown the butter and boil the gnocchi ahead of time. for best results, save the frying of the gnocchi for when you are ready to serve, this is to make sure it is crispy and delicious.

    Related

    Looking for other Italian recipes like this? Try these:

    • Italian Gnocchi Recipe
      Italian Gnocchi Recipe
    • Bowl of chicken and chorizo risotto garnished with parsley
      Chicken and Chorizo Risotto
    • Homemade easy pesto pasta
      Easy Pesto Pasta
    • homemade basil pesto
      Basil Pesto
    See more Italian →

    Pairing

    Gnocchi pairs perfectly with salad, try these:

    • Finished roasted chickpea salad
      Roasted Chickpea Salad
    • Caesar salad finished with dressing tossed in a bowl
      Caesar Salad
    • Finished arugula salad with parmesan and balsamic dressing
      Arugula salad
    • Big mac salad
      Big Mac Salad
    See more Salads →

    Recipe

    gnocchi with brown butter and sage

    Gnocchi WIth Brown Butter and Sage

    Yield: 4
    Prep Time: 5 minutes
    Cook Time: 20 minutes
    Total Time: 25 minutes

    Try this delicious recipe for gnocchi with brown butter and sage, perfect for any special occasion or cozy dinner.

    Ingredients

    • 1 ½ lbs (650g) Gnocchi
    • 5 tbs (75g) unsalted butter
    • 20 fresh sage leaves
    • 3 cloves garlic (thinly sliced)
    • 3 tablespoon olive oil
    • salt and pepper to taste
    • parmesan for serving

    Instructions

    1. Bring a pan of water to the boil, add the gnocchi until it rises to the top, use a slotted spoon remove. It is a good idea to do this in batches. You can actually skip this step if using fresh store-bough gnocchi.
    2. In a pan, over a medium heat, add your olive oil. When the oil is hot, toast the gnocchi on both sides until golden. Don't overcrowd the pan, I did this in two batches. Set aside in a bowl and season with salt and pepper.
    3. Add the butter to the pan and allow to melt over a medium heat. Continue heating until it turns light brown in colour and has a nutty aroma (roughly 5 minutes).
    4. Next add the sage leaves for a further five minutes until crisp, Then add the garlic slices and cook for 5 extra minutes, make sure your pan isn't too hot to avoid burning.
    5. Toss in the gnocchi and coat with the butter, serve hot with a sprinkle of parmesan. Enjoy!
    Nutrition Information:
    Yield: 4 Serving Size: 1
    Amount Per Serving: Calories: 226Total Fat: 25gSaturated Fat: 11gTrans Fat: 1gUnsaturated Fat: 13gCholesterol: 39mgSodium: 211mgCarbohydrates: 1gFiber: 0gSugar: 0gProtein: 1g
    © Shannon
    Cuisine: Italian / Category: 30 Minute Or Less

    Beer Battered Fish and Chips

    April 14, 2025 By Dan

    Beer battered fish and chips with sides of curry sauce, tartar sauce and mushy peas.

    OK… So this is a recipe for beer battered fish and chips but these days I use cider. You can use either and beer will get you a more traditional flavor. There are few dishes in the world that capture the heart of a nation quite like fish and chips does for the British. Crispy battered fish, fluffy-on-the-inside and crispy on the outside chips, a sprinkle of salt, a splash of vinegar...what's not to like?

    Beer battered fish and chips with sides of curry sauce, tartar sauce and mushy peas.

    About this recipe.

    Fish and chips is not just food, it’s a cultural ritual. A bite of history. With this recipe, I’m going to show you how to make traditional fish and chips at home Though I have given the recipe a few modern twists but have pointed them out should you wish to have a more authentic version.

    Follow the recipe below and you will love how crispy and delicious your fish and chips are. You might just want to start your own fish and chips shop! Your beer battered fish and chips will be even more amazing if you fry them in beef tallow.

    Get ready to fry, season, and devour like a true Brit.

    What is the history behind fish and chips?

    Beer battered fish and chips have been popular in the UK since the 19th century, when fried fish—introduced by Jewish immigrants from Spain and Portugal—met fried potatoes, already popular in the north of England.

    The first known fish and chip shop (or “chippy”) opened in London in the 1860s, and from there, the dish took off.

    By World War II, fish and chips were considered so vital to national morale that they were never rationed. Visit any seaside in the UK and you will see that they continue to be a must-have meal for people up and down the country.

    [feast_advanced_jump_to]

    Ingredients

    There aren't a lot of ingredients but they all work so well together. This is simple but delicious comfort food. Be sure to get all your ingredients ready before you start. I use homemade beef tallow which really takes the beer batter fish and chips to the next level.

    Ingredients for the recipe laid out on a counter top.
    • cod or haddock
    • Salt and pepper
    • all-purpose (plain) flour
    • rice flour
    • baking powder
    • Cheyenne chili powder (optional)
    • beer or cider
    • salt
    • Beef tallow or vegetable oil
    • frozen chips

    See recipe card for quantities.

    Step by step photos for the fish.

    You will see from the following photographs that this recipe really is easy. I have tried to show the thickness of the batter which is really important.

    All of the batter ingredients in a mixing bowl.
    1. Step 1: Pour all of the batter ingredients into a mixing bowl.
    Whisking the batter ingredients.
    1. Step 2: Begin whisking the batter together. At first it will be quite lumpy so whisk hard and fast.
    The creamy whisked batter in the mixing bowl.
    1. Step 3: Whisk until the batter is creamy smooth. This will take a couple of minutes.
    Dusting a piece of cod with the plain and rice flour.
    1. Step 4: Dust a piece of fish with the rice flour and plain (all purpose) flour mixture. Shake off any excess flour.

    Adding the fish to the batter.
    1. Step 5: Dip the flour dusted fish into the batter and ensure it is completely coated with the batter.
    Slowly lowering the battered fish into the hot oil.
    1. Step 6: Slowly lower the fish into the hot fat. Let it cook a little before lowering it further down and continue until the batter has hardened some before letting go.

    Deep frying the fish.
    1. Step 7: Fry for about 3 to 4 minutes, carefully turning once and spooning the hot oil over the fish until crispy and golden brown.
    The cooked beer batter fish on a rack to drip excess oil.
    1. Step 8: Transfer the cooked fish to a rack to drip any excess oil and keep warm in a low oven while you cook the rest of the fish and chips.

    Beer batter fish and chips on a plate with curry sauce, mushy peas and tartar sauce.

    Substitutions

    Below you will find a few substitutions that will work for your beef battered fish and chips.

    • Beef Tallow - Traditionally, fish and chips were cooked in beef tallow (beef dripping). You are very lucky to find fish and chip shops that still do but it really takes things up a level or two. If you mush, you could substitute vegetable oil.
    • Cod or Haddock - Cod is great and the most common fish used for fish and chips. You really could substitute and meaty white fish for the cod or haddock.
    • Cider - The use of cider in the batter is a new thing and I like it. You could use you beer of choice or if you want a non-alcoholic version, just add ice cold sparking water (club soda).
    • Frozen Chips: I prefer to use frozen chips and for good reason. The chips that are frozen and sold have been hand-picked for perfection. Most chip shops use them because they can cook them to perfection, quickly as the chips have already been flash fried before freezing and packaging. Some places cook homemade chips using raw potatoes but they are often a big, soggy disappointment. If you want to make your own, see the notes in the recipe card below.

    Equipment

    1. Deep Fryer or Heavy Pot

    • Purpose: For frying both the fish and chips.
    • Tip: A deep, heavy-bottomed Oven or Air Fryer (Best Method):
    • Preheat oven to 180–200°C (350–400°F)
    • Place fish and chips on a wire rack over a baking tray (to keep air circulating)
    • Heat for 10–15 minutes, flipping halfway through
    • For extra crispiness, give them a quick blast under the broiler or in an air fryer at 180°C (350°F) for 5–7 minspot like a Dutch oven or stockpot works great if you don’t have a fryer.

    2. Thermometer

    • Purpose: To monitor oil temperature (130°C / 266°F for the first chip fry, and 180°C / 356°F for the second chip fry and fish).
    • Tip: An instant-read or clip-on candy thermometer is ideal for this if you don't have a built in deep fat fryer thermometer.

    3. Slotted Spoon or Spider Strainer

    • Purpose: To safely lift fish and chips out of the hot oil. Deep fat fryers have a basket so you won't need this if using a deep fat fryer.

    4. Wire Rack or Paper Towels

    • Purpose: For draining excess oil after frying.
    • Tip: A wire rack over a baking tray helps keep things crispy.

    5. Mixing Bowls

    Purpose: For making the batter, dredging the fish, and prepping ingredients.

    Storage

    For the Fish:

    1. Cool it completely before storing (to avoid soggy batter).
    2. Wrap it loosely in foil or parchment paper—this helps avoid trapping steam which can make it soggy.
    3. Place it in an airtight container or zip-top bag.
    4. Refrigerate and use within 1–2 days.

    For the Chips:

    Keep in the fridge for up to 2 days.

    Let them cool down completely.

    Store in a separate airtight container (don’t store chips and fish together or they’ll get soggy).

    How do you reheat leftover fish and chips?

    Oven or Air Fryer (Best Method):

    • Preheat oven to 180–200°C (350–400°F)
    • Place fish and chips on a wire rack over a baking tray (to keep air circulating)
    • Heat for 10–15 minutes, flipping halfway through
    • For extra crispiness, give them a quick blast under the broiler or in an air fryer at 180°C (350°F) for 5–7 mins

    How do you cook the chips?

    I highly recommend using frozen chips. That is what is most often used at fish and chip shops and for good reason. Frozen chips are chosen by the buyers for perfection. You know you will get a crispy exterior chip that is also nice and fluffy on the inside.

    Cook the chips from frozen. You could just read the instructions on the packaging but I recommend cooking them in beef tallow for optimum flavour and frying them twice. Frozen chips are already fried once before freezing so you are going to be getting triple fried chips that are amazing.

    See the recipe card below for cooking instructions.

    Top Tip

    Make sure that you add the beer or cider to the batter when it is ice cold from the fridge. This will help ensure that the fish is extra crispy when you fry it.

    FAQ

    Why do you add rice flour to the fish and batter?

    Although this is not a traditional ingredient in fish and chips, the rice flour will help achieve a crispier batter when you fry it. You can leave it out but trust me here!

    Do you hav to triple fry the chips?

    No but they will be crispier and fluffier if you do.

    More Recipes

    Following are a few of our most recent recipes...

    • Chipotle chicken taquitos served with chipotle dip
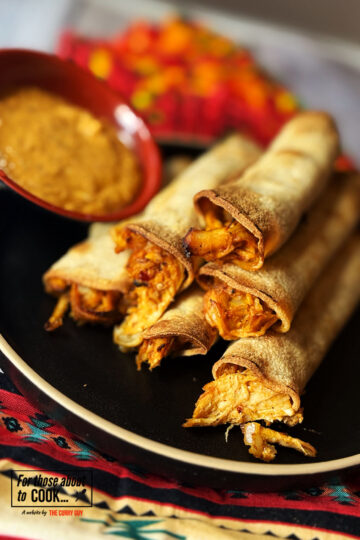
      Chipotle Chicken Taquitos
    • Spicy beef taquitos served with guacamole
      Spicy Beef Taquitos
    • Chicken potato bake served from the baking dish
      Chicken Potato Bake
    • potato chorizo taquitos
      Potato Chorizo Taquitos

    Recipe for Beer Battered Fish and Chips

    Recipe

    Beer battered fish and chips with sides of curry sauce, tartar sauce and mushy peas.

    Fish and Chips

    Yield: 4
    Prep Time: 15 minutes
    Cook Time: 50 minutes
    Total Time: 1 hour 5 minutes

    This is fish and chips at its very best! You need to do the first two fries of the chips before frying the fish. Then when the fish is cooked and being kept warm in a low oven, you do the final blasting of the chips in the hot oil/tallow.

    Ingredients

    • FOR THE FISH
    • 4 fillets of cod or haddock (approx. 150–200g each)
    • Salt and pepper
    • 1 cup all-purpose flour (for dusting)
    • ½ cup rice flour (for dusting)
    • FOR THE BATTER
    • 1 cup all-purpose flour
    • ¼ cup rice flour
    • 1 teaspoon baking powder
    • 1 teaspoon Cheyenne chili powder (optional)
    • 1 cup ice cold beer or cider
    • 1 teaspoon salt
    • FOR THE CHIPS
    • 1 bag of frozen chips (your favourite brand)

    Instructions

    1. In a mixing bowl, mix the flour, baking powder, salt and cayenne, if using. Slowly whisk in the cold
      cider until smooth and lump-free. Let the batter rest in the fridge for 10 to 15 minutes.
    2. When ready to fry, heat the beef tallow or oil to 360°F/180°C. Pat the fish fillets dry and season generously with salt and pepper. Dust the fish with the rice flour and plain (all purpose) flour mixture. Dusting the fish fillets first will help the batter stick and the rice flour will make the fish extra crispy.
    3. When the oil is up to heat, dip a piece of the fish into the batter so that it is completely coated in batter. Then slowly lower the battered fish into the hot oil.
    4. Fry for 5 to 8 minutes, turning the fish a couple of time until the batter is crispy and golden brown.
    5. Transfer the fish to a rack to train any excel oil. Keep warm in a low oven while you cook the rest of the fish and then the chips
    6. FOR THE TRIPLE COOKED CHIPS
    7. You should fry the chips before starting to fry the fish. Heat the oil or tallow to 275–300°F (135–150°C). Fry in batches for 3 to 4 minutes or until the chips are turning a pail yellow but not golden. Transfer to a paper towel lined rack to cool. For best results, let them cool in the fridge for 10 to 15 minutes.
    8. Raise the heat of the oil or tallow to 320–340°F (160–170°C). Fry the chips again in batches for about 3 minutes or until they are just starting to turn golden. Transfer to a paper towel lined rack and let them cool to room temperature either in or out of the fridge. All of this can be done before you start frying the fish.
    9. For the final frying, Raise the temperature to 375–390°F (190–200°C) and fry in batches for another 1 to 2 minutes or until crispy, golden brown. Serve immediately with the fish.
    © Dan
    Cuisine: British / Category: Fish

    How to Make Beef Tallow

    April 14, 2025 By Dan

    Beef tallow in containers ready for storing.

    This is my quick and easy method for how to make beef tallow.

    You can make the process of making beef tallow a long and slow process or do it the easy way using ground beef suet. You will cut hours of work by using suet and most good butchers will have it ready prepared for you.

    Beef tallow in containers ready for storing.

    About this beef tallow recipe.

    I used to prepare beef tallow using chopped up beef fat. You can do that too but it takes a lot longer. First, you need to remove any silver skin from the fat before finely chopping it to render in a pan over a low heat.

    Using beef suet, all that work is done for you. You just need to add the suet to your pan over a low heat and let it render down. As the fat render, you need to skim it before running through a cheese cloth lined strainer so that the beef tallow is free of any impurities.

    You can use your homemade beef tallow to fry instead of using vegetable oils or to make the most delicious fish and chips.

    [feast_advanced_jump_to]

    Ingredients

    There's only one ingredient to make beef tallow and that is beef fat. Below you will see the beef suet I purchased to make the process a lot easier and faster.

    Beef suet ready to be made into tallow.
    • Beef Suet

    See recipe card for quantities.

    Instructions

    As you will see from the photos below, making beef tallow this way is quick and easy.

    Adding beef suet to a slow cooker on low.
    1. Step 1: Fill a pot or slow cooker with the suet. It will reduce down if you have more to add.
    Melting the suet in the pot.
    1. Step 2: Slowly melt the suet over a low heat. As you do this, impurities will rise to the top. Skim that off and discard.
    Adding more suet to the pot.
    1. Step 3: As the suet melts it will reduce in volume. You can add more suet to the pot when it does if you have more.
    Skimming the impurities of the top of the beef tallow.
    1. Step 4: Skim as much of the goop that rises to the top off as you can.
    Pouring the beef tallow through a cheese cloth that is in a strainer.
    1. Step 5: Line a strainer with a fine cheese cloth or similar and pour the tallow through it into a bowl.
    The impurities left behind in the cheese cloth after straining.
    1. Step 6: The remaining impurities will filter out as you pour it through the cloth and strainer.
    Beef tallow in a jug.

    A Brief History of Tallow

    Before vegetable oils took over grocery store shelves, tallow was the go-to fat for everything from frying to candle-making. Ancient civilizations used tallow not only for food but for lubrication, soap, and skincare.

    In Victorian times, it was used in lamps and soaps—and during wartime shortages, people hoarded tallow for its many uses.

    It wasn’t until the mid-20th century, when hydrogenated oils and seed-based fats were marketed as “healthier,” that tallow fell out of favor. But with modern nutrition slowly reassessing the healthiness of saturated fats, tallow is enjoying a well-deserved revival.

    How do you cook beef tallow?

    The secret to success, whether you are using suet or chopped up beef fat is to render the fat over a low heat. Be sure to skim off any impurities and job done!

    What Is Beef Tallow?

    Beef tallow is rendered beef fat, usually sourced from around the kidneys and loins—called suet. When this fat is gently heated and melted down, the impurities are removed, and what’s left is a creamy, shelf-stable fat that solidifies at room temperature. Pure tallow has a clean, mild aroma and a silky texture that makes it incredibly versatile.

    Unlike raw fat trimmings, tallow is purified through rendering, which gives it a longer shelf life and makes it safer and easier to use in both culinary and non-culinary ways.

    Is Tallow the same as lard?

    No but similar. Tallow is to beef what lard is to pork. Both are rendered fats, but they behave slightly differently:

    • Tallow is harder and more stable at room temperature, making it great for high-heat cooking and long storage.
    • Lard is softer, milder in flavor, and often used in baking (think flaky pie crusts).

    Both beef tallow and pork lard have their own strengths, but tallow tends to win out when it comes to deep frying and traditional savory dishes.

    Why should you make beef tallow?

    Beef tallow is of course available prepared from many shops. The thing is, it is a lot more expensive to purchase than to simply make it yourself. We're talking extremely more expensive and who want to pay a lot for something that you can make so easily yourself?

    Equipment

    1. A slow cooker: I find slow cookers to be the best and most fuss free way of preparing beef tallow. You can simply add the beef suet and set your slow cooker to low. Using beef suet, the job should be done in less than an hour!
    2. A heavy bottomed pot: You can also use a good pot to render the beef suet but you will need to watch it carefully so that the suet doesn't burn to the bottom.
    3. A large mixing bowl: You will need to use this to strain the melted beef fat into.
    4. A fine mesh strainer: This can be used to skim the impurities off the top of the beef tallow as it cooks.
    5. Small containers: Small plastic or glass containers are great for storing the beef tallow for an extended time.

    Storage

    Once you have made the tallow, you can store it in a sealed jar at room temperature for about 1 to 2 months. Place it in the fridge and you can store it for 6 months or longer.

    You can also freeze the tallow for up to a year. If doing this, I recommend storing it in convenient size portions and date and label the container.

    Beef tallow is clear and yellow when hot. It will turn white and solid when cold. Be sure to store in dry and very clean containers away from moisture.

    Top Tip

    You need to render the fat over a very low heat. This will stop it burning and produce a clearer beef tallow.

    FAQ

    Do you have to use beef suet to make tallow

    No. All you need is beef fat. Remove any silver skin from the fat and chop it into small pieces. Then render it down. This could take a few hours and you need to watch it so that the fat doesn't burn to the bottom. Using suet is a lot faster and easier.

    What can you use beef tallow for?

    It is great for frying, searing, sautéing and roasting but that's not all! It is also good for making pie crusts and pastries giving them crispiness and depth. You can also use tallow to season pans. It's beyond the scope of this blog post but some people use beef tallow for skin care and making candles and soaps.

    Where can you get the beef fat for tallow?

    Local butchers, farmers shops, online meat suppliers and specialty shops. Many butchers will let you have the suet with no charge or at a very low price. You might have to do some searching but you will find it.

    New recipes to try...

    Following are some of the recently added recipes.

    • coconut chicken served up in a bowl
      Spicy Brazilian Coconut Chicken
    • chicken shawarama
      Chicken Shawarma
    • 30 minute beef madras served with rice
      30 Minute Beef Madras
    • Keema naan cut in half to see the lamb meat
      Keema Naan

    Recipe

    Beef tallow in a jug.

    Beef Tallow

    Yield: 12 to 16 cups
    Prep Time: 2 minutes
    Cook Time: 3 hours
    Total Time: 3 hours 2 minutes

    Beef tallow is really easy to prepare and has many uses. This recipe will help you get it just right! You can easily up or downscale the ingredients depending on how much you want to make. The cooking times will vary depending on how much you make and the heat you cook over.

    Ingredients

    • 12lbs (6kg) ground beef suet (You can also use beef fat cut into small pieces)

    Instructions

    1. I recommend using a slow cooker set to low or your stovetop in a heavy bottomed pan over a low heat. half of the suet or chopped beef fat into your pan or slow cooker. Let it slowly render down.
    2. As it renders down, you will see that impurities rise to the top and some will form at the bottom of the pan. Using a skimmer of some sort, skim the impurities off the top and discard.
    3. Add the remaining suet or beef fat and continue to let it render down, skimming as it does.
    4. Once the fat has all rendered, pour it through a fine mesh strainer, lined with a cheese cloth into a bowl. This will catch any of the impurities you did not skim and also the impurities that are at the bottom.
    5. Pour into suitably containers. When the tallow is hot, it will be a deep yellow colour. As it cools, it will be come white and hard.
    Nutrition Information:
    Yield: 30 Serving Size: 1
    Amount Per Serving: Calories: 15Total Fat: 1gSaturated Fat: 1gTrans Fat: 0gUnsaturated Fat: 1gCholesterol: 3mgSodium: 1mgCarbohydrates: 0gFiber: 0gSugar: 0gProtein: 1g
    © Dan
    Cuisine: British / Category: Beef Recipes

    Chicken Paella

    April 14, 2025 By Dan

    Chicken paella being served up on a plate.

    I love paella. This Valencian style chicken paella is one of my favorites and I have been making it for decades, since my first trip to Spain. It isn't exactly an authentic Valencia chicken paella because I insist on adding Spanish chorizo which I have heard is a big no no. Oh well, I like it so in it goes. You can of course leave it out if you like.

    Chicken paella being served up on a plate.

    What is a Valencian chicken paella?

    This chicken paella comes pretty close to being authentic. If you want to make it authentic, just leave out the chorizo.

    Paella Valenciana is the original, traditional version of paella that comes from the Valencia region on Spain’s eastern Mediterranean coast. It’s a rice-based dish cooked in a wide, shallow pan (called a paellera), and traditionally cooked over an open fire just like I did for this recipe.

    The classic version can feature just chicken or other meats. Following is a list of what you might find in an authentic Velencian chicken paella.

    • Short-grain rice (like bomba, senia or arborio)
    • Rabbit
    • Chicken
    • Snails
    • Green beans and butter or lima beans
    • Saffron, paprika, and sometimes rosemary

    [feast_advanced_jump_to]

    What are the origins of Valencia chicken paella?

    Valencian chicken paella has its roots in the Albufera lagoon region near Valencia. It's a rural area full of rice paddies, game, and fresh vegetables.

    This dish was popular with the local farmers and laborers in the region in the 15th and 16th Centuries and still is today. The farmers and laborers would gather local ingredients and cook them in a large paella pan over an open fire.

    Paella wasn't the expensive dish it is for tourists today. It was low cost and easy food.


    How do you serve chicken paella?

    Paella is meant to be shared. Traditionally, it's cooked outdoors, with everyone gathering around the fire. No plates—people just eat straight from the pan with wooden spoons. It’s as much about community as it is about cuisine.

    Of course you can plate it up if you like but in Spain eating directly from the pan is still a family ritual.

    While the paella is cooking, you might like to offer around some Padron peppers. They are a delicious and easy tapa.


    Ingredients

    There are quite a few ingredient in this chicken paella but they are all easy to source. Not photographed are the butter beans because I decided to add them while I was cooking.

    The ingredients for the recipe on a counter top.

    • extra virgin olive oil
    • onion
    • red bell pepper
    • bone in chicken thighs
    • dry cured Spanish chorizo
    • rosemary
    • thyme
    • sweet smoked paprika
    • green beans
    • cooked butter beans
    • Arborio rice
    • chicken bone broth
    • saffron
    • chopped tomatoes
    • Parsley
    • Salt and pepper

    See recipe card for quantities.


    A log fire burning in a fire pit.

    Cooking your chicken paella over a wood fire is the authentic way of doing it but you can cook it on your stovetop.


    Instructions

    Use this section for process shots, alternating between the step and image showing the step. Users don't like seeing process shots cluttering up the recipe card, so include your process shots here.

    Adding salt and oil to a paella pan over the fire.
    1. Step 1: Place your pan over a medium-high heat. Sprinkle in about a teaspoon of flaky salt and pour in the olive oil.
    Stirring the chopped onions and bell pepper into the oil in the pan.
    1. Step 2: When the oil is hot but not smoking, stir in the chopped onions and bell pepper and fry for about 5 minutes to soften.

    Adding the chicken to the pan to sear the exterior.
    1. Step 3: Push these veggies over to a cooler side of the pan and add the chicken thighs, skin side down.
    Adding the chorizo to the pan to sear it.
    1. Step 4: Brown the chicken all over and then add the chorizo to brown it too.

    Adding the rosemary and thyme to the pan along with the chopped garlic
    1. Step 5: Stir in the garlic, rosemary, bay leaf and thyme and fry for another 30 seconds.
    Stirring in the paprika
    1. Step 6: Then stir in the paprika and add a drop of water or stock so that the paprika doesn't burn.

    Adding a little chicken stock so that the paprika doesn't burn.
    1. Step 7: Pour in about 2 cups (500ml) of the stock and bring it to a simmer.
    Adding the green beans a butter beans to the pan with a little more stock.
    1. Step 8: Add the green beans and butter beans and stir well to combine.

    Stirring in another 4 cups of stock and adding the saffron to bring to a simmer.
    1. Step 9: Stir in the saffron and simmer it all for about a minute.
    Adding about half the rice and the chopped tomatoes.
    1. Step 10: Add half the rice and the chopped tomatoes and stir well.

    Stirring in the remaining rice.
    1. Step 11: Pour in the remaining rice and stir it all together.
    Adding the remaining stock to the pan.
    1. Step 12: Add another 2 cups (500ml) stock and bring to a simmer. Allow this to cook for about 10 minutes.

    Cooking the rice in the hot stock.
    1. Step 13: Continue simmering and adding more stock as required. You want the rice to be tender but not mushy.
    The rice plumping up in the pan.
    1. Step 14: Once the rice is tender, continue to let the stock cook down and soak into the rice.

    The finished chicken paella.
    1. Step 15: Once all the liquid has evaporated, listen carefully for the crackling sound. This is the rice caramelising to the bottom: the socarrat. Let the rice crackle for about 10 to 15 seconds and then take the pan off the heat. Let it stand undisturbed for 5 to 10 minutes which will help achieve a good socarrat.
    Serving the chicken paella.
    1. Step 16: Enjoy! The chicken paella can be eaten directly from the pan or you can plate it up.

    What is socarrat?

    Socarrat is the caramelized crust of rice that forms at the bottom of a well-made paella. It’s not burnt, but perfectly toasted—rich, slightly nutty, and deeply flavorful.

    It happens when the broth has been fully absorbed and the rice at the bottom starts to fry gently in the oil, forming a thin, crispy layer.


    How do you achieve a perfect socarrat?

    Let the paella cook undisturbed for the final few minutes. Once the liquid absorbs into the rice, listen for a gentle crackling sound—a sign that the socarrat is forming.

    You can check by gently scraping the bottom with a spoon. If it resists and has a toasty smell, you’ve done a great job.

    Remove from heat and let it rest for 5–10 minutes—this helps the socarrat set.


    Can you work ahead?

    You bet! In fact, it is a good idea to prepare your ingredients before you start cooking. You want everything ready to add to the hot pan and you can prepare it all one or two days ahead of cooking.

    Store all your ingredients in airtight container in the fridge.


    Variations

    Authentic Valencian chicken paella is often made just with chicken. Here are a few other things you can add that will be just as authentic.

    • Rabbit - Rabbit is a popular substitute for the chicken or you could add both. In Winter when rabbit is readily available, I always add it.
    • Snails - Paellas were originally peasant food and snails were readily available and cheap. Give it a try. Very good.
    • Baby Artichokes - When in season, artichoke heart are delicious added to a paella, either with the green beans or as a substitute.

    Useful Equipment

    Paella Pan: Paella pans are the perfect pans for this dish, both for cooking and presentation. You can also cook your chicken paella in any large frying pan.

    A long spoon or spatula: This will really come in handy for stirring especially if you are cooking over wood. The fire can get quite hot so a long handled spoon is good to have on hand.

    A small pot: For heating the chicken stock before adding it to the paella pan. It is always best to add the stock hot.


    Storing Leftover Chicken Paella

    You can store leftover chicken paella in an airtight container for 3 to 4 days. Let the paella cool to room temperature, but no longer than two hours before refrigerating.

    You can also freeze leftovers for up to 1 month but the rice might be softer and slightly mushy after thawing. I recommend labelling and dating your containers before freezing.

    To reheat, let it thaw completely in the fridge and then heat it up in your microwave or in a pan over a medium heat.


    Top Tip

    Work on making a socarat. Listen carefully at the end off cooking after that liquid has been absorbed. When you hear the rice crackling, get the paella off the heat to rest for about 10 minutes before serving which will further develop the socarrot.


    FAQ

    What kind of rice is best for paella?

    Use a short-grain Spanish rice, such as Bomba, Calasparra or Senia if you can get it. These types of rice absorb the liquid without becoming mushy and help produce the classic paella texture. If, like me, you find it difficult to find a Spanish rice, you can use Arborio which is the rice used in Italian risotto. It is a good substitute but it may get a creamier texture than paella calls for.

    Which cuts of chicken are best for chicken paella

    Bone in thighs or legs with the skin left on. The bones will add more depth of flavour to the paella. If you want, you could use boneless pieces of thigh meat but you will lose some flavor.

    Do you have to use a paella pan?

    Ideally yes but you can also use a large frying pan of skillet. Paella pans are shallow and wide which helps the rice cook correctly. Don't use deep pans or woks as cooking this way will produce more steam and prevent proper evaporation.

    How do you know when the chicken paella is ready?

    Your chicken paella is ready when the rice is tender but not mushy and the chicken is cooked through. Once all the liquid is absorbed listen for the crackling noise which is the rice caramelising to the bottom, the socarrat. Let it caramelise for about 10 to 15 seconds and get it off the heat. Allow to sit for 5 to 10 minutes to further develop the socarrat.


    Related

    Looking for more Spanish recipes? Try these:

    • Chorizo in red wine served in a tapas dish
      Chorizo Al Vino
    • Patatas bravas served with a spicy tomato sauce
      Patatas Bravas
    • Albondigas in a tapas dish topped with parsley
      Albondigas (Spanish Meatballs)
    • Grilled sardines with salt served on a plate with lemon wedges.
      Grilled Sardines with Salt

    Recipe

    The finished chicken paella.

    Chicken Paella

    Yield: 4 to 6
    Prep Time: 15 minutes
    Cook Time: 45 minutes
    Total Time: 1 hour

    This Valencian style chicken paella tastes amazing. You can cook it in under an hour and it's all cooked in one pan. It is the ultimate one pan meal.

    Ingredients

    • 1 teaspoon salt plus more to taste
    • ¼ cup (70ml) extra virgin olive oil
    • 2 medium onions, finely diced
    • 1 red bell pepper, finely diced
    • 10 bone in chicken thighs
    • 10 oz dry cured Spanish chorizo, thinly sliced
    • 6 cloves garlic, finely chopped
    • 2 sprigs rosemary
    • 2 sprigs thyme
    • 1 bay leaf
    • 1 to 2 teaspoon sweet smoked paprika (preferably Spanish paprika)
    • 1 cup green beans
    • 1 cup (100g) cooked butter beans
    • 3 cups Arborio rice
    • 6 to 8 cups chicken bone broth
    • 1 teaspoon saffron
    • 15oz (400ml) chopped tomatoes
    • Parsley
    • Black pepper to taste

    Instructions

    1. Heat a paella pan or large frying pan over a medium-high heat. Sprinkle in about 1 teaspoon of flaky salt and add the olive oil.
    2. When the oil is hot but not smoking hot, stir in the chopped onions and bell pepper
    3. Fry the onion and bell pepper for about 5 minutes to soften and then scrape it all to one side of the pan. Situate your pan so that the onions and bell pepper are not right over the heat.
    4. Add the chicken, skin side down and brown if for a few minutes and then turn it over to sear the other side.
    5. Add the chorizo and brown it for a few minutes, stirring regularly for even cooking and then add the chopped garlic, rosemary, bay leaf and thyme.
    6. Stir everything in the pan together to fry for about 2 minutes and add the paprika and a spash of water or stock so that the paprika doesn’t burn.
    7. Then stir in the green beans and butter beans and half of the rice along with the chopped tomatoes. Stir well and then add the remaining rice and about 2 cups (500ml) of the stock.
    8. Add the saffron and bring it all to a simmer, stirring regularly.
    9. Now pour in about 2 more cups (500ml) of the chicken stock and let it come to a simmer. Allow the paella to cook for about 30 minutes adding more stock as necessary. You want the rice to be good and tender.
    10. Once the rice is tender, continue cooking it all down until almost all of the stock has cooked down. Don’t stir from the bottom. You want the rice to stick to the bottom and brown some. That is the very important socarrat. In the last few minutes of cooking when the liquid is all absorbed into the rice, let it cook and listen carefully for the rice to start to make a crackling noice as it caramelises to the bottom of the pan.
    11. When you hear the crackling rice, let it cook for another 10 seconds and get it off the heat. Allow it to stand, undesturbed for 10 minutes. If it is cold outside or in your kitchen, cover the paella with foil to keep it hot. Letting it stand in this way will help further develop the socarrat.
    12. To finish, season with salt and pepper to taste and garnish with the chopped parsley. Serve with lemon wedges and enjoy!
    Nutrition Information:
    Yield: 6 Serving Size: 1
    Amount Per Serving: Calories: 1208Total Fat: 51gSaturated Fat: 16gTrans Fat: 0gUnsaturated Fat: 32gCholesterol: 339mgSodium: 5243mgCarbohydrates: 48gFiber: 4gSugar: 9gProtein: 143g
    © Dan
    Cuisine: Spanish / Category: European
    • « Previous Page
    • 1
    • …
    • 8
    • 9
    • 10
    • 11
    • 12
    • …
    • 24
    • Next Page »
    For Those About To Cook

    Welcome To For Those About To Cook

    We're a family-run food blog sharing brand-new recipes every week. From easy weeknight staples to indulgent weekend favorites. We're a team of five: Dan (The Curry Guy), Caroline, Joe, Shannon, and Jennifer, bringing you a wide variety of dishes inspired by Europe, the Mediterranean, the Americas, and more.

    This site focuses on Western-inspired recipes, while Eastern flavors are covered in depth over at greatcurryrecipes.net Between the two, you'll find everything you need to cook up something amazing so don't forget to subscribe!

    Subscribe

    Footer

    Contact Privacy Policy

    Subscribe for weekly updates!

    Subscribe
    ↑ back to top

    Copyright © 2024 For Those About to Cook