
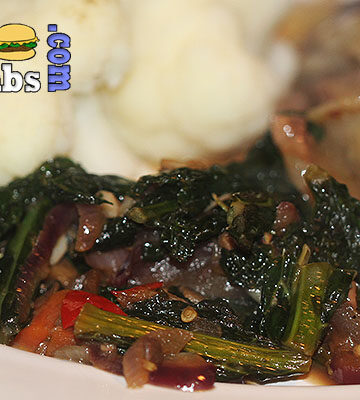
Cavolo Nero isn't all that easy to come by here in the UK but I happened to find some the other day in my neighbours garden. As they were on holiday in a sunny location, I decided they wouldn't mind if I helped myself. So I did. [Read more...]
Lancashire Hot Pot Recipe

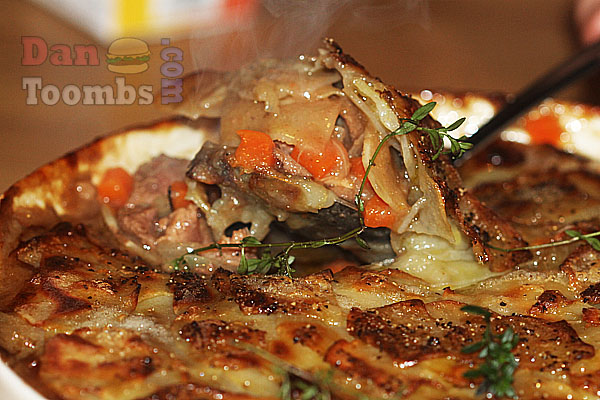
This Lancashire hot pot recipe is one of my all time favourites, especially during the Winter months.
This is my wife Caroline's recipe from when she was growing up. She used to be asked to make it by her family at least once a month and I can totally understand why. It's amazing.
Now she makes it for our family and we're so glad she does.
Although it is equally as delicious in the Spring time, I love this dish when it's cold outside and the lamb is closer to mutton in flavour. We only buy our meat locally so it tastes like mutton because it probably is this time of year.


If you like this recipe, you might like to try some of these too...
Normandy Style Turbot and Sole Stew
Seafood Pancakes with Lobster and Garlic Confit
Barbecued Burritos - Hobo Style
Portuguese Pork with Paprika and Wine Sauce
The Best Macaroni and Cheese Ever
Roast Leg of Lamb with Chimichurri Sauce
Authentic Fish Tacos
German Sausages
N'duja Pasta
Raw Oysters with Chipotle and Lime Sauce
Recipe

Lancashire Hot Pot
Yield:
6
Prep Time:
15 minutes
Cook Time:
1 hour 20 minutes
Total Time:
1 hour 35 minutes
Ingredients
- 1 leg of lamb - cut into bite sized pieces - save the bone
- 2 lambs' kidneys - finely diced
- 1 - 2 litres lamb, chicken or game stock
- 3 carrots - diced
- 2 onions - finely chopped
- 5 potatoes - sliced wafer thin
- Plain flour for dusting the meat
- 5 tablespoons olive oil
- 3 tablespoons unsalted butter
- 3 tablespoons finely chopped rosemary
- 6 sprigs thyme
- 3 tablespoons finely chopped parley
- 2 bay leaves
- Salt and pepper to taste
Instructions
- Dust the lamb and kidney pieces with the flour and brush off any excess.
- In a heavy bottomed pot, heat 3 tablespoons of the olive oil.
- When hot, brown the meat. You may want to do this in batches.
- Remove all the meat to a bowl and fry the onion until soft and translucent. Add more oil as required.
- Now add the garlic and diced carrots and fry for a further couple of minutes.
- Pour in enough stock to cover and add the herbs and salt and pepper to tastes..
- Simmer until the meat is tender.
- Meanwhile, slice your potatoes. I use a food processor to get them as thin as possible and to save time.
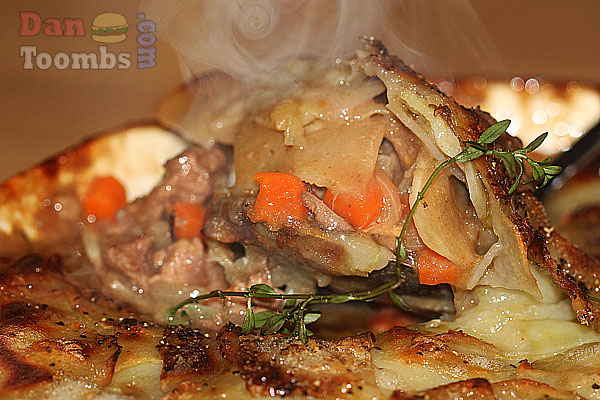
- Pour the meat and liquid into the oven ready dish you plan to serve in and then layer the potatoes over the stew. You should get about five layers of potatoes but this will vary depending on the size of your serving dish.
- Be sure to add a little butter and oil to each layer so that it crisps right up.
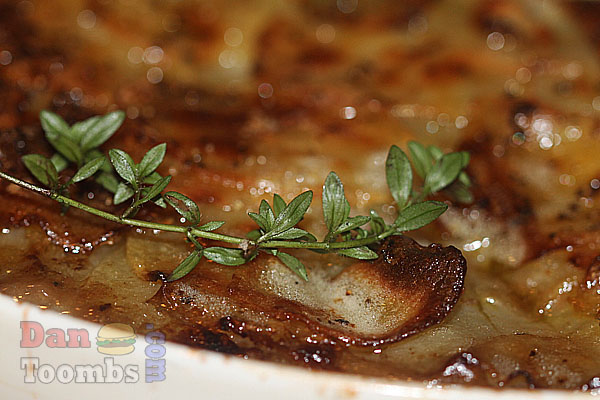
- When ready to bake, pre-heat your oven to 200c (400f) and bake until the stew is hot and the layered potatoes are crispy and browned on top.
- Remove from the oven and allow to settle for about ten minutes before serving.
- Season with a little salt and pepper and serve.
4x4 Burger

An unapologetic, towering stack of smash burgers and cheese! This is the ultimate indulgence for burger lovers everywhere. Four perfectly seared smash burgers topped with four slices of American cheese, you have to try this 4x4 Burger!

About this 4x4 burger:
As the name suggests, this towering burger consists of 4 perfectly seared smash burgers topped with 4 slices of cheese - hence the name 4x4 burger! I first came across this mighty burger when visiting a famous American burger restaurant and couldn't believe how magnificent it was! This is the ultimate indulgence and is perfect for burger lovers everywhere. Forget about doubles or triples, its all about the 4x4 burger!
Ingredients

- 280g Ground beef (split into 4 equal balls)
- Seeded burger bun
- Slices red onion
- Slice of tomato
- Butter
- Salt & pepper
- Slices jalapeno
- Yellow mustard
- Dill pickled slices
- Iceberg lettuce
- American cheese
- Hot pepper cheddar
- Burger sauce
See recipe card for quantities.
Step by step photographs:
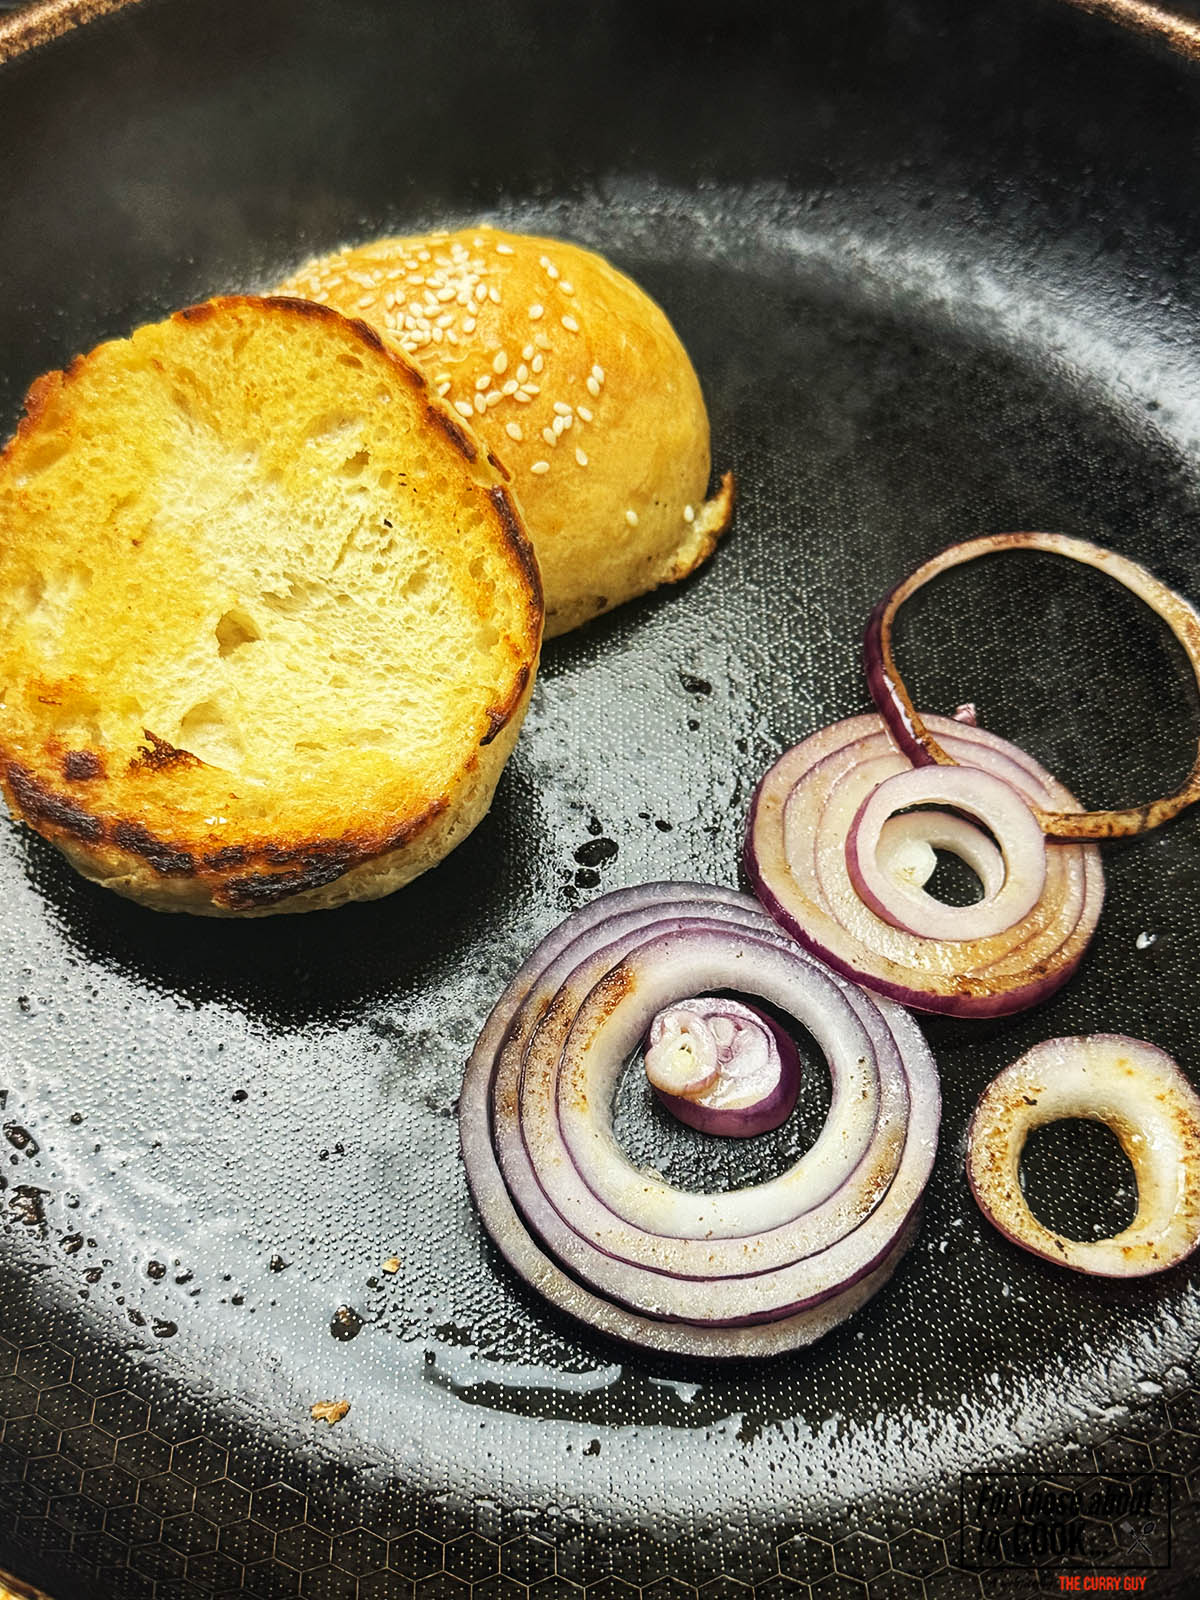
- Step 1: In a pan on medium heat, toast your burger buns with a tablespoon of butter along with your sliced red onion.

- Step 2: Turn the heat up until your pan is smoking hot. Add the four ground beef balls and smash them down as flat as you can get them with a burger press or spatula. To avoid the meat sticking to your press or spatula, slide it under the patty rather than lift. Add a pinch of salt.

- Step 3: When you see that the patties are almost cooked on one side, top with a squirt of mustard then flip over.

- Step 4: Now add a slice of cheese to each patty.
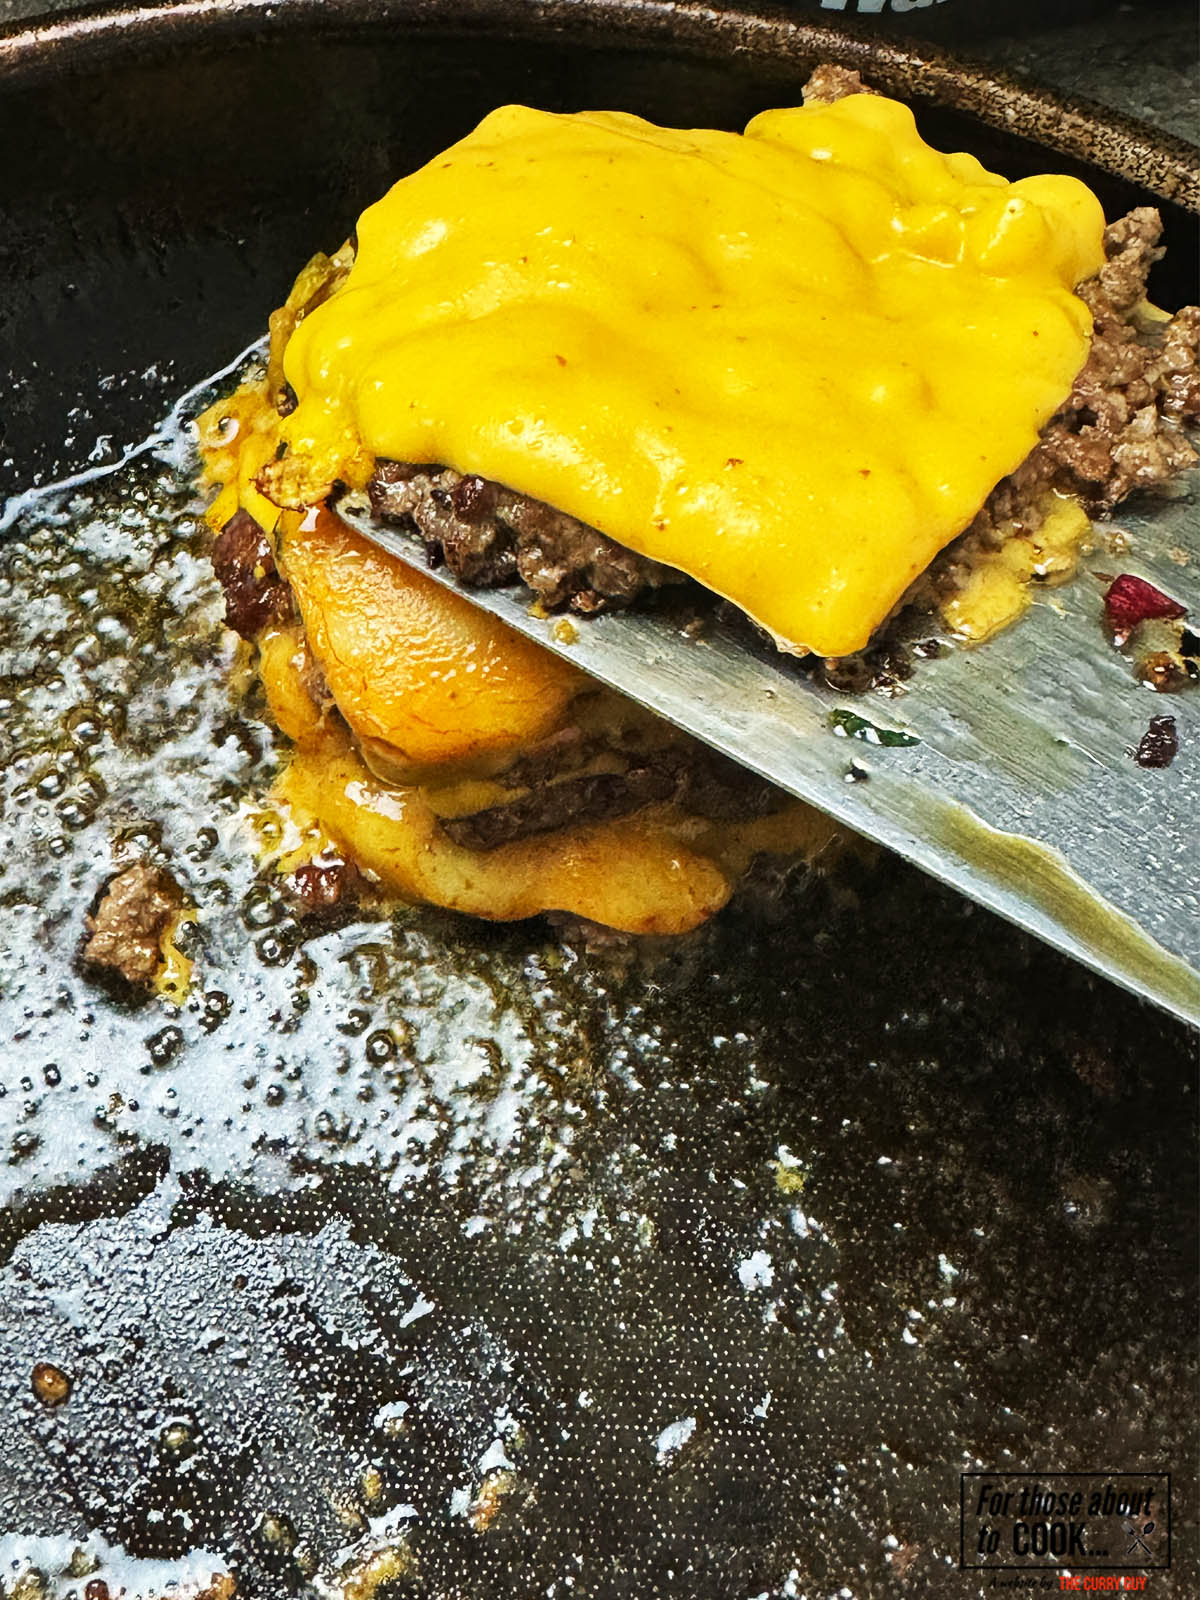
- Step 5: Stack your beef patties, top with the top burger bun and cover with a burger dome. Reduce the heat and let the patties and bun steam for about a minute to soften the bun and further melt the cheese.

- Step 6: Slather a generous amount of burger sauce over the bottom bun and top with dill pickles and your quick fried onion slices.

- Step 7: Add the remaining ingredients (jalapeños, tomato and shredded lettuce)
- Step 8: Finally, add the top half of your burger to the bottom half. Now this is a burger! Enjoy!
What about the burger sauce?
You can use burger sauce that you can buy from any convenience store, however I highly recommend making my Big Mac Sauce to add an extra level of flavor to this mighty 4x4 burger!
What beef should I use for the patty?
The perfect burger patty needs to have a 70/30 meat to fat ratio. This allows the beef to remain succulent and juicy when cooked and adds a depth of flavor that low fat beef just can't match.
Which buns can I use for this recipe?
I have paired this burger with a simple burger bun, the easy recipe can be found here: Homemade Hamburger Buns.
Alternatively, you can definitely use a brioche burger bun, the recipe can be found here: Brioche Hamburger Buns recipe.
Substitutions
This 4x4 burger is already stacked with amazing toppings. However, if you want to use up other items you have in your refrigerator then here are some ideas:
- Vegetarian - the beef hamburger can be replaced with a plant-based burger to make this vegetarian
- Cheese - instead of using a slice of American cheese, an Aged cheddar will melt perfectly or a slice of Mozzarella.
- Bun - use gluten free buns instead of white bread buns to make this gluten free
Variations
- Onions- why not go all out and have your burger 'Animal style' by topping with these incredible caramelized onions.
- Spicy - add an extra burst of flavor by topping with this unbelievable chili jam!
- Bacon - missing your bacon fix with this 4x4 burger? Not to worry, try this delicious bacon jam!
Equipment
All you need to make this recipe perfect is a pan and pan lid. Instead of using a burger dome, simply use the lid for your pan to perfectly steam your buns and melt your cheese to perfection. You can easily fry your burgers in a pan, or be a star chef and grill on an iron skillet or griddle.
Storage
Store the wet ingredients from your 4x4 Burger (mustard, lettuce, pickles, tomato, cheese and onions) separately from the dry ingredients (buns) in the fridge, and recombine when ready. Good for 2-3 days.
Refrigeration: You can store your burger patties raw in the fridge for up to 2-3 days before you want to cook them. Always store in an airtight container and keep away from cooked meat products. You can store cooked patties in the refrigerator for 3-4 days in an airtight container, keep away from any raw meat in your fridge.
Frozen: You can freeze your raw or cooked patties for up to 3 months, ensure they are separated by parchment paper so they don’t stick together and store in freezer bags to prevent freezer burn.
Reheating: To reheat your raw patties, simply thaw out overnight in the refrigerator and fry as instructed above. If you’re reheating cooked patties, heat them in a pan or skillet until they are heated through. Finally, recombine with your buns, mustard, lettuce, pickles, tomato, cheese and onions as instructed above.
Top Tip
The key to making this towering 4x4 burger is the perfect structure. Make sure you carefully follow the steps, adding the lettuce, pickles and tomato at the bottom to create a stable base! You don't want it to topple over!
FAQ
How big is a 4x4 burger?
Its BIG! HUGE! ENORMOUS! Counting all the patties, toppings and buns it weighs in at a whopping 1 pound (450g)! Best not to look at the calorie count for this burger!
How can I smash my beef patty?
For my smash burgers, I use a smasher which is a flat, heavy tool. However, you can use a sturdy spatula with no holes to smash down your burgers.
Related
Looking for other recipes like this? Try these:


Recipe

4x4 Burger
Yield:
1
Prep Time:
5 minutes
Cook Time:
15 minutes
Total Time:
20 minutes
An unapologetic, towering stack of smash burgers and cheese! This is the ultimate indulgence for burger lovers everywhere. Four perfectly seared smash burgers topped with four slices of American cheese, you have to try this 4x4 Burger!
Ingredients
- 10 oz (280g) Ground beef (split into 4 equal balls)
- 1 Seeded burger bun
- 2 slices red onion
- 1 slice tomato
- 1 tablespoon butter
- Pinch of salt & pepper
- 5 jalapeno slices
- 2 tablespoons yellow mustard
- 5 dill pickled slices
- Handful of iceberg lettuce
- 2 slices American cheese
- 2 slices Hot pepper cheddar
- 1 tablespoon Burger sauce
Instructions
- In a pan, on medium-low heat, melt your butter and toast your burger buns until golden along with your red onion slices.
- Remove the buns and onion, turn the heat to high and add your ground beef balls. Smash your balls down as thinly as you can using a burger smasher or a spatula with no holes. Fry on one side for 3 minutes.
- When you see that the patties are almost cooked, season with salt and pepper and top with a squirt of mustard. Flip your patties with a metal spatula and a scraping motion.
- Add a slice of cheese to each patty and cover with a burger dome or pan lid to melt the cheese.
- When the cheese has melted, stack your 4 patties on-top of one another and add your top burger bun. Cover with a burger dome or pan lid and steam the bun for a few minutes.
- Meanwhile, slather your bottom bun with a generous helping of burger sauce, add your dill pickles, jalapeños and red onion. Top with your slice of tomato and shredded lettuce.
- Finally, add the top half of your burger to the bottom half. Enjoy!
Nutrition Information:
Yield: 1 Serving Size: 1Amount Per Serving: Calories: 2858Total Fat: 183gSaturated Fat: 77gTrans Fat: 6gUnsaturated Fat: 87gCholesterol: 835mgSodium: 2109mgCarbohydrates: 50gFiber: 7gSugar: 20gProtein: 245g
Steak Pizzaiola

If you love big, bold flavours—and I know you do—then Steak Pizzaiola is about to become your new favourite. This is Italian home cooking at its rustic best: tender steak simmered in a garlicky, tomato-rich sauce that’s punchy, herby, and absolutely loaded with personality. It’s the kind of dish you make once and find yourself craving again and again.

What is Steak Pizzaiola?
Steak Pizzaiola (or Bistecca alla Pizzaiola) comes from Southern Italy, and the name says it all—it literally means “steak in the style of the pizza-maker.”
That’s because the sauce tastes like something you’d find on a proper Neapolitan pizza: tomatoes, garlic, oregano, olive oil, maybe some capers or olives, and a bit of chilli heat if you’re into that. And you know I am.
Now, there are loads of variations on this dish. Some people cook it low and slow with cheaper cuts, letting the sauce tenderise the meat. Others go for quick-seared steak and a fast sauce. I like to meet somewhere in the middle—get a good-quality steak, sear it hot, and finish it in the sauce just long enough to marry the flavours. The result? Tender meat, punchy sauce, and one very happy cook.
Ingredients
There aren't a lot of ingredients in a good steak pizzaiola but they all go so well together.

- minute steaks
- neutral vegetable oil or beef tallow
- garlic
- tomato paste
- dry white wine
- tomatoes
- dried oregano
- Parmesan
- Mozzarella
- parsley
- Salt and pepper
- dried chili flakes (optional)
See recipe card for quantities.
Step by step photos.
Check out my step by step photographs to see just how easy this steak pizzaiola is to make.

- Step 1: Pound the steaks to flatten and tenderize them. This is optional. If using thicker, more expensive cuts like sirloin or ribeye, you might like to leave them as they are and enjoy them like you would any steak in the sauce cooked to your preferred doneness.

- Step 2: Heat your oil or beef tallow over a high heat. When your pan is smoking hot, sear the steaks for one minute per side. Transfer to a plate and set aside.

- Step 3: Blend the tomatoes until smooth and set aside.

- Step 4: Using the same pan that you seared your steaks, fry the garlic and tomato paste over a medium heat for about 30 seconds in oil or beef tallow.

- Step 3: Pour in the wine to deglaze the pan. Bring to a simmer.

- Step 4: Pour in the blended tomatoes and stir well to combine. Bring to a simmer.

- Step 3: Add half of the Parmesan cheese and stir it into the sauce. Season with salt and pepper to taste and add the chili flakes, if using.

- Step 4: Now add your seared steaks and top with the Mozzarella and remaining Parmesan.

- Step 3: Pre-heat your oven grill to it's highest setting and place the pizzaiola under it. Grill for about 10 minutes or until the cheese melts and browns in places.

- Step 4: Serve hot. Steak pizzaiola is delicious served simply with pasta or you could also serve it with polenta, mashed potatoes or crusty bread.
Substitutions
If you like, you can also use other main ingredients if beef isn't your thing.
- Venison - Steak pizzaiola is delicious made with venison. Use haunch steaks if you want to cook it quickly and tougher rump steaks if you prefer a deeper flavour and slower cook.
- Chicken - This dish is often made with chicken or wild poultry. I like to pound chicken thighs flat and then sear them exactly as you do with beef minute steaks.
- Vegetarian - If you don't want to add meat, this dish will still be good. Try adding roasted potatoes or steamed broccoli or cauliflower before adding the cheese and sticking it in the oven to roast.
Variations
There are a number of things you can do to change your steak pizzaiola while still getting an authentic flavour.
- Spicy - add more chilli pepper flakes while cooking to give it a bit of a kick
- Use tougher cuts of meat - Doing this, you will need to cook it longer and that will change the flavour. Your meat will need to cook longer and this will give the dish a deeper flavour and not the light tomato flavour you would expect on a quickly cooked pizza.
- Add olives and capers - I usually keep my steak pizzaiola simple but adding capers and/or olives is an authentic and delicious addition of you want to add them.
Equipment
Steak pizzaiola is the ultimate one pan dish. All you need is a good, deep frying pan to sear your steaks and then cook the sauce. Put it all in the oven and you have a one pan dish in less than an hour that is sure to satisfy.
Storage
If you happen to have leftovers, we rarely do, you can store it in an airtight container in your fridge for up to 4 days. It also freezes well for up to 3 months.
To reheat, let it defrost completely, if frozen and heat it up in your oven until hot at about 400°F/200°C.
If you do decide to freeze your steak pizzaiola, be sure to freeze it in airtight containers. Label and date the container before freezing.
Top Tip
If you really want your steak pizzaiola to be special, use sirloing or ribeye. Only sear it for about a minute per side in a smoking hot pan so that it remains nice and juicy inside.
FAQ
What’s the best cut of meat for Steak Pizzaiola?
You’ve got options! Ribeye and sirloin are excellent if you want tender, juicy results with minimal cooking time. For a more budget-friendly version, tougher cuts like chuck, blade, or round steak work well too. Just simmer them low and slow in the sauce until tender (about 1.5 to 2 hours). It depends on your time and what texture you're after. I used minute steaks for mine which are cheaper than sirloin or ribeye and very tasty.
Can I make the sauce ahead of time?
Absolutely. The pizzaiola sauce can be made a day or two in advance and actually tastes better as the flavours develop. Store it in the fridge, then just reheat and cook your steaks fresh and place it all in your hot oven. Great for meal prep or dinner parties!
How spicy is Steak Pizzaiola supposed to be?
Traditionally, it's not very spicy, but adding chili flakes (or fresh chili) is a common and delicious twist. You can totally adjust the heat level to suit your taste—or leave it out altogether if you're not a fan of spice.
What should you serve with steak pizzaiola?
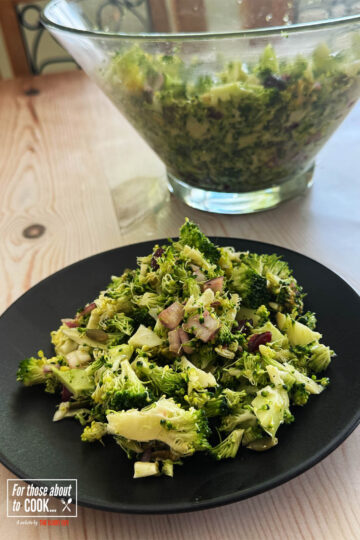
This dish is all about that amazing sauce, so pair it with something that’ll soak it up. Crusty bread, polenta, mashed potatoes, or pasta are all fantastic. For a lighter option, serve it with sautéed greens or a fresh side salad. Me? I like it with pasta and a nice broccoli salad.
Can you use chicken or another protein instead of steak?
Definitely! Chicken breasts or thighs work really well—just sear and simmer them in the sauce until fully cooked through. Pork chops or even fish like cod or halibut can be adapted too. The pizzaiola sauce is super versatile.
Related
Looking for more Italian style recipes? Try these:


Pairing
These are my favorite dishes to serve with Steak Pizzaiola:


Recipe

Steak Pizzaiola
Yield:
4 - 6
Prep Time:
5 minutes
Cook Time:
25 minutes
Total Time:
30 minutes
It's like a pizza in a pan and you can serve it with any carbs you like or just as it is. Steak pizzaiola is a real favorite around our house and I think it will soon become a favorite at your house too. I like to cook this fast, in under 30 minutes. For a deeper flavor, you would let the sauce and meat simmer for longer.
Ingredients
- 4 minute steaks, about 7oz (200g) each
- 2 tablespoon neutral vegetable oil or beef tallow
- 5 cloves garlic, finely chopped
- 2 teaspoon tomato paste
- ¼ cup (70ml) dry white wine
- 5 large tomatoes
- 1 teaspoon dried oregano
- ½ cup Parmesan, grated
- 9oz (250g) Mozzarella cheese balls, sliced
- 3 tablespoon parsley, finely chopped
- Salt and pepper to taste
- 2 – 3 tablespoon dried chili flakes (optional)
Instructions
- Pound the steaks to flatten and tenderize them. This is optional. If using thicker, more expensive cuts like sirloin or ribeye, you might like to leave them as they are and enjoy them like you would any steak in the sauce cooked to your preferred doneness.
- Heat your oil or beef tallow over a high heat. When your pan is smoking hot, sear the steaks for one minute per side. Transfer to a plate and set aside.
- In a blender or food processor, blend your tomatoes until smooth. Set aside.
- Using the same pan that you seared your steaks, fry the garlic and tomato paste over a medium heat for about 30 seconds in oil or beef tallow.
- Pour in the wine to deglaze the pan. Bring to a simmer.
- Pour in the blended tomatoes and stir well to combine. Bring to a simmer.
- Add half of the Parmesan cheese and stir it into the sauce. Season with salt and pepper to taste and add the chili flakes, if using.
- Now add your seared steaks and top with the Mozzarella and remaining Parmesan.
- Pre-heat your oven grill to it's highest setting and place the pizzaiola under it. Grill for about 10 minutes or until the cheese melts and browns in places.
- Serve hot. Steak pizzaiola is delicious served simply with pasta or you could also serve it with polenta, mashed potatoes or crusty bread.
Nutrition Information:
Yield: 6 Serving Size: 1Amount Per Serving: Calories: 373Total Fat: 26gSaturated Fat: 11gTrans Fat: 0gUnsaturated Fat: 12gCholesterol: 75mgSodium: 496mgCarbohydrates: 13gFiber: 4gSugar: 5gProtein: 23g
Garlic Soup

Today I’m sharing a recipe that’s pure comfort in a bowl — Italian Garlic Soup, or as it’s known in some regions, Zuppa d'Aglio.
This is one of those recipes that proves you don’t need fancy ingredients to create a meal that tastes absolutely amazing. If you love garlic — and let’s face it, who doesn’t? — you’re going to absolutely love this.
It’s rich, brothy, and gently creamy at the same time, with the bold punch of roasted garlic mellowed into sweet, savoury goodness. Perfect for a cold evening, a lazy weekend lunch, or even a starter for a big Italian-style dinner feast.
And the best part? It’s easy. You’ll probably already have most of the ingredients in your kitchen.

Where is this garlic soup from?
Garlic soup isn’t unique to Italy — Spain, France, and even parts of Eastern Europe have their own versions. But the Italian take is typically lighter, often broth-based, and really lets the garlic shine without being too heavy.
In some regions like Tuscany and Umbria where my ancestors are from, garlic soup is rustic — a simple mix of garlic, stock, day-old bread or potatoes, and a drizzle of good olive oil. In others, you might find it enriched with cream or eggs for a slightly silkier texture.
The version I'm sharing today is somewhere in between — hearty enough to satisfy, but still light enough that you’ll want a second helping.
Ingredients
There aren't a lot of ingredients in this garlic soup. When in season, I stir in wild garlic right before serving for a bit more color and flavor.
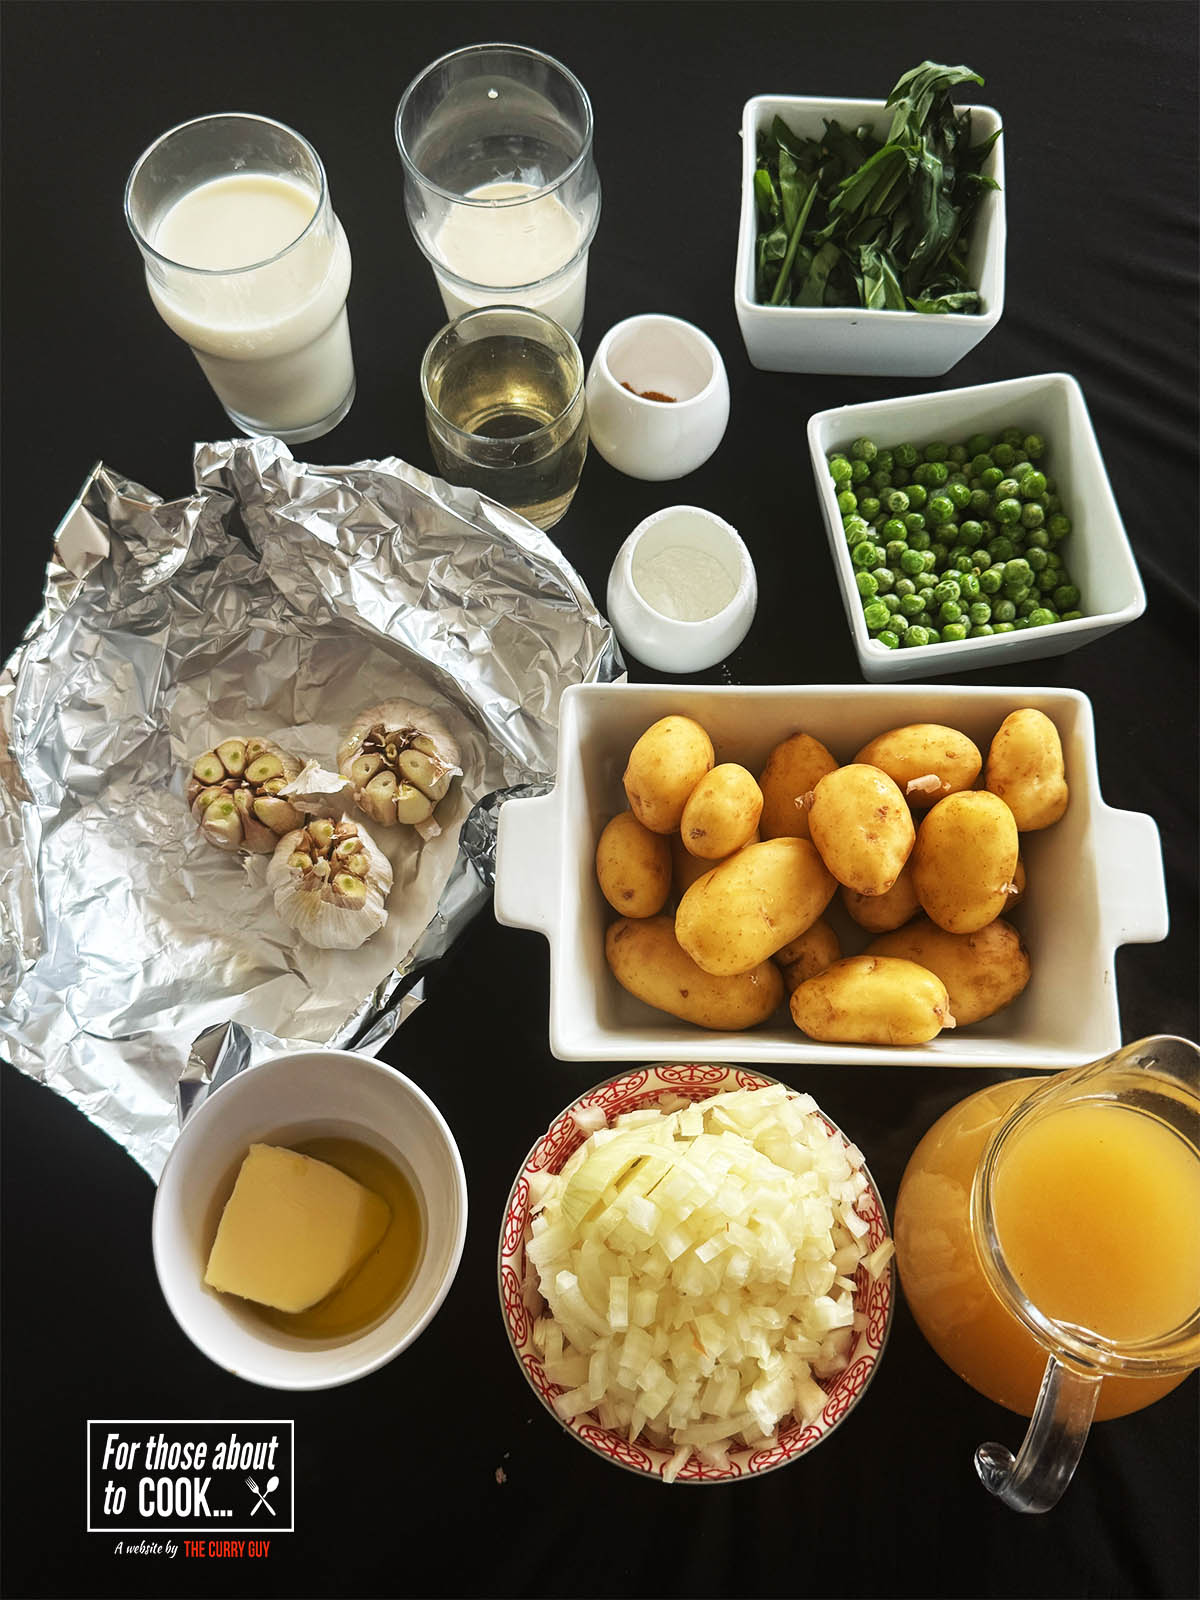
- butter
- olive oil
- onions
- garlic
- new potatoes
- chicken stock
- dry white wine
- bay leaf
- dried Italian herbs
- ground turmeric
- frozen peas
- wild garlic (optional)
- corn starch
- milk
- heavy (double) cream
- Salt and pepper
- dried chili flakes (optional)
See recipe card for quantities.
Instructions
Check out these step by step instructions. You can make this garlic soup in under about 30 minutes though simmering it a little longer will have its flavor benefits.
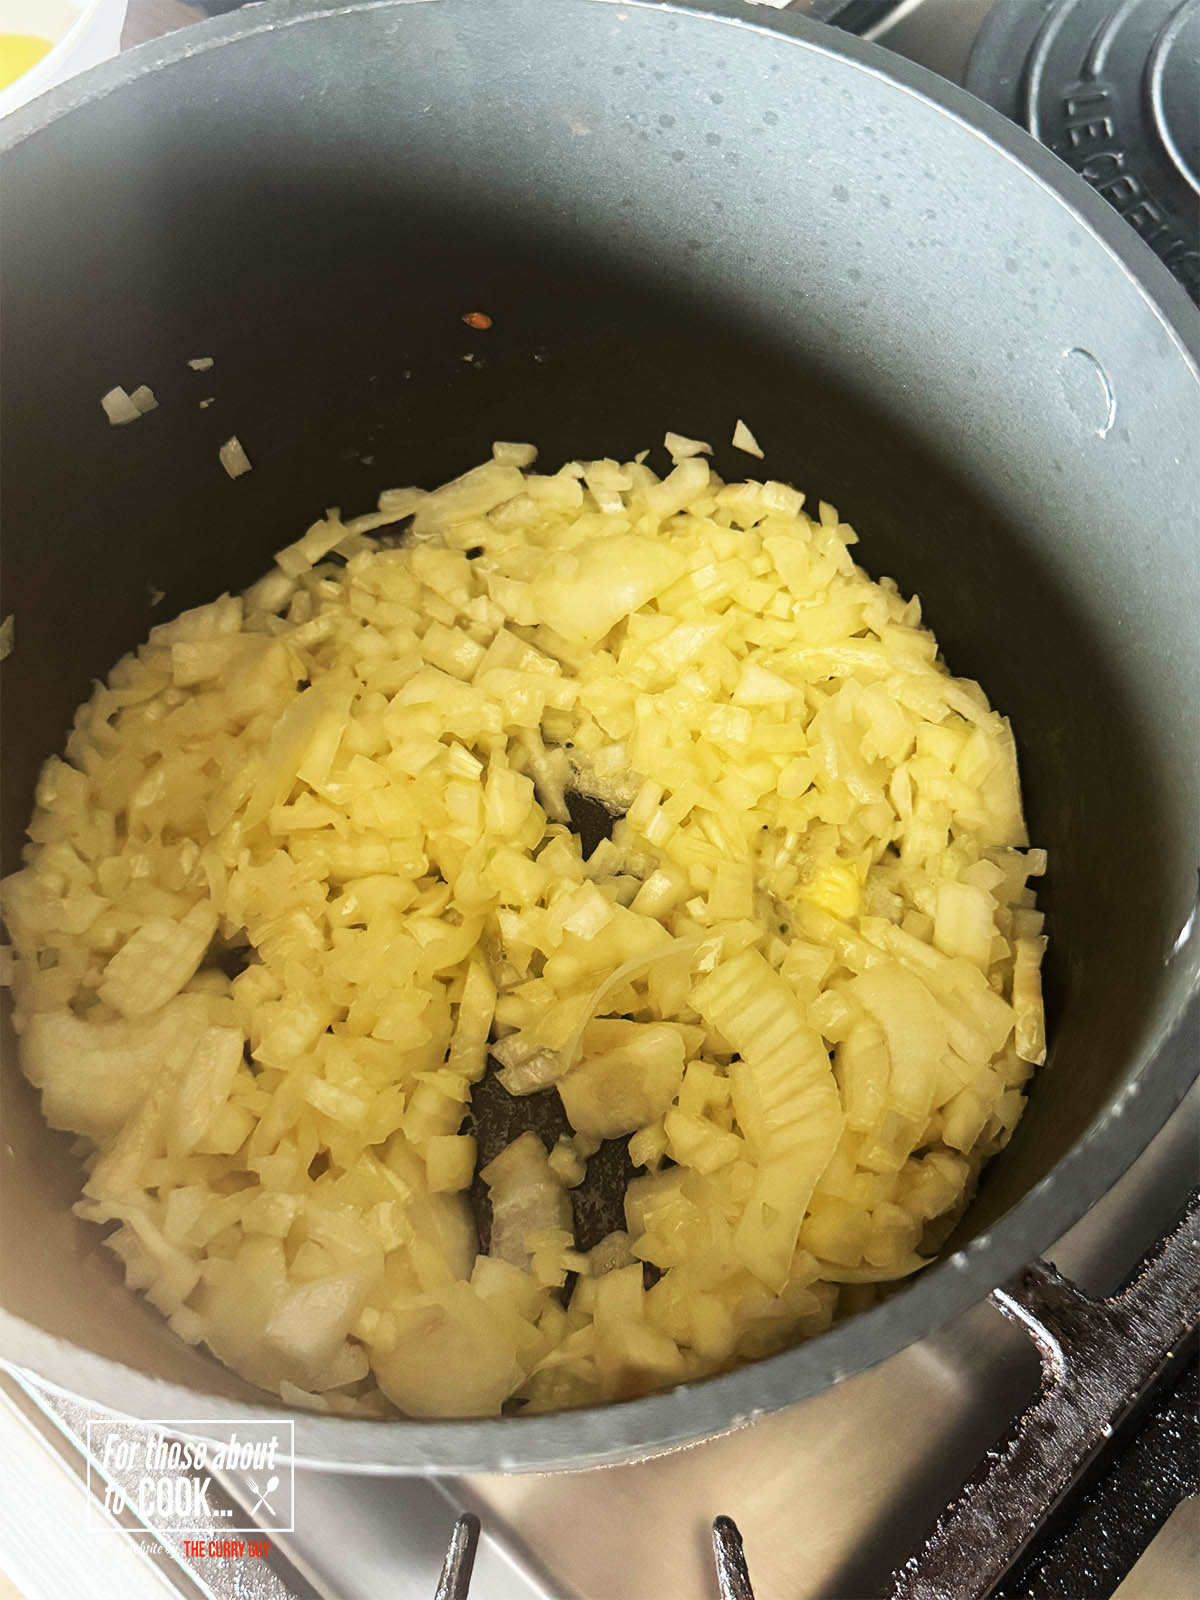
- Step 1: In a saucepan over a medium heat, fry the chopped onions for about 10 minutes or until soft and translucent.
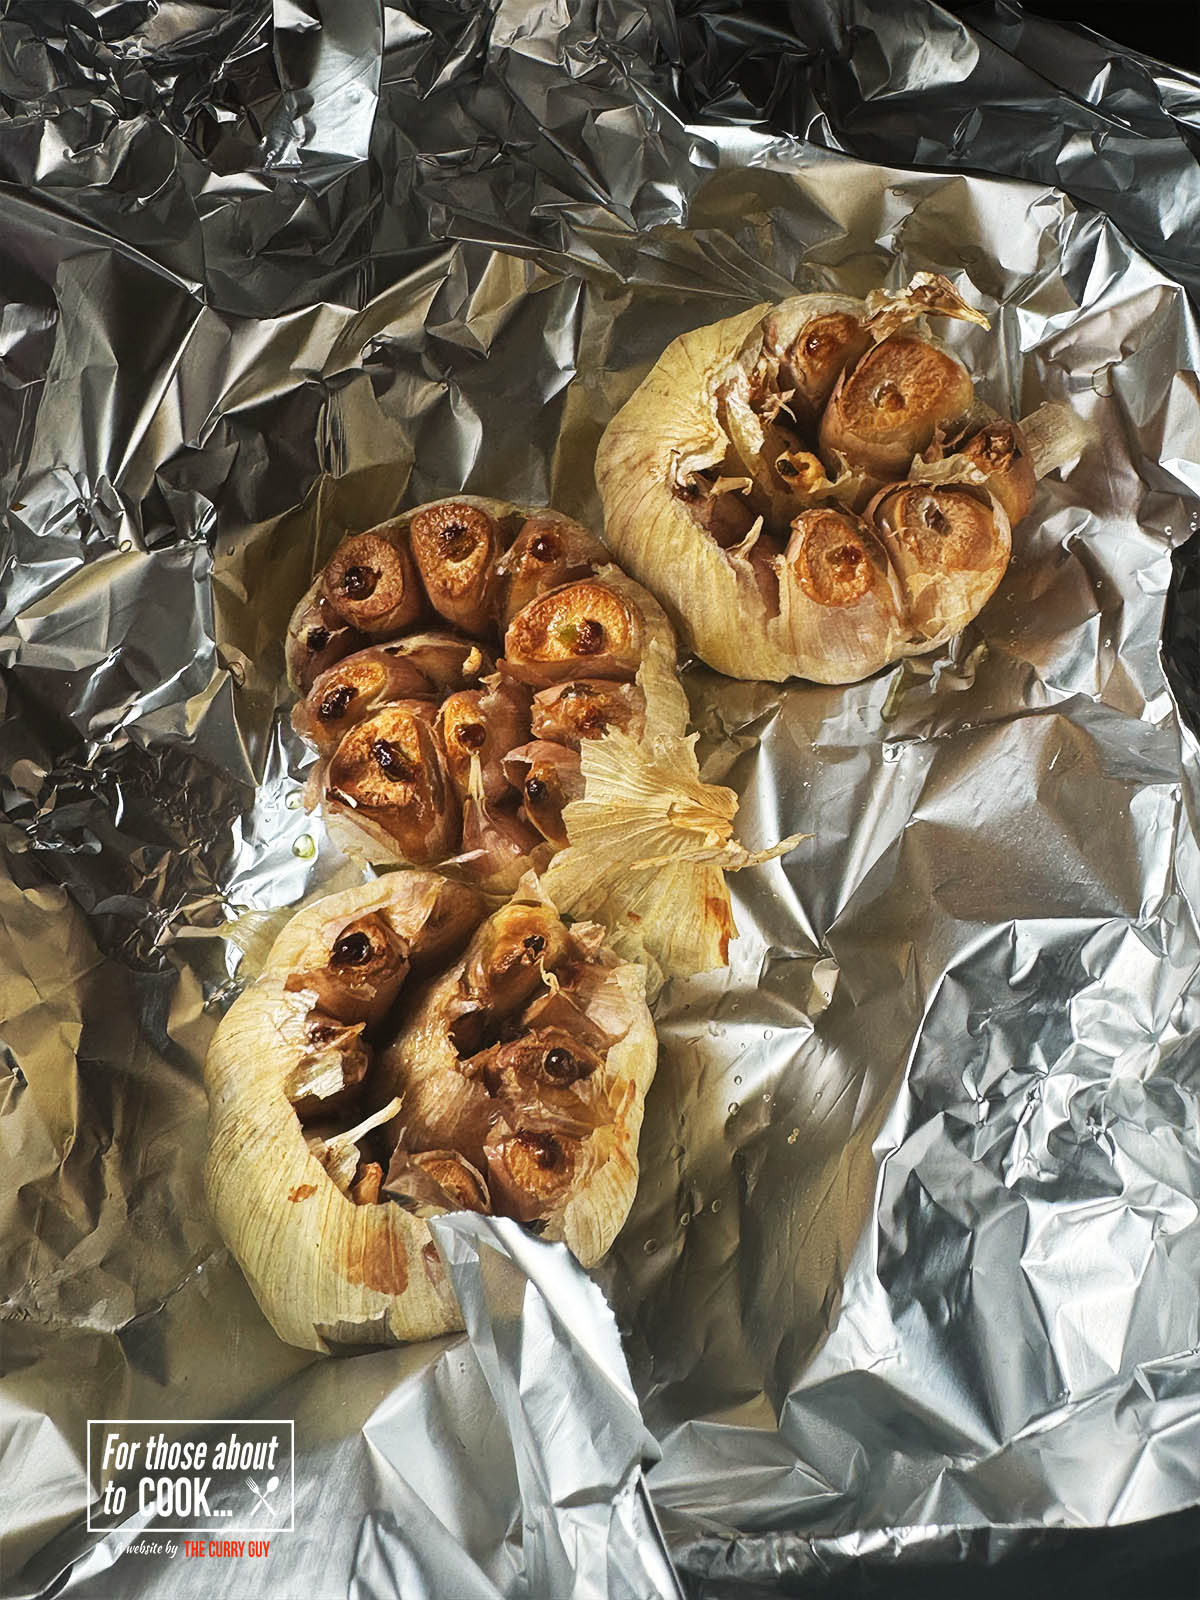
- Step 2: While the onions are frying, roast your garlic. Cut the tops off the heads of garlic and top with a little butter or olive oil. Place in your oven or air fryer at 400°F/200°C for about 10 to 15 minutes or until lightly browned and squeezably soft.
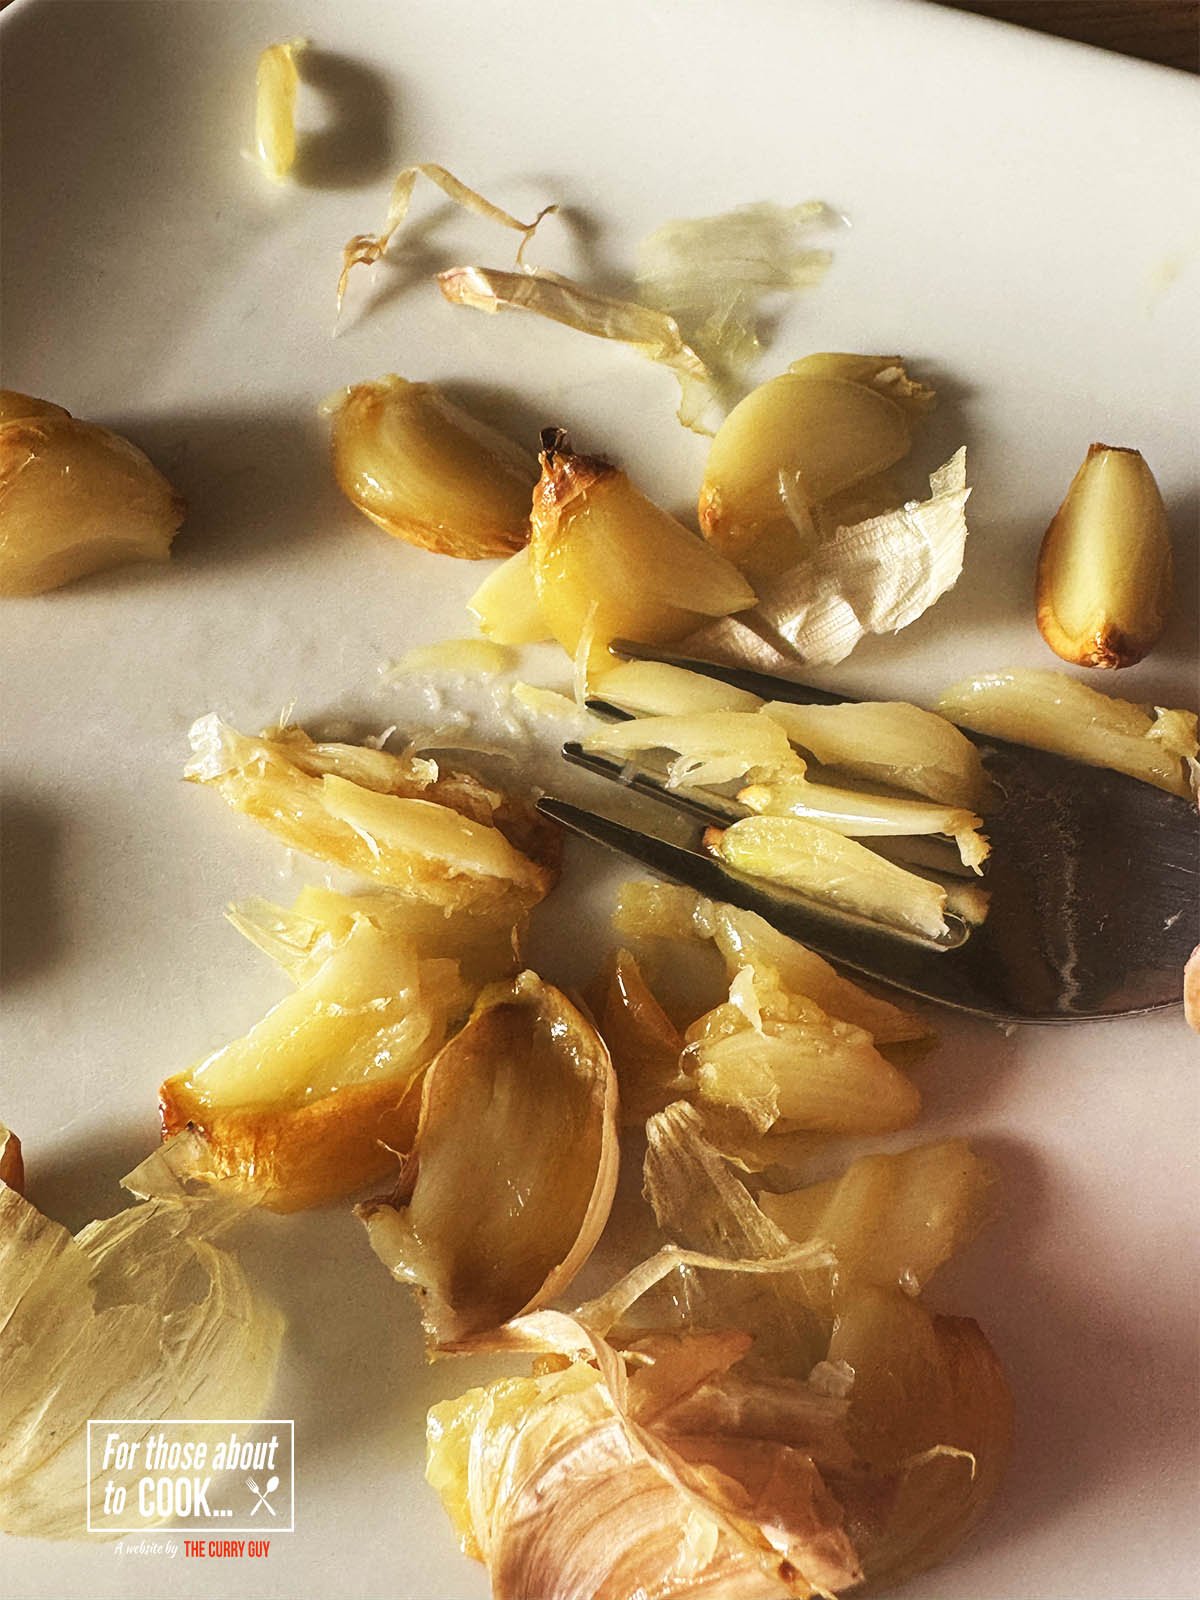
- Step 3: When the garlic is soft, smash it with a fork and remove the skins.
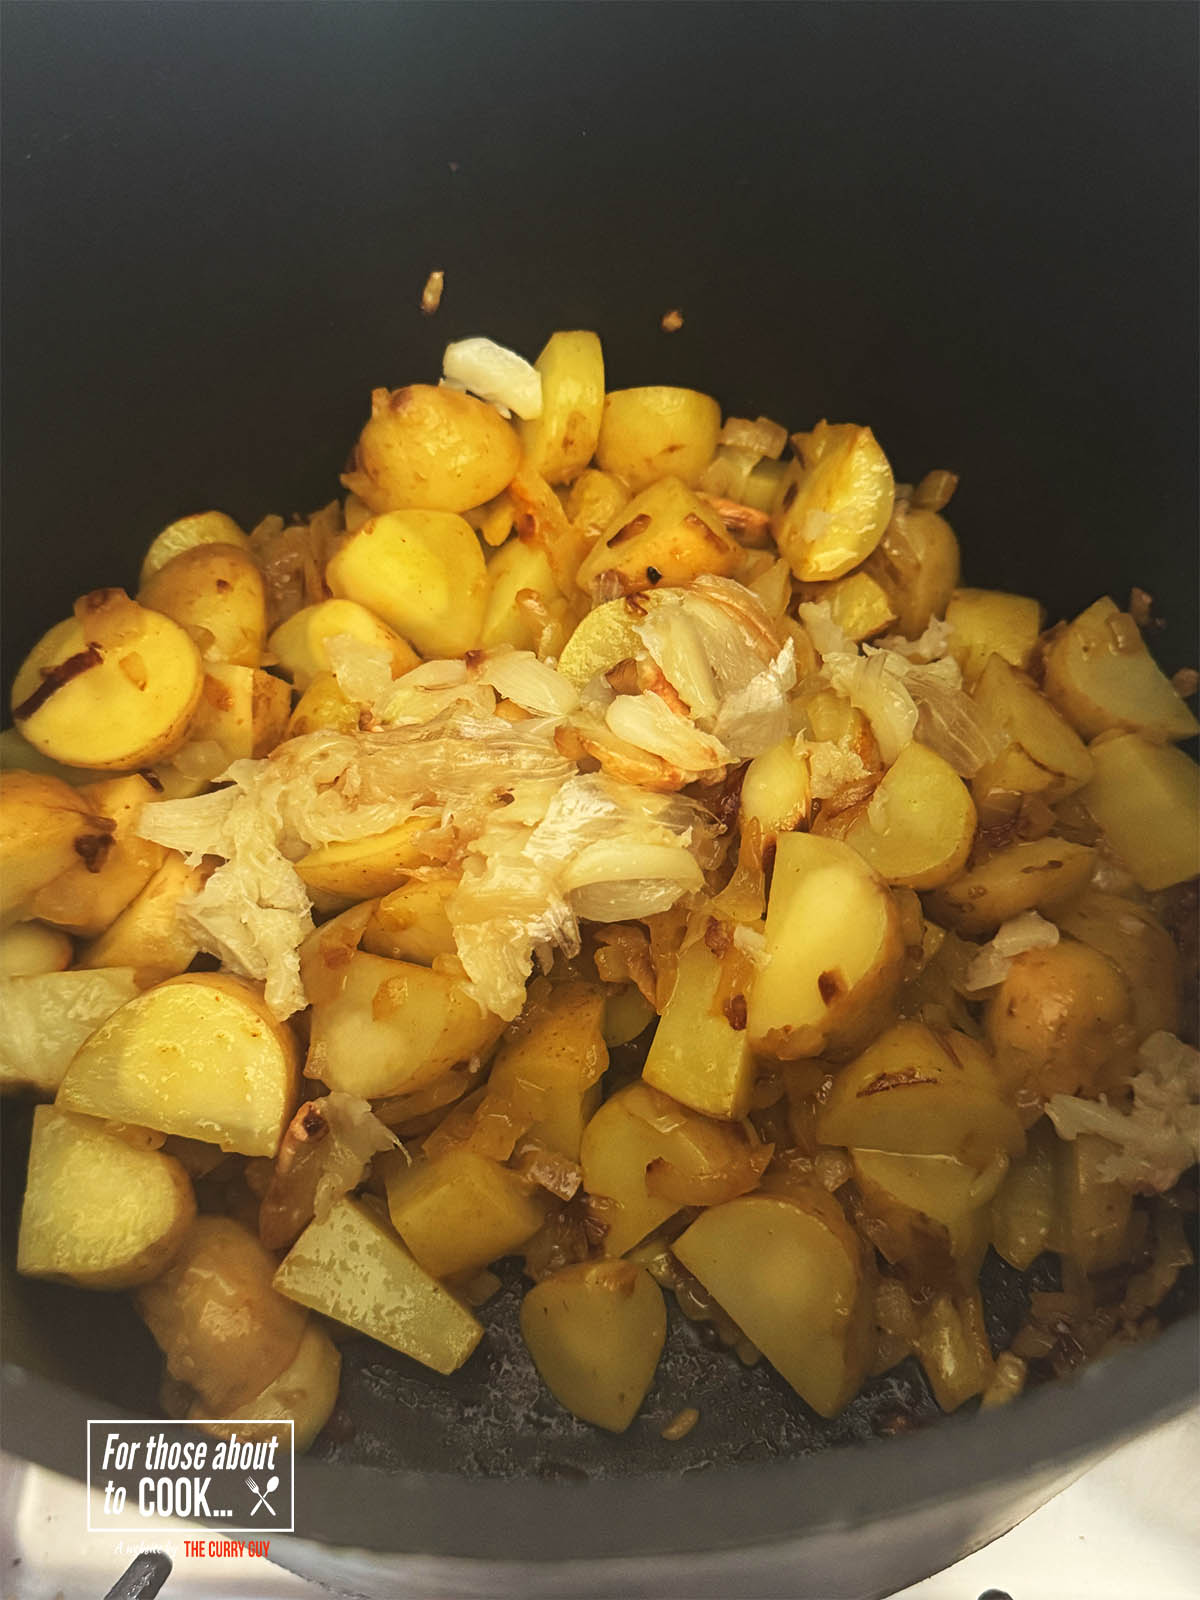
- Step 4: Add the potatoes and smashed garlic to the onions in the pan and fry for about 5 minutes, stirring regularly.
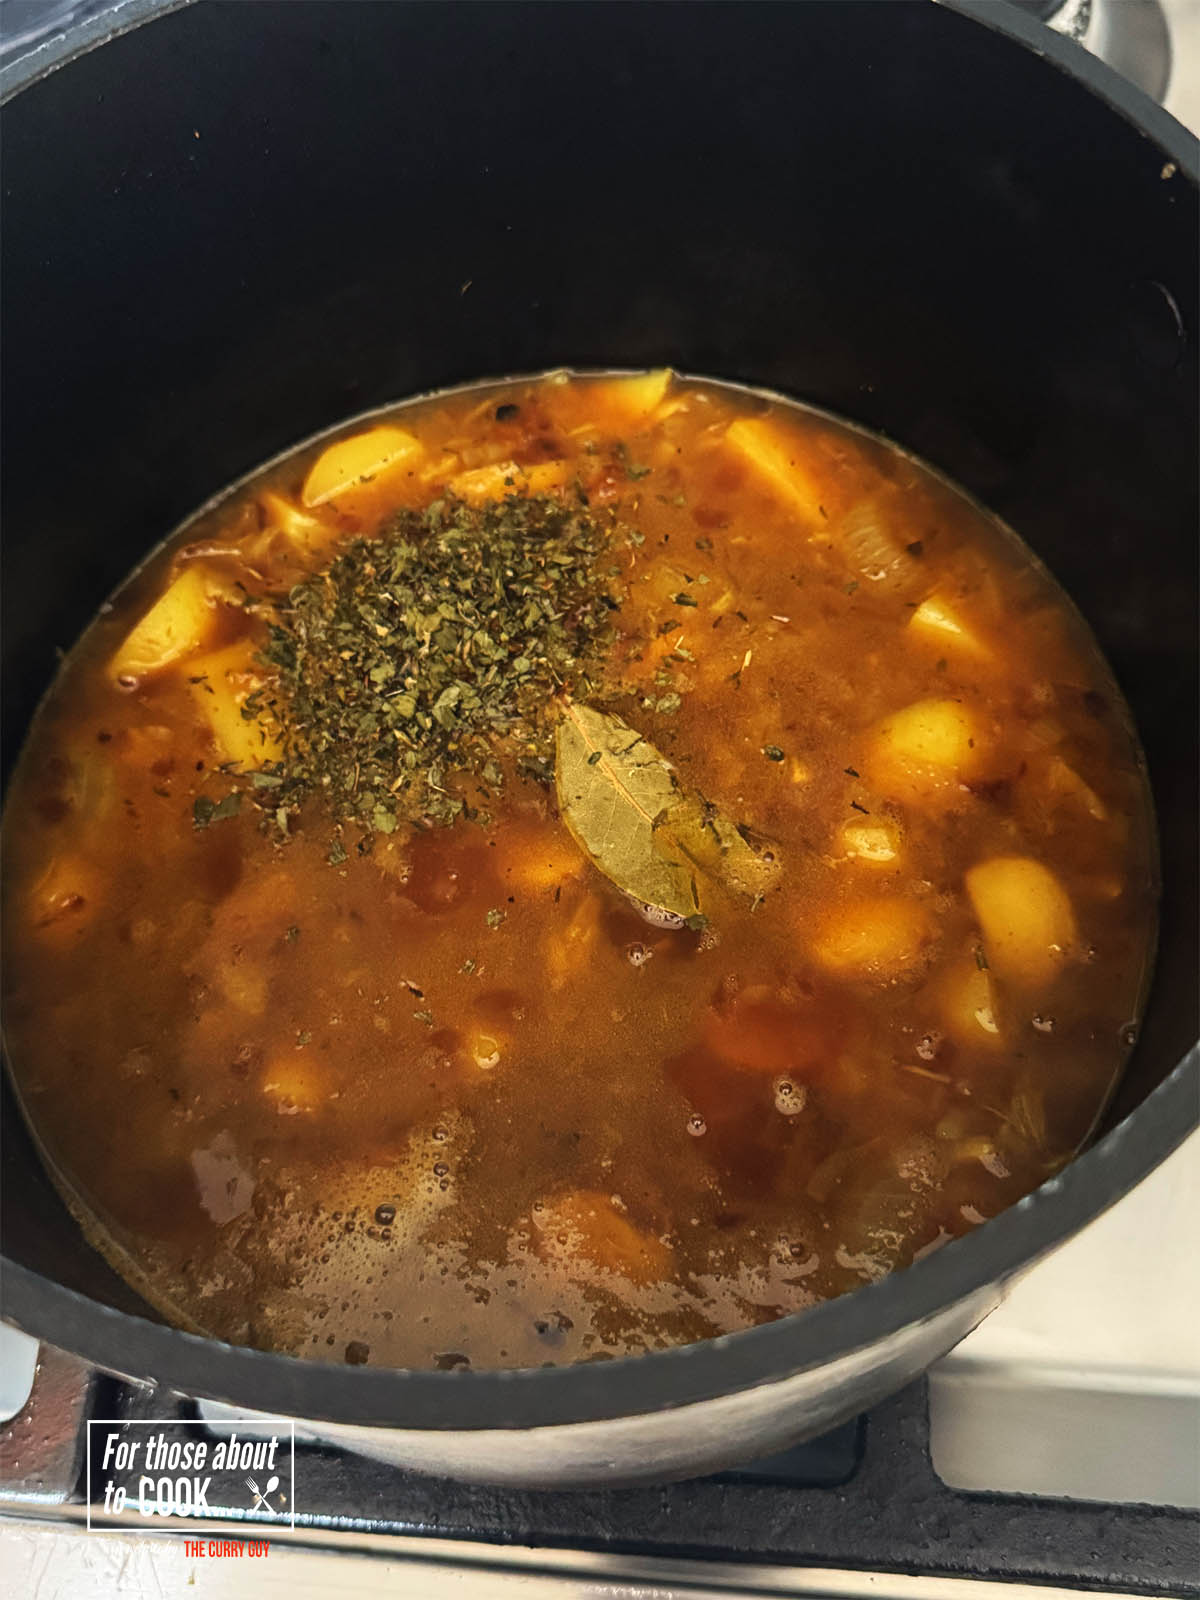
- Step 5: Pour in the stock and add the ground turmeric, bay leaf and dried Italian herbs. Bring to a simmer and let it simmer until the potatoes are soft. This should take about 5 to 10 minutes.

- Step 6: Add the peas and wild garlic if using.
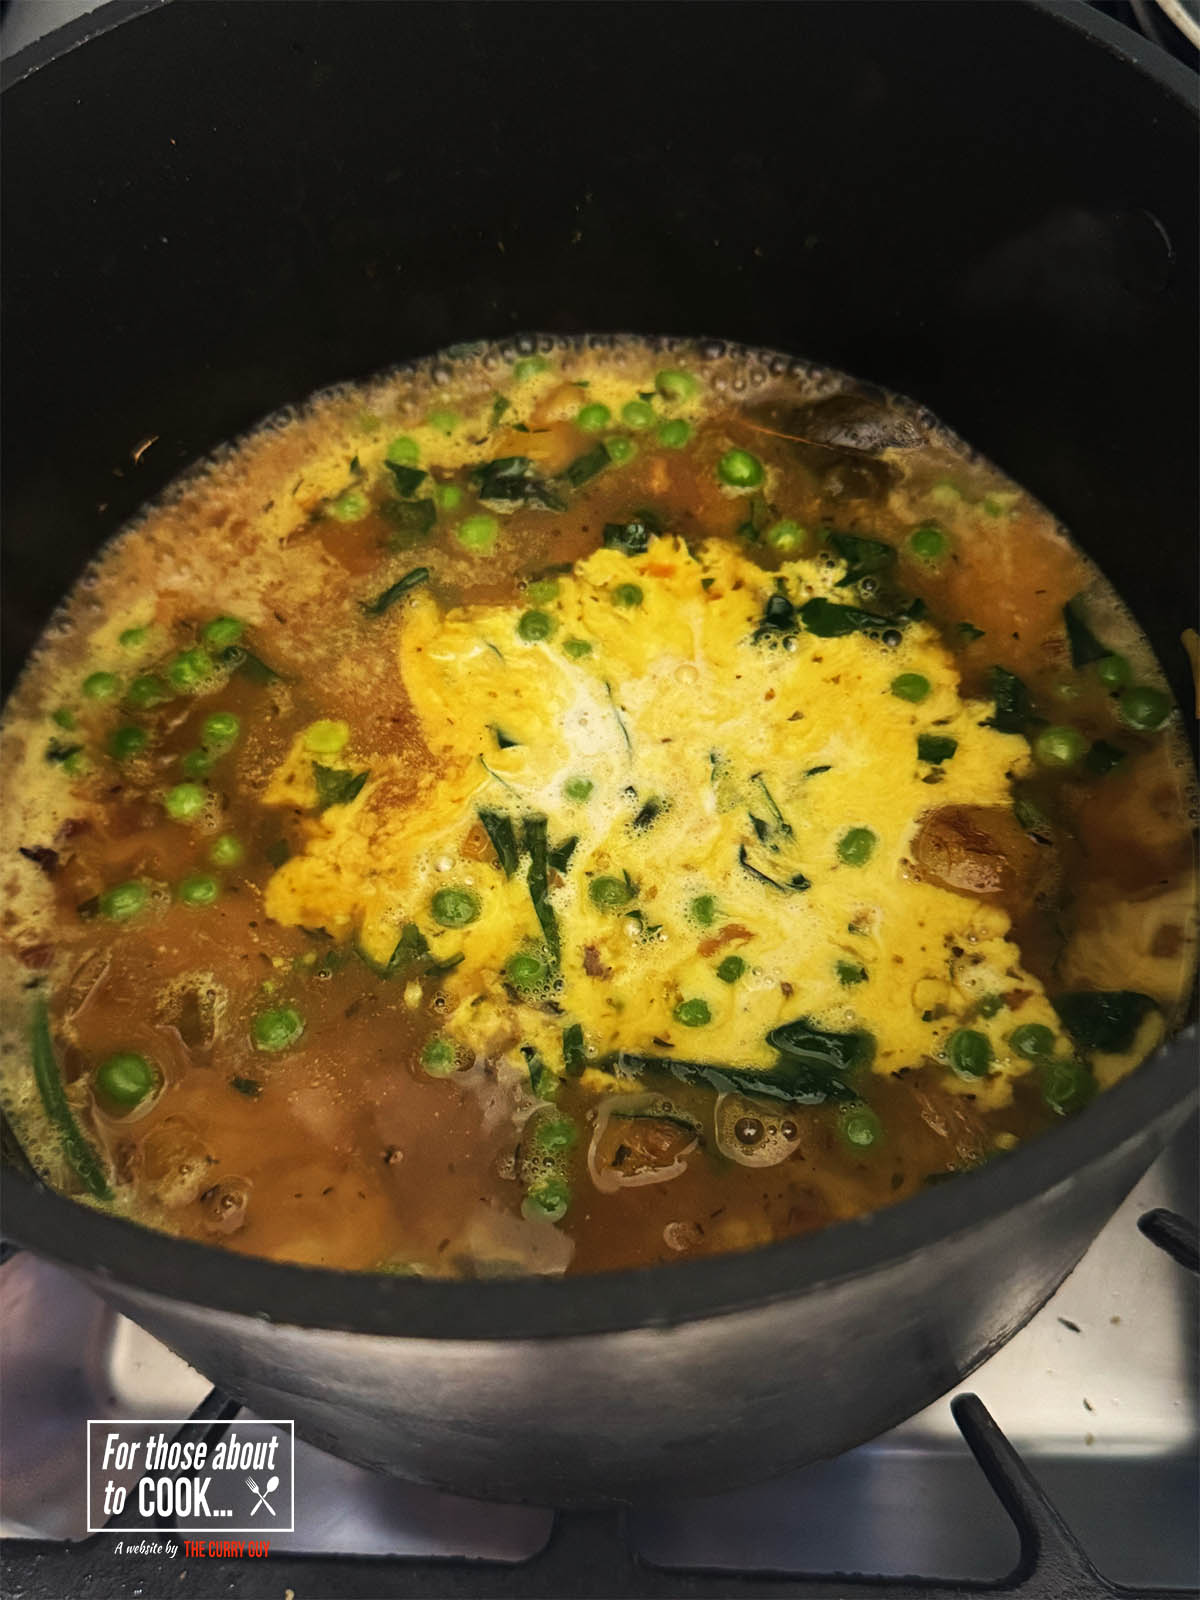
- Step 7: Then stir in the cream and milk slurry mixture. Season with salt and pepper to taste.

- Step 8: Serve hot. This garlic soup is delicious served as is or topped with fried bacon and chili flakes.
Prepping the Garlic
First things first: don't be afraid of all that garlic.
When you roast or slow-cook garlic, it completely transforms. It loses its raw, sharp edge and becomes mellow, sweet, almost buttery.
Here’s how I like to prepare it:
Cut the top off the garlic bulbs. Top with a little butter and/or olive oil and then place in your oven or air fryer at 400°F/200°C for about 15 minutes or until it is lightly browned and soft.
Serving Suggestions
On its own with crusty bread on the side
Topped with a poached egg for a heartier meal
Topped with crispy bacon or ham That's what I did!
With a simple salad for a light dinner
As a starter for a big Italian feast
And of course, a nice glass of crisp white wine doesn’t hurt either.
Variations
Make it vegan: Use vegetable stock and skip the cream and milk. You can use vegan milk substitutes.
Spice it up: Add a pinch of chilli flakes when sautéing the onion and/or sprinkled on top to serve.
Ultra-smooth: Blend and strain for an elegant, velvety soup.
Bulk it out: Stir in a handful of cooked rice or tiny pasta shapes.
Equipment
All you need is a pot to cook the soup. This garlic soup is the ultimate one pot meal. Even the garlic can be cooked simply on top of a piece of foil.
Storage
You can store leftover in an airtight container for 3 to 4 days. To reheat it, just place it in your microwave or heat it in a pot over a medium-high heat until hot.
You can also freeze it for up to 3 months but the texture might change a little because of the cream and milk. If batch cooking, freeze it before adding the milk and cream.
When freezing, be sure to label and date the container.
Top Tip
Although chicken or vegetable stock made with stock cubes will work fine, homemade stock will take this soup up a level or two.
Related
Looking for more Mediterranean style recipes? Try some of these:

Recipe

Garlic Soup
Yield:
2 - 4
Prep Time:
10 minutes
Cook Time:
25 minutes
Total Time:
35 minutes
This delicious garlic soup can be made in just over 30 minutes. It is delicious served with crusty bread.
Ingredients
- 1 tablespoon butter, plus more for the garlic
- 1 tablespoon olive oil
- 2 medium onions, finely chopped
- 3 heads of garlic
- 1lb. (450g) new potatoes, roughly cut into 1 inch pieces
- 2 ¼ cups (600ml) chicken stock
- ¼ cup (80ml) dry white wine
- 1 bay leaf
- 1 teaspoon dried Italian herbs
- ½ teaspoon ground turmeric
- 1 cup (125g) frozen peas
- 1 oz (30g) wild garlic, roughly chopped (optional)
- 2 teaspoon corn starch (cornflour) whisked with 1 cup (250ml) milk to make a slurry
- ¼ cup (70ml) heavy (double) cream
- Salt and pepper to taste
- 1 teaspoon dried chili flakes (optional)
Instructions
- In a saucepan over a medium heat, fry the chopped onions for about 10 minutes or until soft and translucent.
- While the onions are frying, roast your garlic. Cut the tops off the heads of garlic and top with a little butter or olive oil. Place in your oven or air fryer at 400°F/200°C for about 10 to 15 minutes or until lightly browned and squeezably soft.
- While the onions are frying, roast your garlic. Cut the tops off the heads of garlic and top with a little butter or olive oil. Place in your oven or air fryer at 400°F/200°C for about 10 to 15 minutes or until lightly browned and squeezably soft.
- While the onions are frying, roast your garlic. Cut the tops off the heads of garlic and top with a little butter or olive oil. Place in your oven or air fryer at 400°F/200°C for about 10 to 15 minutes or until lightly browned and squeezably soft.
- Pour in the stock and add the ground turmeric, bay leaf and dried Italian herbs. Bring to a simmer and let it simmer until the potatoes are soft. This should take about 5 to 10 minutes.
- Pour in the stock and add the ground turmeric, bay leaf and dried Italian herbs. Bring to a simmer and let it simmer until the potatoes are soft. This should take about 5 to 10 minutes.
- Add the peas and wild garlic if using.
- Then stir in the cream and milk slurry mixture. Season with salt and pepper to taste.
Serve hot. This garlic soup is delicious served as is or topped with fried bacon and chili flakes.
Nutrition Information:
Yield: 4Amount Per Serving: Calories: 350Saturated Fat: 8ggCholesterol: 48mgmg
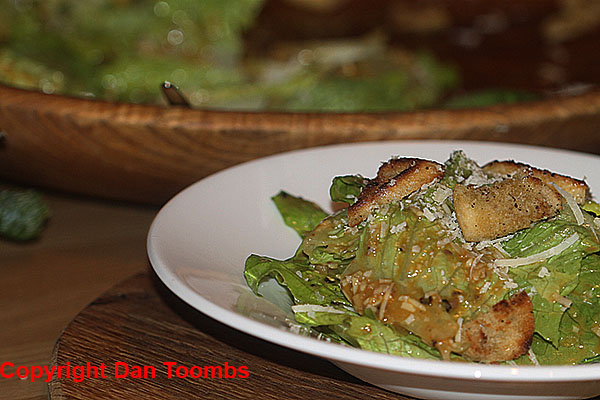
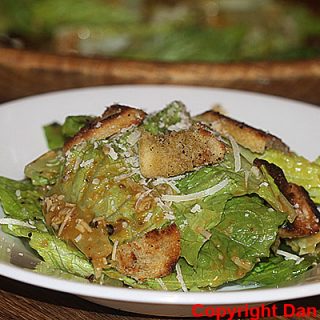
The Best Caesar Salad Recipe


I first learned this Caesar salad recipe from my grandfather when I was about nine. Forty years later, I'm still making it for friends and family.
Caesar salad dressings just don't get any better, hence the title - The Best Caesar Salad Recipe!
Believe me... I've tried hundreds of Caesar salad recipes but I always come back to this one.
Just in case you're wondering if you can make this in a blender, the answer is no!
This ceasar salad recipe was written long before we all had blenders and found Caesar Salad on almost every restaurant menu.
It has to be done by hand with a fork or wooden spoon. My grandfather used to insist that I smash the garlic and anchovy together until they formed a paste and I hope you do too.
The end result is far better and I find that it is quite therapeutic doing it the old fashion way.
It is also worth mentioning that you will want to do this in a wooden bowl. It just tastes better somehow. No other bowl will do.
So go on... Give this caesar salad recipe a try today. I think you're going to love it.


If you like this recipe, you might like to try some of these too...
Caprese salad
Italian style green beans
Ranch dressing
Green goddess salad
Recipe
The Best Caesar Salad Recipe
Yield:
4 - 6
Prep Time:
20 minutes
Cook Time:
5 minutes
Total Time:
25 minutes
Ingredients
- 7 cloves rock hard garlic
- 5 anchovies
- ¾ cup (175ml) extra virgin olive oil
- 2 squirts Worcestershire sauce
- 3 squirt Tabasco sauce
- 1 teaspoon Dijon mustard
- Juice of one half lemon
- 2 eggs
- 1 tablespoon good quality Balsamic vinegar
- 1 ½ cups (2 large handfuls) finely grated fresh Parmesan
- 2 heads of cos (romaine) lettuce
- 3 slices of fresh French bread cut into cubes
- melted butter ( just enough to brown the bread cubes)
- Freshly ground black pepper
Instructions
- In a large wooden salad bowl, smash six garlic and anchovies into a paste with a fork or wooden spoon.
- Add the olive oil, Worcestershire sauce, Tabasco sauce, mustard and the lemon juice.
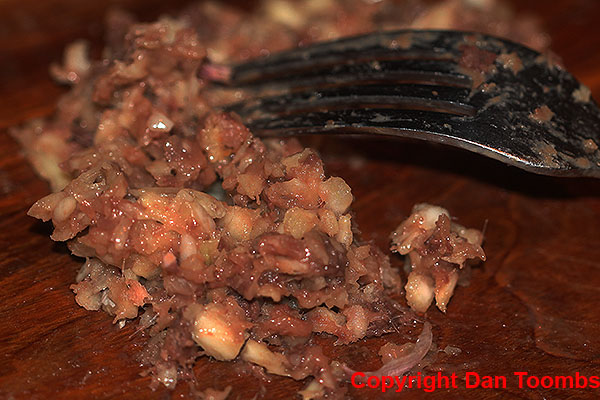
- Boil a pot of water. When it comes to a boil, turn off the heat and place the eggs in the water for 90 seconds.
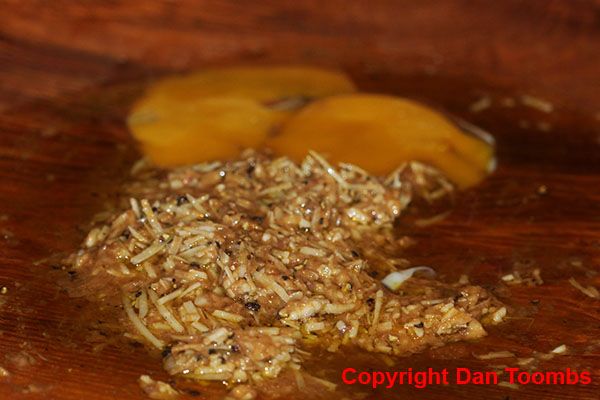
- Remove the eggs from the water and break them into a cup. Use a fork to remove any cooked white egg strings. (see photo above of how this looks.)
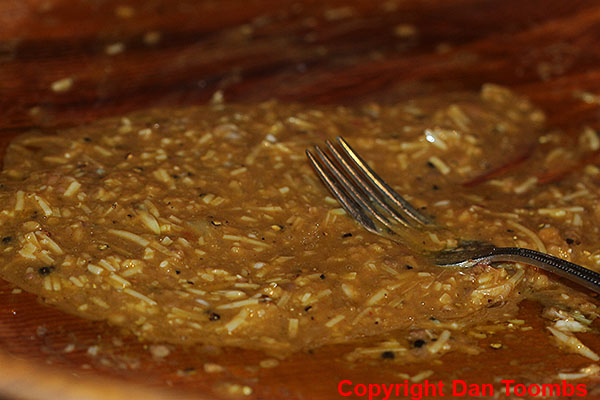
- Mix the eggs with the vinegar, a few grinds of black pepper and a handful of the Parmesan cheese.
- Add this to the salad bowl and mix well.
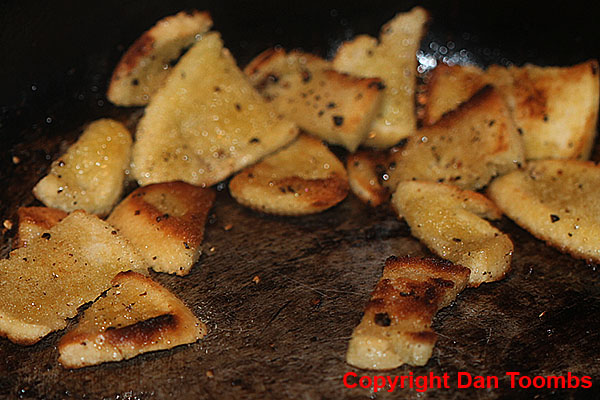
- Now make your croutons. Cut the bread into cubes.
- Melt your butter and add one minced clove of garlic and about two tablespoons of the Parmesan.
- Dip your bread cubes in the butter and fry over medium heat until nicely browned.
- Tear your lettuce into thirds and toss in the dressing.
- Stir in the croutons with the remaining Parmesan and serve.
I hope you enjoy this caesar salad recipe. If you do try it, please leave a comment. I'd love to hear from you.
How To Make A Homemade Squeeze Burger

I have to say that I do miss going to The Squeeze Inn in West Sacramento. This place is amazing. While at university at CSU Sacramento, it was one of my weekly pit stops. Squeeze Burgers are out of this world. [Read more...]
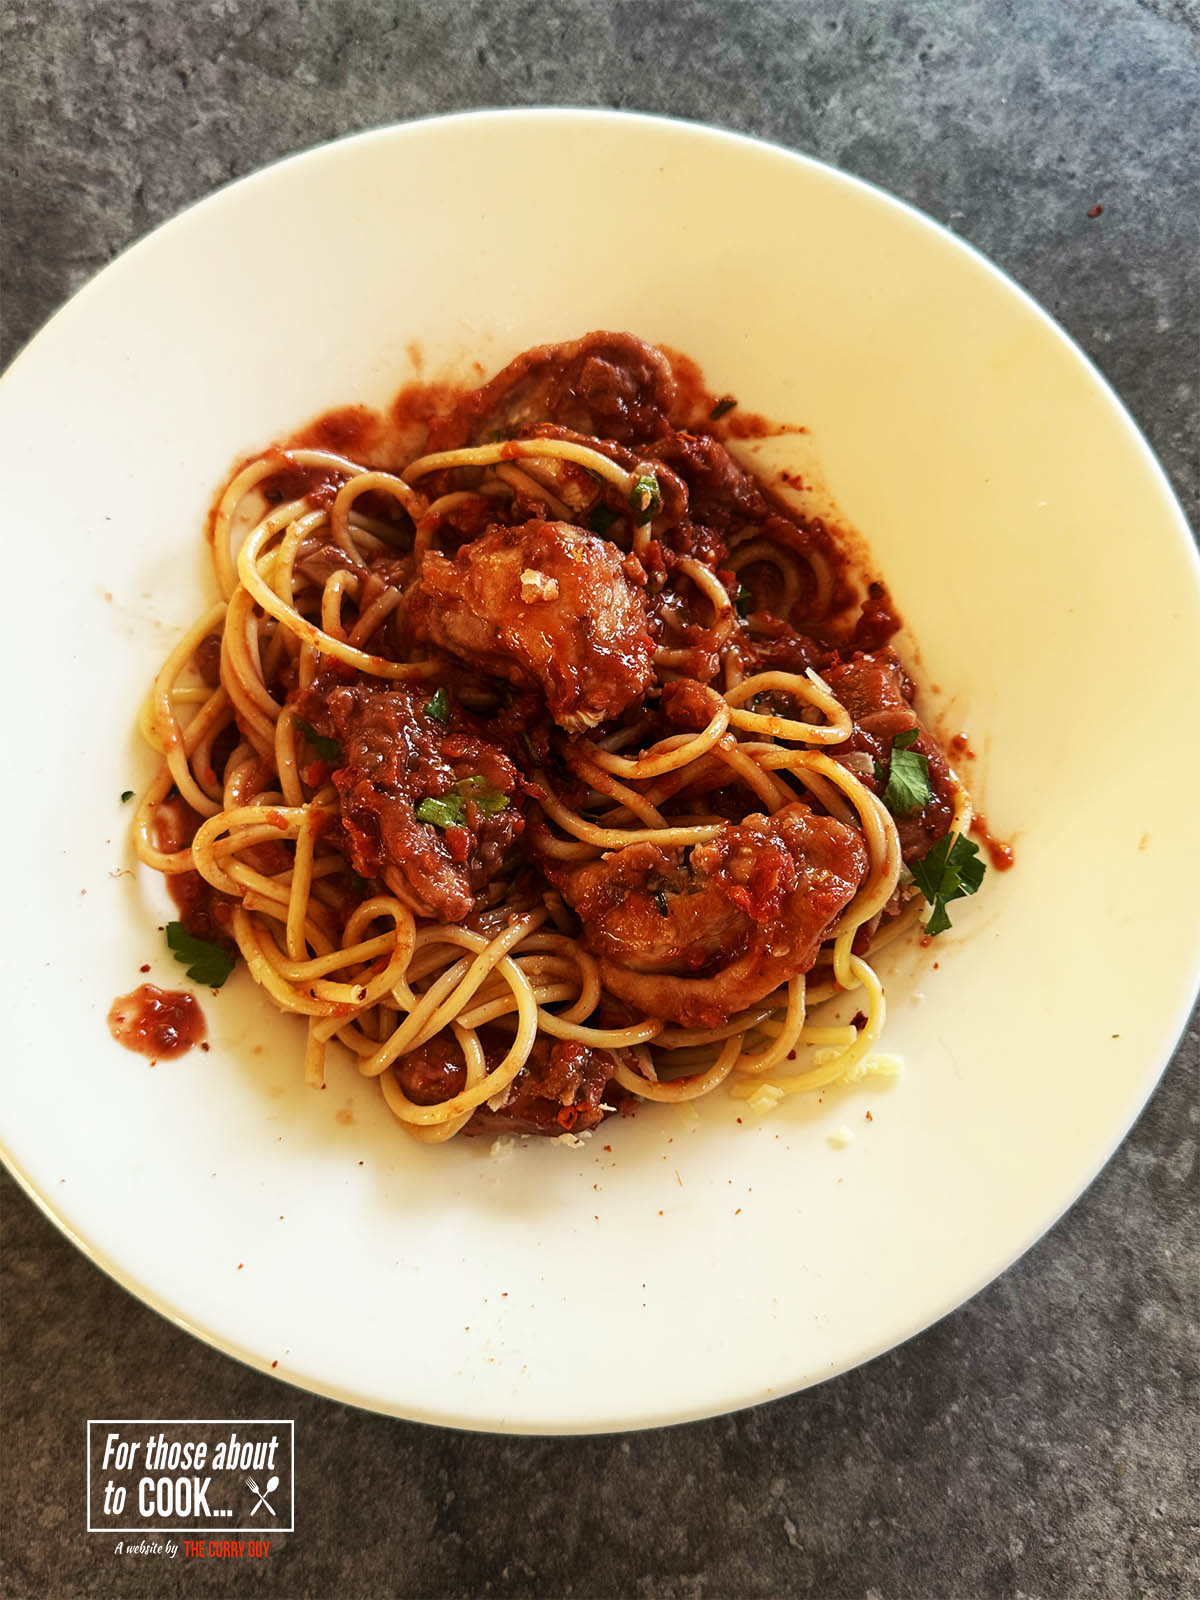
Roman Style Chicken - Polo Alla Romana

When you're craving something simple and hearty that doesn't mess about, let me introduce you to Roman Chicken.
This is a no-nonsense chicken recipe that delivers deep flavour without too much fuss. We're talking about browned chicken, simmered in a mix of red wine, chicken stock, and chopped tomatoes. It’s a dish with roots in Roman home cooking — straightforward, rustic, and dependable.
About this Roman Chicken Recipe.
I’ve cooked many chicken dishes, but this one stands out for its honest ingredients and reliable method. It's great for weeknights, but holds its own at the weekend table too.
This is not a slow cooked chicken with sauce though you could simmer the sauce longer if you like. The idea is to pack is much flavor into a 30 minute cooking session as you can and this Roman chicken ticks all the boxes.
Why This Dish Works
Roman Chicken relies on familiar ingredients, cooked properly. That’s why it works.
The chicken absorbs flavour from the wine and stock. The tomatoes bring balance. The garlic keeps it grounded and familiar. It’s not fancy, but it’s consistent.
And it holds well. You can make it ahead, reheat it, or freeze it.
Ingredients
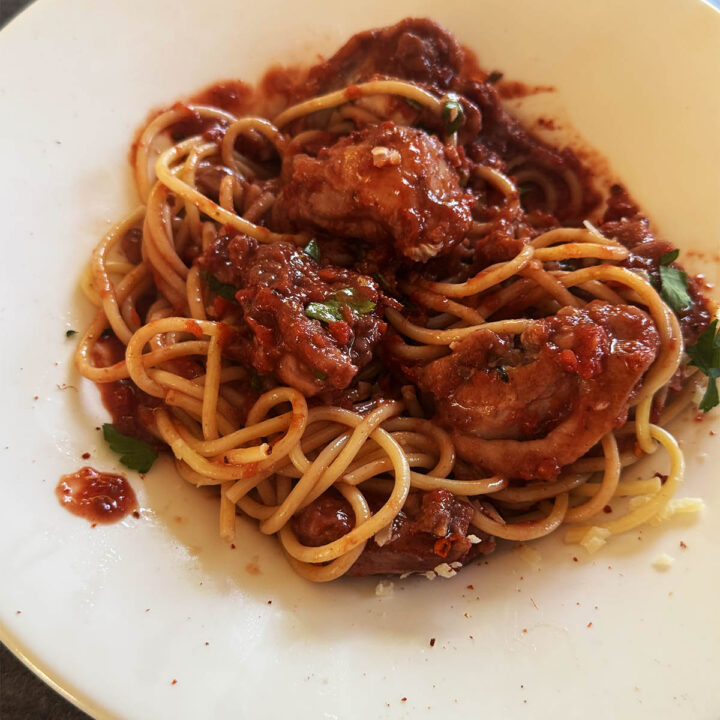
There are only a few ingredients in this one. Even the spaghetti is there just because I decided to eat it over spaghetti but Roman Chicken can be eaten on its own. It's also good served with a crusty loaf of bread or over mashed potatoes.
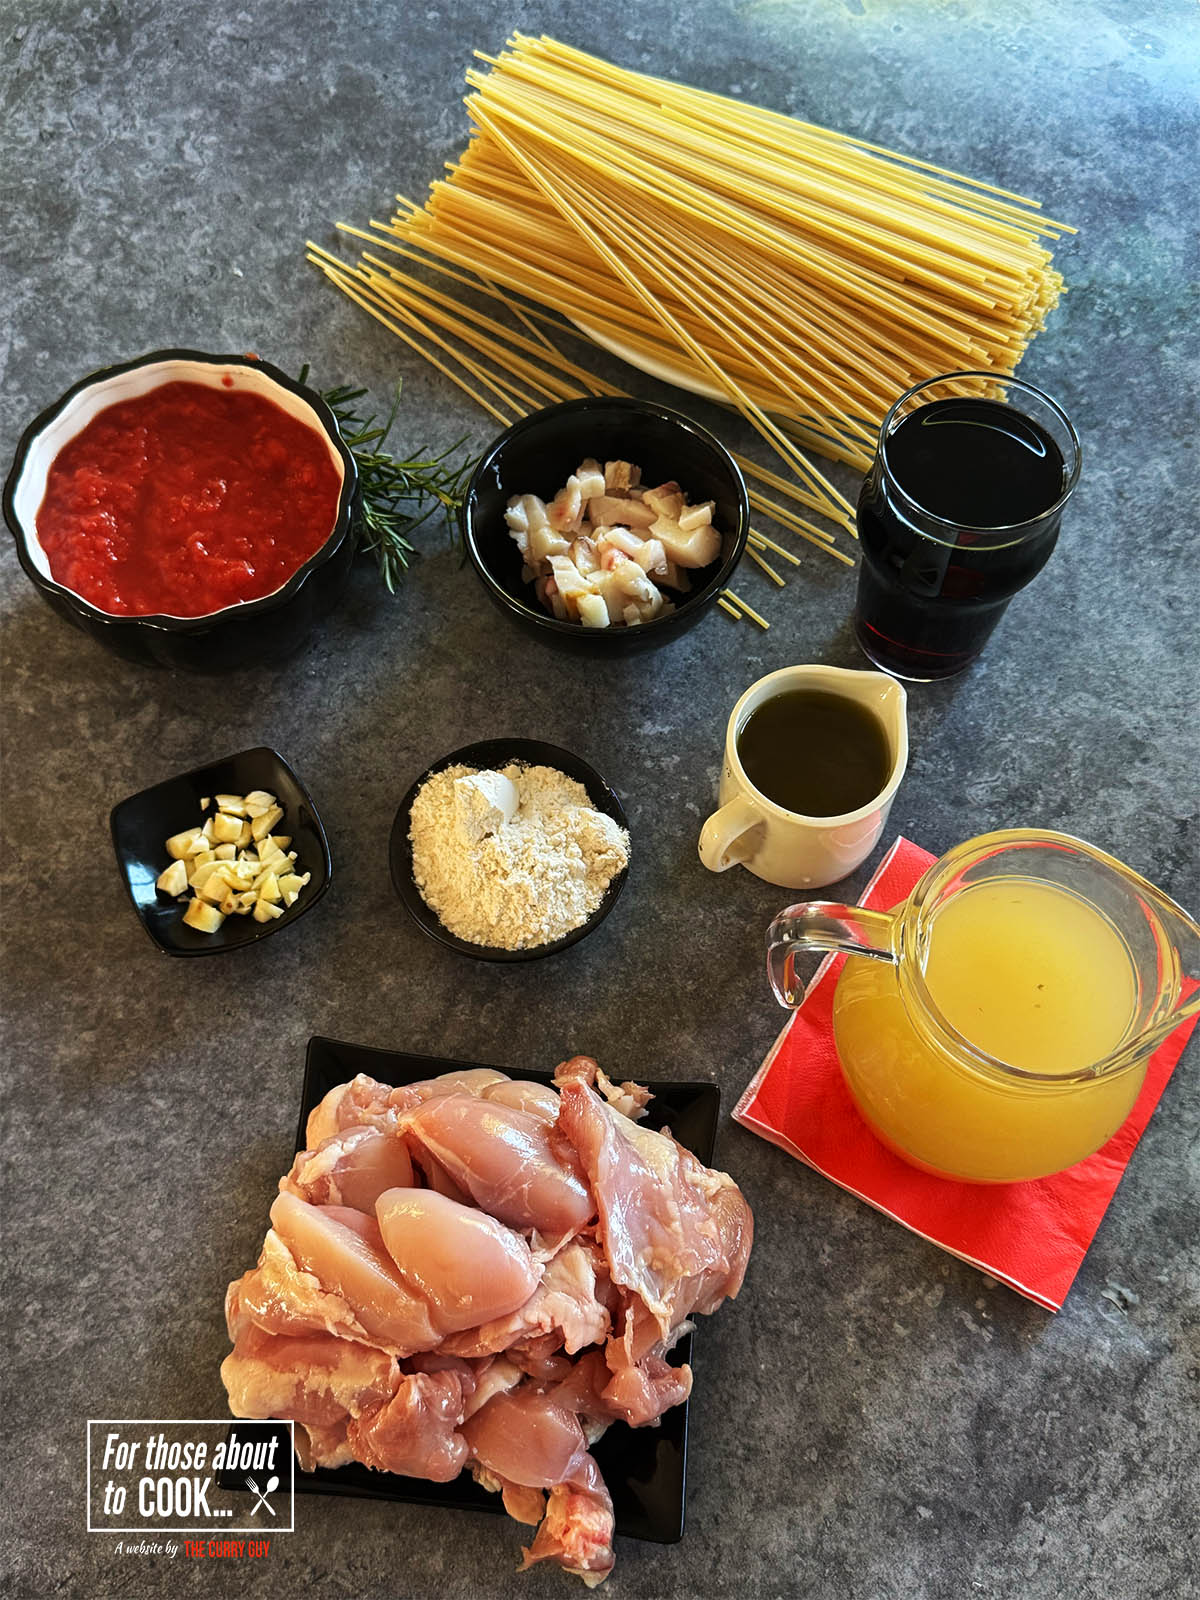
- chicken thighs
- olive oil
- flour - for dusting the chicken pieces
- prosciutto, guanceale, lardons or bacon
- garlic
- rosemary
- red wine
- tomatoes
- hot chicken stock
See recipe card for quantities.
Step by Step photos
Check out below just how easy it is to throw this Roman Chicken together!
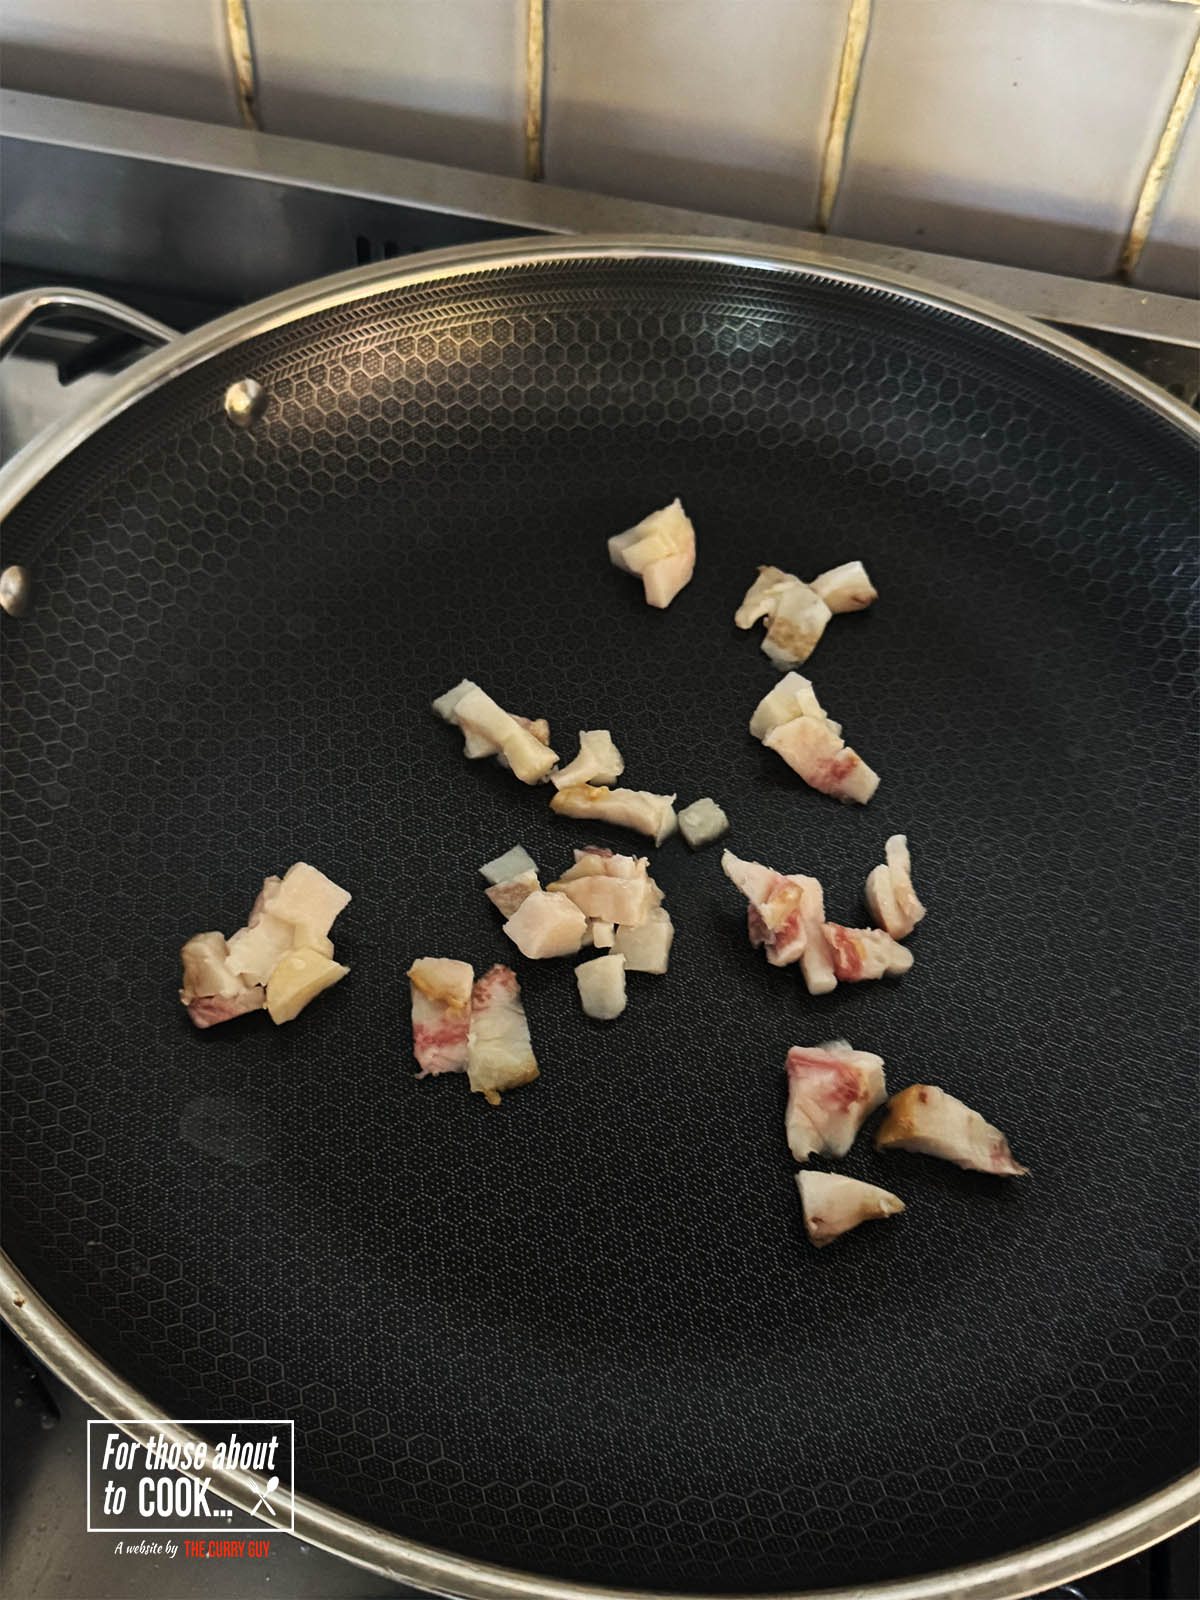
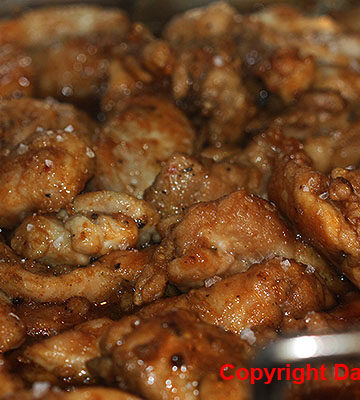
- Step 1: Fry the Guanciale, bacon or lardons until crisp and lightly browned. Transfer to a plate but leave the fat in the pan.
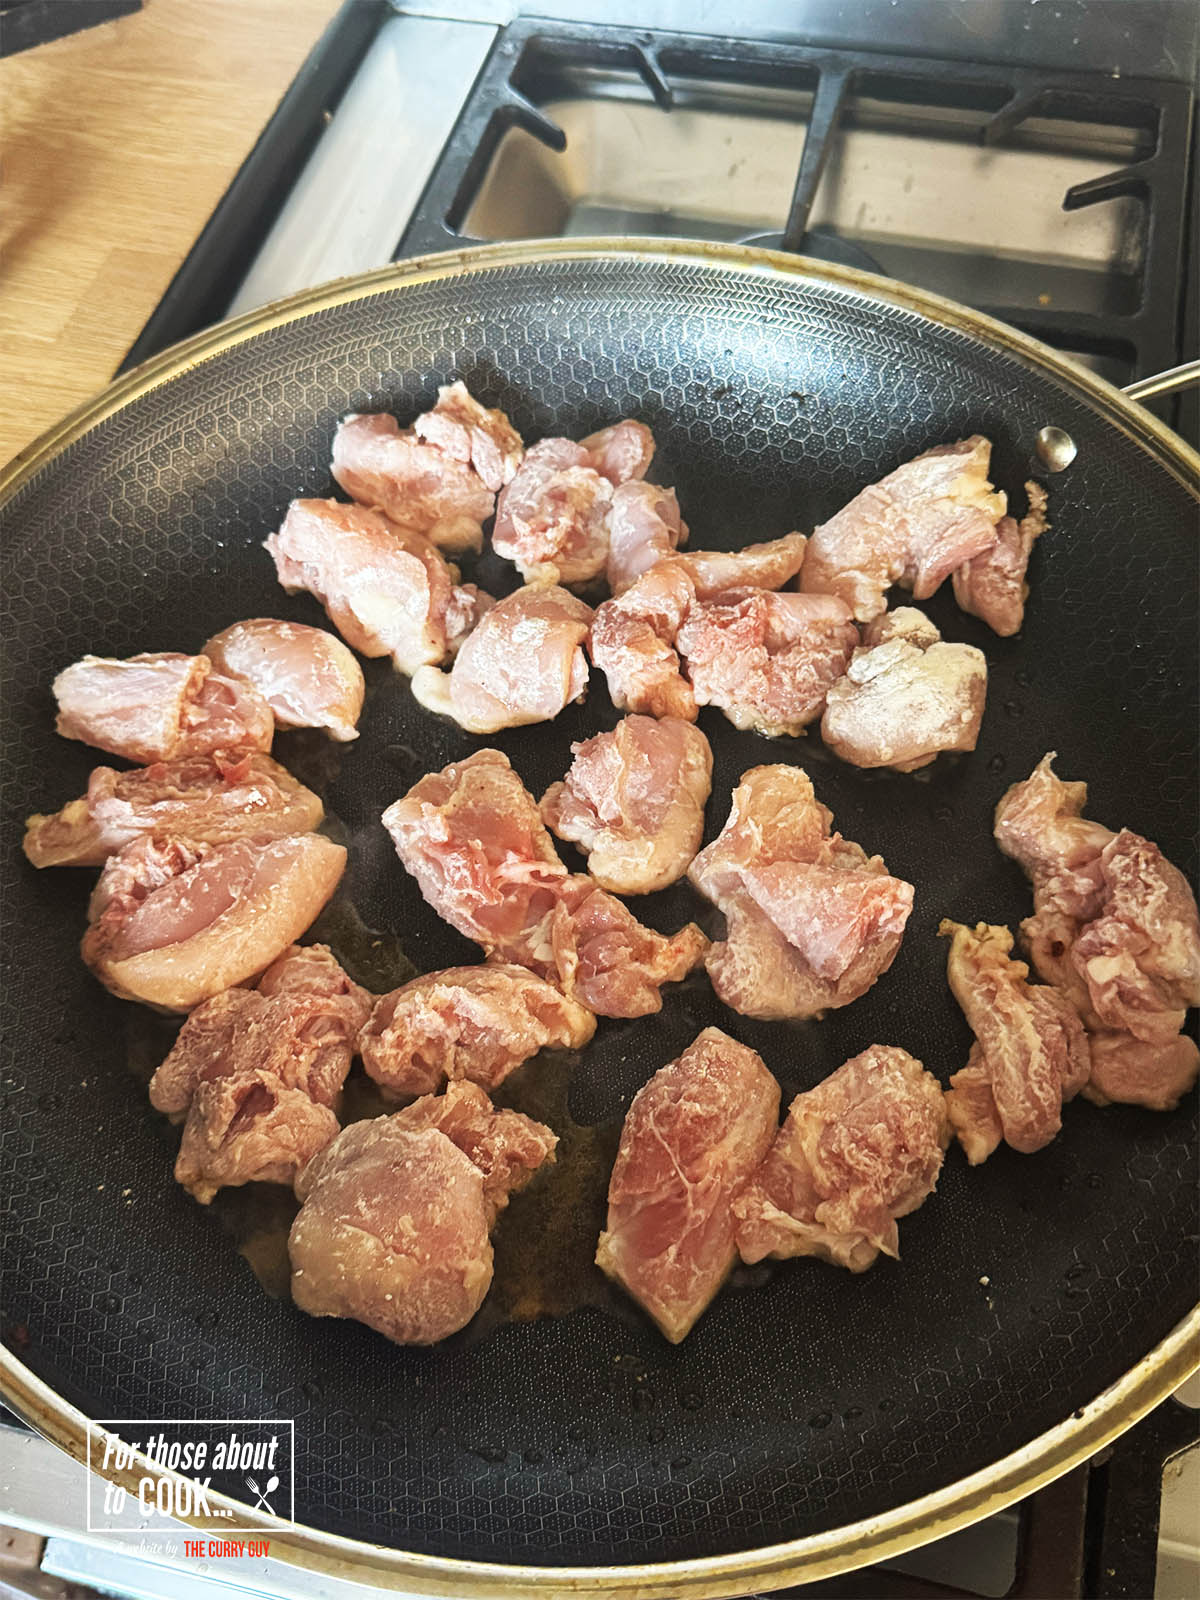
- Step 2: Dust your chicken pieces with flour and shake off any excess flour. Place the chicken in the fat and fry on one side for about 3 minutes to brown it.
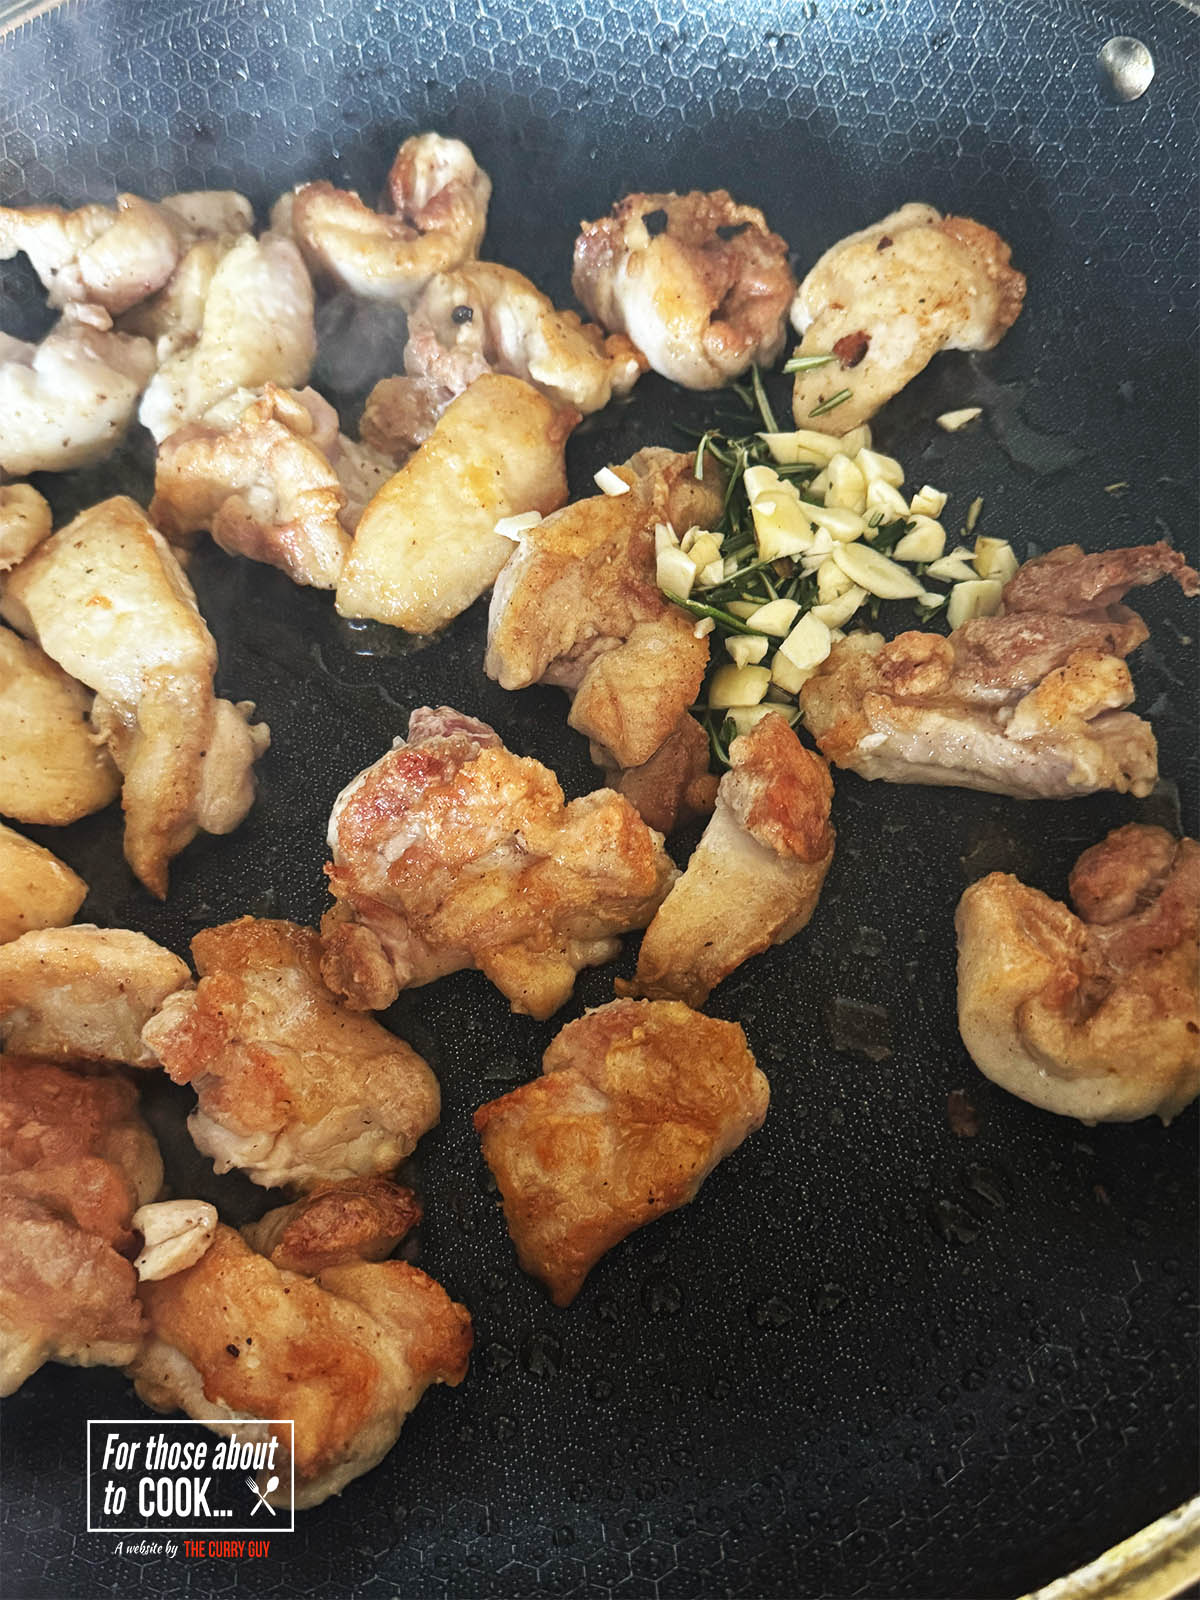
- Step 3: Flip the chicken over and stir in the garlic slivers and chopped rosemary. If you need to, you can add a little light olive oil to the pan if looking dry.
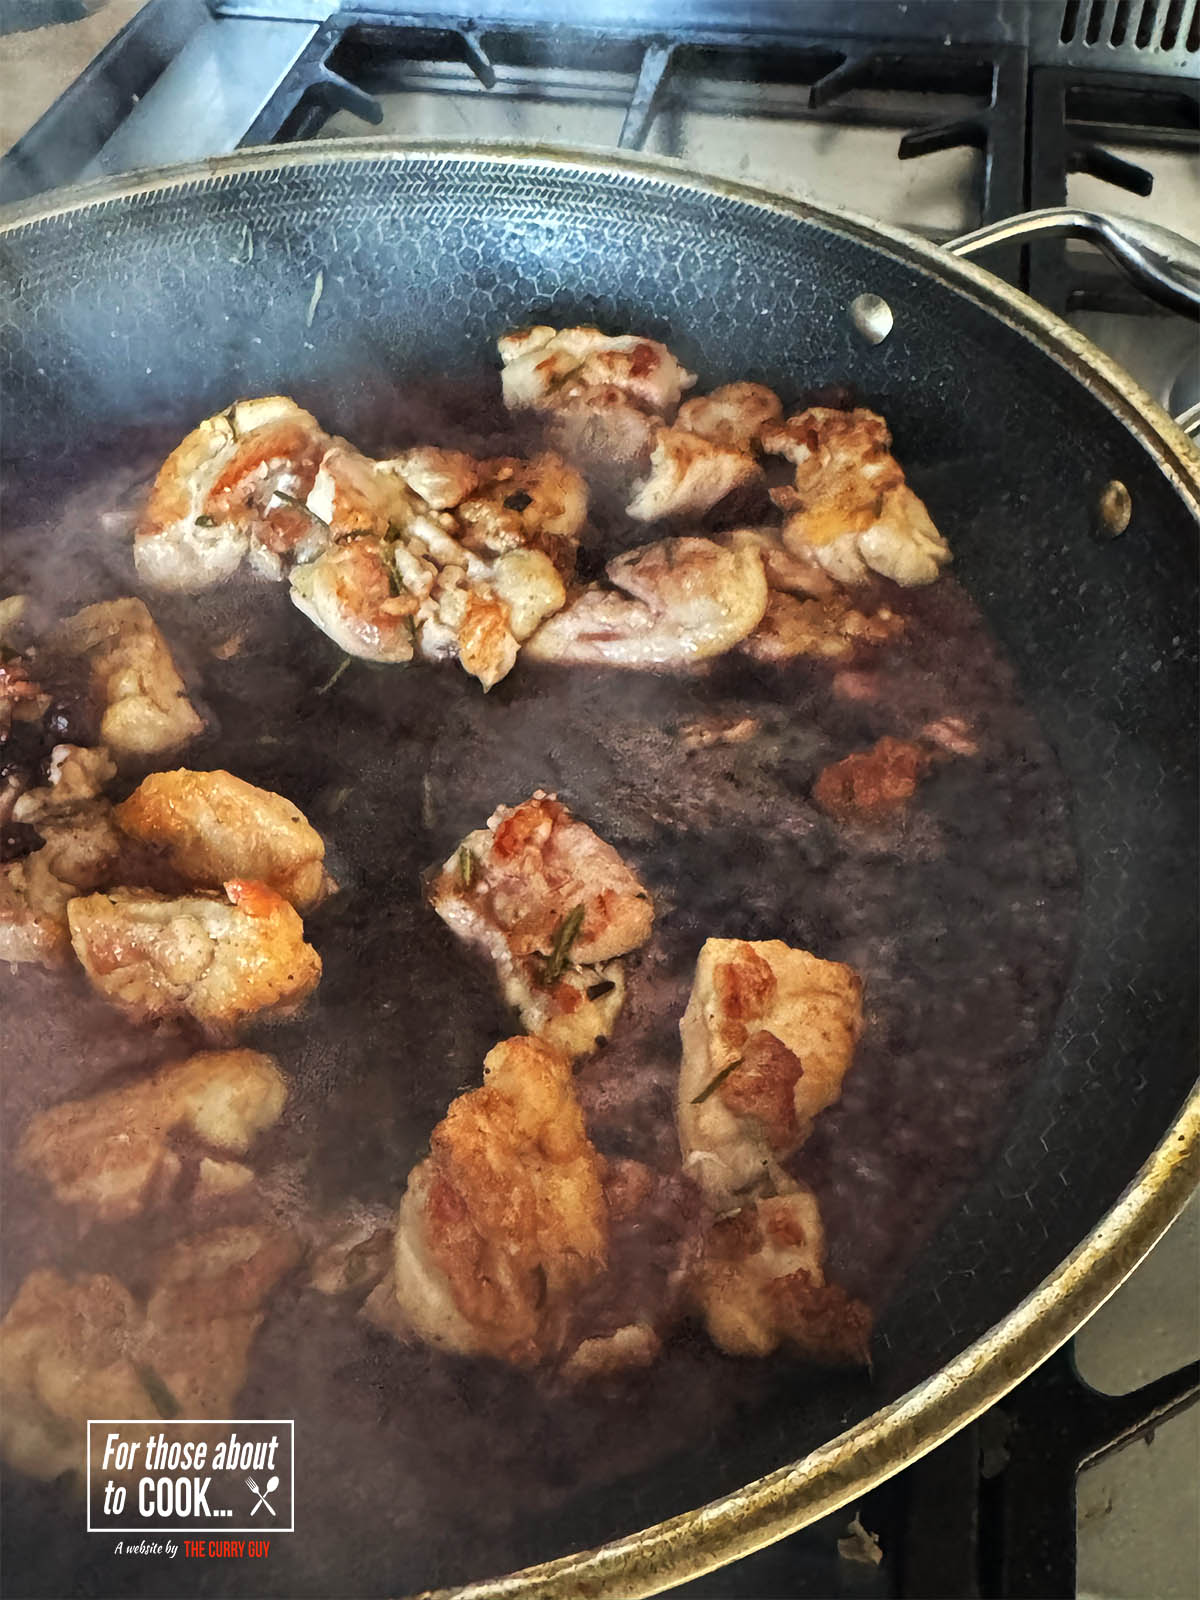
- Step 4: Pour in the red wine and bring to a simmer. Continue cooking and stirring for a few minutes or until the wine has reduced by about two thirds.
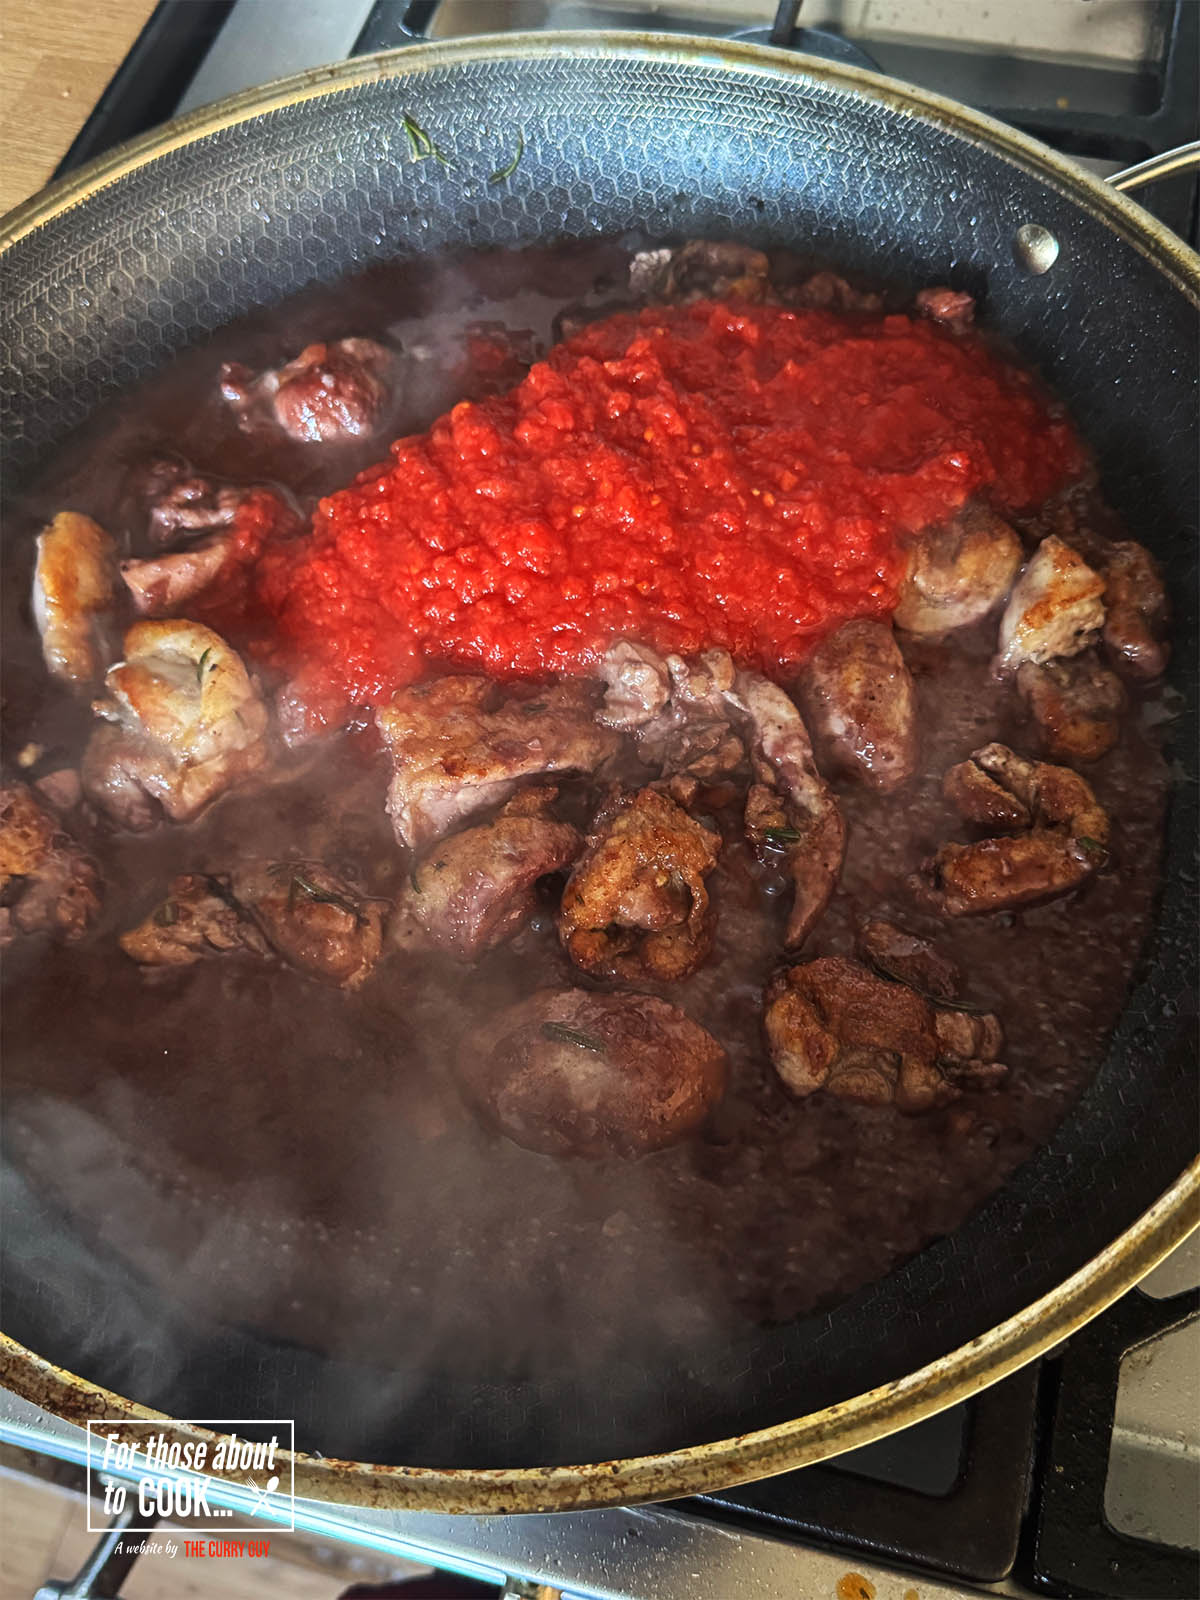
- Step 5: Stir in the chicken stock and the chopped tomatoes and bring to a simmer. Stir well to combine and let it simmer for about 10 minutes. Stir in the cooked guanciale, lardons or bacon and season with salt and pepper to taste.
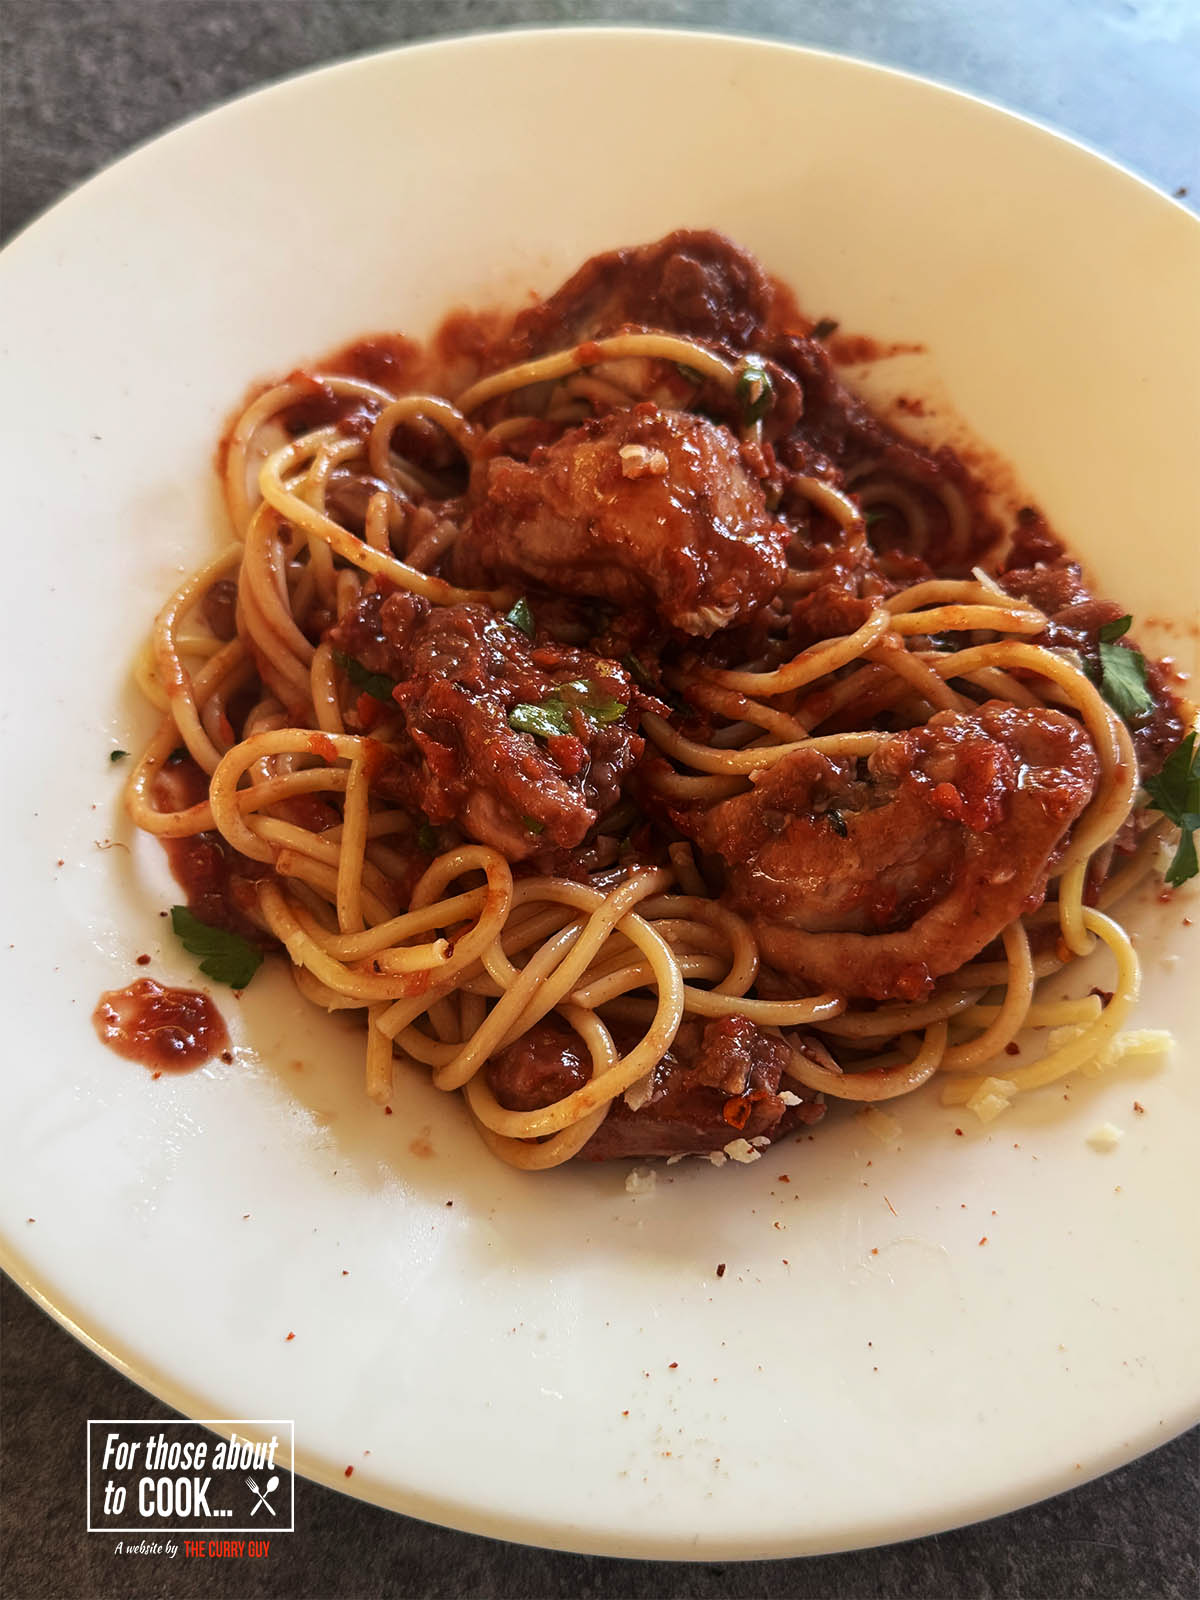
- Step 6: Chicken romana is delicious enough to eat on its own. No need to cook it over paste unless you want to. Garnish with chopped parsley and dried chili flakes.
Variations
This is a base you can build on. Here are a few ideas:
- Use chicken legs or a whole jointed bird if you like different textures.
- Add a splash of balsamic vinegar toward the end for more depth.
- Stir in a spoon of capers or olives to add briny contrast.
- Swap the parsley for fresh basil.
Equipment
This is a one pot meal. No fancy equipment is necessary if you are eating it on its own. If cooking over pasta, a colander will of course come in handy.
Storage
Roman Chicken keeps well in the fridge for 2–3 days. Reheat gently on the hob or in the oven, covered.
You can freeze it too. Let it cool, portion it out, and freeze for up to 3 months. Defrost overnight and reheat thoroughly. If freezing be sure to label and date the containers.
Top Tip
Don’t rush browning the chicken. That colour equals flavour. The better the sear, the better the finished dish.
More helpful tips...
- Use good red wine. Nothing fancy, but something you’d drink.
- Taste the sauce. The salt level will depend on your stock, so adjust at the end.
- Peppers optional. Some versions include them, some don’t. Add them if you like a bit of sweetness.
Final Thoughts
Roman Chicken might not have the glamour of restaurant-style dishes, but it’s proper cooking. Honest ingredients, cooked in one pan, with results that don’t disappoint.
Once you’ve made it, you’ll come back to it. Not because it’s trendy or complex, but because it just works. It tastes like something that’s been cooked with care.
Give it a go. Serve it up with a glass of the same wine you used in the pot. Sit down, eat well, and enjoy a dish that’s stood the test of time.
Related
Looking for a starter or side to go with Roman Chicken?


Looking for more delicious Italian dishes?
Try all of these. You'll love them!


Recipe
Roman Chicken
Yield:
4
Prep Time:
10 minutes
Cook Time:
20 minutes
Total Time:
30 minutes
Ingredients
- 8 chicken thighs - skinned and boned and then cut in thirds
- 3 tablespoons olive oil
- 4 tablespoons flour - for dusting the chicken pieces
- 100g prosciutto - cut into small pieces
- 2 cloves garlic - finely chopped
- ½ teaspoon chopped rosemary
- 1 cup (250ml) red wine
- 4 medium tomatoes - skinned and roughly chopped
- ½ cup (125ml) hot chicken stock
Instructions
- Place a frying pan over a medium-high heat and fry the prosciutto, guanciale, lardons or bacon until browned. Transfer to a plate and set aside but leave whatever fat is leftover in the pan.
- Dust the chicken pieces with the flour and brown them in the hot fat. If you need more oil, add a little light olive oil but be careful not to bring it to smoking point. You could also use vegetable oil which has a higher smoking point and doesn't need to be watched as closely.
- When the chicken is nicely browned all over, toss in the chopped garlic and rosemary and stir to combine.
- Pour in the red wine and simmer until it is almost evaporated and then add the chopped tomatoes and chicken stock.
- Simmer for about 10 to 15 minutes or until the chicken is cooked through. The sauce should thicken a little.
- Season with salt and freshly ground pepper to taste and serve as is or over the pasta of your choice. Roman chicken is also delicious served with a crusty loaf of bread, polenta or mashed potatoes.
Nutrition Information:
Yield: 4 Serving Size: 1Amount Per Serving: Calories: 797Total Fat: 49gSaturated Fat: 13gTrans Fat: 0gUnsaturated Fat: 35gCholesterol: 356mgSodium: 1179mgCarbohydrates: 14gFiber: 2gSugar: 4gProtein: 72g
Easy Sweet And Sour Chicken Recipe
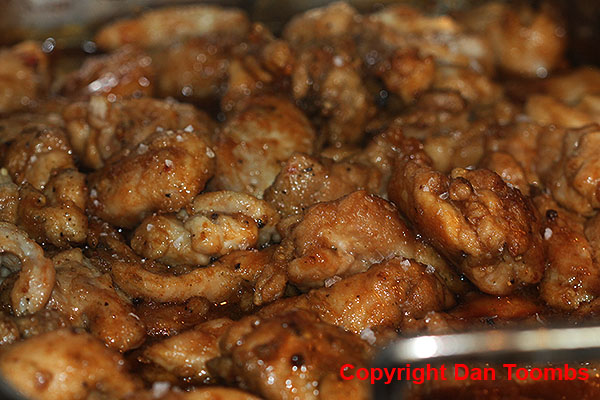
Looking for an easy appetiser that is sure to be a big hit? Almost everyone loves chicken and these sweet and sour chicken bites are just the thing to make a hungry crowd happy. [Read more...]
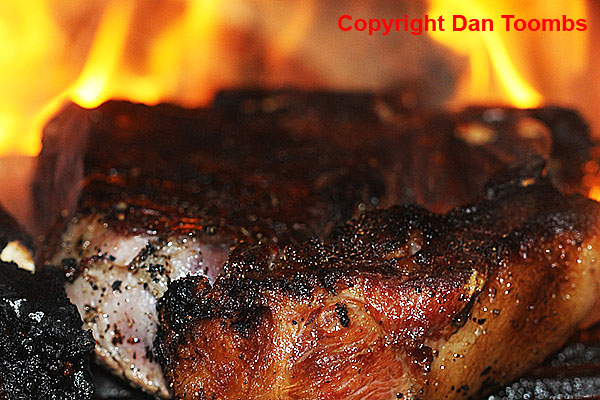
Porterhouse Steak Recipe - Cooked to Perfection

There's nothing quite as good as a porterhouse steak when it's cooked to perfection.
Follow this recipe and you'll have exactly that. There's no need to go to some over-priced steak house though I do like to do that from time to time.
You can achieve the same, no nonsense, mouthwateringly good flavour with this porterhouse steak recipe at home.
As recipes go, my porterhouse steak recipe is easy. The simple cooking method brings out the naturally good flavours of the meat.
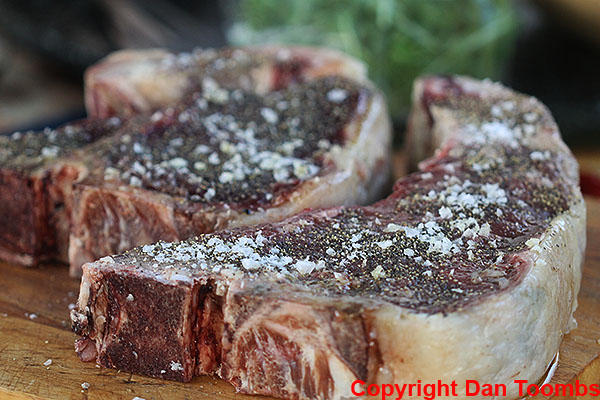
There are no fancy rubs or marinades. Just purchase the best dry aged porterhouse steaks you can find and let the meat do the talking.
I cooked these in my outdoor wood burning oven but you could also use any barbecue. You'll need to find a small grill, however to place right down on the hot coals. That or cooke them dirty.
What is dirty cooking?
Although I cooked these on a grill for this porterhouse steak recipe, my new preferred method is to cook directly on the coals.
Don't do that, however if using a marinade as the ashes will stick to and ruin the steak.
Follow this recipe and you can simply get your coals white hot and cook the steaks directly on them without the need to use a grill.
What to look for in meat...
I can't stress enough that the quality of the meat you use is the most important part of getting this recipe right.
Find yourself a good butcher who hangs his beef for at least three weeks. You will notice the difference in the flavour.
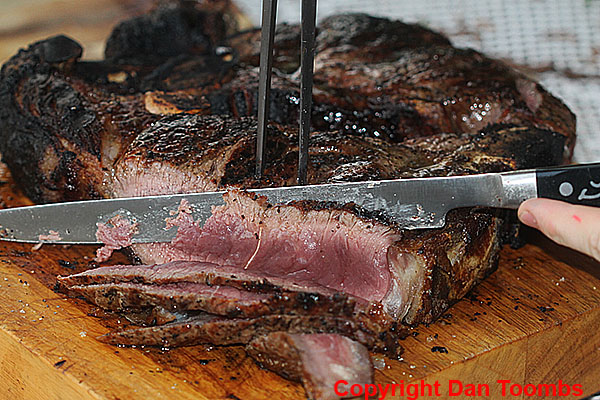
These steaks I cooked had been aged for 40 days. They were awesome!
If you like this recipe, you might like to try some of these too...
Twice baked potatoes
German sausages (bratwurst) cooked on the barbecue
Char grilled double Whopper with cheese
Camping burritos
Recipe
The Best Porterhouse Steak Recipe
Yield:
4
Prep Time:
2 hours
Cook Time:
30 minutes
Total Time:
2 hours 30 minutes
Ingredients
- 2 x 4 inch porterhouse steaks
- Salt and cracked black pepper to taste. I use a lot of pepper.
- 1 teaspoon olive oil
- 1 large rosemary branch
- Parsley/coriander sauce (optional) - recipe below.
Instructions
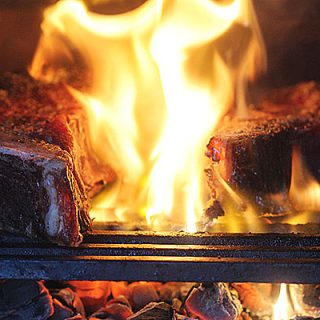
- Build a large wood fire in a kettle barbecue or wood burning oven. If using a wood burning oven, heat up to pizza temperature (550f) and then allow to burn until you have a nice large pile of coals and a few pieces of burning wood. If using a kettle barbecue, do the same, gradually separating the fiery hot coals to one side and the burning wood to the other.
- Place a small grill right down on the coals.
- When ready to cook rub the olive oil over the steaks. The steaks shouldn't be oily, the oil is only their to help the salt and pepper stick.
- Season generously with salt and pepper.
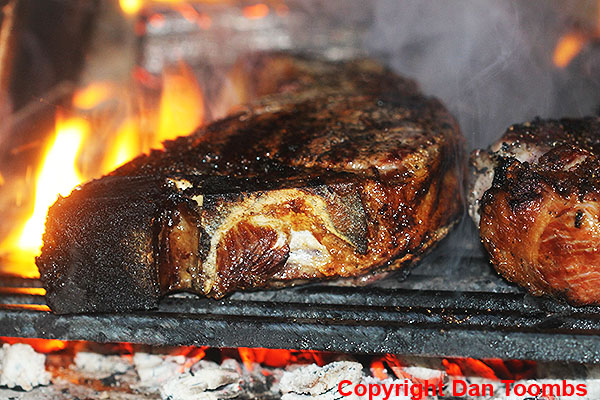
- Throw the rosemary sprigs onto the coals and then place the meat onto the grill.
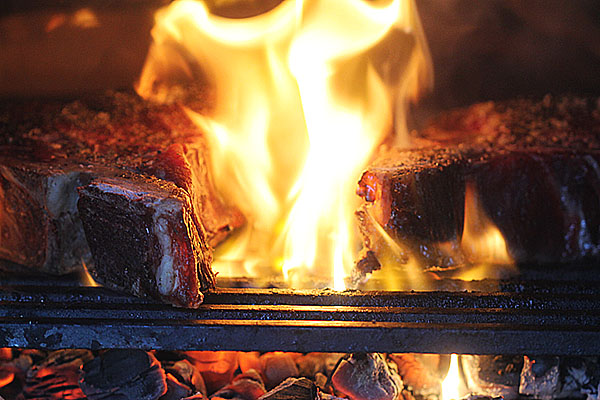
- If your fire is hot enough, the fat in the meat will catch fire. In fact, your steaks will catch fire. No worries, let them burn for about six minutes and then flip over.
- Continue to grill until the centre of the meat is 50c for rare or 56c for medium rare. I like mine rare.
- Let stand on a warm plate for about 20 minutes and then cut into slices.
- Serve on it's own or with your favourite sauce.
I hope you enjoy this porterhouse steak recipe. If you do try it, please leave a comment. I'd love to hear from you.