For Those About To Cook

  • Home
  • About Us
  • All Recipes
  • Subscribe
menu icon
go to homepage
  • Home
  • About Us
  • All Recipes
  • Subscribe
    • Facebook
    • Instagram
    • Pinterest
  • search icon
    Homepage link
    • Home
    • About Us
    • All Recipes
    • Subscribe
    • Facebook
    • Instagram
    • Pinterest
  • ×
    Home

    Italian Gnocchi Recipe

    April 12, 2025 By Joe

    Italian Gnocchi Recipe

    This Italian Gnocchi recipe shows you how to prepare perfect light and fluffy gnocchi, ready to prepare with your favorite sauce. There are tips for boiling, frying and getting the perfect finished dish. Get the family involved and make a large batch, perfect for freezing and cooking straight from frozen, it's all covered here.

    Italian Gnocchi Recipe

    About this Italian Gnocchi Recipe

    Gnocchi are soft, fluffy and small dumplings made with a mixture of potato, flour and egg. Traditionally, gnocchi is served as comfort food in Italy and known for their pillowy texture and versatility. This recipe shows you how to prepare the perfect fluffy gnocchi and provides you with step by step tips for success, suggestions for serving and how to store both in the refrigerator and freezer for best results.

    Traditionally, gnocchi is made without egg. Online you will find it to be 50/50 whether a recipe uses egg or not. In this recipe I use egg, simply for extra security when binding the dough as the dough relies heavily on your potatoes being starchy enough. Check out my top tip below if you're choosing to make more gnocchi as you don't want to increase the quantity of egg as you would with the other ingredients.

    Ingredients

    Delicious fluffy gnocchi only takes few ingredients you will likely already have in your home. Here is what you will need...

    Ingredients for this Italian Gnocchi recipe
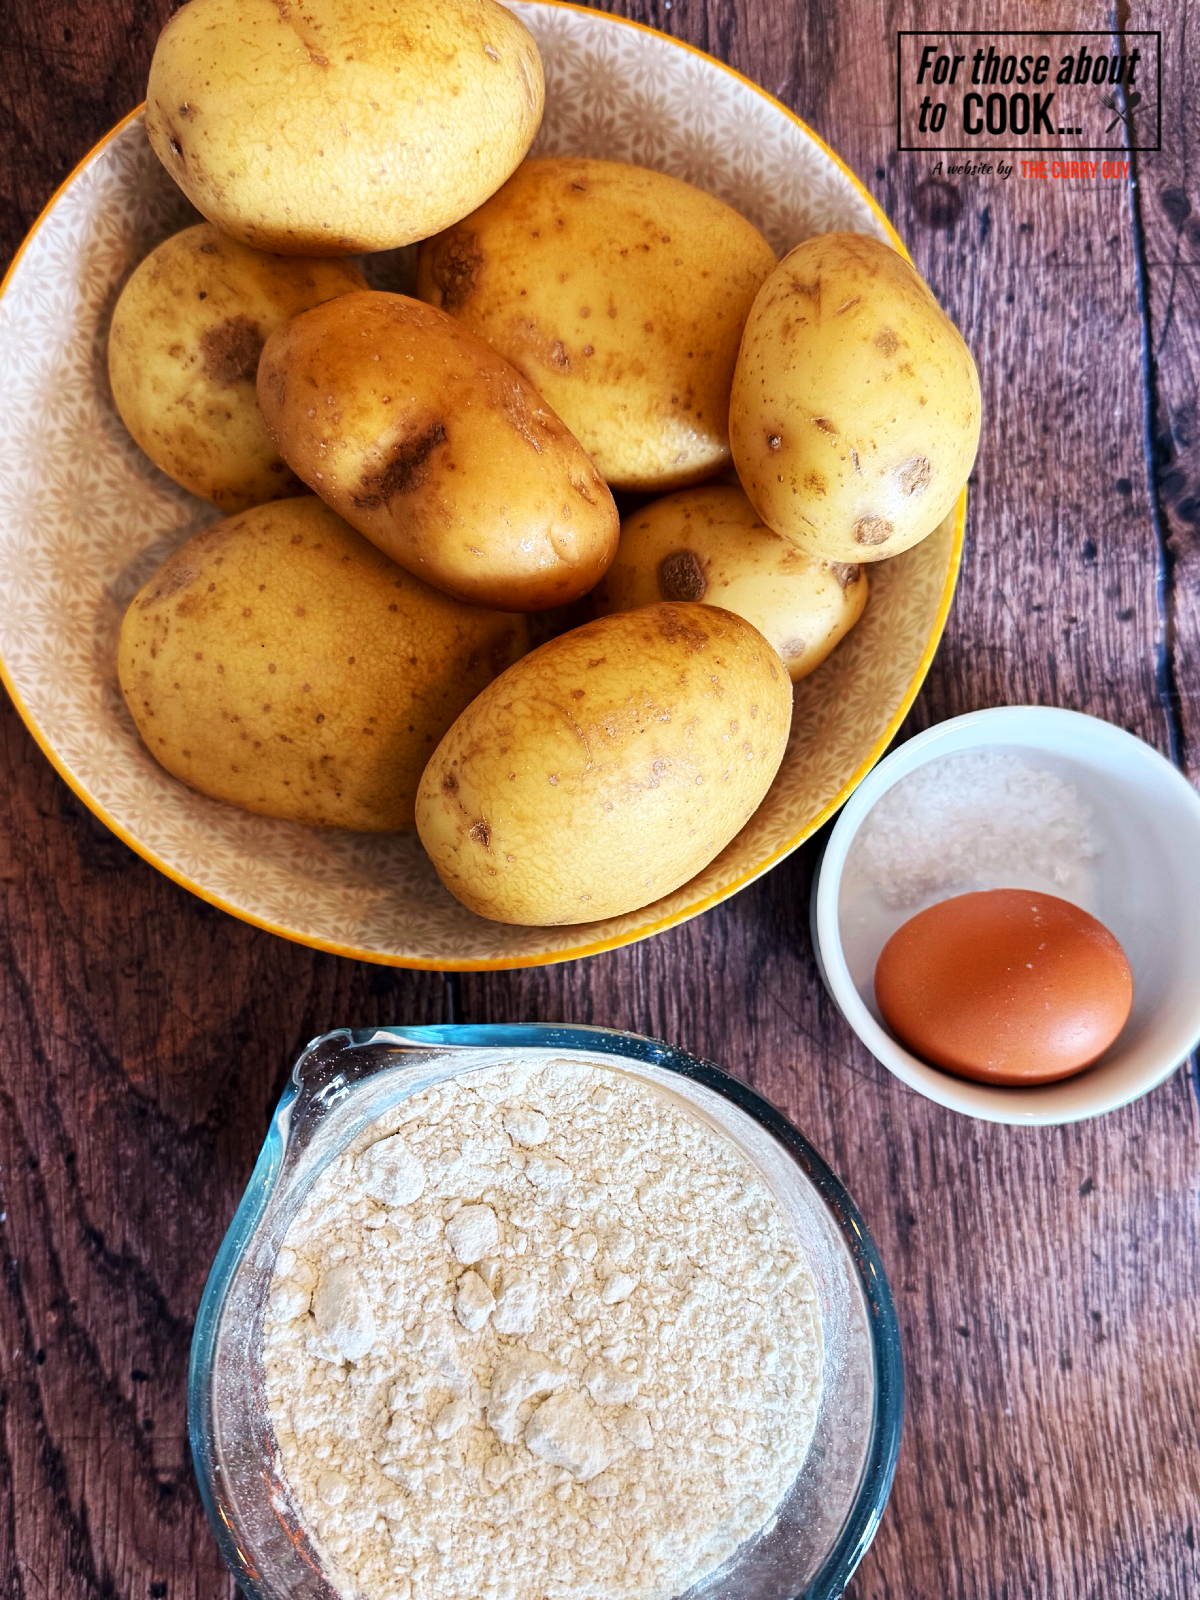
    • Russet (idaho) potatoes or Maris Piper potatoes (UK)
    • 00 flour
    • egg
    • salt

    See recipe card for quantities.

    Step by step photographs...

    Follow these step by step photographs to make the perfect gnocchi. I show you how to get the authentic gnocchi shape for amazing results every time.

    washing potatoes
    1. Step 1: Wash your potatoes under cold water to remove any dirt and grit.
    Boiling the potatoes
    1. Step 2: Boil a pan of water and add your potatoes. Boil for 40-50 minutes until a knife can easily poke into one.
    Drain the water
    1. Step 3: Drain the water and potatoes into a colander.
    Peeling skin of the potatoes for this Italian gnocchi recipe
    1. Step 4: Allow your potatoes to cool slightly, and when you are able to handle them, carefully peel the skins off.
    ricing the potatoes
    1. Step 5: Using a potato ricer, mash your potatoes into a mixing bowl.
    preparing the gnocchi
    1. Step 6: Add your flour to a flat surface and create a well, add your riced potatoes on-top and again create a well. Finally, crack an egg in the middle and add a pinch of salt.
    preparing the dough
    1. Step 7: Whisk the egg with a fork and carefully bring the dough together.
    step by step making the gnocchi shape
    1. Step 8: Split the dough into four sections and roll each piece into a thin log (about ¾ of an inch thick). Cut into one inch pieces. To shape, press your piece of gnocchi into a fork and roll along the prongs.
    1. Step 7: To cook, bring a pan of water to the boil and as each piece rises to the top, remove them as and when with a slotted spoon. Add extra salt and pepper to taste and stir in some good quality olive oil.
    Italian gnocchi recipe with sage butter
    1. Step 8: Prepare you gnocchi however you like. Try this Gnocchi with butter and sage recipe (also below) or skip the frying and stir in this fresh basil pesto. The options are endless! Preparing it as a side dish? simply stir in some garlic butter.

    Hint: Some gnocchi recipes don't call for egg, this one does as it gives extra security when binding the dough as you're relying on your potatoes being starchy enough. If you are planning on doubling or tripling the recipe, I suggest not increasing the quantity of egg as you would the rest of the ingredients. For example, if tripling the recipe, us 2-3 eggs, starting with less and add more if the dough feels too crumbly.

    Variations

    Gnocchi are known for being incredibly versatile. You could fry them after the boiling process and prepare this Gnocchi with brown butter and sage recipe (also see below). You could also skip the frying and stir into a fresh basil pesto.Serving as a side dish? stir in some garlic butter. Delicious!

    Gnocchi with brown butter and sage

    Serves 4

    • 1 ½ lbs (650g) Gnocchi
    • 5 tbs (75g) unsalted butter
    • 20 fresh sage leaves
    • 3 cloves garlic (thinly sliced)
    • 3 tablespoon olive oil
    • salt and pepper to taste
    • parmesan for serving
    gnocchi with brown butter and sage

    Instructions

    1. Bring a pan of water to the boil, add the gnocchi until it rises to the top, use a slotted spoon remove.
    2. In a pan, over a medium heat, add your olive oil. When the oil is hot, toast the gnocchi on both sides until golden. Set aside in a bowl and season with salt and pepper.
    3. Add the butter to the pan and allow to melt over a medium heat. Continue heating until it turns light brown in colour and has a nutty fragrance.
    4. Next add the sage leaves for five minutes until crisp,
    5. Then add the garlic slices and cook for 5 extra minutes, make sure your pan isn't too hot to avoid burning.
    6. Stir in the gnocchi, serve hot with a sprinkle of parmesan. Enjoy!

    Equipment

    You will need a large saucepan to fit 2lb (1kg) of potatoes. You will be boiling these whole so you need enough room. You will also need a potato ricer to make the perfect gnocchi. However, i've made it before by spooning the potato through a sieve, it works but it takes a long time so I do not recommend this option.

    Storage

    You're best storing gnocchi so that each piece is separate.. If you don't have enough space in your fridge, freezer, consider preparing the gnocchi on the day you are going to cook it all.

    uncooked gnocchi will last up to 5 days in the refrigerator, simply cook on demand by bringing a pan of water to the boil and as each piece rises to the top, remove using a slotted spoon.

    Cooked gnocchi will last in the refrigerator for up to 3 days depending on your sauce ingredients, if using.

    To freeze

    This Italian Gnocchi recipe freezes perfectly uncooked., however it is important that each piece is frozen separately before portioning into bags. This stops each piece sticking together and makes the cooking process super easy. See how I do this in the photographs below.

    To cook gnocchi from frozen, bring a pan of water to the boil, add the gnocchi and as an when each piece rises to the top of the water, remove with a slotted spoon and set aside.

    Freezing gnocchi
    Freezing the gnocchi

    Top Tip

    This Italian gnocchi recipe is perfect for a date night or an evening of family fun. Get as many hands involved as you can, especially if you're choosing to double the recipe. See how well it freezes below.

    Get the family involved!

    family making italian gnocchi recipe

    FAQ

    What is the best type of potato to use for this Italian Gnocchi recipe?

    Use a starchy potato like Russet/Idaho (US) or Maris Piper (UK. They are dry and fluffy, which helps the gnocchi hold together with less flour, making them lighter and more delicate.

    Why is my gnocchi dough too sticky or wet?

    This happens if during the boiling process, the potatoes absorbed too much water, which is also why it is important to boil them whole. Simply add a little extra flour at a time until the dough is soft but not sticking to your hands.

    More Italian Recipes

    Looking for other recipes like this? Try these:

    • Finished plate of marry me chicken orzo
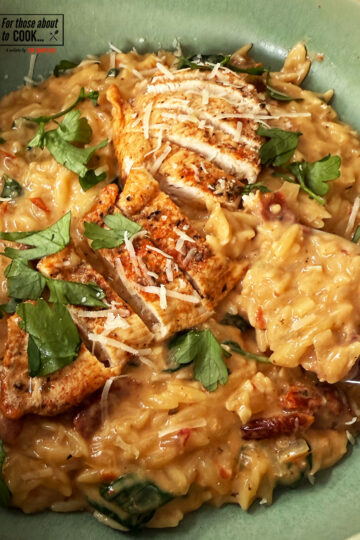
      Marry Me Chicken Orzo
    • Finished Italian chicken in a bowl with garlic bread
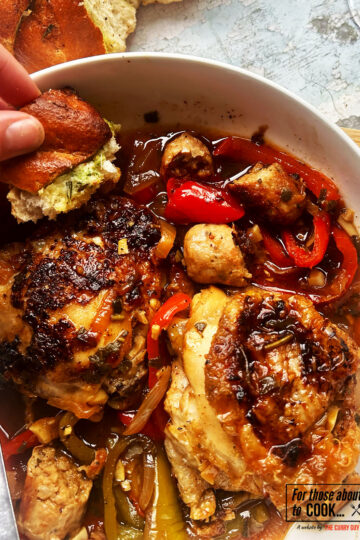
      Italian Chicken (Pollo allo Scarpariello)
    • Veal Scallopini served in the pan it was cooked in.
      Veal Scallopini
    • Finished chicken fettuccini Alfredo
      Chicken Fettuccini Alfredo
    See more Italian →

    Pairing

    Gnocchi pairs perfectly with salad, try these:

    • Finished roasted chickpea salad
      Roasted Chickpea Salad
    • Caesar salad finished with dressing tossed in a bowl
      Caesar Salad
    • Finished arugula salad with parmesan and balsamic dressing
      Arugula salad
    • Big mac salad
      Big Mac Salad
    See more Salads →

    Recipe

    Italian Gnocchi Recipe

    Italian Gnocchi Recipe

    Yield: 6-8
    Prep Time: 1 hour
    Cook Time: 50 minutes
    Total Time: 1 hour 50 minutes

    Master the Italian Gnocchi recipe with step-by-step tips for light, fluffy Gnocchi perfect for your favorite sauces.

    Ingredients

    • 2lb (1kg) Russet (Idaho) potatoes (US) or Marris Piper potatoes (UK)
    • 1 12 cups (180g) 00 flour
    • 1 egg
    • pinch of salt

    Instructions

    1. Wash your potatoes under cold water to remove any dirt and grit.
    2. Boil a pan of water and add your potatoes. Boil for 40-50 minutes until a knife can easily poke into one.
    3. Drain the water and potatoes into a colander.
    4. Allow your potatoes to cool slightly, and when you are able to handle them, carefully peel the skins off.
    5. Using a potato ricer, mash your potatoes into a mixing bowl.
    6. Add your flour to a flat surface and create a well, add your riced potatoes on-top and again create a well. Finally, crack an egg in the middle and add a pinch of salt.
    7. Whisk the egg gently with a fork and carefully bring the dough together. If it is too wet, add more flour.
    8. Split the dough into four sections and roll each piece into a thin log (about ¾ of an inch thick). Cut into one inch pieces. then to shape, press your piece of gnocchi into a fork and roll along the prongs.
    9. To cook, bring a pan of water to the boil and as each piece rises to the top, remove them as and when with a slotted spoon. Add extra salt and pepper to taste and stir in some good quality olive oil.
    Nutrition Information:
    Yield: 8 Serving Size: 1
    Amount Per Serving: Calories: 712Total Fat: 2gSaturated Fat: 1gTrans Fat: 0gUnsaturated Fat: 1gCholesterol: 23mgSodium: 31mgCarbohydrates: 148gFiber: 6gSugar: 1gProtein: 21g
    © Joe
    Cuisine: Italian / Category: Italian

    Padron Peppers

    April 12, 2025 By Dan

    Serving the Padron peppers on a serving plate.

    Padrón peppers (also spelled Padron) are one of my favorite tapas when I visit Spain on our annual family break there. These small chili peppers are originally from the municipality of Padrón in Galicia but you will find them all over Spain now. Now you can bring a bit of Spain home and enjoy this easy and authentic recipe for Padron peppers that only takes minutes to prepare.

    Padron peppers on a plate next to a glass of beer.
    [feast_advanced_jump_to]

    What Are Padrón Peppers?

    Padrón peppers (Pimientos de Padrón) are small green chili peppers from the town of Padrón in Galicia, a region in northwestern Spain. These peppers have been cultivated by Franciscan monks since the 16th century, and today, they’re enjoyed not only in Galician but all over Spain.

    Padron peppers are usually about 2 to 4 inches in length and are bright green in color. They have a thin and wrinkled, skin that when fried develops a smoky, savory flavor that is mild in heat—most of the time.

    Which brings us to their most famous trait...

    The Pepper Roulette: Some Are Hot, Some Are Not

    Ask any Spanish foodie about Padrón peppers and they’ll smile knowingly before quoting the age-old Galician saying:
    "Os pementos de Padrón, uns pican e outros non."
    Translation: "Padrón peppers, some are hot and some are not."

    To be honest, I have yet to find one that makes my eyes water but the Spanish as a rule don't like spicy food like you find on my curry blog so I can understand the above Galacian saying. For many Spanish Padron pepper fans, the fun of eating them is that you never know what you're going to get.

    Most are mild, with a grassy, slightly nutty flavor. But about 1 in 10 packs a spicy surprise. It’s culinary Russian roulette—an edible game of chance that makes them a fun addition to any meal or gathering.

    So are Padron peppers spicy?

    Padron peppers have a Scoville rating of around 500-2500 SHU but the the odd one can be hotter. Generally speaking though, even if you don't like spicy peppers, chances are you are going to love digging into some of these.

    Are Padron peppers the same as Shishito Peppers?

    Padrón peppers are often confused with shishito peppers, a Japanese variety with a similar look and texture. Both peppers are typically mild and cooked in the same blistered style. However, there are subtle differences:

    • Shishitos are even milder than Padróns, with only about 1 in 20 being spicy.
    • Padróns have a slightly deeper, earthier flavor and a more unpredictable spice profile. You can expect 1 in 10 to have a bit more of a kick!

    If you like shishitos but want a bit more excitement (and heat), Padróns are your next step.

    Ingredients

    You only need three ingredients to make a delicious platter of Padron peppers: Padron peppers, extra virgin olive oil and flaky salt like Maldon.

    The ingredients for the recipe on a counter top.
    • Padron Peppers
    • Extra Virgin Olive Oil
    • Flaky Salt

    See recipe card for quantities.

    How to Cook Padrón Peppers

    One of the best things about Padrón peppers is how incredibly easy they are to prepare. You don’t need a complex recipe or a long list of ingredients. In fact, the classic Spanish preparation requires the three ingredients you see above.

    Step by step photos

    The process of making Padron peppers could not be easier as you will see from the photos below.

    Washing the Padron Peppers under water.
    1. Step 1: Wash the peppers thoroughly under cold water.
    Frying the Padron peppers in the olive oil.
    1. Step 2: Dry the peppers completely with a clean cloth. Then heat the oil in a pan over a medium-high heat until hot but not smoking. Add the peppers and cook for about 7 minutes or until blistering. Be sure to stir continuously for even cooking.
    Adding salt to the Padron peppers in the pan once they are cooked.
    1. Step 3: Once the peppers are blistered in places and just cooked though, season with the salt to taste.
    Serving the Padron peppers on a serving plate.
    1. Step 4: Transfer to a serving plate and dig in.

    Usefule Equipment

    A good frying pan or wok: All you need is a good pan to make Padron Peppers. I prefer to use a wok so that I can easily toss the peppers around as they cook.

    A spatula: You will need this to help tossing the peppers around in the pan so that they fry evenly.

    Storage

    You can store any leftovers, covered in the fridge for up to three days. To reheat, toss them back in the pan over a medium-high heat until heated through.

    Top Tip

    Don't be lazy! It's a quick and easy job. Be sure to really get in there as they fry with your spatula so that the fry and blister evenly.

    FAQ

    Do you need to remove the seeds before frying?

    Padrón peppers are cooked whole—seeds, stems, and all. Just wash them and pat them dry before cooking. The stems are useful as little “handles” when eating.

    What is the best way to cook Padron Peppers?

    The classic and traditional way just like in the recipe card below. You fry them for about 7 minutes or until they are soft and char and blister in places. Then you add the salt and serve hot.

    Do you need to prick Padron Peppers before frying?

    No need to prick! They rarely burst and even if they do, it's no big deal. Just make sure your pan is hot and don't overcrowd the pan

    Can you roast or air fry the peppers instead?

    Yes! Toss with olive oil, spread on a baking sheet, and roast at 425°F (220°C) for about 10–15 minutes, until blistered and slightly browned. Finish with sea salt.

    Can you freeze Padron peppers?

    Yes but it is best to freeze them raw. Wash and dry, then freeze in a single layer on a tray before transferring to a bag. Texture may soften a bit after thawing, but they’re still great for cooking.

    Pairing

    These Padron peppers will will go nicely with any of these:

    • Bowl of chicken and chorizo risotto garnished with parsley
      Chicken and Chorizo Risotto
    • homemade croque monsieur
      Croque Monsieur
    • smashed potatoes looking crispy on a tray
      Smashed Potatoes
    • cassoulet on a serving plate with crusty French bread and salad.
      Cassoulet
    • Homemade Tuscan chicken plated up
      Tuscan Chicken
    • Hungarian goulash over pasta.
      Hungarian Goulash
    • Homemade easy pesto pasta
      Easy Pesto Pasta

    Recipe

    Serving the Padron peppers on a serving plate.

    Padron Peppers

    Yield: 2 to 4
    Cook Time: 7 minutes
    Total Time: 7 minutes

    Padron peppers are a delicious tapa that you can literally prepare in about 10 minutes. They are great as a starter for Spanish or any Mediterranean main course dish.

    Ingredients

    • ½ lb. Padron peppers
    • 4 tablespoon extra virgin olive oil
    • Flaky salt to taste

    Instructions

    1. Wash and pat dry the padron peppers. You want them to be dry when they hit the pan for better blistering.
    2. Heat the olive oil in a pan over a medium-high heat until it is hot but not smoking. If the oil begins to smoke, turn down the heat!
    3. Add the padron peppers in one layer. You might need to fry in batches depending on the size of your pan. Fry, stirring regularly for about 7 minutes or until the peppers are lightly charred and blistering in places.
    4. Season to taste with the flaky salt and pour it all onto a serving platter. Padron peppers are best served hot but I have been known to sneak a few, cold from the fridge.
    Nutrition Information:
    Yield: 4 Serving Size: 1
    Amount Per Serving: Calories: 135Total Fat: 14gSaturated Fat: 2gTrans Fat: 0gUnsaturated Fat: 11gCholesterol: 0mgSodium: 147mgCarbohydrates: 4gFiber: 1gSugar: 2gProtein: 1g
    © Dan
    Cuisine: Spanish / Category: European

    Big Mac Salad

    April 11, 2025 By Dan

    Big mac salad

    So easy to prepare... This Big Mac salad tastes just like a Big Mac but without the carbs. If you're gluten free or just cutting back on the carbs, you might like to try this new Big Mac salad recipe soon. It tastes just like a Big Mac!

    You can whip it up in no time. You might also like to try the original Big Mac recipe.

    Big mac salad

    About this recipe.

    This is essentially a Big Mac but without the buns. Well, almost. There is a lot more veg in the recipe to make it worthy of being called a salad.

    I have given the recipe to serve one to two people but I usually make a lot more. Although it is an alternative to a burger in a bun, you don't really need to think of it that way.

    Make this Big Mac salad whenever you want a good salad. Really, it's just another salad and when you prepare as many salads as I do, it's nice to have a few different recipes to stop them from getting boring.

    [feast_advanced_jump_to]

    Ingredients For Big Mac Salad

    Ingredients for big mac salad
    • Rapeseed (canola) oil
    • Minced (ground) beef
    • Onion
    • Iceberg lettuce
    • Cherry tomatoes or baby plum tomatoes
    • Yellow cheddar cheese
    • Red onion
    • Sesame seeds
    • Big mac sauce (recipe below)

    See recipe card for quantities.

    Step by step photographs...

    ground beef and onion in a pan for big mac salad
    1. Step 1: Fry the beef over a medium high heat. When half cooked, stir in the chopped onions.
    browned minced beef
    1. Step 2: Cook for about 5 minutes or until the beef is completely cooked. Take off the heat, cover and keep hot.
    Adding big mac sauce to the big mac salad
    1. Step 3: On a bed of shredded lettuce, arrange all the ingredients and then top with the Big Mac sauce. You can add as much sauce as you like. I'm usually pretty generous with the dressing.
    finished big mac salad
    1. Step 4: Enjoy!

    Hint: Go ahead and prepare your vegetables of choice and store them in the fridge so that they are nice and cold when you add them.

    The meat is best cooked right before adding it to the salad. That said, you could fry it up and store it in your fridge too. Then just heat it up in a pan or in your microwave. If that's more convenient for you, do it.

    The Big Mac sauce takes the most effort but it could not be easier. If you want to gather and whisk all the Big Mac sauce ingredients and place the sauce, covered tightly in your fridge. It lasts a long time just like the ingredients in it last a long time

    How do you make Big Mac Sauce?

    If The Big Mac sauce is the dressing for this salad. I have a detailed Big Mac sauce here with photos but you could simply whisk up the following ingredients. I use dill pickles which are difficult to find in the UK. If using sweet pickles, you can leave out the sugar or just add to taste at the end.

    Following are the ingredient as I normally prepare them. In the recipe card below, I have downscaled it so that there is enough for the Big Mac Salad. If you make this larger amount, it keeps in the fridge for weeks and is good to have on hand.

    • Sugar to taste, I leave it out
    • 1 cup mayonnaise
    • 4 tablespoon pickle relish
    • 2 tablespoon onion, minced
    • 1 tablespoon yellow mustard
    • 1 tablespoon white distilled vinegar
    • 1 teaspoon sweet or smoked paprika
    • ½ teaspoon garlic powder
    • ½ teaspoon onion powder
    • Salt to taste, I use about ½ tsp

    Top Tip

    Make this recipe your own...

    The ingredients I use in my recipe are all in a Big Mac except for the tomatoes and sliced onions. The cheese I use is different too as burger slices just aren't good in a salad.

    So I developed the recipe the way I like it. You could and should do the same. Add what you like. Add more vegetables. Make it with turkey instead of beef.

    You can really prepare your Big Mac salad as you want it to be.

    FAQ

    Is the Big Mac sauce exactly like that you find at McDonald's?

    Nope! It does taste a lot like it but the Big Mac sauce contains ingredients that are not easy to come by and not necessary for the home cook. Things like preservatives and stabilisers.
    Make my version of Big Mac Sauce here and you might be impressed at how close it tastes to the real thing.

    Burger Recipes

    Looking for other recipes like this? Try these:

    • Chicken Chukauni served with rice and naan in a bowl
      Chicken Chukauni
    • Kerala tawa prawns on a bed of curry leaves
      Kerala Tawa Prawn Fry
    • Chicken Achaar finished in the pan
      Chicken Achaar
    • Cottage pie served with garden peas
      Cottage Pie Recipe

    American Recipes

    These are my favorite American dishes:

    • Refried bean taquitos served with chipotle dip
      Refried Bean Taquitos
    • Philly Cheesesteak Recipe
      Philly Cheesesteak Recipe
    • Chipotle mayo served in a bowl
      Chipotle Mayo
    • Cheeseburger tacos topped with big mac sauce
      Smash Burger Tacos
    See more American →

    Recipe

    Big mac salad

    Big Mac Salad

    Yield: 2
    Prep Time: 10 minutes
    Cook Time: 10 minutes
    Total Time: 20 minutes

    It's like a Big Mac but without the bun and all those carbs. Try this Big Mac salad soon. It's so good.

    Ingredients

    • 1 tablespoon rapeseed (canola) oil
    • 14oz (400g) minced (ground) beef
    • ½ onion, finely chopped
    • ½ iceberg lettuce, shredded
    • 6 cherry tomatoes or baby plum tomatoes, halved or quartered
    • 1 cup (100) grated yellow cheddar cheese
    • ½ red onion, thinly sliced
    • 1 generous tablespoon sesame seeds
    • Big Mac Sauce (recipe in post)

    Instructions

    1. Prepare the Big Mac salad dressing first. Place all the ingredients for the Big Mac sauce in a bowl and whisk until smooth. Place, covered in the fridge until ready to use.
    2. Heat a pan over a medium high heat. Heat the oil and then add the minced (ground) beef. Break it apart as best you can with a spatula and then add the chopped onion.
    3. Fry until cooked through and season with a little salt and pepper to taste. Keep warm.
    4. To build the salad, take a couple of large iceberg lettuce leaves and place the in a salad bowl or on a deep plate.
    5. Spread the shredded lettuce on top and then arrange the cheese, sliced red onion, tomatoes and beef on top.
    6. Drizzle to taste with the Big mac sauce and garnish with the pickles and sesame seeds.
    Nutrition Information:
    Yield: 2 Serving Size: 1
    Amount Per Serving: Calories: 306Total Fat: 23gSaturated Fat: 10gTrans Fat: 0gUnsaturated Fat: 10gCholesterol: 53mgSodium: 446mgCarbohydrates: 13gFiber: 3gSugar: 7gProtein: 14g
    © Dan
    Cuisine: American / Category: Burger Recipes

    Strawberry Overnight Oats

    April 10, 2025 By Jennifer

    Strawberry Overnight oats

    This Strawberry Overnight Oats recipe could not be any easier. No cooking is required and you can whip up this super nutritious, protein filled breakfast in absolutely no time at all.

    Strawberry Overnight oats

    About this recipe

    Overnight oats are essentially oatmeal without needing to do any cooking at all. By soaking raw rolled oats in liquid overnight in your refrigerator, you will have delicious softened and creamy oats by the morning. No cooking needed! The fridge does all the work.

    You don't need many ingredients for this recipe and you can so easily adapt them to your liking. See how I make this version below as well as some popular variations.

    [feast_advanced_jump_to]

    Ingredients

    ingredients for strawberry overnight oats
    • Rolled oats
    • Chia seeds
    • Almond milk
    • Greek Yogurt
    • Honey
    • Strawberries

    See recipe card for quantities.

    Step by step photographs...

    This strawberry overnight oats recipe is a perfect make ahead of time breakfast. Here's how to make it. Feel free to switch up any of the ingredients so it's fit to your taste.

    mashing stawberries with a fork
    1. Step 1: Mash the strawberries on a plate with a fork until they reach your desired consistency. You can leave some chunks for texture or mash them completely smooth.
    Start to layer the ingredients in a jar/container, starting with the oats.
    1. Step 2: Start to layer the ingredients in a jar/container, starting with the oats.
    Add the chia seeds
    1. Step 3: Add the chia seeds
    adding the yogurt to the strawberry overnight oats
    1. Step 4: Now the yogurt and honey.
    Finally, add your strawberries
    1. Step 5: Finally, add your strawberries
    stirring the strawberry overnight oats together
    1. Step 6: Stir in the almond milk and mix everything thoroughly to ensure the chia seeds and oats are well mixed with the liquids.. Seal the container with a lid and refrigerate overnight (8-12 hours).

    Hint: Sweeten to taste. Add more or less honey, depending on your own sweet tooth.

    Variations

    There are plenty of variations for this strawberry overnight oats recipe. Here are some suggestions.

    • Add Banana - Add mashed or sliced banana with the strawberries
    • Strawberries and cream- Get the ultimate strawberries and cream flavour by adding a touch of vanilla extract with the yogurt.
    • Chocolate - add just a teaspoon of cocoa powder or chocolate protein powder
    • Strawberry shortcake - Layer some crushed digestive biscuits or granola at the bottom or on the top before serving.

    Equipment

    The best containers for this recipe are containers that have lids. Use a mason jar, glass meal prep containers or anything that has an airtight lid with clear sides. A spoon holder is always useful too!

    Storage

    Storing these overnight properly is important in the process of making these delicious strawberry overnight oats so make sure you follow each step carefully. These strawberry overnight oats will last in the ridge for up to 5 days

    You can also freeze overnight oats in an airtight container. Only freeze after they have refrigerated overnight and thaw no longer than 3 months. Allow to thaw in the fridge or microwave them directly from the freezer. Add extra almond milk if needed.

    Top Tip

    Make sure you give everything a good stir before placing in teh refrigerator. This will help evenly distribute the oats, liquid and any mix-ins so you don't end up with dry patches or clumps.

    FAQ

    Can I heat up overnight oats?

    Yes! While they are typically served cold with no cooking needed, you can pop them in the microwave before serving for 30-60 seconds.

    Can i make them with water instead of milk?

    Yes although they will be less creamy. Consider mixing in nut butter or banana for creaminess.

    Recent recipes

    • Lasagne served on a plate with rocket salad
      Lasagne
    • Salsa verde tacos topped with salsa and cheese
      Salsa Verde Tacos
    • Curried brussels sprouts served in a side dish
      Curried Brussels Sprouts
    • Honey harissa chicken served on a bed of mashed potato with harissa chicken gravy
      Honey Harissa Chicken

    Enjoy high protein recipes? Try this Ribeye Steak recipe for dinner tonight!

    Recipe

    Strawberry Overnight oats

    Strawberry Overnight Oats

    Yield: 2
    Prep Time: 5 minutes
    Additional Time: 8 hours
    Total Time: 5 minutes

    Strawberry Overnight Oats recipe could not be any easier. No cooking is required and you can whip up this super nutritious, protein filled breakfast in absolutely no time at all.

    Ingredients

    • 2 cups (180g) rolled oats
    • 2 tablespoon chia seeds
    • 2 cups (480ml) almond milk
    • ½ cup (115g) Greek yogurt
    • 2 tablespoon honey
    • 8 strawberries

    Instructions

    1. Mash the strawberries on a plate with a fork until they reach your desired consistency. You Can leave some chunks for texture or mash them completely smooth.
    2. Next, you are going to layer the ingredients in a jar or container with a lid, combine the oats, chia seeds, honey, yoghurt, mashed strawberries and almond milk.
    3. It is important to stir everything thoroughly to ensure the chia seeds and oats are mixed well with the liquids.
    4. Seal the container with an airtight lid and refrigerate overnight (8-12 hours). This allows the oats and chia seeds to absorb the liquid and soften.
    5. If the oats have thickened too much, you can add a splash more almond milk to reach your desired consistency. Enjoy!
    Nutrition Information:
    Yield: 2 Serving Size: 1
    Amount Per Serving: Calories: 447Total Fat: 12gSaturated Fat: 4gTrans Fat: 0gUnsaturated Fat: 7gCholesterol: 22mgSodium: 150mgCarbohydrates: 70gFiber: 10gSugar: 37gProtein: 18g
    Cuisine: British/American/European / Category: Breakfast

    Easy Pesto Pasta

    April 9, 2025 By Joe

    Homemade easy pesto pasta

    This easy pesto pasta recipe will become a weeknight favourite. Ready in under 30 minutes, using only the freshest ingredients you can access pretty much everywhere. Skip the jars and make it fresh!

    You can absolutely serve this cold too. A perfect treat for lunch time at work!

    Homemade easy pesto pasta

    About this recipe

    Basil pesto is a classic, popular Italian sauce, which is incredibly versatile. In this recipe. I show you how to make a fresh basil pesto and mix it into a delicious pasta dish with added cream. Once you see how easy it is to make this easy pesto pasta, It will become a favourite in your home.

    [feast_advanced_jump_to]

    Step by step photographs

    You shouldn't have a problem sourcing any ingredients for this easy pesto pasta recipe. All ingredients can be purchased at your nearest grocery store.

    Ingredients for homemade pesto pasta
    • Basil
    • Pine nuts
    • Garlic
    • parmesan
    • olive oil
    • salt & pepper
    • double cream (not in photograph)
    • pasta

    See recipe card for quantities.

    Instructions

    pine nuts and garlic in the food processor 
for easy pesto pasta
    1. Step 1: Start by adding the pine nuts and garlic to the food processor.
    Fresh basil added to teh food processor
    1. Step 2: Then add the basil on top.
    oil, parmesan, salt and pepper added to the easy pesto pasta recipe
    1. Step 3: Now add the grated Parmesan, salt, pepper and olive oil. pulse in short bursts to maintain a good texture and avoid over blending.
    pasta cooking in a pan
    1. Step 4: Bring a pan of water to the boil and add your pasta. Cook as per the packaging instructions.
    Draining the pasta
    1. Step 3: Drain the pasta and set aside.
    cream and basil pesto added to the pan
    1. Step 4: In the same pan, add the pesto and the cream, stir together.
    adding the pasta to the pan for the easy pesto pasta recipe
    1. Step 3: Add the pasta to the pan and mix together well so that the pasta is well coated in sauce.
    Served up easy pesto pasta
    1. Step 4: Serve hot or cold with added pine nuts.

    Hint: If you’re not serving immediately, keep the pesto, cream and pasta separate until ready to serve. This will help prevent the pasta from soaking up the sauce and drying out. Make sure you add a touch of olive oil to your pasta to avoid it sticking together.

    Serving suggestion

    Make this dish a meal by adding a prepared salad to the table. I absolutely love this Green Goddess Salad but check out these other salad recipes too.

    Substitutions For Easy Pesto Pasta

    This easy pesto pasta recipe is easy to substitute ingredients to suit many dietary requirements.

    • Nuts - You can skip them or add toasted breadcrumbs for added texture.
    • Cheese - You can add a spoonful of nutritional yeast instead or even a little extra salt and some lemon juice.
    • Pasta - Use any pasta you like in this recipe or try gnocchi, noodle noodles or you can even try cooked potatoes or rice.
    • Cream - You can skip cream altogether or even add coconut milk for a twist.

    Variations of Easy Pesto Pasta

    Once that you have mastered the basil pesto recipe, you might want to switch it up. This Easy Pesto Pasta recipe is easily adapted and here are some ideas of variations you could try.

    • Spinach & Basil - If you prefer a milder and sweeter taste, swap half of the basil for spinach. It is a a great way to use up leftover greens in your refrigerator.
    • Red pesto - Switch out most of the basil for sun-dried tomatoes and create a red pesto. It's delicious served creamy and stirred into a pasta.

    There are so many other things you can do with basil pesto, instead of adding it to pasta. Check out my Basil Pesto recipe where you can see example of how else to use basil pesto.

    Equipment

    For the best results, use a food processor as this allows you to pulse it in short bursts to maintin a good texture and avoid over-blending. However you can use a regular blender to create the paste.

    Storage

    If possible, store the pesto, cream and pasta separately, adding a touch of oil to the pasta to avoid it sticking. This will stop the pasta from absorbing the sauce and drying it out. You should also add a tablespoon of olive oil to the top of the pesto to stop it going brown, When ready to heat back up, heat the pesto in a pan over a medium heat, stir in the cream and add your pasta.

    If it is already mixed together, simply place it in a bowl, covered and it will last in the refrigerator for up to 5 days.

    The pesto freezes really well, so as long as this is seperate to the cream and the pasta, it will freeze for up to 3 months. It is definitely worth making a big batch so you can do this.

    Top Tip

    Use the best basil you can find, a good quality cheese and a proper extra virgin olive oil. You will taste the difference!

    FAQ

    How do I keep my pesto from going brown in the fridge?

    Add a thin layer of olive oil on the top of your pesto to avoid oxidation. Store in an airtight container. This will help maintain its vibrant green color.

    Can I cook this in advance?

    Yes absolutely!. I recommend that you don't mix the ingredients together until you are ready to serve. This means, you can easily prepare the pesto and pasta and mix together along with the cream when you're ready to serve. Store the pasta with a touch of olive oil to avoid it sticking together. If serving hot, heat the pesto in a pan over a medium heat, stir in the cream and add your pasta. stir continuously until it's hot enough to serve.

    More Italian Recipes

    Looking for other recipes like this? Try these:

    • Finished gnocchi with sausage recipe
      Gnocchi and sausage recipe
    • Pull apart garlic bread
      Pull Apart Garlic Bread
    • All Italian burger finished
      The All Italian Burger
    • The cooked fish on a serving platter drizzled with the herb mixture.
      Mediterranean Fish - Grilled

    Pairing

    These are my favorite dishes to serve with [this recipe]:

    • Chipotle chicken taquitos served with chipotle dip
      Chipotle Chicken Taquitos
    • Spicy beef taquitos served with guacamole
      Spicy Beef Taquitos
    • Chicken potato bake served from the baking dish
      Chicken Potato Bake
    • potato chorizo taquitos
      Potato Chorizo Taquitos

    Recipe

    tomato and mascarpone pasta

    Tomato and Mascarpone

    Yield: 4
    Prep Time: 10 minutes
    Cook Time: 10 minutes
    Additional Time: 5 minutes
    Total Time: 25 minutes

    Discover the easy and delicious Tomato and Mascarpone pasta recipe that is ready in under 30 minutes for a perfect weeknight meal.

    Ingredients

    • 4 cups of pasta (your choice)
    • ⅔ cup (150g) Mascarpone
    • 1 cup (250ml) passata
    • small handful of fresh basil leaves
    • ¾ cup (60g) grated parmesan
    • 4 garlic cloves (peeled and crushed)
    • 4 tablespoon olive oil
    • Salt & pepper to taste

    Instructions

    1. Bring a pan of water to the boil and add your pasta. Cook as per the packaging instructions
    2. Meanwhile, In a food processor (or blender), add the mascarpone, olive oil, garlic, basil, parmesan and salt & pepper.
    3. Stir in the tomato passata.
    4. Once your pasta is cooked, stir in the sauce to your hot pasta. If you're working ahead and already have cooked pasta that is no longer hot, heat the sauce over a low-medium heat first. Top with parmesan. Enjoy!
    Nutrition Information:
    Yield: 4 Serving Size: 1
    Amount Per Serving: Calories: 321Total Fat: 15gSaturated Fat: 2gTrans Fat: 0gUnsaturated Fat: 12gCholesterol: 1mgSodium: 93mgCarbohydrates: 39gFiber: 2gSugar: 1gProtein: 8g
    © Joe
    Cuisine: Italian / Category: 30 Minute Or Less

    Green Goddess Salad

    March 26, 2025 By Dan

    Green goddess salad served on a chilled plate next to a salad bowl.

    Once you make a homemade green goddess dressing, you might like to try it tossed into a green goddess salad. Here I will show you how I put mine together but there are of course many different options.

    Green goddess salad served on a chilled plate next to a salad bowl.

    About this recipe.

    There are many different recipes for green goddess salad. I have yet to find a bad one. The salad has bold flavors and it really is a good addition to any meal.

    This is a recipe that I have been making since I was a kid. The green goddess dressing is a recipe from our family cookbook and in my personal and perhaps biassed opinion, it is the best!

    [feast_advanced_jump_to]

    Ingredients

    There aren't a lot of ingredients for this one. You can use the salad ingredients of your choice. Just be sure to use the freshest vegetables you can get your hands on.

    Ingredients for the salad.
    • baby gem lettuce
    • lardons
    • carrot
    • red onion
    • cucumber
    • radishes
    • red bell pepper
    • green goddess dressing
    • Salt and pepper

    See recipe card for quantities.

    Ingredients

    Use a clear shot of the ingredients for this recipe, prepped, and labeled if necessary. Add a paragraph of content describing why these ingredients were chosen. Insert the ingredients into the list below, omitting quantities.

    Ingredients for the salad.
    • baby gem lettuce
    • lardons
    • carrot
    • red onion
    • cucumber
    • radishes
    • red bell pepper
    • green goddess dressing
    • Salt and pepper

    See recipe card for quantities.

    Step by step photographs.

    You can literally make this salad in about 15 minutes including the time it takes to make the dressing!

    Frying the lardon until browned and crispy.
    1. Step 1: Combine all spices into a large bowl and combine thoroughly with mixture
    All of the salad ingredients minus the dressing in a large salad bowl.
    1. Step 2: Form into ball shape with your hands
    Tossing the dressing into the green goddess salad in a wooden salad bowl.
    1. Step 3: Press into patties
    Serving the green goddess salad on a plate with the salad bowl in the background.
    1. Step 4: Cook in oven for x minutes at 400 degrees

    Substitutions

    You can and should have a play with the ingredients so that you use the freshest ingredients you can get your hands on. It is also ok to substitute other ingredients as listed below.

    • Lettuce: instead of baby gem lettuce, you can use romaine or cos lettuce or another hearty lettuce. As the dressing is quite thick, more delicate lettuce won't work as well.
    • Lardons: - You could use bacon instead of lardons. Just chop it up nicely.
    • Vegetarian/Vegan: Consider adding capers instead of the anchovies. If you are vegan, you could use a vegan mayonnaise or yoghurt in the dressing.

    Equipment

    A large mixing bowl: Use a large mixing bowl or salad bowl for tossing the salad together. Depending on the size of your salad bowl, it might be easier to toss the salad in a large mixing bowl before transferring it to your salad bowl.

    A wooden salad bowl: It just looks good and is great for presentation.

    A grater and sharp chefs knife: For preparing the vegetables.

    Storage

    You can store the green goddess dressing in the fridge for about 5 days. I don't recommend storing the salad once the dressing has been added.

    Top Tip

    Whenever I make a nice salad, it's not just about the salad! Consider chilling your plates and forks in the freezer for about an hour before serving. The cold plate and fork takes the salad up a level or two.

    FAQ

    Can you make Green Goddess salad without mayonnaise?

    Yes. The green goddess dressing I use includes mayonnaise but you can substitute Greek yoghurt for a healthier version.

    Can you use dried herbs instead of fresh?

    Although theoretically you could, you won't achieve that beautiful green colour that green goddess dressing is famous for. If you do need to use dried herbs, try using one teaspoon of dried for every 2 tablespoons of fresh.

    Is Green Goddess dressing suitable for vegans?

    The traditional recipe for the dressing includes mayonnaise and anchovies. Sometimes, as in this recipe it also calls for sour cream and cheese. You could make this vegan by substituting a vegan mayonnaise for the mayonnaise and sour cream and adding capers instead of the anchovies.

    Related

    Looking for other salad ideas? Here you go…

    • Caesar Salad
      The Best Caesar Salad Recipe
    • Salad Caprese
      Caprese Salad Recipe
    • Broccoli Salad on a serving plate.
      Broccoli Salad
    • Salad Nicoise
      Salad Nicoise With Creamy Vinaigrette Dressing

    Pairing

    This green goddess salad is amazing on its own or served with any of the below.

    • Finished asparagus risotto
      Asparagus Risotto
    • Hungarian goulash over pasta.
      Hungarian Goulash
    • homemade croque monsieur
      Croque Monsieur
    • Homemade Tuscan chicken plated up
      Tuscan Chicken
    • cassoulet on a serving plate with crusty French bread and salad.
      Cassoulet
    • Serving the steak and ale pie.
      Steak and Ale Pie
    • Finished pasta bake
      Salmon and Broccoli Pasta Bake
    • Penne alla Puttanesca
      Penne Pasta Recipe - Penne alla Puttanesca

    Recipe

    Tossing the dressing into the green goddess salad in a wooden salad bowl.

    Green Goddess Salad

    Yield: 4 to 6
    Prep Time: 10 minutes
    Total Time: 10 minutes

    You can build your green goddess salad using your vegetables and lettuce of choice. This recipe shows how I make mine but feel free to experiment and add other ingredients. The amount of dressing you use is down to personal preference.

    Ingredients

    • 4 baby gem heads of lettuce
    • 100g (3.5oz) lardons
    • 1 carrot, grated
    • 1 medium red onion, thinly sliced
    • ½ cucumber, thinly sliced
    • 7 radishes, thinly sliced
    • 1 red bell pepper, thinly sliced
    • ½ batch green goddess dressing
    • Salt and pepper to taste

    Instructions

    1. Tear the baby gem into small pieces to your preferrence. Set aside.
    2. In a frying pan, fry the lardons for about 5 minutes or until crispy. Set aside to cool.
    3. To make the salad, place all of the ingredients except for the salt and pepper in a large salad bowl and toss until the dressing is coating all the vegetables. You can use more or less dressing to preference.
    4. Season with salt and freshly ground pepper to serve.
    Nutrition Information:
    Yield: 4 Serving Size: 1
    Amount Per Serving: Calories: 118Total Fat: 7gSaturated Fat: 1gTrans Fat: 0gUnsaturated Fat: 5gCholesterol: 6mgSodium: 228mgCarbohydrates: 13gFiber: 5gSugar: 6gProtein: 3g
    © Dan
    Cuisine: American / Category: Salads

    Garlic Butter

    March 23, 2025 By Shannon

    Homemade garlic butter

    You will never buy garlic butter again when you see how simple it is to make at home! Using only 5 ingredients, you’ll be using this flavorful spread non-stop for steaks, pasta and so much more!

    Homemade garlic butter

    About this recipe:

    This garlic butter recipe will up level so many of your family favorite dishes! Filled with minced garlic and aromatic herbs, add it to so many mid week meals to pack an extra flavorful punch.

    Whether you need something to spread on golden, toasted bread or want to make your meat or seafood more exciting, this recipe is for you.

    [feast_advanced_jump_to]

    Ingredients

    Garlic butter ingredients separated into bowls
    • Butter
    • Garlic
    • Thyme
    • Rosemary
    • Parsley

    See recipe card for quantities.

    Step by step pictures:

    Garlic butter ingredients added to a food processor
    1. Step 1: In a food processor or pestle and mortar, add your butter, garlic, parsley, thyme and rosemary.
    butter ingredients blended in a food processor
    1. Step 2: Blend until fully combined.
    Blended butter spooned out onto cling film
    1. Step 3: Spoon out the mixture onto cling film.
    Blended garlic butter rolled into a stick
    1. Step 4: Form into a log by gently rolling and shaping. Twist the ends of the cling film to maintain freshness.

    What can I use this for?

    Garlic butter is so incredibly versatile and can be added to so many dishes. Here are a few ideas:

    • Pasta: Toss it with your favorite pasta for a simple yet flavorful dish. Why not pair it with Pasta Bolognese, Penne Al Puttanesca, Nduja pasta or Tomato Mascarpone.
    • Bread: Spread it on warm, toasted bread or make garlic bread by slathering it on a baguette and baking it in the oven. Try my Garlic Bread recipe here.
    • Seafood and fish: Drizzle it over shrimp, lobster, or crab. Garlic butter pairs especially well with seafood. Melt over Pan Seared Sea Bass or Seafood Pancakes.
    • Steak: Top this Ribeye Steak with a dollop of garlic butter.
    • Vegetables: Use it to sauté or roast vegetables like broccoli and asparagus or melt onto these Perfectly Creamy Mashed Potatoes.

    Variations

    The simplicity of this recipe comes from only needing 5 ingredients, but there are still plenty of ways to add extra flavors to your garlic butter to suit your tastes. Here are some ideas:

    • Lemon Garlic Butter: Add zest and juice of lemon to your garlic butter. The citrusy kick will balance out the richness of the butter and garlic, creating a fresh and tangy flavor.
    • Spicy Garlic Butter: Add a little crushed red pepper flakes, chili powder, or even a dash of cayenne pepper to give it some heat.
    • Parmesan Garlic Butter: Stir in some grated Parmesan cheese for a nutty, savory twist. This works well for pasta, bread, and even steaks. You can also add garlic powder and a pinch of salt to enhance the cheesy flavor.
    • Truffle Garlic Butter: Add a drizzle of truffle oil or mix in some finely grated truffle for a luxurious flavor.

    Storage

    Refrigeration: Place in an airtight container: Transfer the garlic butter into a small, airtight container or jar. This will keep it fresh in the fridge for up to 1-2 weeks.

    Wrap in parchment paper or plastic wrap: If you prefer, you can form the garlic butter into a log using parchment paper or plastic wrap, which is great if you plan to slice off portions as needed. It will last in the fridge for about 1-2 weeks as well.

    Top Tip

    If you are planning to use this garlic butter for spreading and not sautéing and baking then the rawness of the garlic can sometimes come through. Luckily there’s an easy solution! Before you add your chopped garlic to the food processor, mince it together with some flaky sea salt using the flat side of a knife. This will help dull the rawness of the garlic if you’re not cooking with it.

    FAQ

    Can I use garlic powder instead of fresh garlic?

    Yes, garlic powder can be used as a substitute for fresh garlic, though the flavor might be slightly different. Use about ¼ teaspoon of garlic powder for every clove of garlic.

    How do I soften butter?

    If your butter is too hard, let it sit at room temperature for about 30 minutes to soften. Alternatively, you can microwave it for a few seconds (in short intervals) until softened, but be careful not to melt it.

    Can I use dried herbs?

    Yes, you can definitely use dried herbs! Dried herbs like oregano, thyme, rosemary, or parsley work well and can provide great flavor. However, because dried herbs tend to be more concentrated than fresh ones, you’ll want to use less.

    Most recent recipes:

    • coconut chicken served up in a bowl
      Spicy Brazilian Coconut Chicken
    • chicken shawarama
      Chicken Shawarma
    • 30 minute beef madras served with rice
      30 Minute Beef Madras
    • Keema naan cut in half to see the lamb meat
      Keema Naan

    Recipe

    Homemade garlic butter

    Garlic Butter

    Yield: 1 cup
    Prep Time: 5 minutes
    Cook Time: 5 minutes
    Total Time: 10 minutes

    You will never buy garlic butter again when you see how simple it is to make at home!

    Ingredients

    • ⅔ cups (150g) unsalted butter
    • 3 gloves garlic
    • 2 sprigs of thyme
    • 2 sprigs of rosemary
    • 1 small bunch of parsley

    Instructions

    1. Add your room temperature butter, chopped garlic, thyme, rosemary and parsley to a food processor.
    2. Blend until all the ingredients are combined.
    3. Place a square of cling film on a flat surface and spoon your butter into a log shape.
    4. Fold one side of the cling film over the butter and gently shape into a smooth roll.
    5. When you’re happy with the shape, seal with the rest of the cling film by continuing to roll and twisting the sides to seal for freshness.
    6. Place in the fridge for at least 2 hours to solidify the shape of the butter ready for serving with whatever you like!
    Nutrition Information:
    Yield: 5 Serving Size: 1
    Amount Per Serving: Calories: 100Total Fat: 11gSaturated Fat: 6.8gTrans Fat: 0.4gUnsaturated Fat: 3gCholesterol: 28mgSodium: 130mgCarbohydrates: 1gFiber: 0gSugar: 0gProtein: 0g
    © Shannon
    Cuisine: British/American/European / Category: 30 Minute Or Less

    Smashed Potatoes

    March 18, 2025 By Joe

    smashed potatoes looking crispy on a tray

    Smashed potatoes are a delicious and versatile side dish that combines the best aspects of baked and mashed potatoes. Just boil or steam new potatoes, then gently smash them flat and roast until crispy.

    This recipe creates a delightfully crunchy exterior, a soft, creamy interior and a flavour explosion, all while being incredibly easy to prepare in just 10 minutes.

    smashed potatoes looking crispy on a tray
    Mouth watering smashed potatoes, topped with a rich garlic and parmesan butter.

    Why use new potatoes for smashed potatoes?

    New potatoes are ideal for this recipe due to their thin skins, tender texture and small size, which makes them easy to work with and perfect for getting crispy without falling apart. They also have a slightly sweet, nutty flavour that pairs wonderfully with cheese and herbs.

    [feast_advanced_jump_to]

    Ingredients for smashed potatoes

    Ingredients for smashed potatoes
    • new potatoes
    • parmesan
    • unsalted butter (softened)
    • parsley (chopped)
    • garlic (minced)
    • salt
    • pepper
    • FOR THE DIP
    • soured cream
    • spring onions (scallions)
    • salt
    • pepper

    See recipe card for quantities.

    Instructions

    ingredients for garlic topping in the bowl.
    1. Step 1: First, in a bowl, combine your softened butter, parmesan, parsley, garlic and salt and pepper.
    whisking together the ingredients for smashed potatoes
    1. Step 2: Next, combine your ingredients together.
    smashing the smashed potatoes
    1. Step 3: After that, place your parboiled potatoes on a parchment lined baking tray. Using the bottom of a glass, carefully smash the potatoes into flattened disks.
    Loading the smashed potatoes with garlic.
    1. Step 4: Then, take a spoonful of the parmesan garlic butter and carefully spread it on top of your smashed potatoes.
    loading each smashed potatoes
    1. Step 5: Ensure that your potatoes are spread out evenly on the baking tray with a generous amount of butter on each smashed potato. Place in the oven for 30 minutes at 200C/400F.
    crispy smashed potatoes
    1. Step 6: Finally, dip your crispy and cheesy smashed potatoes into your sour cream dip. Enjoy!

    Variations of smashed potato

    To elevate your smashed potatoes even more, you should try adding this cowboy butter to the top instead! It's Garlicy with extra spices to make them even more delicious!

    Potato: While new potatoes provide all the components for the perfect, crispy smashed potato, they're not the only perfect potato for this recipe. 

    • Baby potatoes are similar to new potatoes in size and texture, making them a great alternative. They are easy to cook and smash, providing a fluffy interior with a crispy crust. 
    • Red potatoes have a firm texture that stays intact when smashed. They are also visually appealing with their red skins, adding a pop of colour to the dish. 
    • Fingerling potatoes have a unique shape that can create interesting textures when smashed. They are also quite flavourful and visually distinctive. 
    • Russet potatoes can become quite crispy due to their higher starch content, though they may not hold their shape as well as waxy potatoes. Their fluffy interior contrasts nicely with a crispy exterior.

    What about cheese?

    Yes! If you're looking for an extra level of crisp on top of your potato, then parmesan is the way to go. However, there are plenty of other cheeses that will add a melty, gooey element to your smashed potatoes that you might be looking for. 

    Cheddar's melting properties make it a great choice for a gooey, cheesy topping. Gruyère will give you a sophisticated flavour and creamy texture that adds depth and richness, making it ideal for a more gourmet touch. Mozzarella will provide a gooey, melted topping and will give you that classic cheesy texture with a mild flavour that complements the other ingredients.

    How to store smashed potatoes

    If you think there might be leftovers of these smashed potatoes, you might be wrong—because they're that delicious, you’ll be fighting over the last bite!

    If by some miracle you do have any left, they can be stored in the fridge for up to 3-4 days. To restore that crispy, golden goodness, reheat them in the oven at 400°F (200°C) for about 10-15 minutes or in a pan with a touch of oil for a few minutes on each side.

    You could also air fry the smashed potatoes to reheat or cook them. You'll see details and photos of air frying the potatoes below.

    Top Tip

    Tossing them in hot oil or ghee before baking ensures an ultra-crispy exterior.

    FAQ

    Can I make smashed potatoes ahead of time?

    Yes! You can boil and smash them in advance, then refrigerate until ready to roast. When you're ready to serve, toss them in hot oil or ghee and bake until crispy. This makes them perfect for meal prep or entertaining!

    Can these be made in the air fryer?

    Absolutely, yes! An air fryer is an excellent choice for cooking smashed potatoes because it achieves a crispy, golden texture in just 10 minutes, compared to the 30 minutes needed in a conventional oven. I have outlined how below...

    smashed potatoes in the air fryer

    This smashed potato recipe can be easily converted to air fryer.

    Simply prepare the smashed potatoes as shown in the photos and instructions below, then place them in a preheated air fryer set to 200°C (400°F) for 10 minutes. Be sure not to overcrowd the air fryer, as doing so can prevent the potatoes from crisping evenly and may result in a less satisfying texture.

    Related

    Looking for other recipes like this? Try these:

    • Peshwari naan with flaked almonds and sultanas
      Peshwari Naan
    • cheese naan
      Cheese Naan
    • Chili cheese naan breads stacked and topped with garlic butter and chillies
      Chili Cheese Naan
    • Chorizo in red wine served in a tapas dish
      Chorizo Al Vino
    • Chili Lime Chicken plated
      Chili Lime Chicken (BBQ)
    • Finished feta and hot honey stuffed flatbreads
      Feta and Hot Honey Stuffed Flatbread
    • Finished bacon double cheese burger garnished with crispy bacon and pickle
      Bacon Double Cheeseburger
    • smash burger
      Smash Burger

    Recipe

    smashed potatoes looking crispy on a tray

    Smashed Potatoes

    Yield: 4 (as a side dish)
    Prep Time: 5 minutes
    Cook Time: 30 minutes
    Total Time: 35 minutes

    These Smashed Potatoes are topped with parmesan and garlic butter. Ready in just 30 minutes, they’re an irresistible side dish that’s easy to prepare and impossible to resist.

    Ingredients

    • 1lb (500g) new potatoes
    • 1 cup (100g) parmesan
    • 3 tablespoon unsalted butter (softened)
    • 1 tablespoon fresh parsley (chopped)
    • 4 cloves garlic (minced)
    • 1 teaspoon salt
    • 1 teaspoon pepper
    • FOR THE DIP
    • 1 cup (250 ml) soured cream
    • 3 spring onions (scallions)
    • 1 teaspoon salt
    • 1 teaspoon pepper

    Instructions

    1. Preheat your oven to 200°C (400°F).
    2. In a bowl, combine softened butter, Parmesan cheese, parsley, garlic, salt, and pepper. Mix the ingredients together until well combined.
    3. Bring a pan of water to a boil and add the potatoes. Parboil for approximately 7 minutes, or until fork-tender.
    4. For extra stability and structure, let the potatoes cool. Alternatively, once drained, place them back in the pot and cover with a lid to allow them to steam dry.
    5. In a separate bowl, mix together your dipping ingredients and place them in the fridge until you’re ready to serve.
    6. Line a baking tray with parchment paper. Place the parboiled potatoes on the prepared baking tray. Use the bottom of a water glass to carefully smash each potato into flattened disks.
    7. Spoon a generous amount of the Parmesan garlic butter onto each smashed potato.
    8. Ensure the potatoes are spread out evenly on the baking tray. Place the tray in the preheated oven and bake for 30 minutes, or until the potatoes are crispy and golden brown.
    Nutrition Information:
    Yield: 4 Serving Size: 1
    Amount Per Serving: Calories: 176Total Fat: 14gSaturated Fat: 8gTrans Fat: 0gUnsaturated Fat: 5gCholesterol: 35mgSodium: 1260mgCarbohydrates: 12gFiber: 2gSugar: 1gProtein: 2g
    © Joe
    Cuisine: American / Category: Side Dish

    Croque Monsieur

    March 18, 2025 By Shannon

    homemade croque monsieur

    Crispy, cheesy and grilled to perfection! Level up your lunchtime with this classic french Croque Monsieur.

    homemade croque monsieur

    About this recipe:

    You have to make this classic french delight. Consisting of two slices of crusty white bread, filled with rich, melted Gruyère cheese, thinly sliced ham and layers of Béchamel sauce, this sandwich will make you savour every last bite.

    A warm, gooey, crispy masterpiece that’s rich in flavor and absolutely satisfying. Don’t just settle for a simple grilled cheese sandwich, indulge in this rich and decedent recipe.

    [feast_advanced_jump_to]

    Ingredients

    ingredients for croque monsieur
    • Thick slices of white bread
    • Smoked ham slices
    • Dijon mustard
    • Gruyère cheese
    • Flour
    • Milk
    • Butter
    • Garlic
    • Bay leaves
    • Salt and pepper to taste

    See recipe card for quantities.

    Step by step photographs

    Follow along with these step by step photographs. You'll see just how easy it is to whip up and construct.

    adding flour to melted butter for the roux
    1. Step 1: In a pan, heat your milk with bay leaves and slightly crushed garlic and allow to infuse (not photographed). In a separate pan, melt your butter and add flour.
    whisking the flour into to roux
    1. Step 2: Whisk together on a low heat until the rawness of the flour is cooked out and the mixture has a biscuity smell.
    slowly adding infused milk to the roux
    1. Step 3: Gradually add your warm, infused milk. Make sure to whisk your sauce continuously until you have your desired consistency.
    finished roux with added salt and pepper
    1. Step 4: When your Béchamel sauce is thick and glossy, remove from the heat and add salt and pepper to taste.
    toasted bread for the croque monsieur
    1. Step 5: With your grill on a medium heat, place your bread on a baking try and toast one side until golden.
    dijon mustard spread on the bread
    1. Step 6: On the side of the bread that isn’t toasted, spread a thin layer of Dijon mustard.
    béchamel sauce added to the bread for the croque monsieur
    1. Step 7: Next, spread a generous layer of your Béchamel sauce.
    cheese added to the croque monsieur recipe
    1. Step 8: Then, top with your grated Gruyère cheese and a thin slice if you want an unbelievable cheese pull.
    Added ham to the croque monsieur
    1. Step 9: Layer slices of ham onto your sandwich.
    finishing off the sandwhiches
    1. Step 10: Finally, place the other toasted bread slice onto your sandwich and top with a final generous helping of Béchamel and Gruyère.
    homemade croque monsieur

    Variations of Croque Monsieur:

    • Croque Madame: This is the most well-known variation of the Croque Monsieur. Construct your sandwich as the instructions above lay out, but top with a fried or poached egg. The addition of the egg makes it a bit more indulgent, adding richness and extra textures.
    • Gruyère cheese: if you are raiding your fridge to find the perfect cheese and don’t gave Gruyère to hand, don’t worry! Here are some perfect substitutions: Emmental - This Swiss cheese is one of the most common substitutes for Gruyère. It’s mild, slightly nutty and perfectly meltable, making it an ideal replacement. Comté - Comté has a flavor and texture very similar to Gruyère, with a slightly nutty and fruity taste. It's a great substitute if you want to stick to a French-style cheese. Cheddar - While it’s not quite as nutty as Gruyère, it will still melt well and add a different depth of flavor to your sandwich.

    Storage

    If you've made extra sandwiches or have leftovers, here's how to store them:

    • Let it Cool: Allow the sandwich to cool completely before storing. This prevents condensation inside the storage container, which can make the bread soggy.
    • Wrap or Place in an Airtight Container: Wrap the Croque Monsieur tightly in plastic wrap or foil, or place it in an airtight container. This will keep it fresh and prevent it from drying out.
    • Refrigerate: Store the wrapped sandwich in the refrigerator. It should keep for about 1 to 2 days.

    Reheating Croque Monsieur:

    When you're ready to enjoy your leftover Croque Monsieur, reheating it properly is key to maintaining its texture and flavor:

    • Reheat in the Oven: The best way to reheat your sandwich is in a preheated oven at 350°F (175°C). If the sandwich is already assembled and chilled, wrap it loosely in foil to prevent it from drying out. Heat for about 10-15 minutes, or until the cheese is melted and the sandwich is heated through. For a crispier crust, you can open the foil for the last few minutes of reheating.
    • Air fryer: Set your air fryer to 350°F (175°C). Air fry the sandwich for 3-5 minutes if it's from the fridge, or 6-8 minutes if it's frozen. Check halfway through to ensure it's heating evenly and the bread gets crispy. You may want to flip the sandwich at the halfway point to ensure even crisping.

    Top Tip

    A top tip when making a Croque Monsieur is to make sure your béchamel sauce is smooth and creamy.

    The béchamel sauce helps bind everything together and gives the sandwich its creamy consistency. If your béchamel is too thick or lumpy, it can affect the overall texture, making the sandwich dry or uneven.

    Click here for the perfect Béchamel sauce recipe in more detail.

    FAQ

    Can I make a Croque Monsieur without béchamel sauce?

    My Béchamel sauce recipe is so quick and easy to whip up. However if you’re in a hurry, you can technically skip it if you prefer a simpler sandwich. Just know that the béchamel adds a creamy richness that makes the dish special. If you really want to skip this step, you could try using a creamy mustard sauce or a cheese sauce, but it won't have the same indulgent texture.

    Can I use different types of bread for a Croque Monsieur?

    Yes, you can experiment with different types of bread, but the best choices are those with a sturdy structure that can hold the melted cheese and béchamel. Traditionally, a white or brioche-style bread is used. You can use sourdough, whole wheat, or even gluten-free bread if you prefer, but keep in mind that the texture might differ.

    What can I substitute for the ham in a Croque Monsieur?

    If you don’t eat ham, you can substitute it with turkey, chicken or even smoked salmon.

    More French Recipes

    Looking for other recipes like this? Try these:

    • Grilled rabbit on a serving plate with lemon wedges.
      Grilled Rabbit - French Style
    • Moules Mariniere on a serving plate.
      Moules Mariniere
    • Finished french onion burger
      French Onion Burger
    • Brioche hamburger buns
      Brioche Hamburger Buns

    Recipe

    homemade croque monsieur

    Croque Monsieur Recipe

    Yield: 2
    Prep Time: 10 minutes
    Cook Time: 20 minutes
    Total Time: 20 minutes

    Crispy, cheesy and grilled to perfection! Level up your lunchtime with this classic french sandwich.

    Ingredients

    • FOR THE BECHAMEL SAUCE:
    • ½ cup (125ml) milk
    • 2 cloves garlic (slightly crushes)
    • 2 bay leaves
    • 2 ½ tablespoon (20g) flour
    • 1 ½ tablespoon (20g) butter
    • FOR THE SANDWHICH
    • 4 slices of thick white bread
    • 2 teaspoon Dijon mustard
    • 2 slices of Gruyère cheese and 1 cup (100g) grated
    • 4 slices of smoked ham

    Instructions

    1. Start by heating the milk in a small saucepan over medium heat. Add the crushed garlic and bay leaves and let the milk warm until it starts to steam. Remove it from the heat and let it infuse for about 5-10 minutes, then strain out the garlic and bay leaves.
    2. Next, in a separate saucepan, melt the butter over medium heat. Stir in the flour slowly, mixing until smooth to form the roux. Cook the roux for 1-2 minutes, being careful not to let it brown.
    3. Gradually add the infused milk to the roux, whisking constantly to avoid lumps. Continue to add the milk slowly while whisking until all the milk is incorporated.
    4. Bring the sauce to a gentle simmer and cook for 3-5 minutes until it thickens to your desired consistency. Add more milk if necessary. 
    5. Take off the heat, taste and adjust the seasoning with salt and pepper.
    6. Turn on the grill to medium heat and add your slices of bread. Toast until one side is golden brown. At this point, preheat your oven to 400F/200C for the final stage.
    7. To construct your sandwich, place a slices of your bread toasted side down and spread a thin layer of Dijon mustard.
    8. Apply a thick layer of Béchamel sauce and half of the grated Gruyère along with one slice of Gruyere for an extra cheesy pull.
    9. Add your sliced ham and place the other toasted slice of bread on top, toasted side up.
    10. Finally, top with another layer of Béchamel sauce and the remaining Gruyère cheese and bake at 400F (200C) for 10 - 15 minutes or until golden.
    Nutrition Information:
    Yield: 2 Serving Size: 1
    Amount Per Serving: Calories: 480Total Fat: 17gSaturated Fat: 9gTrans Fat: 0gUnsaturated Fat: 7gCholesterol: 53mgSodium: 1329mgCarbohydrates: 53gFiber: 3gSugar: 7gProtein: 29g
    © Shannon
    Cuisine: French / Category: 30 Minute Or Less

    Big Mac Sauce

    March 16, 2025 By Joe

    homemade big mac sauce

    When you try this Big Mac sauce, you will instantly recognise the flavour. No, it is not an exact copy of Big Mac because the real sauce includes ingredients like stabilisers and preservatives that aren't needed to make Big Mac sauce at home and to spread them on your very own copycat Big Mac Burger!

    homemade big mac sauce

    About this recipe

    This is a big mac sauce recipe I developed as a kid and long before I started writing this blog. I worked for two days as a teenager at McDonald's before I learned it just wasn't for me.

    Still, I managed to take a bottle of special sauce home with me and went to work trying to recreate it. It wasn't easy as I had never heard of most of the ingredients. It was obvious that there was mayonnaise in it and the label stated that it contained mustard, garlic, onion and vinegar.

    I think at the time, I added ketchup but that wasn't on the label. The reddish colour comes from paprika. You could try adding a little ketchup but it isn't needed for that famous flavour Big Mac sauce flavour.


    [feast_advanced_jump_to]

    Ingredients

    ingredients for homemade big mac sauce
    • mayonnaise
    • pickle relish
    • onion, minced
    • yellow mustard
    • distilled vinegar
    • sweet or smoked paprika
    • garlic powder
    • onion powder
    • salt
    • sugar

    See recipe card for quantities.


    Instructions

    big mac sauce ingredients in a bowl
    1. Step 1: Place all of the ingredients in a mixing bowl except for sugar.
    Big mac sauce ingredients mixed together
    1. Step 2: Whisk these ingredients together until smooth. Taste it and add sugar to taste. You could also add salt and pepper to taste.

    Storage for Big Mac Sauce

    This Big Mac Sauce can be stored in the fridge for up to a week in an airtight container. The flavors actually improve after a few hours, so making it a little in advance is ideal. Just give it a good stir before using!


    Top Tip for Big Mac Sauce

    Let it sit for at least a few hours (ideally overnight) before using. This allows the flavors to develop and blend properly, giving it that authentic taste.


    FAQ for Big Mac Sauce

    What kind of pickle relish do you use?

    The pickles you use in this recipe are dill pickles or dill pickle relish. Dill pickle relish and pickles are widely available in the UK. 

    In the UK, they are a bit more difficult to find. You can use sweet pickles or sweet pickle relish if you are unable to get dill pickles. If using sweet pickles, don't add any sugar unless you taste it first and decide you want a sweeter flavour.


    More American Recipes

    Looking for other recipes like this? Try these:

    • Finished chili cheese burger
      Chili Cheeseburger
    • How to caramelised onions
      Caramelized onions
    • Finished mac and cheese burger
      Mac and Cheese Burger
    • Finished guacamole burger
      Mexican Burger

    Recipe

    homemade big mac sauce

    Big Mac Sauce Recipe

    Yield: 1 cup
    Prep Time: 5 minutes
    Total Time: 5 minutes

    This Big Mac sauce tastes just like the real thing. It isn't the real thing because the recipe only calls for fresh ingredients you can find at your local supermarket. It can be made in about 5 minutes and is delicious on any burger.

    Ingredients

    • 1 cup mayonnaise
    • 4 tablespoon pickle relish
    • 2 tablespoon onion, minced
    • 1 tablespoon yellow mustard
    • 1 tablespoon white distilled vinegar
    • 1 teaspoon sweet or smoked paprika
    • ½ teaspoon garlic powder
    • ½ teaspoon onion powder
    • Salt to taste, I use about ½ tsp
    • Sugar to taste, I leave it out

    Instructions

    1. Pour all of the ingredients into a mixing bowl except for the salt and sugar.
    2. Whisk until smooth and then try some. You can add salt and/or sugar to taste if needed.
    3. Cover tightly and refridgerate until needed.
    Nutrition Information:
    Yield: 8 Serving Size: 1
    Amount Per Serving: Calories: 204Total Fat: 21gSaturated Fat: 3gTrans Fat: 0gUnsaturated Fat: 17gCholesterol: 12mgSodium: 402mgCarbohydrates: 4gFiber: 0gSugar: 3gProtein: 1g
    © Dan
    Cuisine: American / Category: American
    • « Previous Page
    • 1
    • …
    • 9
    • 10
    • 11
    • 12
    • 13
    • …
    • 24
    • Next Page »
    For Those About To Cook

    Welcome To For Those About To Cook

    We're a family-run food blog sharing brand-new recipes every week. From easy weeknight staples to indulgent weekend favorites. We're a team of five: Dan (The Curry Guy), Caroline, Joe, Shannon, and Jennifer, bringing you a wide variety of dishes inspired by Europe, the Mediterranean, the Americas, and more.

    This site focuses on Western-inspired recipes, while Eastern flavors are covered in depth over at greatcurryrecipes.net Between the two, you'll find everything you need to cook up something amazing so don't forget to subscribe!

    Subscribe

    Footer

    Contact Privacy Policy

    Subscribe for weekly updates!

    Subscribe
    ↑ back to top

    Copyright © 2024 For Those About to Cook