For Those About To Cook

  • Home
  • About Us
  • All Recipes
  • Subscribe
menu icon
go to homepage
  • Home
  • About Us
  • All Recipes
  • Subscribe
    • Facebook
    • Instagram
    • Pinterest
  • search icon
    Homepage link
    • Home
    • About Us
    • All Recipes
    • Subscribe
    • Facebook
    • Instagram
    • Pinterest
  • ×
    Home

    Chicken & Pork Belly Adobo

    February 11, 2015 By Dan

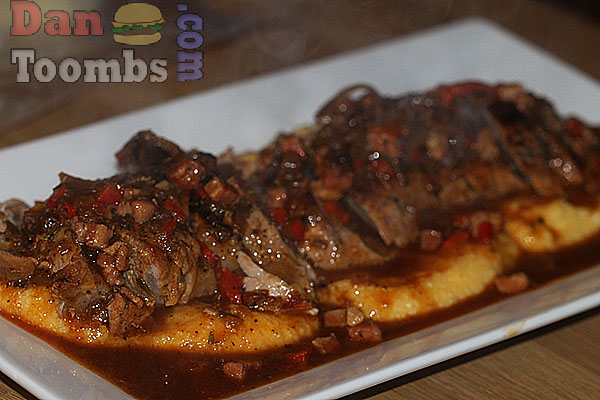
    Pork belly and chicken adobo.

    Where I grew up in California, there was a large Filipino population. Not nearly as large as the Mexican population, however so Mexican food became a lot more popular.

    Adobo recipes were for many years something I'd find in my Mexican cookbooks.
    Pork belly and chicken adobo.
    Pork belly adobo with chicken. 

    Then one day I was introduced by a friend to Filipino adobo. It is the same in name but is nothing like Mexican adobo.

    Filipino adobo is much closer to Chinese. In fact when I served this to my family, they all thought it was a new Chinese dish.

    Whatever its influences, Filipino adobo is awesome. There are so many recipes for chicken and pork belly adobo but I think this is the best that you can do in your kitchen. I have a smoky slow cooked barbecue version I'll share with you this Summer.

    One of the things I like about pork belly is the crispy crackling you get when you roast it. There was no way I wanted that crispy fat to go into the sauce and become soggy. So I roast the pork belly separately.

    By the way, the crackling got gobbled up by my three kids before I had a chance to get the meal to the table. That's why you don't see any in the photographs. Next time I'm going to hide it.

    Making pork belly and chicken adobo
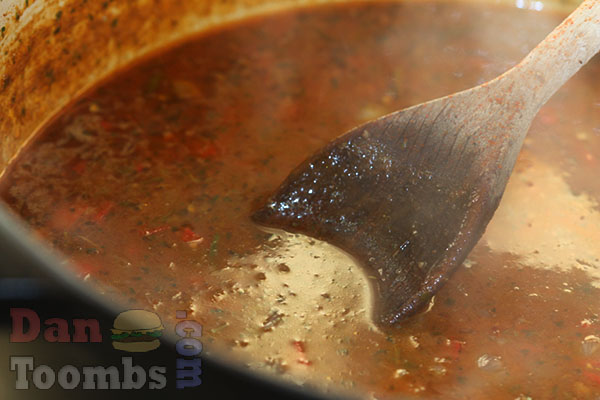
    Once the chicken is browned, add the rest of the sauce ingredients.
    making pork and chicken adobo
    When pork belly is cooked through, remove the crackling.
    Making pork adobo
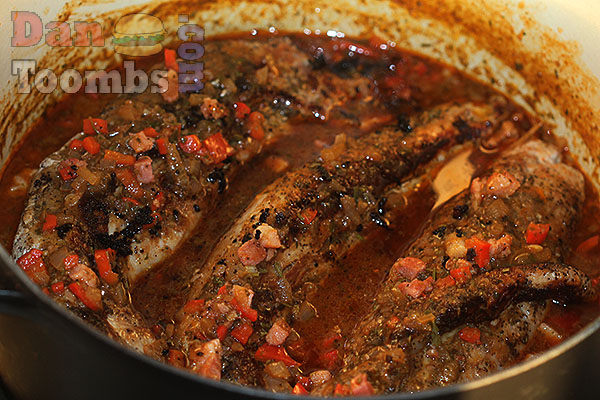
    Add the pork to the sauce.
    Making adobo
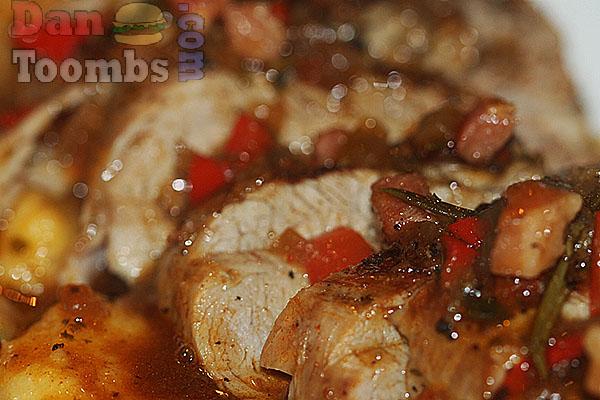
    Stir in the coconut milk. I used Kingfisher.
    Pork belly and chicken adobo
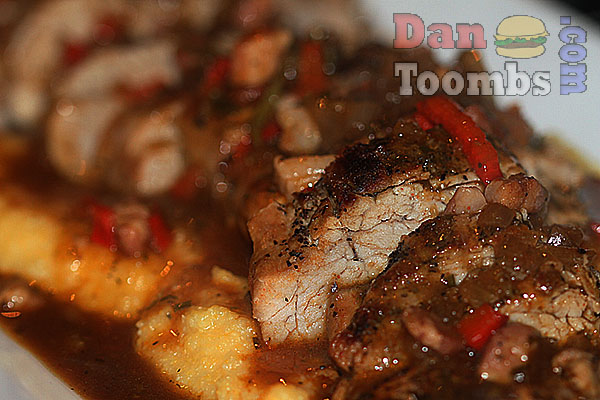
    Dig in!

    If you like this recipe, you might like to try some of these too...

    Spaghetti with Lardo and Artichokes
    Portuguese Pork Tenderloin
    Homemade Chilli con Carne
    Pasta Bolognese

    Recipe

    Chicken & Pork Belly Adobo

    Chicken & Pork Belly Adobo

    Yield: 4 - 6
    Prep Time: 10 minutes
    Cook Time: 1 hour 10 minutes
    Total Time: 1 hour 20 minutes

    Ingredients

    • 750g (1 ½ lbs) whole pork belly
    • 750g (1 ½ lbs) chicken thighs on the bone
    • 3 tablespoons olive oil or vegetable oil
    • 1 onion - finely chopped
    • 4 bay leaves
    • 1 tablespoon whole black peppercorns
    • 20 cloves garlic - minced
    • 250ml (1 cup) white wine vinegar (plus a little more for serving)
    • 250ml (1 cup) soy sauce
    • 400ml Coconut milk
    • 3 tablespoons brown sugar
    • 1 cup water or chicken stock
    • Salt to taste

    Instructions

    1. Preheat your oven to its highest setting.
    2. Score the fat of your pork belly and rub salt all over it. Let sit while your oven heats.
    3. When the oven is up to temperature, place your pork belly on a rack in a a baking dish and roast until the crackling is all crispy. This should take about 25 minutes.
    4. Reduce the heat of the oven to 180c (360f) and roast for a further 30 minutes.
    5. Meanwhile, heat the oil in a large pan and brown your chicken.
    6. Toss in the chopped onions and fry until the onions are soft and translucent.
    7. Add the garlic and fry for a further minute before adding the soy sauce, vinegar, brown sugar, bay leaves and water or stock.
    8. Simmer the chicken in this sauce over low heat for about 20 minutes to reduce it some.
    9. When your pork is cooked, remove the crackling and cut the meat into large cubes. Add the cubes to the sauce. Eat the crackling or save it for later.
    10. Add the coconut milk.
    11. Season with salt and pepper to taste.
    12. I like my sauce to be quite vinegary. If you do too, add a little more vinegar just before serving.
    13. Chicken and pork belly adobo goes great with simple white rice.
    © Dan Toombs
    Cuisine: Filipino


    I hope you enjoy this pork belly adobo recipe. If you do give it a try, please don't be a stranger. Leave a comment. I'd love to hear from you.

    Nduja Pasta Recipe

    February 8, 2015 By Dan

    nduja pasta recipe

    This njuja pasta recipe is proof that you don't need a lot of ingredients to make a fantastic Italian meal. What's more, Italian n'duja sausage pasta sauce takes no time at all to prepare.

    Make it for your friends and/or family though and they will think you're a master chef who has been slaving away at the stove for hours. This sauce has such an amazing flavour. N'duja soft salami is both smoky and spicy. The famous salami really does all the work.

    nduja pasta recipe

    About this n'duja pasta recipe

    I tried a similar sauce while on holiday in Italy. Fresh pasta was tossed in the hot sauce and then piled onto warm plates. The Chianti was flowing that evening. I recommend finding a couple of nice bottles to go with your meal and you will be in Italian food heaven.

    When I was first taught this recipe, the instructor used 300g of n'duja along with some ground pork or another Italian sausage. He did mention that you could use up to 600g of n'duja, but warned that it would make the dish very spicy and quite an expensive option. My version is inspired by his but I’ve adapted it to be more cost-effective while keeping all the flavor and deliciousness.

    Ingredients

    Using the freshest ingredients in this n'duja pasta recipe makes all the difference. Below, you will see the ingredients laid out along with.a list. Exact measurements and quantities can be found in the recipe card at the bottom of this page. Make sure to have everything ready and prepared before you start cooking for best results.

    ingredients for nduja pasta recipe

    See recipe card for quantities.

    • N'duja salami (The more you use the spicier it will be)
    • Spicy (Italian) sausages
    • Pork mince
    • Fesh pasta (or good quality dry pasta) cooked al dente
    • Passata
    • Onion - finely chopped
    • Garlic - finely chopped
    • Dried Italian mixed Herbs
    • Salt and pepper to taste
    • Parmesan - grated or sliced thin for serving.

    See recipe card for quantities.

    Instructions

    You will find photographs of each step below, along with a full layout including the ingredients in the recipe card. Use whichever format works best for you. These steps are clear and easy to follow, so you can cook along with confidence.

    cooking the pasta
    1. Step 1: Cook your pasta to your preferred doneness and toss in oil or butter.
    frying the sausage
    1. Step 2: In a pan over a med-high heat, add a splash of oil then brown the Itailan sausage (cut into bite sized pieces). This should take no longer than 5 minutes. Remove and set aside.

    cooking off the nduja and minced pork
    1. Step 3: In the same pan, add the nduja sausage and the ground pork until cooked through.
    adding the onion to the sausage in a pan for nduja pasta recipe
    1. Step 4: Toss in the chopped onion, garlic and dried Italian herbs. Reduce the heat, stir together and fry until the onions have softened slightly.

    returning the cooked sausage to the pan for nduja pasta recipe
    1. Step 5: Return the cooked sausage to the pan.
    adding tomato and topping with fresh herbs
    1. Step 6: Add the passata to the pan then throw in the bay leaves and half of the fresh parsley.

    sauce cooking for nduja pasta recipe
    1. Step 7: Now over a med-low heat, allow the sauce to simmer and for the flavors to develop for 10-15 minutes, stirring occasionally. If it appears to be drying out, add a splash of water if needed.
    plated up nduja pasta, delicious
    1. Step 8: Serve on top of hot pasta, topped with more fresh parsley, grated parmesan and a sprinkle of dried mixed herbs. Enjoy!

    Serving Size (Serves 4-6)

    This recipe serves 4–6. For four people, it makes a generous feast, while for six, it still works well with a little less sauce on the fresh pasta, which is often the way in finer dining anyway. It’s perfect as a family meal, or for making sure there are leftovers to enjoy the next day. Since cooking fresh food takes effort, why not make the most of it with a second meal? If you’re serving fewer people, the recipe can easily be halved. Feeding a crowd? Simply scale it up and add extra protein or sides to suit. It’s all about adapting it to your table.

    Storage

    Fridge: Allow your dish to cool completely, then store in an airtight container for up to 3 days. Flavours often develop even more after a night in the fridge.
    Freezer: Portion and freeze for up to 3 months. Defrost overnight in the fridge, then reheat gently on the hob or in the oven until piping hot.

    Working ahead...

    So it goes without saying that this nduja pasta recipe can be made in advance. In fact, the sauce gets better after a day or so in the fridge. Let those ingredients get to know each other and develop if time allows. If time isn't on your side, just go for it. This, my favourite nduja pasta recipe is very good even when cooked on a whim.

    Top Tip

    Don’t rush the cooking; allow the n'duja to slowly melt into the sauce so it evenly coats the pasta with its spicy, smoky richness.

    FAQ

    What is n'duja and where can I find it?

    N'duja is a soft, spreadable Italian salami made with pork, chilli, and spices and melts beautifully into sauces. You’ll usually find it in larger supermarkets, Italian delis, or online.

    Can I make this recipe less spicy?

    Yes! Use less n'duja and balance it with more ground pork, Italian sausage, or even pancetta. You can also stir in cream, ricotta, or mascarpone at the end to mellow the heat while keeping the flavour.

    Does it keep well for leftovers?

    Definitely. The sauce tastes even better the next day as the flavours develop. Store it in the fridge for up to 3 days, or freeze for up to a month. Just reheat gently and add a splash of pasta water or stock to loosen it before serving.

    Italian Recipes

    Looking for more Italian recipes? Try these:

    • Finished plate of marry me chicken orzo
      Marry Me Chicken Orzo
    • Finished Italian chicken in a bowl with garlic bread
      Italian Chicken (Pollo allo Scarpariello)
    • Veal Scallopini served in the pan it was cooked in.
      Veal Scallopini
    • Finished chicken fettuccini Alfredo
      Chicken Fettuccini Alfredo
    See more Italian →

    Pairing

    These are my favorite dishes to serve with n'duja pasta:

    • Pull apart garlic bread
      Pull Apart Garlic Bread
    • Finished arugula salad with parmesan and balsamic dressing
      Arugula salad
    • Caesar salad finished with dressing tossed in a bowl
      Caesar Salad
    • Patatas bravas served with a spicy tomato sauce
      Patatas Bravas

    Recipe

    plated up nduja pasta, delicious

    Nduja Pasta

    Yield: 4-6
    Prep Time: 5 minutes
    Cook Time: 25 minutes
    Total Time: 30 minutes

    Make your dinner unforgettable with this n'duja pasta recipe, packed with flavor and perfect for sharing with family and friends.

    Ingredients

    • 7oz (200g) n'duja salami
    • 4 spicy (Italian) sausages (cut into bite sized pieces)
    • 10oz (300g) pork mince
    • 1 tablespoon olive oil
    • 1lb (500g) fresh pasta (see notes)
    • 5 cups (1200ml) passata
    • 1 onion - finely chopped
    • 2 cloves garlic - finely chopped
    • Salt and pepper to taste
    • 1 ½ teaspoon dried Italian mixed herbs
    • Parmesan - grated or sliced thin for serving.

    Instructions

    1. Cook your pasta to your preferred doneness and toss in oil or butter.
    2. In a pan over a med-high heat, add a splash of oil then brown the Itailan sausage (cut into bite sized pieces). This should take no longer than 5 minutes. Remove and set aside.
    3. In the same pan, add the nduja sausage and the ground pork until cooked through.
    4. Toss in the chopped onion, garlic and dried Italian herbs. Reduce the heat, stir together and fry until the onions have softened slightly.
    5. Return the cooked sausage to the pan. Add the passata to the pan then throw in the bay leaves and half of the fresh parsley.
    6. Now over a med-low heat, allow the sauce to simmer and for the flavors to develop for 10-15 minutes, stirring occasionally. If it appears to be drying out, add a splash of water if needed.
    7. Serve on top of hot pasta, topped with more fresh parsley, grated parmesan and a sprinkle of dried mixed herbs. Enjoy!

    Notes

    Pasta - This could also be 400g dried pasta. This is for 4 people. For 6 people 750g fresh or 600g dried

    Nutrition Information:
    Yield: 4 Serving Size: 1
    Amount Per Serving: Calories: 624Total Fat: 37gSaturated Fat: 12gTrans Fat: 0gUnsaturated Fat: 22gCholesterol: 167mgSodium: 1038mgCarbohydrates: 35gFiber: 0gSugar: 1gProtein: 37g
    © Dan
    Cuisine: Italian / Category: 30 Minute Or Less

    Have you tried this recipe?

    If yes, please give it a star rating in the recipe card below and leave a comment. We love receiving your feedback and I’m sure other readers of my blog do too. Thank you.

    If you are not already doing so, please follow For Those About To Cook on Instagram and Facebook for all our latest recipes.

    Pan Seared Sea Bass With Tomatoes, Chorizo and Chickpeas

    February 7, 2015 By Dan

    Seabass with tomato, chorizo and chickpeas
    Seabass with tomato, chorizo and chickpeas

    I have the best fishmonger around. He always has a large selection of fresh seafood, caught locally that day. Today he had about ten wild seabass. Farmed is good but wild is out of this world gorgeous.

    So I purchased one. It was only my wife an me eating. I would have loved to purchase more but that would have been a bit greedy.

    I usually purchase my seabass whole and then fillet them myself when I get home. The bones and head are delicious for making stocks and soups. I bone the fish by hand without a knife. I would love to show you how to do this but it proved a bit difficult boning and photographing all at the same time.

    You could of course ask your fish monger to fillet the fish for you and then keep the bones. Why didn't I think of that before now?

    I must be losing it a bit.

    When searing seabass, it is important to get all of the moisture out of the skin. If you don't the skin won't get crispy and you will be left with a wet, oily fish on your plate.

    Try scraping the skin with a chefs knife a few times. You will see the moisture coming out as you do.

    By the way, the sauce that I served the bass on is also good on it's own or over pasta. The sauce and the seabass together were a real treat.

    wild seabass
    It all starts with a nice fresh wild seabass

    Frying onions and chorzo
    Fry up your onions and chorizo

    Making tomato, chorizo and chickpea sauce
    Add the chickpeas, garlic and herbs.

    Making tomato, chorizo and chickpea sauce

    Making tomato, chorizo and chickpea sauce
    Add the tomatoes and simmer

    Seabass with tomato, chorizo and chickpea sauce
    Dig in!

    Recipe

    Spanish Seared Seabass With Tomatos, Chorizo and Chickpeas

    Spanish Seared Seabass With Tomatos, Chorizo and Chickpeas

    Yield: 2 - 4
    Prep Time: 15 minutes
    Cook Time: 30 minutes
    Total Time: 45 minutes

    Ingredients

    • 1 large wild seabass
    • 4 tablespoons olive oil
    • 200g Spanish chorizo - cut into small circles.
    • 1 large onion - finely chopped
    • 4 cloves garlic - finely chopped
    • 500ml (2 cups) tomato passata
    • 1 tablespoons Spanish smoked paprika
    • 1 x 400ml tin of chickpeas
    • 1 tablespoon chopped fresh thyme
    • 1 tablespoon dried oregano
    • 3 tablespoons chopped fresh parsley
    • 1 teaspoon fennel seeds
    • 1 teaspoon red chilli flakes
    • Salt and pepper to taste

    Instructions

    1. Fillet your seabass and then cut them into two to four pieces.
    2. Score the skin in several places.
    3. Sprinkle the skin with salt and pepper and set aside.
    4. Now make your tomato, chorizo and chickpea sauce.
    5. Heat two tablespoons of the olive oil in a large wok or pan.
    6. Add the chopped onions and sizzle for about five minutes until the onion is translucent and soft.
    7. Throw in your chorizo and brown on both sides.
    8. Now add the chopped garlic, paprika, fennel seeds and herbs and stir it all up to combine.
    9. Pour in the chickpeas followed by the tomato passata and simmer while you sear your seabass.
    10. Heat the remaining olive oil in a large frying pan over medium high heat.
    11. When the oil is hot, add the sea bass skin side down. You may need to press the fillet down in the oil so that the skin sears evenly.
    12. Fry until you see that the fish is about 80% cooked through.
    13. Flip to cook the other side.
    14. To serve, Season the sauce with salt and pepper and place a few spoonfuls on two to four warm plates.
    15. Top the sauce with a piece of seabass. Done!
    © Dan Toombs
    Cuisine: Spanish


    Canned Tuna Recipe

    February 5, 2015 By Dan

    Hot canned tuna recipe served up with vegetables and bread.

    You know I love sharing recipes that are big on flavor but easy enough to knock out any night of the week. Well, today I’m sharing something a little different. This canned tuna recipe is certain to make a good impression. It's absolutely brilliant: Baking canned tuna... right in the can!

    Sounds crazy, right? But trust me... it’s a simple trick that can totally transform an ordinary can of tuna into a rich, savoury, almost gourmet-tasting dish with hardly any effort.

    Minimal prep, maximum flavour — just how I like it.
    Let’s dive in!

    Hot canned tuna recipe served up with vegetables and bread.

    Where the Idea Comes From

    Baking tuna in the can is an old-school trick that’s popular in some coastal Mediterranean kitchens, especially in parts of Italy and Spain where canned fish is practically an art form.

    Instead of just opening a can and stirring it into mayo, people figured out you could bake it gently — usually with a few aromatics or a glug of olive oil — and it would develop deeper, toasted, slightly nutty flavors.

    It takes canned tuna to a whole new level.
    Think of it like a simple confit, but much easier and quicker. I know you will enjoy this canned tuna recipe!

    Ingredients

    Below you will see the ingredients I add when I make this canned tuna recipe. Feel free to experiment though. If it sounds good, it probably will be.

    Ingredients for the recipe laid out on a counter top.
    • tuna
    • dried oregano
    • mayonnaise
    • extra virgin olive oil
    • Parmesan
    • tomato
    • shallots
    • capers
    • parsley

    See recipe card for quantities.

    Step by step photos

    Check out my step by step photos below and see how easy it is to make this delicious canned tuna recipe.

    Adding the canned tuna to the mayonnaise, olive oil and oregano.
    1. Step 1: Add the tuna to the mayonnaise, olive oil and dried oregano in a mixing bowl.
    Adding half the Parmesan, the diced tomatoes, capers, chopped shallots and parsley to the smashed tuna.
    1. Step 2: Smash the tuna into the mayonnaise, oregano and olive oil. Then add half the parmesan, diced tomato, chopped shallot, cappers and parsley.

    Mixing all the ingredients together in the bowl until well combined.
    1. Step 3: Mix all of these ingredients together until well combined.
    Transferring the tuna mixture back to the cans.
    1. Step 4: Transfer it all back to the tuna cans. You will need to press it all down well to fit it all back in or snack on what's left over in the bowl.

    Topping the tuna in the cans with the remaining Parmesan.
    1. Step 5: Top the tuna with the remaining Parmesan. If you feel you need more Parmesan, then add it.
    Placing the tuna in an air fryer to cook for 8 to 10 minutes.
    1. Step 6 Preheat your oven to 325°F/170°C or use an air fryer at the same temperature. Cook for 20 minutes or until the cheese has melted and turning a golden brown.

    The tuna with the cheese melted and browned on top. Serving with toasted bread.
    1. Step 7: When the Parmesan has melted on top and golden brown, serve the tuna right from the can with toasted bread and/or vegetables.

    Important Safety Tip

    Before we get started, a quick but important note:
    ONLY bake tuna that's packed in oil or water and comes in a can that’s safe for heating.

    Most tuna cans today are lined with a food-safe material, but if you’re unsure, transfer the tuna into a small ovenproof ramekin instead.
    Better safe than sorry!

    Also: Always bake at a low temperature (around 170°C or 325°F), never high heat.
    This isn’t a "blast it in the oven" recipe — it’s a slow, gentle process.

    What Happens to the Tuna?

    When you bake tuna in the can, something incredible happens:

    • The tuna intensifies in flavour without drying out.
    • The oil or brine becomes infused with the shallots, tomatoes, capers and herbs.
    • The edges of the tuna get a little crispy and caramelised — so good!
    • It loses that "tinny" taste some canned fish can have.

    With this canned tuna recipe, you end up with tuna that tastes closer to something you’d get from a top-notch deli or seafood restaurant.

    Serving Ideas

    Here’s are a few idea for serving this canned tuna recipe:

    • Tuna bruschetta: Pile onto toasted sourdough with a drizzle of good olive oil and a squeeze of lemon.
    • Pasta hero: Toss through hot spaghetti with a handful of capers, some chopped parsley, and a sprinkle of chilli flakes.
    • Salad king: Flake it over a bed of crisp greens, maybe with a jammy soft-boiled egg on the side.
    • Mega sandwich: Load into a baguette with roasted peppers, olives, and rocket for an Italian-style sub.
    • Simple snack: Just spoon it up with crackers and a cold beer.

    Honestly, once you try it, you’ll be thinking of a dozen ways to use it!

    Variations

    1. Spicy Mediterranean Tuna

    • Add: A handful of sliced black olives, a few chopped sun-dried tomatoes, and a pinch of smoked paprika before baking.
    • Top with: Fresh parsley and a squeeze of lemon after baking.

    Perfect for: Tossing into pasta or stuffing into pita bread

    2. Garlic Butter Tuna

    • Add: A big spoonful of soft butter mixed with minced garlic over the tuna before baking.
    • Finish with: A sprinkle of chopped chives or parsley.

    Perfect for: Melting over hot rice or mashed potatoes. Next-level comfort food!

    3. Tuna Nicoise Style

    • Add: A few green beans (blanched), a couple of halved cherry tomatoes, and a few baby potatoes (cooked) into the dish with the tuna.
    • Drizzle: A little more olive oil and a splash of white wine vinegar.

    Perfect for: Flaking over a salad with a boiled egg. Classic French flavours with a baked twist!

    4. Asian-Style Baked Tuna

    • Add: A dash of soy sauce, a few drops of sesame oil, and a sprinkle of toasted sesame seeds before baking.
    • Garnish with: Thinly sliced spring onions and a little fresh chilli.

    Perfect for: Filling sushi rolls, topping rice bowls, or eating straight out of the can (I won't judge).

    5. Herby Lemon Zest Tuna

    • Add: A generous handful of fresh herbs (basil, parsley, oregano — whatever you’ve got) and loads of lemon zest before baking.
    • Finish with: A drizzle of extra virgin olive oil and cracked black pepper.

    Perfect for: Making an epic tuna melt sandwich or jazzing up a couscous salad.

    Equipment

    All you need for this canned tuna recipe is a mixing bowl and a fork. There's very little clean up to do because it's all cooked in the can it came from!

    Storage

    You can store any leftovers in an air tight container in the fridge. I don't recommend doing this though as it is much better right out of the oven. If you do have leftovers, they will keep for 2 to 3 days. Do not store in the can.

    Top Tip

    Mix and match your toppings!
    These flavours are made to be played with. Baked tuna loves salt (olives, capers), spice (chilli, paprika), acid (lemon, vinegar), and fresh herbs. Experiment and have fun coming up with new comb

    FAQ

    Is it safe to bake tuna directly in the can?

    Most modern tuna cans are lined with food-safe materials that can handle low oven temperatures (around 160°C/325°F). However, if you're unsure about the can or it looks a bit dodgy (older cans, damaged lining, etc.), it’s safest to transfer the tuna into a small ovenproof dish. Better safe than sorry!

    Can you bake tuna packed in water instead of oil?

    Absolutely! Tuna packed in oil will naturally taste richer and stay juicier when baked, but tuna in water works just fine too.
    If you’re using tuna in water, I recommend adding a drizzle of good olive oil before baking to keep everything moist and flavorful.

    How long should you bake canned tuna?

    You want to bake it low and slow for the best results.
    Bake at 160°C (325°F) for about 20–25 minutes.
    That gives the tuna time to absorb any aromatics you add without drying out or burning.

    Related

    Looking for more Mediterranean style recipes? Try some of these:

    • All Italian burger finished
      The All Italian Burger
    • Ribeye steak with garlic butter served with loaded potato and broccoli
      Ribeye Steaks
    • The cooked fish on a serving platter drizzled with the herb mixture.
      Mediterranean Fish - Grilled
    • Bowl of chicken and chorizo risotto garnished with parsley
      Chicken and Chorizo Risotto
    • Finished asparagus risotto
      Asparagus Risotto
    • Steak Pizzaiola in the dish it was cooked in.
      Steak Pizzaiola
    • Broccoli Salad on a serving plate.
      Broccoli Salad
    • tomato and mascarpone pasta
      Tomato and Mascarpone Pasta

    Recipe

    Hot canned tuna recipe served up with vegetables and bread.

    Canned Tuna Recipe

    Yield: 2 to 4
    Prep Time: 10 minutes
    Cook Time: 20 minutes
    Total Time: 30 minutes

    This canned tuna recipe shows that you can have a really posh lunch without a lot of mess. It's a fun recipe to serve for a quick lunch and it also looks quite impressive. You can make this in about 30 minutes so give it a try soon.

    Ingredients

    • 2 cans of tuna
    • 1 teaspoon dried oregano
    • ½ cup Mayonnaise
    • 2 tablespoon extra virgin olive oil
    • 3.5oz Parmesan, grated
    • 1 medium tomato, diced
    • 2 small shallots, finely chopped
    • 1 generous teaspoon capers, roughly chopped
    • 2 tablespoon parsley, finely chopped

    Instructions

    1. Add the tuna to the mayonnaise, olive oil and dried oregano in a mixing bowl.
    2. Smash the tuna into the mayonnaise, oregano and olive oil. Then add half the parmesan, diced tomato, chopped shallot, capers and parsley.
    3. Mix all of these ingredients together until well combined.
    4. Transfer it all back to the tuna cans. You will need to press it all down well to fit it all back in or snack on what's left over in the bowl.
    5. Top the tuna with the remaining Parmesan. If you feel you need more Parmesan, then add it.
    6. Preheat your oven to 325°F/170°C or use an air fryer at the same temperature. Cook for 20 minutes or until the cheese has melted and turning a golden brown.
    7. When the Parmesan has melted on top and golden brown, serve the tuna right from the can with toasted bread and/or vegetables.
    Nutrition Information:
    Yield: 4 Serving Size: 1
    Amount Per Serving: Calories: 429Total Fat: 35gSaturated Fat: 8gTrans Fat: 0gUnsaturated Fat: 25gCholesterol: 53mgSodium: 667mgCarbohydrates: 9gFiber: 1gSugar: 3gProtein: 21g
    © Dan
    Cuisine: Italian / Category: Italian

    Slow Cooked Shredded Beef Tacos

    February 2, 2015 By Dan

    Slow cooked Mexican beef taco


    beef taco
    EASY slow cooked shredded beef tacos.


    This is one of those recipes that just plain gets it. Back when I was at high school in California, the local taco trucks were the place to be.

    My friends and I would often escape our closed campus school to drive into town for a box full of shredded beef tacos.

    Shredded beef tacos are easy to make because you can simply place your beef and spices in the oven and let the beef cook itself to perfection over six hours.

    Yes, those taco trucks were convenient but there is nothing like homemade.

    I always use achiote paste when cooking Mexican beef this way.

    It's the only way to get that authentic taco truck shredded beef flavour. The natural red colouring looks great too.

    Achiote (Annatto) seeds and paste is available at Mexican grocers and many supermarkets. You can also find it online.

    I like to use corn tortillas for my shredded beef tacos. You could also use flour tortillas. Top the tacos with pico de gallo, cheese, sour cream or whatever else you fancy.

    A word about corn tortillas

    Corn tortillas like those you find in the US and Mexico can be difficult to find in other countries. I have seen corn tortillas at supermarkets in the UK but they are not the real deal. 

    I purchase mine in the UK from The Cool Chilli Company. 

    Achiotte seeds
    Achiotte paste is optional but tastes great if you can find the achiote seeds.

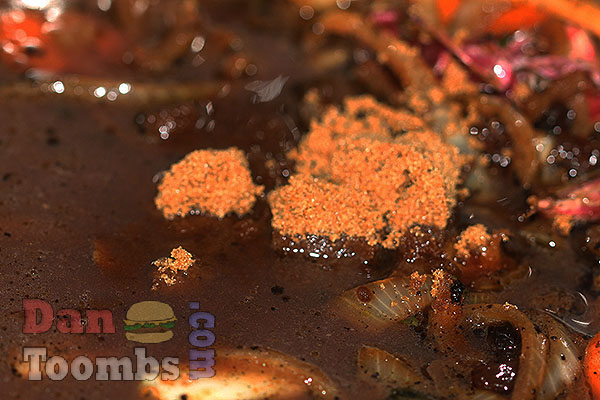
    Achiote paste
    Achiote paste

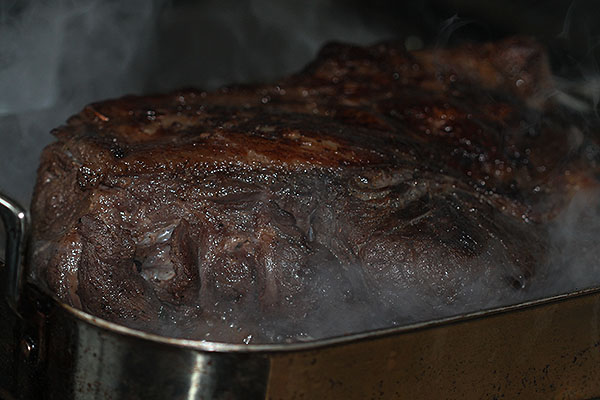
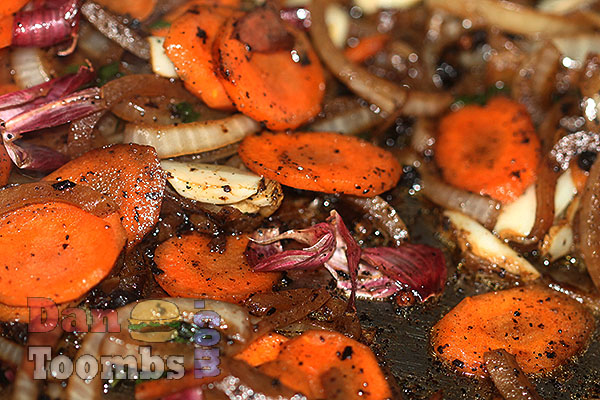
    Making Mexican slow cooked beef
    Start by seasoning your topside and then browning in hot oil.

    Making slow cooked Mexican beef tacos
    Ready for the oven

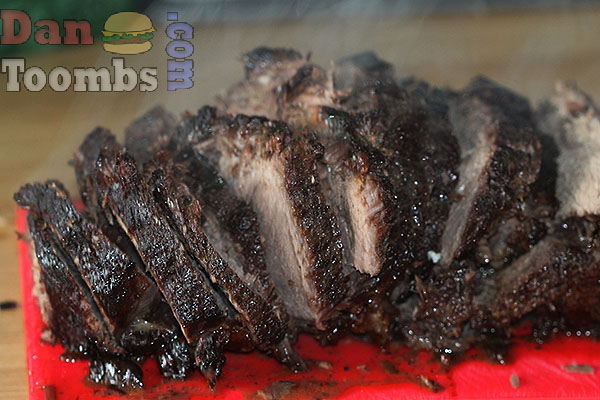
    Slow cooked Mexican beef
    After six hours in the oven.

    Slow cooked Mexican beef
    Break it up and then shred with a fork

    Slow cooked Mexican beef
    This tastes so good wrapped in corn tortillas

    Slow cooked Mexican beef taco
    Dig in!

    If you like these shredded beef tacos, you might like to try some of these recipes too...

    Easy homemade chilli con carne
    Camping burritos
    Grilled fish tacos
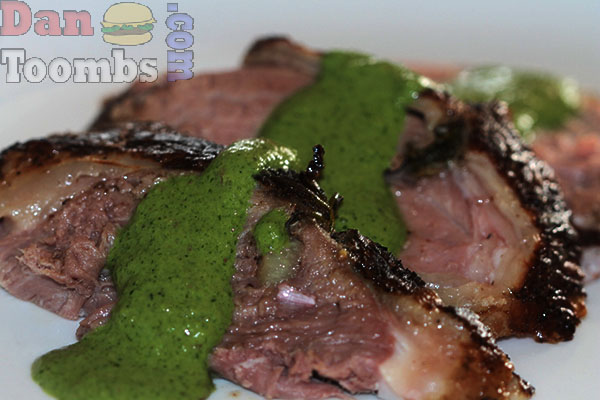
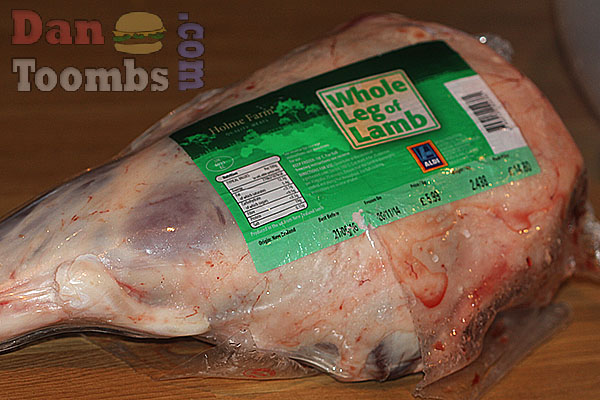
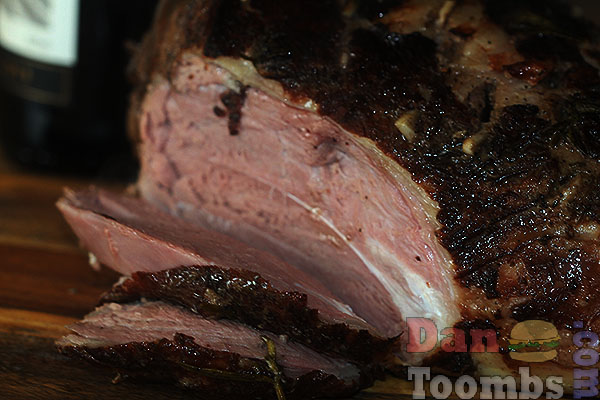
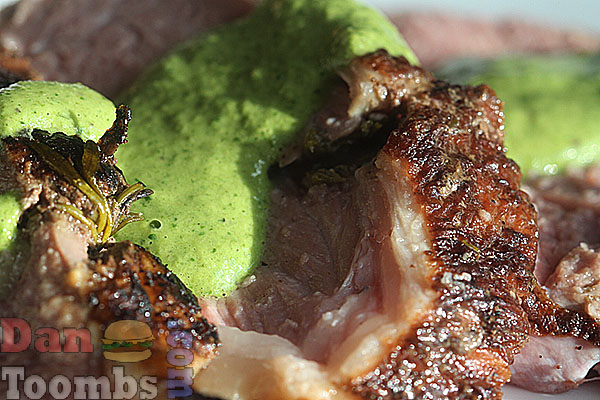
    Roast leg of lamb with chimichurri sauce
    Easy salsa recipe
    Homemade Pico de gallo
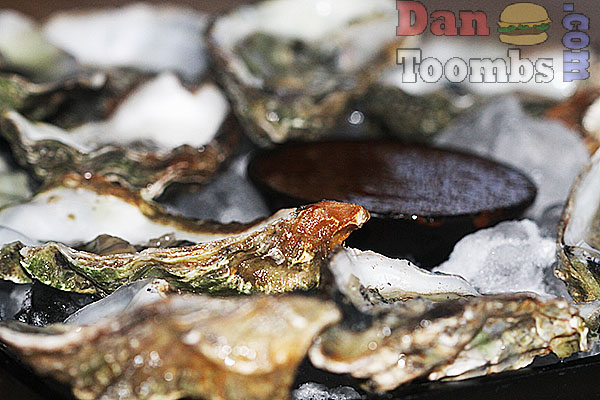
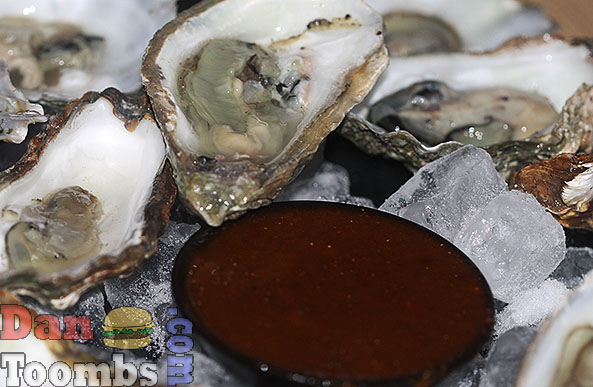
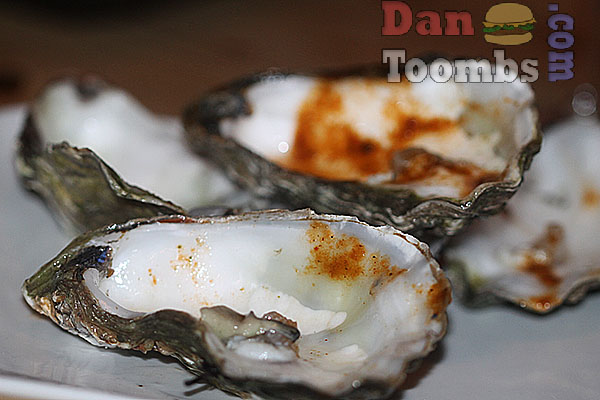
    Raw oysters with chipotle and lime sauce

    Recipe

    Slow Cooked Mexican Shredded Beef Tacos

    Slow Cooked Mexican Shredded Beef Tacos

    Yield: 6
    Prep Time: 30 minutes
    Cook Time: 7 hours
    Total Time: 7 hours 30 minutes

    Ingredients

    • 1 x 1400g topside joint
    • 3 tablespoons olive oil
    • 3 tablespoons achiote paste (recipe below)
    • 5 cloves garlic - finely chopped
    • 1 large onion - finely chopped
    • 400ml chopped tomatoes
    • 2 chilli peppers slit lengthwise down the centre
    • 500ml water or beef stock
    • 2 tablespoons ground cumin
    • 2 tablespoons oregano (preferably Mexican oregano)
    • Salt and freshly cracked pepper to taste

    Instructions

    1. Pre-heat your oven to 150c (300f)
    2. Start by making your achiote paste.
    3. Place about ½oz of achiote seeds in a spice grinder and grind to a fine powder.
    4. Add 2 tablespoon of white wine vinegar and blend to a paste.
    5. Add 3 cloves garlic and blend.
    6. Rub the topside with the achiote paste, salt and pepper, oregano and cumin.
    7. In a heavy bottomed saucepan that has an oven proof lid, heat the oil over medium high heat and brown the beef topside all over
    8. Once browned, add the onions and let them fry in the oil for about three minutes.
    9. Add the garlic, tomatoes, chilli peppers and stock and then cover.
    10. Place in the oven and cook for about 30 minutes. Reduce the heat to 100c (200f) and allow to cook for six to seven hours turning the meat every now and then in the liquid.
    11. When ready, you will be able to easily break the meat apart and shred it. The sauce will reduce during cooking into a thick sauce.
    12. Stir the shredded beef into the sauce and serve wrapped in lightly fried corn tortillas or soft white flour tortillas.
    13. Top with sour cream, pico de gallo salsa, guacamole and/or grated cheese to make your tacos amazing.
    © Dan Toombs
    Cuisine: Mexican


    I hope you enjoy these shredded beef tacos. If you do try this recipe, please leave a comment. I'd love to hear from you.

    How to Make Pico de Gallo

    February 2, 2015 By Dan

    Pico de gallo in a serving bowl next to homemade corn chips.

    If there’s one condiment I never tire of making – and eating – it’s pico de gallo. This classic Mexican salsa, also known as salsa fresca, is a staple at my house whether I’m cooking tacos, grilling steak, or just snacking with tortilla chips. It’s fresh, punchy, and incredibly easy to throw together. Like many great things in cooking, the magic is in the simplicity.

    Today I’m going to walk you through how to make proper pico de gallo, how to tweak it to your taste, and where it shines best. Whether you’re new to this salsa or a longtime fan, I think you’ll love my take.

    Pico de gallo in a serving bowl next to homemade corn chips.

    What Is Pico de Gallo?

    Let’s start with the basics. Pico de gallo translates to “rooster’s beak” – nobody knows exactly why, though one theory is that it was traditionally eaten by pinching bits with the thumb and forefinger, like a beak.

    Unlike smooth, blended salsas, pico de gallo is all about the chop. It’s a raw, chunky mix of tomatoes, onions, chillies, coriander (cilantro), lime juice, and salt. That’s it. No cooking. No fuss. It’s the kind of thing that comes together in minutes but can totally transform a dish.

    The Ingredients Matter – Keep Them Fresh!

    With such a short ingredient list, every element needs to pull its weight. Here’s what I use:

    • Tomatoes – Ripe, juicy tomatoes are key. I prefer vine-ripened or plum tomatoes with lots of flavour. If they’re too watery, just scoop out the seeds.
    • Onion – I use white onion for that crisp, clean bite, but red onion works if you want a slightly sweeter touch.
    • Fresh chillies – Serranos or jalapeños are ideal. Want it spicier? Leave in the seeds. Want it milder? Scrape them out.
    • Coriander (cilantro) – A handful of chopped fresh cilantro (coriander) brings everything to life.
    • Lime juice – Always fresh. Bottled lime juice won’t cut it.
    • Salt – Just enough to balance and lift the flavours.

    Optional but recommended: a little minced garlic and a splash of Mexican beer. One or two tablespoons takes it all up another level. At least in my opinion.

    Ingredients

    There aren't a lot of ingredients so be sure to get the freshest you can find. There are many different versions of pico de gallo but these are the ingredients that go into mine.

    Ingredients for the salsa recipe.
    • Tomatoes
    • Onion
    • Jalapeños
    • Cilantro (coriander)
    • Garlic
    • Salt
    • Lime juice
    • Beer

    See recipe card for quantities.

    Step by step photographs

    Making pico de gallo is super easy. Check out my step by step instructions below.

    Chopping the tomato.
    1. Step 1: Slice through the tomatoes and remove most if not all of the seeds. You don't want a lot of that excess liquid, especially if you are adding a drop or two of beer at the end.
    Dicing the tomatoes and chilies.
    1. Step 2: Dice the tomatoes, chilies and onion. How small you dice is up to you and your personal preference.
    All of the ingredients for the pico de gallo in a mixing bowl.
    1. Step 3: Add all of the ingredients except the beer and salt to a mixing bowl.
    Stirring the ingredients together. Then adding salt and beer to taste.
    1. Step 4: Stir it all up to combine. At this stage you can season the salsa with salt to taste and add a drop of beer if you like. Look at it and taste it. Decide if you need to adjust it in any way. More chilies, onion, tomato, salt...
    Pico de gallo in a serving bowl.
    1. Step 3: That's it! Enjoy.

    Why You'll Love Pico de Gallo

    Pico de gallo isn’t just a recipe – it’s a technique. A way to take simple ingredients and create something vibrant, healthy, and incredibly satisfying. It doesn’t need cooking, doesn’t need gadgets, and yet it packs more flavour than most sauces simmered for hours.

    It’s a reminder of how great ingredients, treated with care, can make magic on a plate.

    Variations

    Pico de gallo is endlessly adaptable. Once you’ve got the basic version down, try some of these:

    • Pineapple pico – Add diced fresh pineapple for a sweet contrast (great with grilled pork).
    • Avocado pico – Stir in diced avocado just before serving.
    • Mango pico – Swap in ripe mango for a tropical twist.
    • Roasted corn pico – Mix in some charred corn kernels for smoky-sweet goodness.

    Equipment

    All you need is a good mixing bowl, a sharp knife and a spoon. This recipe is simple!

    Storage

    It's best to let pico de gallo chill in the fridge for about 30 minutes before serving.

    If you have any leftover, it will keep in an airtight container in the fridge for 2 to 3 days. It's best to serve it on the day you make it though.

    Final Thoughts

    If you’re into Mexican food – or even if you’re just looking for a way to bring some zing and freshness to your meals – this is a recipe worth learning by heart. Keep some in the fridge, and you’ll always have a bright, delicious sidekick ready to go.

    And if you make it your own, let me know! I always like to hear about creative spins on the classics.

    Top Tip

    Double this recipe – Trust me, it disappears quickly. I always regret not making more.

    FAQ

    Is pico de gallo spicy?

    It can be as spicy or mild as you want to make it. There are no rules. If you like it spicier, use more chilies. If you like it mild, used fewer.

    Which chilies are best for pico de gallo?

    Jalapeño or serrano chilies are the most common. You could use other chilies if you like.

    Related

    Once you've mastered pico de gallo, you might like to try some of these too.

    • Fnished corn chips
      Corn Chips
    • Homemade Guacamole in a serving bowl next to corn chips.
      Guacamole Recipe
    • Salsa
      Easy Salsa Recipe
    • The finished dish
      Creamy Salsa for Fish

    Recipe

    Pico de gallo in a serving bowl next to homemade corn chips.

    Pico De Gallo - Delicious Salsa

    Yield: 6
    Prep Time: 10 minutes
    Total Time: 10 minutes

    Pico de gallo is not only one of the easiest Mexican salsas to make, it's also one of the most delicious. This recipe will get you restaurant quality results. No need to go out and purchase pico de gallo when it's so easy to make at home!

    Ingredients

    • 3 fresh medium sized tomatoes - cut into small cubes
    • 1 small onion - finely chopped
    • 1 - 3 green jalapeños, finely chopped
    • 1 small bunch fresh cilantro (coriander), finely chopped
    • 2 cloves garlic, finely chopped
    • Juice of one lime
    • A splash of Mexican beer (optional)
    • Salt to taste

    Instructions

    1. Place all of the ingredients except for the beer, if using and salt in a mixing bowl and stir together.
    2. Add a drop of beer, if using and season with salt to taste.
    3. For best results, place in the fridge for about half an hour before serving.
    Nutrition Information:
    Yield: 6 Serving Size: 1
    Amount Per Serving: Calories: 21Total Fat: 0gSaturated Fat: 0gTrans Fat: 0gUnsaturated Fat: 0gCholesterol: 0mgSodium: 101mgCarbohydrates: 5gFiber: 1gSugar: 2gProtein: 1g
    © Dan Toombs
    Cuisine: Mexican / Category: Side Dish


    Linguini Vongole

    February 1, 2015 By Dan

    Linguini Vongole on a serving plate.


    Today, I’m sharing one of my all-time favourite Italian dishes: Linguine Vongole.

    If you’ve been following me for a while, you know I’m all about bold flavors, simple techniques, and recipes that make you look like a pro in the kitchen — without all the fuss.

    It’s quick. It’s easy. And it’s pure, seaside, Mediterranean magic on a plate.
    Whether you’ve had it in Italy or you’re trying it for the first time, this recipe will show you how easy it is to get restaurant-quality linguini and clams at home.

    Linguini Vongole on a serving plate.

    What is Linguini Vongole?

    Linguine Vongole (pronounced von-go-lay) simply means linguine pasta with clams.
    It’s a dish that’s all about fresh, simple ingredients coming together perfectly:
    al dente pasta, briny clams, garlic, white wine, olive oil, and a good sprinkle of parsley.

    Done right, it tastes like sunshine, sea air, and Italian holidays — all in one bite.

    And the best part? It cooks in about the same time it takes to boil the pasta. Try this with a side of broccoli salad or fried cauliflower.

    Ingredients

    To make the perfect linguini vongole, you only need about 30 minutes and a few ingredients.

    The ingredients for the recipe laid out on a counter top.
    • linguine pasta (or spaghetti if you prefer)
    • frozen or fresh clams
    • extra virgin olive oil
    • garlic
    • dried chili flakes
    • dry white wine
    • flat-leaf parsley
    • Zest of 1 lemon (optional)
    • Salt and black pepper
    • butter
    • splash of pasta cooking water

    See recipe card for quantities.

    Step by step photos

    Check out my step by step photos below and see just how quick and easy it is to make and authentic and easy linguini vongole.

    Cooking the linguini in a large pot of salted water.
    1. Step 1: Bring a big pot of salted water to the boil. Add your linguine and cook just shy of al dente. That’s about 1–2 minutes less than the packet says.
    Frying the garlic and dried chilies in olive oil.
    1. Step 2: While the pasta's cooking, heat the olive oil in a large pan over medium heat. Add the sliced garlic and chili flakes.

    Adding the wine and clams to the pot.
    1. Step 3: Now turn the heat up to medium-high and stir in the wine and clams.
    Covering the pot of clams with a lid to steam for 3 to 4 minutes
    1. Step 4: Cover with a lid and steam for 3–5 minutes, shaking the pan occasionally, until the clams open up. Discard any clams that stay closed after cooking.

    The cooked clams in the pan.
    1. Step 5: When the clams open, turn the heat to low. I usually remove about half of the clams from the shells to make them easier to eat and leave the rest intact.
    Scooping up some of the cooking water before draining the pasta.
    1. Step 6: Just before the pasta is ready, be sure to scoop up some of the cooking liquid which can be added to your linguini vongole after adding the pasta.

    Adding the drained pasta, lemon zest and the clams that are out of the shell.
    1. Step 7: Add your drained pasta straight into the pan with the clams that you remove from the shell and the lemon zest.
    Tossing the pasta into the sauce.
    1. Step 8: Add the butter and toss everything together really wellfor about 60 seconds, letting the pasta soak up all that garlicky, winey sauce. If the sauce looks a little dry, splash in some reserved pasta water to loosen it up.

    Seasoning with salt and pepper to taste and garnishing with the chopped parsely.
    1. Step 9: Season with salt and pepper to taste and plate it up. Garnish with the chopped parsley.

    The 5 Most Common Mistakes When Making Linguini Vongole... and how to avoid the

    Overcooking the Clams

    Nothing ruins a great vongole faster than rubbery, overcooked clams.
    They only need 3–5 minutes tops — just until they pop open.
    Once they’re open,

    Overcooking the Pasta

    Linguine should be al dente — meaning it still has a bit of bite to it.
    Remember, the pasta will finish cooking for a minute or two when you toss it with the clams and sauce.
    If you boil it all the way in the pot, you’ll end up with mush.

    Equipment

    Large Pot for Boiling Pasta: You’ll need a big pot with plenty of salted water to give the linguine space to move around and cook evenly. Pasta likes lots of room. Cramped pots lead to clumpy pasta!

    Large, Deep Pan or Sauté Pan with a Lid: This is for cooking the clams and tossing everything together at the end. You want a pan that’s wide enough to fit the clams in a single layer and deep enough to toss the pasta and sauce together.

    Colander or Pasta Strainer: You’ll need to drain the pasta — but remember to save a cup of the cooking water first!

    Tongs or Pasta Fork:
    Tongs are perfect for tossing the pasta and clams together without breaking anything up too much.

    A Small Bowl or Mug: Don’t forget this one! That reserved pasta water is key for making the sauce silky and helping it cling to the pasta strands.

    A Sharp Knife and Cutting Board: For chopping the garlic and lemon zest.

    A Small Brush (optional): If you’re using fresh clams, a little scrubbing brush is handy for giving the shells a quick clean before cooking. It’s not essential, but it does make the job easier and quicker.

    Storage

    Your linguini vongole will be best hot from the pan. If you do have leftovers, you can store them in your fridge for up to 3 days. To reheat, pour it into a pan over a medium heat and stir continuously until heated through.

    Top Tip

    Save a mug of pasta water before you drain it. That starchy water is liquid gold for your sauce.

    FAQ

    What type of wine should you use?

    Use a dry white wine — nothing too sweet.
    Pinot Grigio, Sauvignon Blanc, Verdicchio, or even a dry Vermentino are perfect.
    And remember: if you wouldn't drink it, don’t cook with it!
    A cheap, harsh wine will come through in the final dish.

    How do you ensure your clams aren't gritty?

    If you are using frozen clams, as they do at most restaurants, you won’t have this problem. If If you are cooking live fresh clams, soak them in salted water (about the salinity of seawater) for 30–60 minutes.This encourages them to spit out any grit trapped inside. After soaking, give them a good rinse under running cold water and scrub the shells if needed.
     

    Related

    For a light lunch, team this fried cauliflower with one of these.

    • Broccoli Salad on a serving plate.
      Broccoli Salad
    • Hot canned tuna recipe served up with vegetables and bread.
      Canned Tuna Recipe
    • Garlic soup in a serving bowl.
      Garlic Soup
    • Italian fried cauliflower with Anchovies and garlic in a frying pan.
      Italian Fried Cauliflower With Anchovies and Garlic

    Looking for a good main dish to go with your fried cauliflower?

    Try all of these. You'll love them!

    • All Italian burger finished
      The All Italian Burger
    • Ribeye steak with garlic butter served with loaded potato and broccoli
      Ribeye Steaks
    • The cooked fish on a serving platter drizzled with the herb mixture.
      Mediterranean Fish - Grilled
    • Bowl of chicken and chorizo risotto garnished with parsley
      Chicken and Chorizo Risotto
    • Finished asparagus risotto
      Asparagus Risotto
    • Steak Pizzaiola in the dish it was cooked in.
      Steak Pizzaiola
    • tomato and mascarpone pasta
      Tomato and Mascarpone Pasta
    • Homemade easy pesto pasta
      Easy Pesto Pasta
    • Homemade Tuscan chicken plated up
      Tuscan Chicken
    • gnocchi with brown butter and sage
      Gnocchi With Brown Butter And Sage
    • Italian Gnocchi Recipe
      Italian Gnocchi Recipe
    • homemade basil pesto
      Basil Pesto

    Recipe

    Seasoning with salt and pepper to taste and garnishing with the chopped parsely.

    Linguini Vongole

    Yield: 3 to 4
    Prep Time: 5 minutes
    Cook Time: 15 minutes
    Total Time: 20 minutes

    This is restaurant quality linguini vongole and you can make it in less than 30 minutes. If you like clam linguini, this is one you need to try soon.

    Ingredients

    • 500g (16 oz) linguine pasta (or spaghetti if you prefer)
    • 1kg (2.2 lb) frozen or fresh clams, cleaned and scrubbed
    • 4 tablespoon extra virgin olive oil
    • 5 cloves garlic, thinly sliced
    • 1 teaspoon dried chili flakes (optional)
    • ¾ cup (200ml) dry white wine
    • A good handful of fresh flat-leaf parsley, chopped
    • Zest of 1 lemon (optional but highly recommended)
    • Salt and black pepper, to taste
    • A knob of butter stirred in at the end
    • A splash of pasta cooking water, to help bind the sauce

    Instructions

    1. Bring a big pot of salted water to the boil.
    2. Add your linguine and cook just shy of al dente. That’s about 1–2 minutes less than the packet says.
      While the pasta's cooking, heat the olive oil in a large pan over medium heat. Add the sliced garlic and crushed chilli.
    3. Let it sizzle gently. You want it soft and fragrant, not browned.
    4. Now, crank up the heat, toss in the clams, and pour over the white wine.
    5. Cover with a lid and steam for 3–5 minutes, shaking the pan occasionally, until the clams open up. Discard any clams that stay closed after cooking.
    6. Add your drained pasta straight into the pan with the clams.
    7. Toss everything together really well, letting the pasta soak up all that garlicky, winey sauce.
    8. If the sauce looks a little dry, splash in some reserved pasta water to loosen it up.
    9. Stir in most of the chopped parsley and the lemon zest (if using).
    10. Taste and season with salt and freshly cracked black pepper
    11. Be careful though — clams are naturally salty, so you might not need much extra salt. Add the butter to melt into the pasta.
    12. Plate up your linguine vongole while it’s still steaming hot.
    13. Sprinkle over the remaining parsley, maybe another drizzle of good olive oil, and a final twist of black pepper.
    Nutrition Information:
    Yield: 4 Serving Size: 1
    Amount Per Serving: Calories: 287Total Fat: 18gSaturated Fat: 4gTrans Fat: 0gUnsaturated Fat: 13gCholesterol: 23mgSodium: 581mgCarbohydrates: 19gFiber: 3gSugar: 3gProtein: 9g
    © Dan
    Cuisine: Italian / Category: Italian

    Easy Salsa Recipe

    January 30, 2015 By Dan

    Salsa

    Salsa
    Try this easy salsa recipe. It's so good.

    I have so many salsa recipes that I'll be sharing with you in later posts. This easy salsa recipe the easiest of them all.

    It literally takes five minutes to make and tastes so much better than anything available at the supermarket.

    This easy salsa recipe is great served with tacos, corn chips, enchiladas or almost anything. Try it on eggs or on top of your next sirloin.

    You can adjust this easy salsa recipe to taste...

    I only used two chillies for this recipe. You could of course make it a lot spicier by adding more. That's what I do when the kids aren't around.

    I find that the best salsas are usually quite salty. Start with a little salt and then add more to taste.

    I also like to add a about 50ml of Mexican beer. Any pale lager will do really but as this is Mexican food, I go with a Mexican beer like Corona.

    Salsa
    All ready!


    Recipe

    Easy Salsa Recipe

    Easy Salsa Recipe

    Prep Time: 5 minutes
    Total Time: 5 minutes

    Ingredients

    • 400ml chopped tomatoes
    • 2 green and/or red chilli peppers
    • ½ onion - finely chopped
    • 2 cloves garlic
    • Juice of one lime
    • 1 small bunch of fresh coriander
    • 50ml beer
    • Salt to taste

    Instructions

    1. Place all of the ingredients in a food processor and blend until smooth. It should still be slightly chunky as pictured.
    2. Check for seasoning and add salt to taste.
    © Dan Toombs
    Cuisine: Mexican / Category: Side Dish


    Tuna Stuffed Peppers - Delicious Italian Snack

    January 30, 2015 By Dan

    Tuna stuffed peppers on a serving plate with olives, next to bread.

    Today I’ve got something a little different for you—but still right in that category of big flavor, simple prep, and maximum crowd-pleasing power. Let me introduce you to one of my absolute favourite party bites: Tuna Stuffed Peppers. Specifically, Peppadew peppers.

    Tuna stuffed peppers on a serving plate with olives, next to bread.

    What Are Peppadew Peppers?

    Peppadew is actually a brand name, originally from South Africa and hugely popular in Italy and other Mediterranean countries, known for its mildly spicy, sweet pickled red peppers. These things are magic in a jar.

    They’re:

    • Small and round (perfect for stuffing),
    • Sweet and tangy with just the right amount of heat,
    • Packed in a light vinegar brine that keeps them fresh and zippy.

    You can usually find them in jars in the pickles or deli section of your supermarket.

    [feast_advanced_jump_to]

    Ingredients

    If you like preparing Italian food, chances are you already have all of these ingredients on hand. If not, they are all very easily sources.

    The ingredients for the recipe on a counter top.
    • peppadew peppers
    • canned tuna
    • mayonnaise
    • brine from the peppadew peppers
    • capers
    • scallions (spring onions)
    • lemon juice
    • olive oil
    • Salt and pepper

    See recipe card for quantities.

    Step by Step Photos

    There isn't much to do for this tuna stuffed peppers recipe. Check out my step by step photos to see how easy it is to make this Italian classic.

    Placing all of the ingredients in a food processor except for the peppers.
    1. Step 1: Place all of the ingredients, except for the peppers in a food processor.
    Blending the stuffing ingredients until smooth.
    1. Step 2: Blend all of these ingredients until smooth.
    The peppers filled with the tuna mixture on a work surface.
    1. Step 3: Fill each of the peppers with the tuna mixture. I usually do this with the handle of a spoon as it's smaller and easier to fill the small peppers.
    The tuna stuffed peppers on a serving plate with olives.
    1. Step 4: Serve them up on their own or as part of a larger anti-pasta platter.

    Why Tuna?

    Because it works and beautifully so.

    You’ve got the sweet-tart kick of the Peppadews and the creamy richness of a good tuna mayo filling.

    Add a few pantry extras like capers, lemon zest, or herbs, and it becomes this incredibly moreish combo that punches way above its weight.

    It’s the kind of bite that makes you think, why am I not eating this every week?

    Why You’ll Love This Recipe

    Super versatile: Swap the tuna for chicken, feta, or even a veggie-friendly hummus mix.

    Quick and easy: 10 minutes flat, no stove required.

    Perfect make-ahead dish: Great for parties, picnics, and barbecues.

    Big flavours in small bites: Creamy, tangy, salty, and sweet — all in one mouthful.

    Variations

    Want to mix it up? Here are some simple ways to change the filling:

    No mayo version: Use Greek yogurt or cream cheese instead for a lighter feel.

    Mediterranean style: Add chopped black olives, sun-dried tomatoes, and crumbled feta to the tuna mix.

    Spicy version: Add harissa paste, sriracha, or chopped fresh chilli.

    Herby twist: Try fresh dill, chives, or basil for a different flavour profile.

    Equipment

    You don’t need much for this one:

    Serving platter

    A small mixing bowl or food processor

    Fork or spoon

    Small teaspoon or piping bag (for stuffing)

    Storage

    These keep well in the fridge for up to 2 days in an airtight container.

    Don’t freeze them — the mayo doesn’t hold up well.

    Top Tip

    Feel free to work up to 2 days ahead of cooking. Then you can just bring these out and watch how much people love them and beg you for the recipe.

    Related

    For a light lunch, team this fried cauliflower with one of these.

    • Broccoli Salad on a serving plate.
      Broccoli Salad
    • Hot canned tuna recipe served up with vegetables and bread.
      Canned Tuna Recipe
    • Garlic soup in a serving bowl.
      Garlic Soup
    • Italian fried cauliflower with Anchovies and garlic in a frying pan.
      Italian Fried Cauliflower With Anchovies and Garlic

    Looking for a good main dish to go with your fried cauliflower?

    Try all of these. You'll love them!

    • All Italian burger finished
      The All Italian Burger
    • Ribeye steak with garlic butter served with loaded potato and broccoli
      Ribeye Steaks
    • The cooked fish on a serving platter drizzled with the herb mixture.
      Mediterranean Fish - Grilled
    • Bowl of chicken and chorizo risotto garnished with parsley
      Chicken and Chorizo Risotto
    • Finished asparagus risotto
      Asparagus Risotto
    • Steak Pizzaiola in the dish it was cooked in.
      Steak Pizzaiola
    • tomato and mascarpone pasta
      Tomato and Mascarpone Pasta
    • Homemade easy pesto pasta
      Easy Pesto Pasta
    • Homemade Tuscan chicken plated up
      Tuscan Chicken
    • gnocchi with brown butter and sage
      Gnocchi With Brown Butter And Sage
    • Italian Gnocchi Recipe
      Italian Gnocchi Recipe
    • homemade basil pesto
      Basil Pesto

    Recipe

    Tuna stuffed peppers on a serving plate with olives, next to bread.

    Italian Tuna Stuffed Peppadew Peppers

    Yield: 8
    Prep Time: 25 minutes
    Total Time: 25 minutes

    These tuna stuffed peppers could not be easier to prepare. They are packed with flavor and sure to impress as a snack or part of an Italian anti-pasta platter.

    Ingredients

    • 1 x 400g bottle of peppadew peppers
    • 2 tins of tuna
    • 3 tablespoons mayonnaise
    • 2 tablespoons of the brine from the peppadew peppers
    • 10 capers
    • 2 spring onions - finely chopped
    • 2 tablespoons lemon juice
    • 2 tablespoons olive oil
    • Salt and pepper to taste

    Instructions

    1. Place all of the ingredients except for the peppadew peppers, salt and pepper in a food processor.
    2. Blend until the tuna is smooth but be careful not to over process.
    3. Check for seasoning and add salt and pepper to taste.
    4. Using a small spoon, fill each of the peppadew peppers with the tuna blend.
    5. If you have any leftover tuna, eat it. I don't like waste.
    Nutrition Information:
    Yield: 8 Serving Size: 1
    Amount Per Serving: Calories: 111Total Fat: 8gSaturated Fat: 1gTrans Fat: 0gUnsaturated Fat: 6gCholesterol: 12mgSodium: 336mgCarbohydrates: 4gFiber: 1gSugar: 2gProtein: 7g
    © Dan
    Cuisine: Italian / Category: Italian


    Guanciale Pasta & Artichokes

    January 30, 2015 By Dan

    Guanciale pasta with artichokes on a serving plate.

    I made up this guanciale pasta recipe because I love guanciale and artichokes. I haven’t ever tried any dish like it in Italy but pasta alla gricia is similar.

    This recipe has a few more ingredients and they all go very well together so I hope you enjoy it as much as my family did.

    Guanciale pasta with artichokes on a serving plate.

    About this guanciale pasta recipe

    This was a bit of an experiment because I wanted to use up some ingredients I had on hand. That’s kind of what this blog is all about. Unlike my curry blog, I wanted to bring you my family recipes, most of which can be prepared in less than 30 minutes.

    The guanciale is cooked in a similar way to how it is cooked in dishes in Italy. Low and slow is the key to success until the fat renders out of it and it becomes deliciously crunchy. Together with the artichoke hearts, I think this is a pasta I will be making many more times.

    Ingredients

    There really aren’t a lot of ingredients in this guanciale recipe.

    Ingredients for the recipe on a counter top.
    • Spaghetti
    • guanciale
    • Onion
    • Garlic
    • Artichoke hearts
    • Dry white wine
    • Salt and pepper to taste
    • Grated Parmesan

    See recipe card for quantities.

    Step by Step Photos

    Check out these step by step photos and see how easy it is to make this guanciale pasta.

    Frying the guanciale and then adding the onions to fry.
    1. Step 1: Slowly cook the guanciale over a medium heat until you have rendered all the fat and it turns crispy. Then add the chopped onions and fry for a further 5 minutes until soft and translucent.
    Cooking the pasta in salted water.
    1. Step 2: While the guanciale and onions are frying cook your pasta in a large pot of salted water. Cook the pasta al dente, about 2 minutes shorter than the instructions say on the packaging.

    Getting a bit of the cooking water out of the pot before straining the pasta.
    1. Step 3: Don’t forget to get about a cup of the cooking water out before straining the pasta. It’s liquid gold!
    Adding the artichokes and white wine.
    1. Step 4: Add the artichoke hearts and brown them some in the pan. If using fresh artichokes, you will need to cook them a bit longer until tender. Stir in the wine and bring it to a simmer to continue heating/cooking the artichokes through.

    Adding the strained spaghetti to the pan
    1. Step 5: Strain and then toss the pasta around in the pan for about a minute. This is really important to coat the pasta. If your pan is looking dry, add a little of the cooking water from the pasta.
    The finished guanciale pasta
    1. Step 6: After tossing the pasta all around in the pan for 60 seconds, it’s ready to serve. Season with salt and pepper to taste.

    Guanciale pasta on a serving plate, garnished with parsley and Parmesan cheese.
    1. Step 7: Garnish with chopped parsley and Parmesan to serve.

    What Is Guanciale?

    If you’re new to guanciale, you’re in for a treat. Guanciale (pronounced gwan-CHAH-leh) is an Italian cured meat made from pork jowl or cheek. It’s fattier than pancetta, has a stronger flavour, and renders into the most delicious, silky fat you could imagine. That fat is the foundation of many classic Roman pasta dishes.

    I first came across guanciale on a food trip through Lazio years ago, and honestly, I haven’t looked at bacon the same way since. It’s not smoked like bacon, and it’s not as lean as pancetta. It’s salty, savoury, and utterly indulgent.

    You can usually find it at Italian delis or good butchers – and trust me, it’s worth the hunt.

    Substitutions

    Although I hope you can try this with guanciale, you can substitute other cured meat. The only thing is, you will need to use a bit more oil. As the guanciale renders, you not only get the delicious crispy meat but that silky fat which is really the star of the show.

    • Pancheta - You can crisp pancheta up in a pan but it is a lot less fatty than guanciale and you will need to use more oil.
    • Bacon - Streaky bacon is a good substitute but like pancheta you will need to add more oil and the flavour will not be the same.
    • Vegetarian - Use vegetarian or vegan bacon if that’s your thing. That said, you will not come close to the flavor of guanciale and you might like to try one or our vegetarian pasta recipes instead.

    Why You’ll Love This Dish

    There’s something magical about the simplicity of this pasta. Four ingredients, one pan for the sauce and another for the pasta. This is a plate of food that feels both rustic and elegant. It’s the kind of dish I love making at the end of a long day – satisfying, quick, and rich without being too heavy.

    I think more than anything, I like cooking with simple ingredients that have been used for dishes like this for centuries.

    Equipment

    A large pot - This is for cooking the pasta. When cooking pasta, you want to cook it in a lot of water. Cramped pasta is sticky pasta. It needs to be able to swim around inside.

    A high side frying pan - This is to prepare the simple sauce. It needs to be large enough to toss the cooked pasta around in to coat it with the delicious sauce.

    Storage

    You can store leftovers, covered in the fridge for 3 to 4 days. To reheat, heat it up in a large pan over a medium heat until heated through.

    Although you can freeze it, I don’t recommend doing so with this recipe.

    Top Tip

    Don't rush the guanciale. Let it crisp gently – burning it ruins the flavor.

    Related

    Looking for a starter or side to go with guanciale pasta?

    • Broccoli Salad on a serving plate.
      Broccoli Salad
    • Hot canned tuna recipe served up with vegetables and bread.
      Canned Tuna Recipe
    • Garlic soup in a serving bowl.
      Garlic Soup
    • Italian fried cauliflower with Anchovies and garlic in a frying pan.
      Italian Fried Cauliflower With Anchovies and Garlic

    Looking for more delicious Italian dishes?

    Try all of these. You'll love them!

    • All Italian burger finished
      The All Italian Burger
    • Ribeye steak with garlic butter served with loaded potato and broccoli
      Ribeye Steaks
    • The cooked fish on a serving platter drizzled with the herb mixture.
      Mediterranean Fish - Grilled
    • Bowl of chicken and chorizo risotto garnished with parsley
      Chicken and Chorizo Risotto
    • Finished asparagus risotto
      Asparagus Risotto
    • Steak Pizzaiola in the dish it was cooked in.
      Steak Pizzaiola
    • tomato and mascarpone pasta
      Tomato and Mascarpone Pasta
    • Homemade easy pesto pasta
      Easy Pesto Pasta
    • Homemade Tuscan chicken plated up
      Tuscan Chicken
    • gnocchi with brown butter and sage
      Gnocchi With Brown Butter And Sage
    • Italian Gnocchi Recipe
      Italian Gnocchi Recipe
    • homemade basil pesto
      Basil Pesto

    Recipe

    Guanciale pasta on a serving plate, garnished with parsley and Parmesan cheese.

    Guanciale Pasta with Artichokes

    Yield: 4 to 6
    Prep Time: 10 minutes
    Cook Time: 20 minutes
    Total Time: 30 minutes

    Guanciale pasta with artichokes makes a delicious and fast weekday meal but it is also good enough for entertaining friends at the weekend. You can make this pasta in about 30 minutes. Just be sure not to rush the cooking of the guanciale. You want to render the fat out and also have a few crispy bits left.

    Ingredients

    • 16oz (500g) spaghetti
    • 7oz (200g) guanciale, diced small
    • 1 onion, finely chopped
    • 4 garlic cloves
    • 10 canned artichoke hearts, halved
    • ½ cup (125ml) dry white wine
    • Salt and pepper to taste
    • Grated Parmesan, to taste

    Instructions

    1. Slowly cook the guanciale over a medium heat to render the fat and make it crispy. Then add the chopped onions and fry for a further 5 minutes until soft and translucent.
    2. While the guanciale and onions are frying, cook your pasta in a large pot of salted water. Cook the pasta al dente, about 2 minutes shorter than the instructions say on the packaging.
    3. Don’t forget to get about a cup of the cooking water out before straining the pasta. It’s liquid gold!
    4. Add the artichoke hearts and brown them some in the pan. If using fresh artichokes, you will need to cook them a bit longer until tender. Stir in the wine and bring it to a simmer to continue heating/cooking the artichokes through.
    5. Strain and then toss the pasta around in the pan for about a minute. This is really important to coat the pasta. If your pan is looking dry, add a little of the cooking water from the pasta.
    6. After tossing the pasta all around in the pan for 60 seconds, it’s ready to serve. Season with salt and pepper to taste.
    7. Garnish with chopped parsley and Parmesan to serve.
    Nutrition Information:
    Yield: 6 Serving Size: 1
    Amount Per Serving: Calories: 540Total Fat: 2gSaturated Fat: 0gTrans Fat: 0gUnsaturated Fat: 1gCholesterol: 1mgSodium: 1324mgCarbohydrates: 51gFiber: 25gSugar: 5gProtein: 13g
    © Dan
    Category: Italian
    • « Previous Page
    • 1
    • …
    • 16
    • 17
    • 18
    • 19
    • 20
    • …
    • 24
    • Next Page »
    For Those About To Cook

    Welcome To For Those About To Cook

    We're a family-run food blog sharing brand-new recipes every week. From easy weeknight staples to indulgent weekend favorites. We're a team of five: Dan (The Curry Guy), Caroline, Joe, Shannon, and Jennifer, bringing you a wide variety of dishes inspired by Europe, the Mediterranean, the Americas, and more.

    This site focuses on Western-inspired recipes, while Eastern flavors are covered in depth over at greatcurryrecipes.net Between the two, you'll find everything you need to cook up something amazing so don't forget to subscribe!

    Subscribe

    Footer

    Contact Privacy Policy

    Subscribe for weekly updates!

    Subscribe
    ↑ back to top

    Copyright © 2024 For Those About to Cook