For Those About To Cook

  • Home
  • About Us
  • All Recipes
  • Subscribe
menu icon
go to homepage
  • Home
  • About Us
  • All Recipes
  • Subscribe
    • Facebook
    • Instagram
    • Pinterest
  • search icon
    Homepage link
    • Home
    • About Us
    • All Recipes
    • Subscribe
    • Facebook
    • Instagram
    • Pinterest
  • ×
    Home

    Homemade Flour Tortillas

    April 30, 2015 By Dan

    Homemade tortillas
    Homemade tortillas are amazing!


    Traditionally, flour tortillas are made using flour, water, salt and pork fat. For this recipe I used olive oil. It's much better for you.

    If you want to try the recipe the traditional way, use the same amount of rendered pork fat. Roast a piece of pork belly and use the oil from that. The pork belly meat tastes amazing in homemade soft tacos.

    Of course you could also purchase rendered pork fat at most supermarkets.

    Why make your own homemade flour tortillas

    You can of course purchase good quality flour tortillas almost every nowadays. If you like to cook though, you will prefer these. I promise.

    I like to cook the tortillas and serve them immediately. They are simply better that way.

    How to take this homemade flour tortilla recipe to the next level...

    Plain homemade flour tortillas are delicious but there are so many things you can do to them to really make them special.

    Try adding dried chilli flakes, cumin seeds, cilantro (coriander) and/or fresh green chillies for example.

    I love experimenting with this recipe and hope you try a few of your own ideas. 


    making tortillas
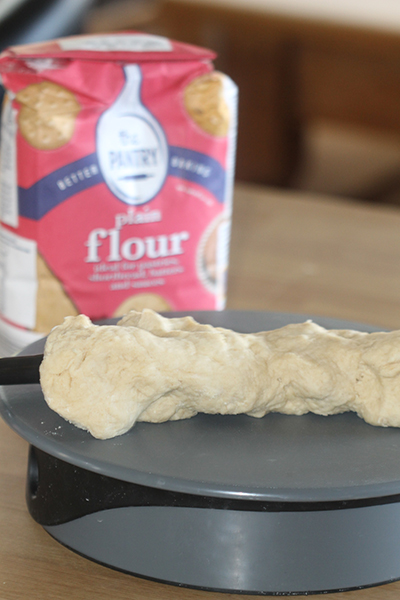
    The GitaDini rolling board is perfect for tortillas. The dough doesn't stick!
    Making tortillas
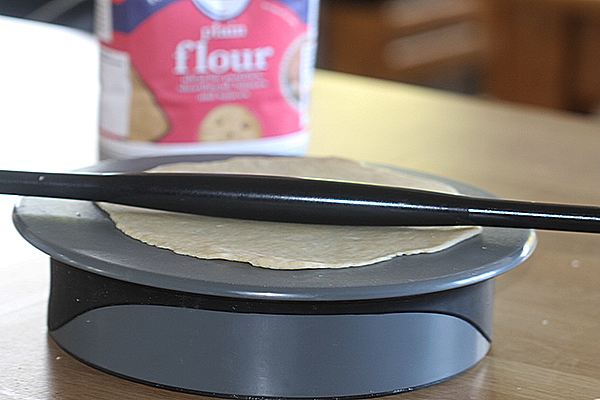
    Roll out your tortillas until they are about a millimetre thick.
    Making tortillas
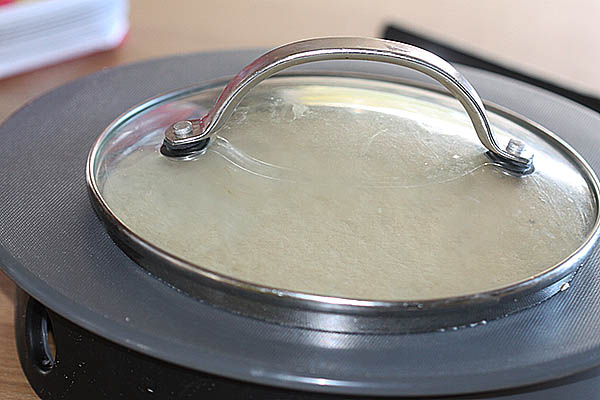
    I use the top to a pan to cut the tortillas so that they are nice and round.
    Making tortillas
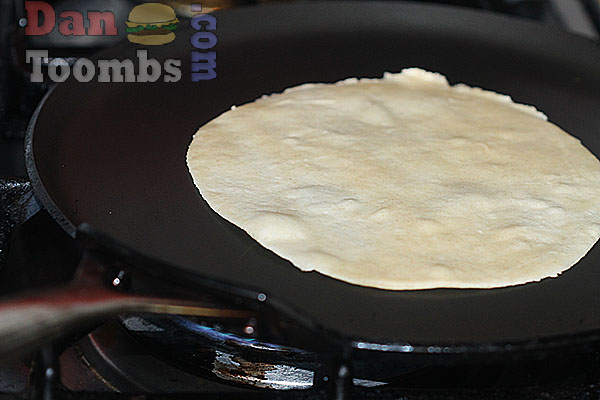
    Place your tortillas in a non-stick pan and cook for about a minute per side.
    Making tortillas
    After you have cooked both sides for about a minute, flip over one more time and press down with a flat spatula. They should puff up.

    Like this recipe? Try some of these! 

    Ceasar Salad
    Fish Tacos
    Shredded Beef Tacos
    Easy Salsa Recipe
     

    Recipe

    Homemade Flour Tortillas

    Homemade Flour Tortillas

    Yield: 8
    Prep Time: 10 minutes
    Cook Time: 15 minutes
    Total Time: 25 minutes

    Ingredients

    • 280g plain flour
    • 170ml warm water
    • 3 tablespoons olive oil
    • 1 teaspoon salt

    Instructions

    1. Mix all the ingredients together until you have a firm dough.
    2. separate the dough into eight ball.
    3. Roll each ball into a flat tortilla. I usually use a cutter to keep them round but that is completely optional.
    4. Heat a non-stick pan over medium high heat.
    5. When hot, add your first tortilla to the pan and let it cook for about a minute.
    6. Flip over and cook for another minute being careful not to burn it.
    7. Flip over again and press it down with a flat spatula or wet cloth. It should puff up with will give your tortillas a lighter, fluffier texture.
    8. Keep warm while you cook your remaining tortillas.
    9. If you are not eating these immediately, keep them under a towel or wrap in plastic wrap. Wet them lightly with some water and place in the microwave for about 30 seconds just before serving.
    © Dan Toombs
    Cuisine: Mexican / Category: Side

     I hope you enjoy making your own homemade flour tortillas. If you do give this recipe a try, please don't be a stranger! I'd love to hear from you so leave a comment. 


    Homemade Hamburger Buns

    April 25, 2015 By Joe

    Homemade burger buns

    These homemade hamburger buns are beautifully light and fluffy, so much better than anything you will find in the store. This recipe guides you step-by-step on how to make the best burger buns. There's nothing quite like the taste of freshly baked bread!

    Homemade burger buns

    For many years, we have been exploring How to make the best burger and it all starts with the buns. Homemade burger buns are an absolute must!

    This recipe for homemade hamburger buns will make 12-16 homemade hamburger buns. The number varies, depending on the size of the bun you are going for. A standard hamburger dough ball weighs around 3.5 ounces (100g) and this recipe allows you to make 12 that size. If you want to go smaller divide your dough into 16 equal size dough balls instead.

    [feast_advanced_jump_to]

    Ingredients for homemade hamburger buns

    It will be easy to source the ingredients for this recipe for homemade hamburger buns. Some grocery stores don't stock 00 flour but most do so you won't need to look far. Here is what you will need.

    Ingredients for homemade hamburger buns
    • Strong bread flour
    • All purpose flour
    • Sugar
    • Milk
    • Water
    • Dried yeast
    • Eggs
    • Fine salt
    • Olive oil
    • Sesame seeds

    See recipe card for quantities.

    Step by step photographs...

    Follow each step to this recipe for homemade hamburger buns and you will not fail. Here's what you need to do...

    Yeast activating with milk
    1. Step 1: To begin with, mix the warm milk and warm water together with the yeast and a tablespoon of the sugar. Let sit for 15 minutes until frothy just like you see in the photograph. Meanwhile, whisk the eggs for step two.
    Combining the wet and dry ingredients for homemade hamburger buns
    1. Step 2: In a bowl, combine the dry ingredients and add the wet ingredients including the whisked egg.
    Forming a dough
    1. Step 3: Mix together until it forms a dough. If you are doing this by hand and not in an electric mixer, the dough will be and needs to be slightly sticky at this point. Only add a small amount of extra flour, if needed, to manage this step.
    Kneading the dough
    1. Step 4: Knead for 10-15 minutes. This step is very important for fluffy hamburger buns. As mentioned in step 3, only add a touch more flour if you are doing this by hand. Enough for it to just be manageable.
    dough risen
    1. Step 3: Transfer to a greased bowl (1 tablespoon olive oil), Cover the dough with a damp cloth/towel and let it rise in a warm place for 1.5-2 hours.
    shaping the burger buns
    1. Step 4: Knock the dough back by using your fist to punch it down. Divide the dough into 12 equal pieces. Stretch the dough, folding underneath, aiming for no creases in the dough, then shape them into balls.
    perfectly smooth, round dough balls
    1. Step 3: Place onto a lined baking tray a couple inches apart. Cover loosely and let rise again for 45-60 minutes, until puffy.
    Brushing homemade hamburger buns with egg wash and topping with sesame seed
    1. Step 4: Pre-heat your oven to 400F/200C then evenly brush each bun with egg wash (1 egg with 1 tablespoon milk) Top with sesame seeds (if using)
    Homemade burger buns on cooling rack
    1. Step 3: Bake for 15-20 minutes until golden then place your homemade burger buns on a cooling rack.
    Homemade burger buns
    1. Step 4: The perfect hamburger buns!

    Hint: Make sure you follow each step and allow for two rises. The first after you have kneaded the dough and a second after you have shaped the buns.

    Variations of homemade hamburger buns

    This recipe for homemade hamburger buns will guide you on how to make the perfect buns. You can use this recipe as a guide and still vary it up a little. Here are some suggestions.

    • Classic white buns (without the sesame seeds)- Adding sesame seeds to this recipe is completely optional, I just prefer them. You can absolutely leave them out and still get perfect results!
    • Brioche buns - Depending on your filling, you might want to make brioche buns instead, they're sweeter than classic hamburger buns and pair perfectly with pulled pork and smash burgers! Follow this Brioche Burger Bun recipe.
    • Wholemeal - To make this recipe more wholemeal, switch out the plain flour for wholemeal flour. I recommend still using the strong bread flour.

    Be sure to check out this Brioche Hamburger Bun recipe for variation.

    Equipment for homemade hamburger buns

    This section highlights equipments that is either essential or especially helpfu the more common kitchen equipment.

    Electric Mixer and dough hook - I highly recommend using an electric mixer for this recipe. Although it is not needed, it helps make the mixing and kneading easier with the sticky dough required for this recipe. In each step I guide you through using a mixer, or by hand, so there's no 'knead' to worry!

    Measuring scales - Very important for accuracy.

    Large flat pan baking tray - This is important to make sure you leave enough room between each bun so that they do not merge together. You will see better (rounder) results.

    Storage

    For short term storage for your homemade hamburger buns, you can leave these buns out at room temperature, in an airtight container or a resealable plastic bag for 2-3 days. If you're storing for longer, I recommend freezing.

    Freezing - store individually wrapped or in a ziplock bag for up to 3 months. I recommend freezing them as soon as possible after baking and cooling.

    Top Tip

    After the first rise, knock the dough back with your fist, then leave in the fridge for a minimum of 4 hours or up to 24. This helps improve flavour and makes it a lot easier to handle when you're ready for the second rise.

    FAQ

    Why are my burger buns dense?

    This is likely because there was not enough kneading or they were not left to rise long enough. Make sure you knead for at least 10 minutes to develop gluten. If the dough is stiff, add a little more water and make sure you let the dough rise in a warm place.

    Can I make the dough the night before?

    Yes! I recommend this. Leaving the dough in the refrigerator after the first rise develops flavour and makes it easier to work with when shaping.

    Now time for the perfect burger?

    You've made the hamburgers buns, now time to fill them. Try these delicious recipes.

    • Karumura chicken served in the pan
      Karumura Chicken
    • Crispy threaded chicken served on a board and topped with garlic and curry leaves
      Crispy Threaded Chicken - Pottitherichath
    • Garlic dough balls served in a baking dish
      Garlic Dough Balls
    • Spicy vodka pasta served in a bowl and topped with basil
      Spicy Vodka Pasta

    Related:

    If you love hamburgers, then these American recipes will have your tastebuds dancing!

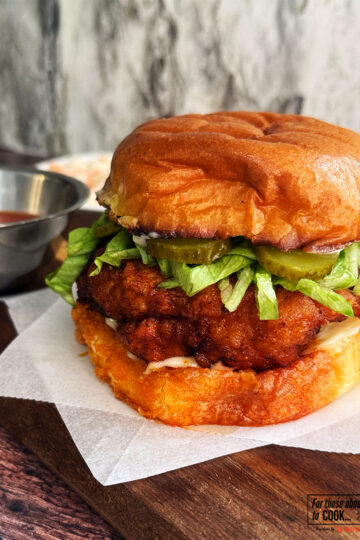
    • Nashville hot chicken burger served with hot sauce and topped with pickles and lettuce
      Nashville Hot Chicken Burger
    • Refried bean taquitos served with chipotle dip
      Refried Bean Taquitos
    • Philly Cheesesteak Recipe
      Philly Cheesesteak Recipe
    • Chipotle mayo served in a bowl
      Chipotle Mayo
    See more American →

    Recipe

    Homemade burger buns

    Homemade Hamburger Buns

    Yield: 12-16 buns
    Prep Time: 30 minutes
    Cook Time: 20 minutes
    Additional Time: 3 hours
    Total Time: 3 hours 50 minutes

    Make delicious homemade hamburger buns that are light, fluffy, and far better than store-bought options for your burgers.

    Ingredients

    • 6 cups strong bread flour
    • 1 ⅓ cup plain flour
    • 5 tablespoons sugar
    • 6 tablespoons warm milk
    • 2 cups (500ml) warm water (not too hot)
    • 4 ½ teaspoon (14g or two packets) dried yeast
    • 3 eggs
    • 3 teaspoons fine salt
    • Sesame seeds (optional)

    Instructions

    1. Start by combining the warm mil and warm water with the yeast and 1 tablespoon of the sugar. Cover and set in a warm place for about 20 minutes. The yeast will begin to foam.
    2. Now combine the flour, salt and remaining sugar in a large mixing bowl. Whisk the eggs and add these to the dry ingredients along with the yeast mixture.
    3. Combine and form into a sticky dough, then knead for 10-15 minutes, preferably with an electric mixer and a dough hook. If you are doing this by hand, add only a touch more flour, if needed, so that it is manageable.
    4. You will know when the dough is ready when you take a golf ball sized piece of dough out of the bowl and stretch it until you can see through the stretched dough.
    5. Cover the bowl and allow to rise for 1.5 -2 hours in a warm place. It should double in size.
    1. Punch it down and divide the dough into 12-16 hamburger buns shapes. Stretch and fold the dough underneath. You are aiming for super smooth dough balls.
    2. Place the burger buns on one or two baking paper lined baking trays and cover with a towel to rise for another 45 minutes to 1 hour.
    3. When you are ready to bake your hamburger buns, pre-heat your oven to 400F/200F.
    4. Whisk 1 egg with 1 tablespoon milk to create an egg wash. Brush each bun evenly with egg wash.
    5. If making sesame seed buns as I have here, sprinkle the buns just before placing in the oven.
    6. Bake for 15-20 minutes until the top of the buns are nicely browned and the bottom of the buns sound hallow when tapped.
    7. Place the cooked hamburger buns on a rack to cool slightly before slicing.
    Nutrition Information:
    Yield: 12 Serving Size: 1
    Amount Per Serving: Calories: 354Total Fat: 4gSaturated Fat: 1gTrans Fat: 0gUnsaturated Fat: 2gCholesterol: 47mgSodium: 554mgCarbohydrates: 67gFiber: 2gSugar: 6gProtein: 12g
    © Joe
    Cuisine: American / Category: How to make the best burger

    How To Make A Double Whopper With Cheese CopyCat Recipe

    April 25, 2015 By Dan

    Homemade Burger King Double Whopper With Cheese

    Homemade Burger King Double Whopper With Cheese
    My homemade BK Double Whopper with cheese copycat.


    This is a Double Whopper with Cheese copycat that you are unlikely to find at any BK restaurant. 

    Fast food burgers are simply better when you make them at home. Yes, the photos in the adverts for double whoppers with cheese do look really good but they don't look anything like what you actually get.

    I love copying well known burgers and other fast food meals too. You get to taste them as they should be.

    How to get this Whopper recipe just right...

    There's no point copying a recipes if you are just going to copy it. You may as well go out. 

    I like to up the score a bit and make my own soft hamburger buns. I also only use the best quality beef which in this case is a delicious blend of 80% chuck which naturally has as 80/20 beef to fat ratio and the rest is skirt. 

    The flavour of skirt is so good.

    To this mix, and this is optional, I add a few finely chopped pieces of beef marrow. The marrow and beef chuck give the burger a juiciness that far surpasses that of the real Whopper with cheese. 

    The Vegetables are also important...

    Use only the freshest tomatoes, onions and iceberg lettuce you can get your hands on. Take them crisp and cold from the fridge just before serving.

    Cooking...

    Originally, Whoppers were known for being flame grilled. I can still remember the days when they actually were. Does that make me old?

    Nowadays, the smoke flavoured burgers are simply taken out of the fridge, pre-cooked and then microwaved. That's no way to have a burger!

    Although you could cook you Whopper with cheese copycat burger in a pan, I recommend cooking them on the barbecue. That is how they should be. 

    I also made sure to use 100% real Cheddar Slices to top the grilled burgers. None of those processed cheese slices were going on my whopper with cheese! 

    There are times when a good processed cheese slice is perfect when copying a burger. In this case I wanted to up the score. 

    Be sure to stack your Whopper with ingredients in the exact order shown.


    Are you ready to get started making your Whopper with cheese copycat burger? You are going to love this one!

    Making a Homemade Whopper with cheese copycat
    Cook your burger patties to preferred doneness over high heat.


    Adding cheese to the beef patties
    Add the cheese after you flip your patties.


    Adding sauces to the burger
    Spread the mayonnaise over the top bun and place the burger patties on the bottom bun.


    Topping the Whopper with pickles
    Add the pickles.


    Making Homemade Burger King Whopper
    Squirt on the ketchup.


    Adding cold salad to Whopper with cheese copycat
    Then the onion slices.


    Making Homemade Burger King Whopper
    Set the tomato slices side by side.


    Topping burger with lettuce
    Top with shredded lettuce and your done!


    Making Homemade Burger King Whopper
    Dig in!

    If you like this recipe, you might like to try some of these too...

    Lancashire Hot Pot
    Pan Seared Sea Bass with Chorizo
    Nduja Pasta
    The Best Macaroni and Cheese Ever!

    Recipe

    How To Make A Double Whopper With Cheese

    How To Make A Double Whopper With Cheese

    Yield: 1
    Prep Time: 20 minutes
    Cook Time: 6 minutes
    Total Time: 26 minutes

    Ingredients

    • 2 x quarter pound beef patties pressed thinly and round (see above for my mix)
    • 1 sesame seed burger bun - about 6" diameter
    • 2 tablespoons butter
    • 2 tablespoons mayonnaise
    • 2 slices of 100% Cheddar deli slices
    • 2 slices of tomato
    • Dill pickle slices
    • Shredded lettuce
    • Onion slices
    • Ketchup
    • Salt and pepper to taste

    Instructions

    1. Heat a gas or charcoal BBQ until very hot. If using charcoal, you want the coals to be white hot.
    2. Start by preparing your bun. Toast your buns, sliced side down in a little butter until nicely browned.
    3. Spread the mayonnaise on the top bun.
    4. Now place your burger patties on the hot grill and cook for about two minutes. They should not take long to cook through as they are so thin.
    5. Season the burgers generously with salt and pepper and then flip them over.
    6. Top with the cheese slices and grill for a further couple of minutes.
    7. When cooked to your liking, place one patty on top of the other and transfer to the bottom bun.
    8. Top the cheese with the sliced pickles followed by three rings of ketchup.
    9. Now place the onion rings on top of the ketchup followed by the tomatoes (place side by side) and then the shredded lettuce.
    10. Eat!
    © Dan Toombs
    Cuisine: American


    German Beef Sauerbraten

    March 28, 2015 By Dan

    Making sauerbraten

    German beef sauerbraten
    It takes some time to make but this beef Sauerbraten is worth the wait.

    This beef Sauerbraten is authentic and really easy too.

    When I was working on my MA, I lived in Germany for two years. I was on a tight budget and didn't have much of a kitchen so nice meals were far and few between.

    The second year I was there, I was invited to a friend's house for the Easter holidays and his mother served this beef sauerbraten dish. I loved it and asked her for the recipe.

    She was more than happy to oblige.

    The key to success is to allow the meat to marinate for three days and to cook it really slowly. You'll need to turn it in the marinade from time to time.

    The great thing about this recipe is the marinade does all the work.

    You just need to make it and then cook the meat in a low oven for three to four hours until it is really tender.

    The recipe she gave me calls for a five pound beef rump joint. This is a meal for a crowd and serves eight. You could of course reduce the amount of meat used if serving fewer.

    I like to serve beef sauerbraten with homemade spätzle.

    Spätzle is a pasta that is popular in the southern Germany. I have a recipe for it here if you would like to try it. You could also use any good quality pasta.

    Making sauerbraten
    Sear the beef all over in the oil and then remove from the pan.

    Making sauerbraten
    Fry the onions, garlic and carrots and then stir in the marinade.

    Making sauerbraten
    Pour the sauce over the vegetables and add the brown sugar.

    Working ahead...

    As I mentioned above, this is the perfect dish for a crowd. It can and should be prepared a few days ahead of time.

    Just place the marinated beef in the oven a few hours before serving and you are in for a real treat!

    Making sauerbraten
    Place the beef back in the casserole and spoon the sauce over it. Cover and place in the oven.

    Making sauerbraten
    After about four hours, remove the beef from the sauce to stand for about 15 minutes and then carve.

    Making sauerbraten
    Meanwhile make your roux and then strain the sauce into it to from a slightly thickened sauce.

    Making sauerbraten
    Enjoy!

    Recipe

    German Beef Sauerbraten

    German Beef Sauerbraten

    Yield: 8
    Prep Time: 30 minutes
    Cook Time: 4 hours 30 minutes
    Total Time: 5 hours

    Ingredients

    • 4 - 5 lbs (2 - 2.5 kilos) beef rump, topside or silverside
    • 1 large onion - sliced thinly
    • 5 cloves garlic - skin on and smashed
    • 700ml red wine vinegar
    • 700ml water
    • 4 bay leaves
    • 5 cloves
    • 1 tablespoon black peppercorns
    • 2 tablespoon granulated sugar
    • 3 tablespoons vegetable oil
    • 4 tablespoon packed brown sugar
    • 2 large carrots - peeled and thinly sliced
    • 2 tablespoons unsalted butter
    • 2 tablespoons plain flour
    • A handful of raisons - finely chopped
    • Salt and pepper to taste

    Instructions

    1. Season the beef liberally all over with salt and pepper.
    2. Place the sliced onions at the bottom of a large glass bowl and set the beef on top.
    3. In another bowl, combine the vinegar, water, bay leaves, cloves peppercorns, garlic and granulated sugar.
    4. Pour this mixture over the beef and onions and cover to marinate for 3 to 4 days turning every 12 hours or so.
    5. When ready to cook, preheat your oven to 175c (350f).
    6. Remove the meat from the marinade and dry it all over.
    7. Strain the marinade into a bowl and keep the onion slices and smashed garlic.
    8. Heat the vegetable oil over high heat in a large pan and brown the meat all over. This will take about 20 minutes.
    9. Remove the meat and set aside.
    10. Now add the sliced onions and garlic from the marinade and the carrots to the pan and fry until soft and lightly browned. Be careful not to burn the garlic or it will become bitter.
    11. Pour the strained marinade over these vegetables and add the brown sugar, Simmer over a low heat for about 15 minutes.
    12. Place the beef in a large casserole dish, pour the onion sauce mixture over the top and cover with silver foil.
    13. Put this in the oven to cook for about four hours.
    14. When the meat is tender, remove it from the dish to stand for 15 minutes while you finish your sauce.
    15. In a small saucepan, melt the butter and whisk in the flour to form a roux.
    16. Continue stirring until roux becomes golden brown.
    17. Stain the sauce into the roux and whisk it until smooth.
    18. Check for seasoning and add salt and pepper to taste.
    19. Slice your meat and serve on heated plated topped with the sauce.
    © Dan Toombs
    Cuisine: German / Category: Main


    The stainless steel casserole used in the recipe was supplied free of charge by Le Creuset. It is the best I've ever used!

    Portuguese Pork With Paprika & White Wine Sauce

    March 28, 2015 By Dan

    Portuguese Pork recipe

    Pork doesn't get much better than this. I love the combination of pork with paprika and wine.

    Whether you are cooking for a large crowd or just one, this pork with paprika and white wine sauce is a delicious, simple recipe that is perfect for celebrating special occasions.

    Portuguese Pork recipe
    Pork with paprika and white wine! Dig in!


    There is a lot of sauce. I make the same amount when cooking for groups of people or just for my wife and myself. Any leftover sauce freezes well too.

    Then all you need to do the next time you make this recipe is defrost the sauce and go for it.

    As you can see from the photographs, this time I served the pork with paprika over polenta which was the way my parents always served it when I was growing up.

    The recipe is equally as good served with rice, pasta or crusty bread.

    Portuguese pork recipe ingredients
    Some of the ingredients you will need.

    Making Portuguese pork
    Blend the herbs, spices and garlic with a little water into a paste.

    Making Portuguese pork
    Heat the butter and then sizzle the anchovies until they become a paste.

    Making Portuguese pork
    Add the onions, long sweet red peppers and herb paste followed by the white wine.

    Making pork tenderloin
    Brown your pork tenderloins and lardons in a little olive oil.

    Portuguese pork
    The sauce should look like this before adding the meat.

    Making Portuguese pork
    Once browned, add the pork tenderloins to the sauce and cover.

    Making Portuguese pork
    Serve on a heated platter with rice, pasta or polenta.

    Making Portuguese pork
    This recipe is so easy and fuss free.

    Portuguese Pork
    All ready!

    If you like this recipe, you might like to try some of these too...

    Recipe

    Portuguese Pork Tenderloin With Paprika & White Wine Sauce

    Portuguese Pork Tenderloin With Paprika & White Wine Sauce

    Yield: 6
    Prep Time: 20 minutes
    Cook Time: 40 minutes
    Total Time: 1 hour

    Ingredients

    • 3 pork tenderloins
    • 4 tablespoons butter
    • 2 tablespoons flour
    • 3 sprigs of rosemary
    • 1 handful of fresh parsley
    • 1 tin of anchovies
    • 2 cups beef or chicken stock. Homemade is best but not essential.
    • 250ml dry white wine
    • 100ml white wine vinegar
    • 1 tablespoon cumin
    • 1 tablespoon paprika
    • 6 cloves garlic - skinned and roughly chopped
    • ½ Spanish onion - roughly chopped
    • 1 long sweet red pepper - roughly chopped
    • 2 tablespoons extra virgin olive oil
    • 125g lardons or bacon cut into small pieces
    • Salt and pepper to taste

    Instructions

    1. In a large pot, melt two tablespoon of butter and then add the anchovies.
    2. Move the anchovies around in the butter and break them up until they become a paste.
    3. Add the chopped onions and red pepper and fry until they become soft and the onion is translucent.
      Pour in the white wine and stock and simmer while you make your herb paste.
    4. Using a spice grinder or pestle and mortar, grind the parsley, rosemary, garlic, paprika and cumin into a paste with a little water. You could of course use a knife but it takes longer.
    5. Add this to the sauce and bring to a low simmer.
      In another pan heat the olive oil and brown your tenderloins all over. You may need to do this in batches.
    6. Add the browned tenderloins to the sauce, cover and simmer until cooked through. This should take about 20 minutes.
    7. Using the same pan you cooked your pork in, melt the remaining two tablespoons of butter.
    8. Add the flour and whisk into a paste. Add this to the sauce to thicken it.
    9. Just before serving add the vinegar and stir it in.
    10. Check for seasoning and add salt and pepper to taste.
      Carve the meat at the table and serve on warmed plates covered with the sauce.
    Cuisine: Portuguese
    I hope you enjoy this Portuguese pork tenderloin with paprika. If you do try it, pleas don't be a stranger! Leave a comment. I'd love to hear from you. 

    Seafood Pancakes with Lobster and Garlic Confit

    March 28, 2015 By Dan

    Lobster crêpe with garlic confit and tomato salsa

    Lobster crêpe with garlic confit and tomato salsa
    Seafood pancakes just don't get any better!

    Sometimes prepared lobster is easier and just as delicious as live.

    I received 500g of cooked lobster meat from my new friends at The Colchester Oyster Fishery.

    This was Canadian lobster which was caught in the Western Atlantic and it sure was good.

    The Canadian lobster fishery is the largest in the world and is divided into two districts, each with different seasons which enables fishermen to ensure a sustainable amount of lobsters without overfishing.

    From late Spring to early Autumn, The Colchester Oyster Fishery supplies lobster that is caught locally off the coast of Essex, Suffolk and Norfolk.

    Although I do prefer to cook my own live lobsters, I have to say the convenience of having the lobster arrive in this way was great! The meat was so sweet and tender.

    Perfect for these seafood pancakes!

    The forward preparation.

    To make this recipe as you see it in the photographs, you will need to follow this link to my crêpe recipe.

    You will also need to make my tomato salsa.

    The combination of flavours is out of this world. My wife even when so far as to say this is her favourite recipe of the year!

    I highly recommend The Colchester Oyster Fishery. If you are interested in making this lobster crêpe recipe or perhaps trying some of their delicious oysters as featured in this recipe, check out their site here.

    Lobster meat
    Lobster delivered cooked and ready to serve.

    Lobster meat
    This was enough to serve my family of five.

    Making garlic confit
    Making the garlic confit

    Lobster crêpes
    Top each crêpe with the warmed lobster pieces and garlic confit

    Making lobster crêpes
    Fold the crêpes around the lobster filling.

    Lobster crêpes
    Dig in!


    Recipe

    Crêpes Filled With Lobster & Garlic Confit

    Crêpes Filled With Lobster & Garlic Confit

    Yield: 6
    Prep Time: 10 minutes
    Cook Time: 40 minutes
    Total Time: 50 minutes

    Ingredients

    • 3 whole bulbs garlic - cloves skinned and roughly chopped
    • Juice of two limes
    • 500ml olive oil
    • 500g cooked lobster meat
    • 1 batch crêpe batter - link to my recipe above
    • 1 batch tomato salsa - link to recipe above
    • Salt and pepper to taste

    Instructions

    1. Start by making your garlic confit.
    2. Place the chopped garlic in a small saucepan and cover with the olive oil.
    3. Bring to a simmer over medium heat and cook for at least 30 minutes. Do not allow the garlic to brown. It should be soft but not at all browned.
    4. When ready, squeeze in the lime juice and season with a little salt and pepper.
    5. Make your tomato salsa as per my recipe link above.
    6. Chop up your lobster meat into small pieces put into the garlic confit oil to warm.
    7. Now make your crêpes (link to my recipe above).
    8. Fill each crêpe with some lobster and garlic and then fold over. Keep warm while you make the rest of the crêpes.
    9. Place on heated plates and top with a spoonful or two of the tomato salsa.
    © Dan Toombs
    Category: Main


    Disclaimer: I was sent the lobster free of charge by The Colchester Oyster Fishery to try in my recipes. The meat was magnificent. The crêpe pan used to make the crêpes was supplied by LeCreuset. It is the best I've ever used. All opinions are my own.

    How To Make Crêpes

    March 28, 2015 By Dan

    Making crêpes

    Crêpe recipe
    You are about to learn to make crêpes the authentic way!

    Want to learn how to make crepes? This recipe will get you fantastic results.

    Whether you want to learn how to make crepes or you want to make pancakes like a pro, this recipe is for you.

    Be sure to do it before Pancake day though. There's no excuse for substandard crepes or pancakes on Pancake day!

    Since my friends at Le Creuset sent me a non-stick crêpe pan to use in my recipes, I've been using it all the time.

    My kids love them. In fact they love them so much they asked me to teach them how to make crepes and I did.

    Sometimes we make them sweet but I prefer the savoury version. Crêpes are great on their own but I like to fill them with different things.

    A bacon and cheese filling is great for breakfast. If you want to go all out, try this lobster and garlic confit filled crêpe recipe. It makes a delicious starter or main course.

    For best results, be sure to use free range eggs and sift your flour. This will make a better batter.

    Working ahead...

    The batter can be made a day ahead of cooking. Many people find this much more convenient but the batter really doesn't take long to make.

    If you do make it earlier, be sure to whisk it well before cooking.

    Getting the perfect crepes...

    If you are new to crepe making, I can almost assure you that your first few crepes won't look great. It takes practice.

    I suggest doubling this recipe if this is your first go at this homemade crepe recipe. Practice makes perfect.

    By the time you are ready to start serving, you'll be making crepes like a pro!

    Making crêpes
    Whisk the milk, water and and eggs until smooth.

    Making crêpes
    Sift the flour, salt and sugar into a bowl and pour the milk and egg mixture in.

    How to make crêpes
    Whisk until you have a smooth batter.

    Making crêpes
    Cook in the pan until you can easily flip the crêpe. Then cook a little longer on the other side.

    Crêpe recipe
    Dig in!

    If you like this recipe, you might like to try some of these too...

    French Turbot and Sole Stew
    Dosa with minced lamb
    Dosa with onion and cheese

    Recipe

    How To Made Crêpes

    How To Made Crêpes

    Yield: 6
    Prep Time: 10 minutes
    Cook Time: 15 minutes
    Total Time: 25 minutes

    Ingredients

    • 250g plain flour
    • ½ teaspoon salt
    • 1 teaspoon sugar
    • 2 free range eggs
    • 400ml milk
    • Butter for frying

    Instructions

    1. Sift the flour, salt and sugar into a bowl.
    2. In another bowl, whisk the eggs, milk and water together.
    3. Pour the egg and milk mixture into the sifted flour and whisk until you have a smooth batter.
    4. Heat a crêpe pan over medium heat and coat with a little butter.
    5. Pour in enough batter to thinly and evenly cover the surface of the pan.
    6. Fry for about a minute or until the crêpe easily comes away from the pan.
    7. Flip over and cook for another minute.
    8. Continue until all the batter is used. Place finished crêpes between pieces of wax paper while you are making the rest of the crepes.
    © Dan Toombs
    Cuisine: French / Category: Main


    Disclaimer: I received the Le Creuset  crêpe pan free of charge for use in my recipes. I highly recommend getting one!

    I hope you enjoy this easy homemade crepe recipe. If you do try it, please don't be a stranger. Leave a comment. I'd love to hear from you.

    Roast Leg of Lamb With Chimichurri Sauce

    March 28, 2015 By Dan

    Roast leg of lamb with chimmicurri sauce

    Roast leg of lamb with chimichurri sauce
    Roast leg of lamb with chimichurri sauce

    I love lamb. Always have and this leg of lamb with chimichurri sauce just plain gets it!

    The Mexican chimichurri sauce is usually used on beef but I like it on lamb too with the addition of a few mint leaves.

    If you are looking for a roast leg of lamb recipe, this one definitely needs to be on your 'must try' list. 

    Forward preparation...

    Marinating the meat in a little of the chimichurri sauce overnight is a must. The meat  soaks up the flavours of the sauce and tastes fantastic.

    If you have a couple of days before cooking and serving, I suggest marinating the meat even longer.

    Cooking to perfection...

    I prefer roast leg of lamb rare but the rest of my family prefer it medium. They usually win that argument.

    For rare, cook until your meat thermometer reads 50c. That will be quite red. For medium, aim for 55 to 56c.

    I promise you, this is an excellent and colourful alternative to the more traditional leg of lamb Sunday dinner.

    Leg of lamb
    Aldi's leg of lamb was excellent value for money and delicious.

    Ingredients for chimichurri sauce
    The required fresh ingredients.

    chimichurri sauce
    Blend the chimichurri ingredients until smooth.


    Roast leg of lamb
    Cooked to medium or 56c.

    Roast leg of lamb with chimichurri sauce
    Dig in!

    chimichurri sauce
    It's always nice to serve loads of sauce at the table. It all goes!

    If you like this recipe, you might also like to try some of these...

    Portuguese pork with paprika and wine sauce
    Pan Seared Sea Bass
    Oysters with chipotle and lime sauce
    N'duja Pasta
    Seafood pancakes with lobster and garlic confit
     

    Recipe

    Roast Leg of Lamb With chimichurri Sauce

    Roast Leg of Lamb With chimichurri Sauce

    Yield: 4 - 6
    Prep Time: 10 minutes
    Cook Time: 1 hour 15 minutes
    Total Time: 1 hour 25 minutes

    Ingredients

    • FOR THE LAMB
    • 1 leg of lamb
    • 3 cloves garlic cut into thick slivers
    • 3 sprigs of rosemary
    • FOR THE CHIMICHURRI SAUCE
    • 1 large bunch of fresh coriander
    • 1 small bunch of parsley
    • 20 mint leaves
    • 100ml lime juice
    • 100ml red wine vinegar
    • 4 cloves garlic
    • ½ red onion - roughly chopped
    • 1 - 2 green chilli peppers
    • Salt and peppet to taste
    • 200ml olive oil

    Instructions

    1. Make about 30 small incisions into the lamb with a sharp knife and fill with the garlic slivers and rosemary.
    2. Make you chimichurri sauce by blending all of the ingredients in a blender until smooth.
    3. Rub about a quarter of the sauce into the meat and cover to marinate for about 24 hours. Cover the remaining sauce and store in the fridge until ready to use. It should be served at room temperature.
    4. When ready to roast your lamb, preheat your oven to 200c (400f).
    5. Place the marinated roast in the oven for about an hour to an hour and a half until cooked to your preferred doneness. Remember 50c for rare and 56 for medium.
    6. Remove the leg of lamb from the oven and allow to stand for 15 minutes before carving.
    7. Serve on heated plates with bowls of the chimichurri sauce to scoop over the meat.
    © Dan Toombs
    Cuisine: Mexican / Category: Main

     I hope you enjoy this roast leg of lamb recipe. If you do try it, please leave a comment. I'd love to hear from you. 


    Raw Oysters With Chipotle Chilli and Lime Dipping Sauce

    March 27, 2015 By Dan

    Colchester rock oyster

    Oyster with chilli chipotle sauce
    This whole recipe can be made in minutes.

    I love oysters and have as long as I can remember. Even as a kid, I was taught how to serve them raw and cooked with many different sauces.

    When serving raw, the oysters need to be ice cold and the sauce should complement but not overpower the flavour of the oyster.

    Raw oysters have different flavours depending on species and where they live, the water they filter, and how they're handled.

    The raw oysters I used were Rock Oysters or Crassostrea Gigas for you oyster connoisseurs out there.

    I have to say they are absolutely delicious. The oysters are firm and creamy with the flavour of salted butter, mushroom and minerals.

    If you can get your hands on some of this variety, I strongly recommend you do.  

    Their distinctive flavour comes from their habitat in the plankton rich waters off Mersey Island where they have been hand picked or dredged from the seabed since Roman times.

    Opening an oyster
    Using an oyster knife and holder to open an oyster.

    Preparing Your raw oysters

    If you have never prepared oysters before, I recommend getting an oyster knife and holder which makes the difficult task of opening the shells much easier.

    You'll get faster at it the more you do it. There are a lot of Youtube videos out there demonstrating how to easily open an oyster.

    So then... Let's talk sauce. Colchester rock oysters would be great on their own or with a simple squeeze of lemon.

    I decided, however to make a sauce which has been in my family for at least 50 years. It only takes minutes to make. If you are unfamiliar with chipotle paste, it is now available all over the UK.

    It has a smoky flavour and is quite spicy though I do consider this sauce to be mild in heat intensity.

    Colchester rock oysters
    Best served on ice.


    Colchester rock oysters
    This family recipe for chipotle lime sauce is one of my favourites.


    Colchester rock oyster
    Dig in!

    Colchester rock oysters eaten.
    Colchester rock oysters are magnificent.

    If you like this recipe, you might like to try some of these too...

    Crêpes filled with lobster and garlic confit
    Normandy Style Turbot and Sole Stew
    Spanish Seared Sea Bass

    Recipe

    Raw Oysters With Chipotle Chilli and Lime Dipping Sauce

    Raw Oysters With Chipotle Chilli and Lime Dipping Sauce

    Prep Time: 10 minutes
    Total Time: 10 minutes

    Ingredients

    • 12 rock oysters or the oysters of your choice
    • 125ml lime juice
    • 125ml white wine vinegar
    • 1 – 2 teaspoons chipotle paste (to taste)
    • 2 shallots – finely chopped
    • 1 teaspoon honey
    • Salt and pepper to taste
    • 3 tablespoons finely chopped coriander

    Instructions

    1. Place all of the ingredients except for the salt and pepper in a blender and blent until smooth.
    2. Season to taste with salt and pepper and chill in the fridge until ready to serve.
    © Dan Toombs
    Cuisine: Mexican / Category: Starter or main


    I hope you agree that this is the perfect way to enjoy raw oysters. If you do try the recipe, please don't be a stranger! Leave a comment. I would love to hear from you. 

    Normandy Seafood Stew with Turbot and Sole

    March 11, 2015 By Dan

    Turbot and sole fish stew

    Turbot and sole fish stew
    This seafood stew is great served with garlic bread.

    This time of year when it's cold and miserable out, there's nothing quite as nice as a good seafood stew made with the freshest ingredients you can find.

    That's exactly what I did last night with turbot and sole that had been caught earlier in the morning just a few miles from my home.

    This seafood stew recipe was my attempt at a delicious Normandy fish stews my wife and I had on a short break there last year. I am happy to say it was a complete success.

    I love turbot and sole and prefer not to cut them up when making a stew.

    Instead I leave the fillets whole. Cutting into the fresh fish fillets smothered in the creamy cider sauce just plain gets it.

    We served the seafood stew with garlic bread. You can't go wrong with garlic bread!

    Which Fish?

    I of course use turbot and sole. These fish are fantastic for making the stock. You could use other meaty fish such as monkfish, bass and bream. 

    Shellfish like mussels, prawns and clams also work well in the mix. That's why I did it. 

    If using prawns, be sure to order them with the shells and heads on. There is so much flavour in there. It would be a shame to waste it. 

    Just don't use oily fish such as salmon for the stock. 

    Working ahead...

    Seafood stock is always best used as soon as you can. It tends to lose flavour if kept too long. 

    That said, I often make the stock for this stew earlier in the day and then throw it all together just before serving. 

    Serving...

    Let's make this seafood stew perfect! There's no point making a delicious fish stew like this and then serving it in cold bowls.

    Be sure to heat them in a low oven for about 20 minutes just before serving. You'll be glad you did. 

    I like to serve the stew with lemons and chopped parsley which I serve at the table for people to add as they want. 


    Making Normandy Seafood Stew
    Just wanted you to see my amazing turbot. I cut it up before making the stock.

    Steaming mussels for the Stew
    Steaming the mussels in the fish and cider stock.

    Frying the veggies for the Stew
    Frying the leeks and onions

    Making fish stew
    Adding mushrooms and herbs.

    Making seafood stew Normandy style
    In go the prawns.

    Adding water/stock
    Pour in your cider fish stock.

    Making fish stew
    Press the fish fillets into the stock and cover. Simmer until cooked through.

    Cooking large chunks of fish like this really makes the soup.

    Fish should just be cooked through and not at all flaky. So be careful not to overcook it. 

    Making fish stew
    Add the cream and and mussel meat and  bring to a simmer.

    Normandy fish stew
    All done!

    If you like this recipe, you might also enjoy trying these...

    Pan seared sea bass with chorizo
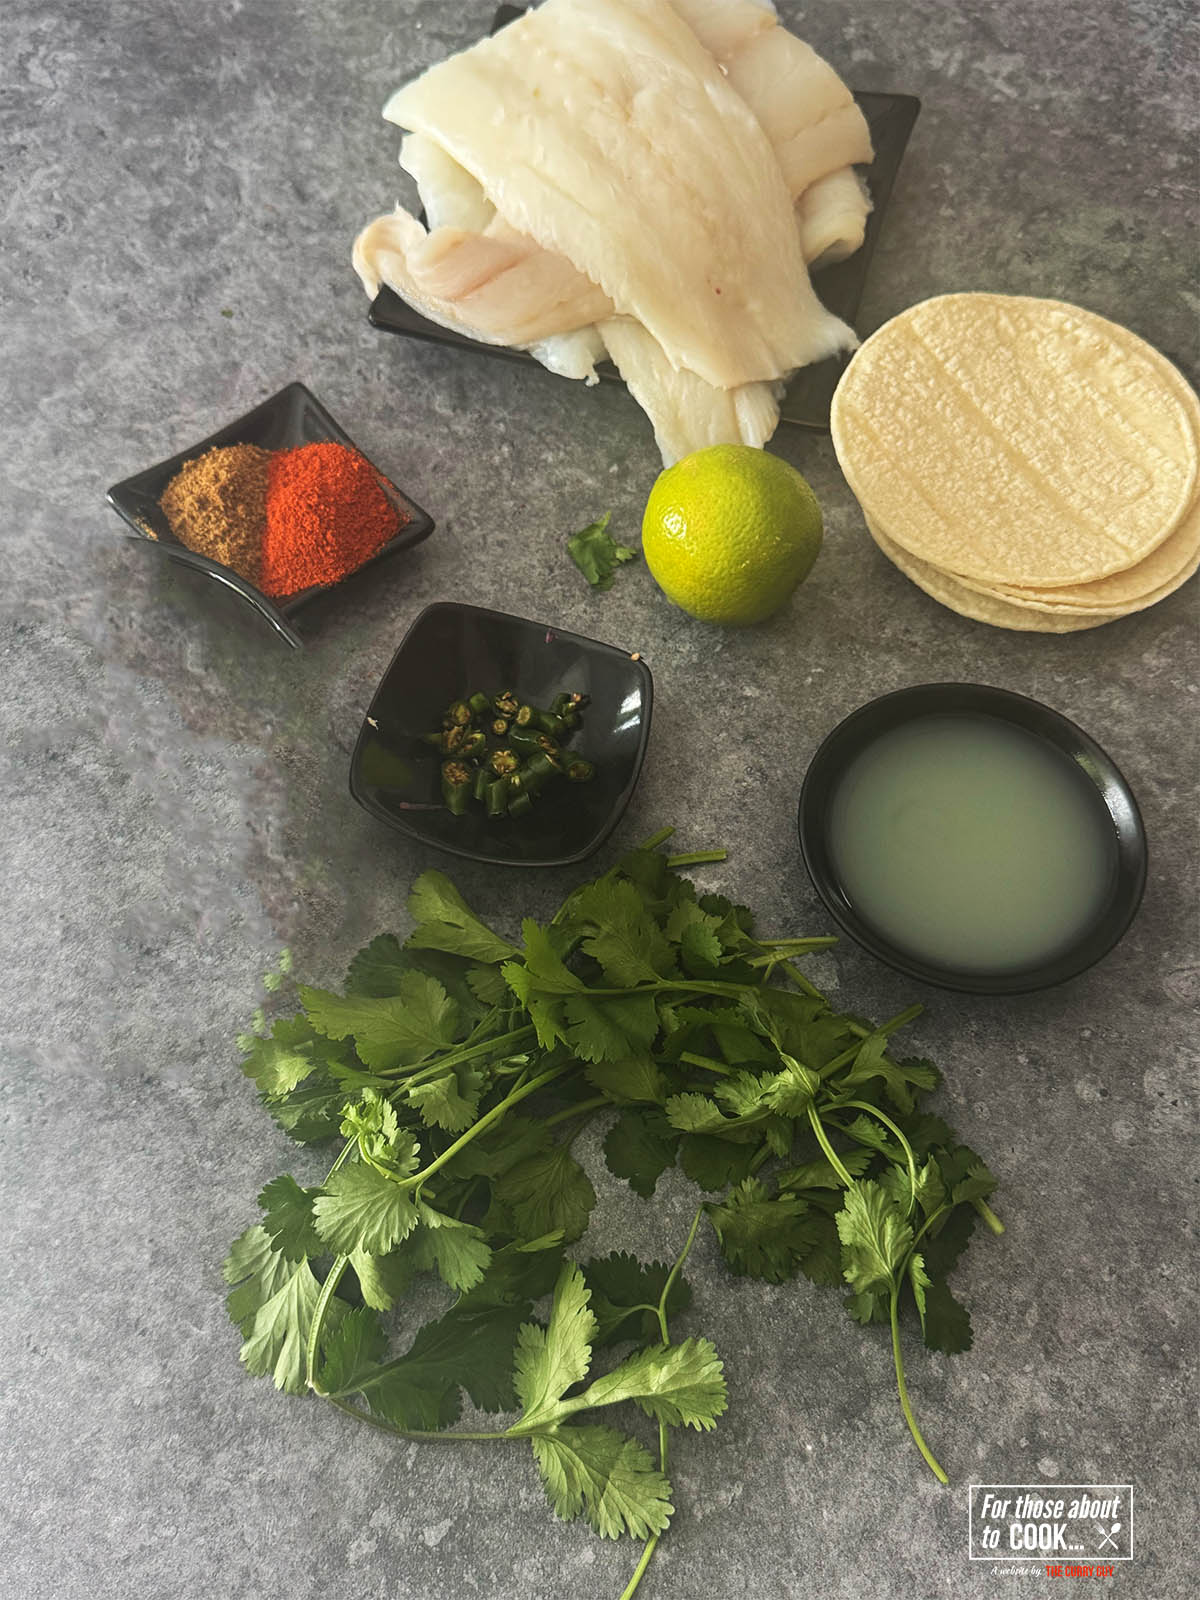
    Authentic Fish Tacos
    Seafood pancakes

    Recipe

    Fish Stew Normandy Style

    Fish Stew Normandy Style

    Yield: 6
    Prep Time: 15 minutes
    Cook Time: 50 minutes
    Total Time: 1 hour 5 minutes

    Ingredients

    • 1 large turbot - filleted - keep the bones
    • 400g lemon sole fillets - skinned
    • 300ml double cream
    • 4 tablespoons chopped parsley
    • 2 bay leaves
    • 1 tablespoons herb de provence
    • 300g small button mushrooms
    • 1 large leek - white part only - sliced thinly
    • 1 onion - finely chopped
    • 2 cloves garlic - smashed and chopped
    • 2 tablespoons butter
    • 500ml cider
    • 20 medium sized prawns
    • 20 mussels or clams

    Instructions

    1. Pour the cider into a large pot and place the turbon bones in it. Add about 200ml water and simmer for 20 minutes.
    2. Meanwhile, scrub your mussels and pull out the beards. Then devein the prawns.
    3. Place the mussels in the cider /fish stock and cover the pot. Steam them until the mussels open. Throw away any mussels that don't open.
    4. Take the steamed mussels out of the stock and remove the meat. Set aside.
    5. Now strain the fish stock into a large bowl and throw away the fish bones.
    6. Wipe your pot clean and throw the butter in.
    7. Melt the butter over low heat and add the sliced leeks and chopped onion.
    8. When the onion and leeks become soft, add the mushrooms and prawns and continue to fry until the prawns are about half way cooked and beginning to turn pink.
    9. Add the garlic and herbs de provence and allow to sizzle for about a minute.
    10. Now pour in your stock and bring to a simmer.
    11. Place the fish fillets in the hot stock and cover your pot. Steam the fish in the stock until cooked through. This should only take a few minutes.
    12. Add the cream and bring to a simmer.
    13. Serve when hungry for an amazing fish stew.
    © Dan Toombs
    Cuisine: French


    The wok and pot used to make this dish were supplied by my friends at Le Creuset. I used the wok for ease but this dish could really be made with the large cast iron pot on its own. Le Creuset cookware makes cooking a lot more fun!

    Le Creuset casserole dish

    I hope you enjoy this Normandy style seafood stew recipe. If you do try it, please leave a comment. I'd love to hear from you. 

    • « Previous Page
    • 1
    • …
    • 15
    • 16
    • 17
    • 18
    • 19
    • …
    • 25
    • Next Page »
    For Those About To Cook

    Welcome To For Those About To Cook

    We're a family-run food blog sharing brand-new recipes every week. From easy weeknight staples to indulgent weekend favorites. We're a team of five: Dan (The Curry Guy), Caroline, Joe, Shannon, and Jennifer, bringing you a wide variety of dishes inspired by Europe, the Mediterranean, the Americas, and more.

    This site focuses on Western-inspired recipes, while Eastern flavors are covered in depth over at greatcurryrecipes.net Between the two, you'll find everything you need to cook up something amazing so don't forget to subscribe!

    Subscribe

    Footer

    Contact Privacy Policy

    Subscribe for weekly updates!

    Subscribe
    ↑ back to top

    Copyright © 2024 For Those About to Cook