For Those About To Cook

  • Home
  • About Us
  • All Recipes
  • Subscribe
menu icon
go to homepage
  • Home
  • About Us
  • All Recipes
  • Subscribe
    • Facebook
    • Instagram
    • Pinterest
  • search icon
    Homepage link
    • Home
    • About Us
    • All Recipes
    • Subscribe
    • Facebook
    • Instagram
    • Pinterest
  • ×
    Home

    Tuna Stuffed Peppers - Delicious Italian Snack

    January 30, 2015 By Dan

    Tuna stuffed peppers on a serving plate with olives, next to bread.

    Today I’ve got something a little different for you—but still right in that category of big flavor, simple prep, and maximum crowd-pleasing power. Let me introduce you to one of my absolute favourite party bites: Tuna Stuffed Peppers. Specifically, Peppadew peppers.

    Tuna stuffed peppers on a serving plate with olives, next to bread.

    What Are Peppadew Peppers?

    Peppadew is actually a brand name, originally from South Africa and hugely popular in Italy and other Mediterranean countries, known for its mildly spicy, sweet pickled red peppers. These things are magic in a jar.

    They’re:

    • Small and round (perfect for stuffing),
    • Sweet and tangy with just the right amount of heat,
    • Packed in a light vinegar brine that keeps them fresh and zippy.

    You can usually find them in jars in the pickles or deli section of your supermarket.

    [feast_advanced_jump_to]

    Ingredients

    If you like preparing Italian food, chances are you already have all of these ingredients on hand. If not, they are all very easily sources.

    The ingredients for the recipe on a counter top.
    • peppadew peppers
    • canned tuna
    • mayonnaise
    • brine from the peppadew peppers
    • capers
    • scallions (spring onions)
    • lemon juice
    • olive oil
    • Salt and pepper

    See recipe card for quantities.

    Step by Step Photos

    There isn't much to do for this tuna stuffed peppers recipe. Check out my step by step photos to see how easy it is to make this Italian classic.

    Placing all of the ingredients in a food processor except for the peppers.
    1. Step 1: Place all of the ingredients, except for the peppers in a food processor.
    Blending the stuffing ingredients until smooth.
    1. Step 2: Blend all of these ingredients until smooth.
    The peppers filled with the tuna mixture on a work surface.
    1. Step 3: Fill each of the peppers with the tuna mixture. I usually do this with the handle of a spoon as it's smaller and easier to fill the small peppers.
    The tuna stuffed peppers on a serving plate with olives.
    1. Step 4: Serve them up on their own or as part of a larger anti-pasta platter.

    Why Tuna?

    Because it works and beautifully so.

    You’ve got the sweet-tart kick of the Peppadews and the creamy richness of a good tuna mayo filling.

    Add a few pantry extras like capers, lemon zest, or herbs, and it becomes this incredibly moreish combo that punches way above its weight.

    It’s the kind of bite that makes you think, why am I not eating this every week?

    Why You’ll Love This Recipe

    Super versatile: Swap the tuna for chicken, feta, or even a veggie-friendly hummus mix.

    Quick and easy: 10 minutes flat, no stove required.

    Perfect make-ahead dish: Great for parties, picnics, and barbecues.

    Big flavours in small bites: Creamy, tangy, salty, and sweet — all in one mouthful.

    Variations

    Want to mix it up? Here are some simple ways to change the filling:

    No mayo version: Use Greek yogurt or cream cheese instead for a lighter feel.

    Mediterranean style: Add chopped black olives, sun-dried tomatoes, and crumbled feta to the tuna mix.

    Spicy version: Add harissa paste, sriracha, or chopped fresh chilli.

    Herby twist: Try fresh dill, chives, or basil for a different flavour profile.

    Equipment

    You don’t need much for this one:

    Serving platter

    A small mixing bowl or food processor

    Fork or spoon

    Small teaspoon or piping bag (for stuffing)

    Storage

    These keep well in the fridge for up to 2 days in an airtight container.

    Don’t freeze them — the mayo doesn’t hold up well.

    Top Tip

    Feel free to work up to 2 days ahead of cooking. Then you can just bring these out and watch how much people love them and beg you for the recipe.

    Related

    For a light lunch, team this fried cauliflower with one of these.

    • Broccoli Salad on a serving plate.
      Broccoli Salad
    • Hot canned tuna recipe served up with vegetables and bread.
      Canned Tuna Recipe
    • Garlic soup in a serving bowl.
      Garlic Soup
    • Italian fried cauliflower with Anchovies and garlic in a frying pan.
      Italian Fried Cauliflower With Anchovies and Garlic

    Looking for a good main dish to go with your fried cauliflower?

    Try all of these. You'll love them!

    • All Italian burger finished
      The All Italian Burger
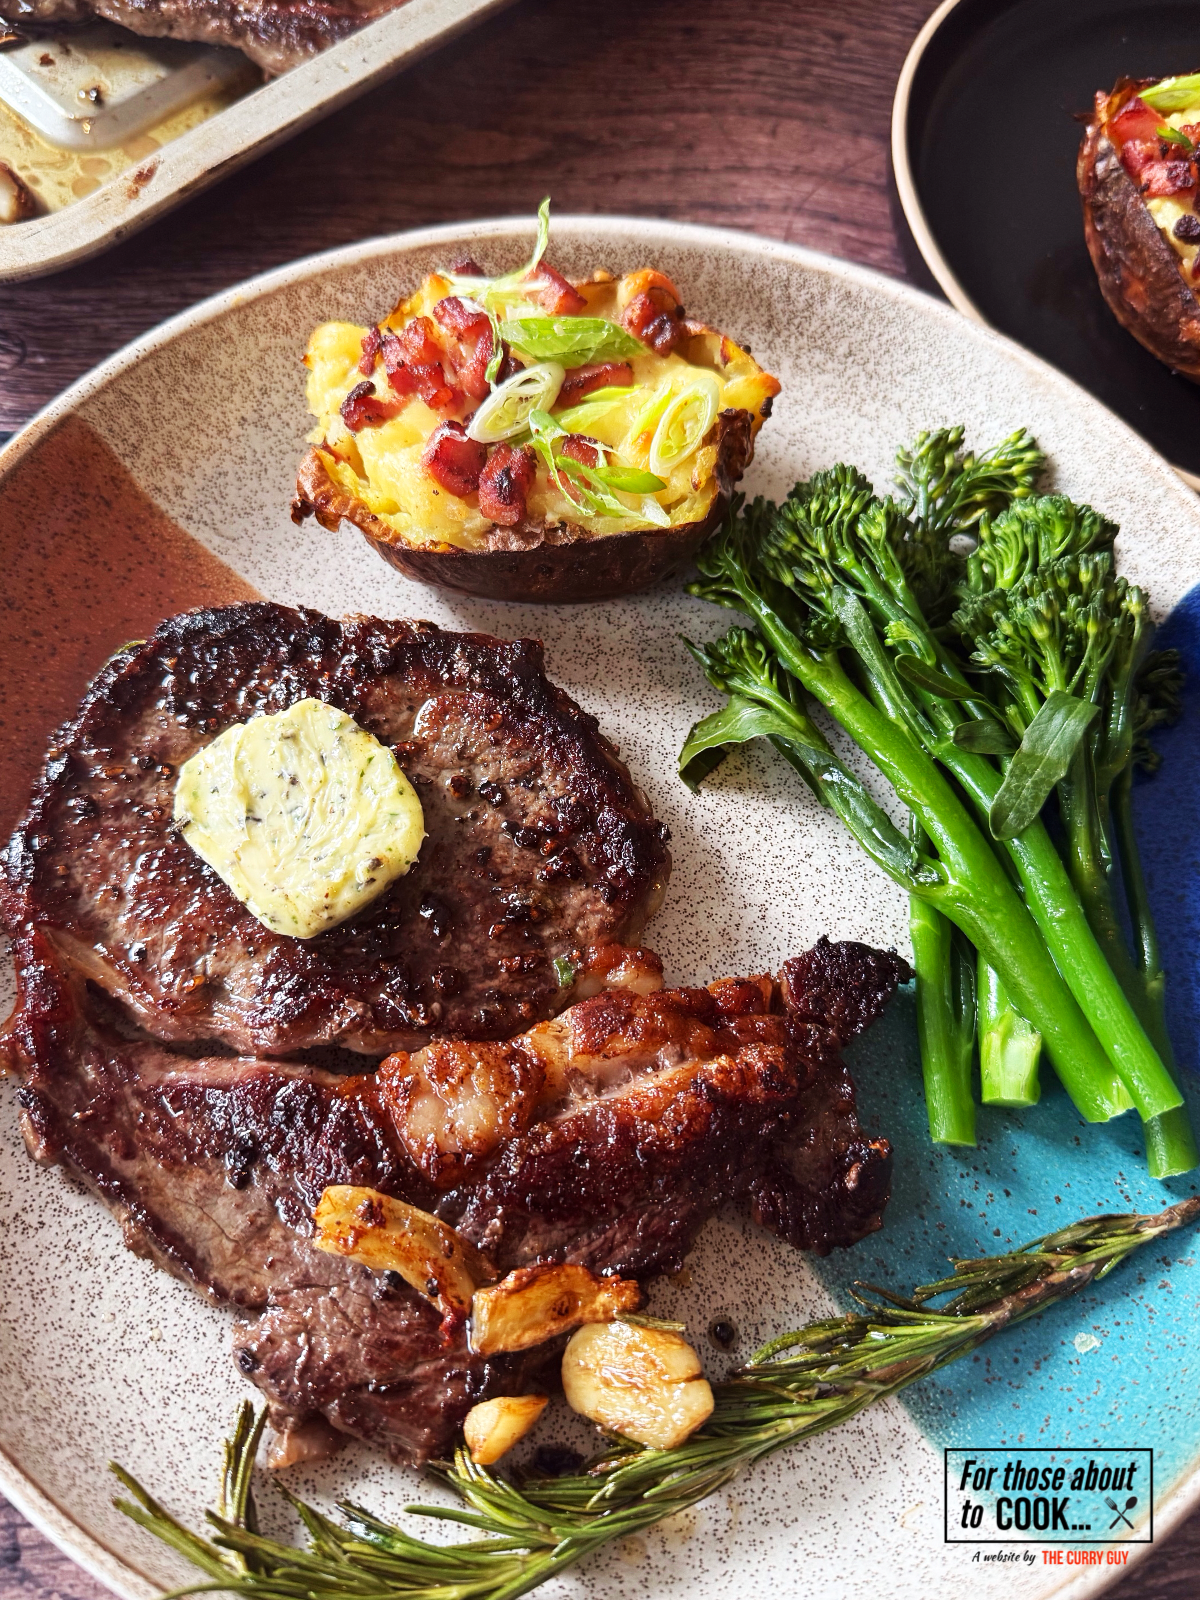
    • Ribeye steak with garlic butter served with loaded potato and broccoli
      Ribeye Steaks
    • The cooked fish on a serving platter drizzled with the herb mixture.
      Mediterranean Fish - Grilled
    • Bowl of chicken and chorizo risotto garnished with parsley
      Chicken and Chorizo Risotto
    • Finished asparagus risotto
      Asparagus Risotto
    • Steak Pizzaiola in the dish it was cooked in.
      Steak Pizzaiola
    • tomato and mascarpone pasta
      Tomato and Mascarpone Pasta
    • Homemade easy pesto pasta
      Easy Pesto Pasta
    • Homemade Tuscan chicken plated up
      Tuscan Chicken
    • gnocchi with brown butter and sage
      Gnocchi With Brown Butter And Sage
    • Italian Gnocchi Recipe
      Italian Gnocchi Recipe
    • homemade basil pesto
      Basil Pesto

    Recipe

    Tuna stuffed peppers on a serving plate with olives, next to bread.

    Italian Tuna Stuffed Peppadew Peppers

    Yield: 8
    Prep Time: 25 minutes
    Total Time: 25 minutes

    These tuna stuffed peppers could not be easier to prepare. They are packed with flavor and sure to impress as a snack or part of an Italian anti-pasta platter.

    Ingredients

    • 1 x 400g bottle of peppadew peppers
    • 2 tins of tuna
    • 3 tablespoons mayonnaise
    • 2 tablespoons of the brine from the peppadew peppers
    • 10 capers
    • 2 spring onions - finely chopped
    • 2 tablespoons lemon juice
    • 2 tablespoons olive oil
    • Salt and pepper to taste

    Instructions

    1. Place all of the ingredients except for the peppadew peppers, salt and pepper in a food processor.
    2. Blend until the tuna is smooth but be careful not to over process.
    3. Check for seasoning and add salt and pepper to taste.
    4. Using a small spoon, fill each of the peppadew peppers with the tuna blend.
    5. If you have any leftover tuna, eat it. I don't like waste.
    Nutrition Information:
    Yield: 8 Serving Size: 1
    Amount Per Serving: Calories: 111Total Fat: 8gSaturated Fat: 1gTrans Fat: 0gUnsaturated Fat: 6gCholesterol: 12mgSodium: 336mgCarbohydrates: 4gFiber: 1gSugar: 2gProtein: 7g
    © Dan
    Cuisine: Italian / Category: Italian


    Guanciale Pasta & Artichokes

    January 30, 2015 By Dan

    Guanciale pasta with artichokes on a serving plate.

    I made up this guanciale pasta recipe because I love guanciale and artichokes. I haven’t ever tried any dish like it in Italy but pasta alla gricia is similar.

    This recipe has a few more ingredients and they all go very well together so I hope you enjoy it as much as my family did.

    Guanciale pasta with artichokes on a serving plate.

    About this guanciale pasta recipe

    This was a bit of an experiment because I wanted to use up some ingredients I had on hand. That’s kind of what this blog is all about. Unlike my curry blog, I wanted to bring you my family recipes, most of which can be prepared in less than 30 minutes.

    The guanciale is cooked in a similar way to how it is cooked in dishes in Italy. Low and slow is the key to success until the fat renders out of it and it becomes deliciously crunchy. Together with the artichoke hearts, I think this is a pasta I will be making many more times.

    Ingredients

    There really aren’t a lot of ingredients in this guanciale recipe.

    Ingredients for the recipe on a counter top.
    • Spaghetti
    • guanciale
    • Onion
    • Garlic
    • Artichoke hearts
    • Dry white wine
    • Salt and pepper to taste
    • Grated Parmesan

    See recipe card for quantities.

    Step by Step Photos

    Check out these step by step photos and see how easy it is to make this guanciale pasta.

    Frying the guanciale and then adding the onions to fry.
    1. Step 1: Slowly cook the guanciale over a medium heat until you have rendered all the fat and it turns crispy. Then add the chopped onions and fry for a further 5 minutes until soft and translucent.
    Cooking the pasta in salted water.
    1. Step 2: While the guanciale and onions are frying cook your pasta in a large pot of salted water. Cook the pasta al dente, about 2 minutes shorter than the instructions say on the packaging.

    Getting a bit of the cooking water out of the pot before straining the pasta.
    1. Step 3: Don’t forget to get about a cup of the cooking water out before straining the pasta. It’s liquid gold!
    Adding the artichokes and white wine.
    1. Step 4: Add the artichoke hearts and brown them some in the pan. If using fresh artichokes, you will need to cook them a bit longer until tender. Stir in the wine and bring it to a simmer to continue heating/cooking the artichokes through.

    Adding the strained spaghetti to the pan
    1. Step 5: Strain and then toss the pasta around in the pan for about a minute. This is really important to coat the pasta. If your pan is looking dry, add a little of the cooking water from the pasta.
    The finished guanciale pasta
    1. Step 6: After tossing the pasta all around in the pan for 60 seconds, it’s ready to serve. Season with salt and pepper to taste.

    Guanciale pasta on a serving plate, garnished with parsley and Parmesan cheese.
    1. Step 7: Garnish with chopped parsley and Parmesan to serve.

    What Is Guanciale?

    If you’re new to guanciale, you’re in for a treat. Guanciale (pronounced gwan-CHAH-leh) is an Italian cured meat made from pork jowl or cheek. It’s fattier than pancetta, has a stronger flavour, and renders into the most delicious, silky fat you could imagine. That fat is the foundation of many classic Roman pasta dishes.

    I first came across guanciale on a food trip through Lazio years ago, and honestly, I haven’t looked at bacon the same way since. It’s not smoked like bacon, and it’s not as lean as pancetta. It’s salty, savoury, and utterly indulgent.

    You can usually find it at Italian delis or good butchers – and trust me, it’s worth the hunt.

    Substitutions

    Although I hope you can try this with guanciale, you can substitute other cured meat. The only thing is, you will need to use a bit more oil. As the guanciale renders, you not only get the delicious crispy meat but that silky fat which is really the star of the show.

    • Pancheta - You can crisp pancheta up in a pan but it is a lot less fatty than guanciale and you will need to use more oil.
    • Bacon - Streaky bacon is a good substitute but like pancheta you will need to add more oil and the flavour will not be the same.
    • Vegetarian - Use vegetarian or vegan bacon if that’s your thing. That said, you will not come close to the flavor of guanciale and you might like to try one or our vegetarian pasta recipes instead.

    Why You’ll Love This Dish

    There’s something magical about the simplicity of this pasta. Four ingredients, one pan for the sauce and another for the pasta. This is a plate of food that feels both rustic and elegant. It’s the kind of dish I love making at the end of a long day – satisfying, quick, and rich without being too heavy.

    I think more than anything, I like cooking with simple ingredients that have been used for dishes like this for centuries.

    Equipment

    A large pot - This is for cooking the pasta. When cooking pasta, you want to cook it in a lot of water. Cramped pasta is sticky pasta. It needs to be able to swim around inside.

    A high side frying pan - This is to prepare the simple sauce. It needs to be large enough to toss the cooked pasta around in to coat it with the delicious sauce.

    Storage

    You can store leftovers, covered in the fridge for 3 to 4 days. To reheat, heat it up in a large pan over a medium heat until heated through.

    Although you can freeze it, I don’t recommend doing so with this recipe.

    Top Tip

    Don't rush the guanciale. Let it crisp gently – burning it ruins the flavor.

    Related

    Looking for a starter or side to go with guanciale pasta?

    • Broccoli Salad on a serving plate.
      Broccoli Salad
    • Hot canned tuna recipe served up with vegetables and bread.
      Canned Tuna Recipe
    • Garlic soup in a serving bowl.
      Garlic Soup
    • Italian fried cauliflower with Anchovies and garlic in a frying pan.
      Italian Fried Cauliflower With Anchovies and Garlic

    Looking for more delicious Italian dishes?

    Try all of these. You'll love them!

    • All Italian burger finished
      The All Italian Burger
    • Ribeye steak with garlic butter served with loaded potato and broccoli
      Ribeye Steaks
    • The cooked fish on a serving platter drizzled with the herb mixture.
      Mediterranean Fish - Grilled
    • Bowl of chicken and chorizo risotto garnished with parsley
      Chicken and Chorizo Risotto
    • Finished asparagus risotto
      Asparagus Risotto
    • Steak Pizzaiola in the dish it was cooked in.
      Steak Pizzaiola
    • tomato and mascarpone pasta
      Tomato and Mascarpone Pasta
    • Homemade easy pesto pasta
      Easy Pesto Pasta
    • Homemade Tuscan chicken plated up
      Tuscan Chicken
    • gnocchi with brown butter and sage
      Gnocchi With Brown Butter And Sage
    • Italian Gnocchi Recipe
      Italian Gnocchi Recipe
    • homemade basil pesto
      Basil Pesto

    Recipe

    Guanciale pasta on a serving plate, garnished with parsley and Parmesan cheese.

    Guanciale Pasta with Artichokes

    Yield: 4 to 6
    Prep Time: 10 minutes
    Cook Time: 20 minutes
    Total Time: 30 minutes

    Guanciale pasta with artichokes makes a delicious and fast weekday meal but it is also good enough for entertaining friends at the weekend. You can make this pasta in about 30 minutes. Just be sure not to rush the cooking of the guanciale. You want to render the fat out and also have a few crispy bits left.

    Ingredients

    • 16oz (500g) spaghetti
    • 7oz (200g) guanciale, diced small
    • 1 onion, finely chopped
    • 4 garlic cloves
    • 10 canned artichoke hearts, halved
    • ½ cup (125ml) dry white wine
    • Salt and pepper to taste
    • Grated Parmesan, to taste

    Instructions

    1. Slowly cook the guanciale over a medium heat to render the fat and make it crispy. Then add the chopped onions and fry for a further 5 minutes until soft and translucent.
    2. While the guanciale and onions are frying, cook your pasta in a large pot of salted water. Cook the pasta al dente, about 2 minutes shorter than the instructions say on the packaging.
    3. Don’t forget to get about a cup of the cooking water out before straining the pasta. It’s liquid gold!
    4. Add the artichoke hearts and brown them some in the pan. If using fresh artichokes, you will need to cook them a bit longer until tender. Stir in the wine and bring it to a simmer to continue heating/cooking the artichokes through.
    5. Strain and then toss the pasta around in the pan for about a minute. This is really important to coat the pasta. If your pan is looking dry, add a little of the cooking water from the pasta.
    6. After tossing the pasta all around in the pan for 60 seconds, it’s ready to serve. Season with salt and pepper to taste.
    7. Garnish with chopped parsley and Parmesan to serve.
    Nutrition Information:
    Yield: 6 Serving Size: 1
    Amount Per Serving: Calories: 540Total Fat: 2gSaturated Fat: 0gTrans Fat: 0gUnsaturated Fat: 1gCholesterol: 1mgSodium: 1324mgCarbohydrates: 51gFiber: 25gSugar: 5gProtein: 13g
    © Dan
    Category: Italian

    Fried Artichoke Hearts With Parma Ham & Peas

    January 29, 2015 By Dan

    Making artichokes and peas

    Artichokes and peas
    So easy and delicious. Try these fried artichoke hearts!

    When I make this recipe in the Summer, I use fresh artichokes when they are available.

    During the Winter months I use large artichoke hearts from a jar. To be honest, the flavour and texture are different but equally as good.

    So as the snow fell outside my window this afternoon, I decided to whip these fried artichoke hearts up for lunch.

    It's so easy to make and absolutely delicious.

    I used Parma ham as I have a big leg of it in my fridge. You could also use pork lardons or bacon with equally good results.

    You could also leave the meat out and add other veggies to your fried artichoke hearts for a vegetarian version.

    This fried artichoke hearts recipe has been around a while...

    I spotted this recipe in my family cookbook. It was written my one of my great great aunts.

    She lived near Monterey in California where fresh artichoke grow in abundance.

    I wish I could have tried her cooking. She seems to have loved cooking. These fried artichoke hearts might look simple but it's their simplicity that makes the dish so good.

    So are you ready to start cooking?

    Give this easy but delicious recipe a try. I think you are going to love this one.

    marinating artichoke hearts
    Artichokes marinating in the lemon juice.

    cutting parma ham
    Parma ham cut into small chunks.

    frying the artichoke hearts
    Cooking the Parma ham and onion in the hot oil and butter.

    adding peas to the recipe
    Add the peas, artichokes and stock.

    fried artichoke hearts with parma ham and peas
    Season and eat!

    If you like this recipe, you might like to try some of these too...

    Spaghetti with lardo and artichokes
    Caprese salad
    Nduja pasta recipe
    Rainbow trout poached in white wine

    Recipe

    Artichokes With Parma Ham & Peas

    Artichokes With Parma Ham & Peas

    Yield: 4 - 6
    Prep Time: 20 minutes
    Cook Time: 20 minutes
    Total Time: 40 minutes

    Ingredients

    • 10 small artichoke hearts
    • ½ small onion - finely chopped
    • 6 heaping tablespoons chopped Parma ham or bacon
    • 2 tablespoons butter
    • 2 tablespoons olive oil
    • 250ml (1 cup) fresh or frozen peas
    • ½ cup chicken stock
    • Juice of two lemons
    • Salt and pepper to taste

    Instructions

    1. Squeeze the lemon juice over the artichokes and let them soak in the juice for about 20 minutes.
    2. Heat the butter and oil in a large frying pan or wok.
    3. When bubbling hot, through in your Parma ham chunks and the chopped onions.
    4. Allow to cook in the oil until the onion is soft and translucent but not browned.
    5. Add the peas, artichoke hearts and stock and cover for about five minutes until everything is heated through.
    6. Serve immediately as a side or main dish.
    © Dan Toombs
    Cuisine: Italian / Category: Main or Side Dish


    I hope you enjoy these fried artichoke hearts. If you do try the recipe please leave a comment. I'd love to hear from you.

    Keema Dosa Recipe

    January 29, 2015 By Dan

    Dosa with minced lamb

    Dosa with minced lamb
    One of my favourite ways to serve dosas. You will love a good keema dosa!

    Dosas are delicious with all kinds of fillings. They're even amazing on their own with a few chutneys to dip them in. For me though, this keema dosa recipe is my favourite.

    A few years ago, we had a fantastic dosa restaurant near our home. Unfortunately though, dosas aren't very well know in north east England so the restaurant didn't survive.

    Luckily, I know how to make dosas so I copied this, their most popular keema dosa.

    What you need to know before starting...

    The hardest part of making this keema dosa recipe is in preparing your dosas. This does take some practice but once you've given it a few goes, you should be a dosa expert.

    My dosa batter recipe is here.

    As for the minced lamb, I use very few ingredients. You want to be able to taste the dosa. I do like to top the lamb with my red hot chilli chutney though. We're talking food heaven here.

    If you aren't a spice fan, you could also try topping the meat with coconut chutney or sesame and coriander chutney. Both work really well.

    Dosa with minced lamb
    Top the meat with plenty of chilli chutney. Or the chutney of your choice.

    Dosa with minced lamb
    So good!

    Recipe

    Dosa With Minced Lamb

    Dosa With Minced Lamb

    Yield: 6
    Prep Time: 10 minutes
    Cook Time: 30 minutes
    Total Time: 40 minutes

    Ingredients

    • 1 batch of dosa batter (recipe link above)
    • 500g (1lb.) minced lamb
    • 2 cloves garlic
    • 1 teaspoon cumin powder
    • ½ small onion - very finely chopped
    • Salt and pepper to taste
    • 2 tablespoons vegetable oil

    Instructions

    1. Make your dosas as per my recipe link above. These can be made in advance and kept warm in a low oven or on a grill.
    2. Heat your oil over medium high heat in a large frying pan or wok.
    3. Add the spices and the onion and fry for about ten minutes until the onion is soft and translucent.
    4. Now add the meat and fry until cooked through. Be sure to move the minced lamb around in the pan so that it combines with the other ingredients.
    5. Place the cooked minced lamb on one half of each dosa and fold over.
    6. Top with your chutney of choice and serve immediately.
    © Dan Toombs
    Cuisine: Indian / Category: Main


    Teriyaki Marinade

    January 29, 2015 By Dan

    Teriyaki marinade

    Teriyaki marinade
    Small roast marinating in the teriyaki marinade.

    This is my grandmother's recipe which I found in a book of family recipes a while back. She wrote it down about forty years ago and I made it just as she wrote it.

    I'm not sure who gave her the recipe or if perhaps she just made it up. One thing is for certain, it is good!

    You can use this teriyaki marinade with beef, chicken, pork or whatever else you fancy. She used to use it to marinate standing rib roasts which my grandfather then barbecued. Talk about delicious.

    I like this recipe because all of the ingredients are quite easy to find. Some more traditional teriyaki marinades I've come across look fantastic but sourcing the ingredients was a bit of a chore.

    So here you have it. Grandma's Teriyaki Marinade. You've got to give this one a go.

    Teriyaki marinade
    The marinade also makes a nice gravy.

    If you like this teriyaki marinade, you might like to try some of these recipes too...

    Steak and stout pie
    German sausages
    Fiery chilli olive oil
    Nduja pasta
    Raw oysters with chipotle and lime sauce

    Recipe

    Teriyaki Marinade

    Teriyaki Marinade

    Yield: 3 cups
    Prep Time: 10 minutes
    Total Time: 10 minutes

    Ingredients

    • 500ml (2 cups) beef stock
    • 200ml (⅔ cup) dark soy sauce
    • 125ml (½ cup) red wine
    • 4 finely chopped spring onions
    • 3 tablespoons brown sugar
    • 3 tablespoons lemon juice
    • 2 teaspoons ground ginger
    • 5 cloves crushed garlic

    Instructions

    1. Place all of the ingredients in a large bowl and whisk until the sugar has dissolved.
    2. That's it. Simple.
    3. If marinating a rib roast, you will want to marinate it, turning several times for at least 24 hours. Smaller cuts and chicken can be marinated for the same amount of time but you could probably get away with just a few hours.
    4. Retain the marinade after use. It freezes well. You could also heat it up and reduce a little. Stir in a tablespoon or so of cornflour to thicken and serve as a gravy.
    © Dan Toombs
    Cuisine: Japanese/American / Category: Marinade


    Dry Ageing Beef at Home

    January 29, 2015 By Dan

    Dry ageing beef

    Dry ageing beef
    Dry ageing beef at home is easy. This 45 day aged beef was amazing.


    The love going to a good steak house where they age their beef and then char grill. The meat is so tender and delicious. It's worth paying the extra cash to get such perfection.

    The thing is, the meat you get at the supermarket isn't aged enough. Some butchers will dry age their meat for three to four weeks. It's great to find a good butcher like that.

    Over the past ten years or so I've taken to dry ageing my own beef at home. It's a simple process and a nice way of ensuring you get that steak house flavour at home.

    So here I'll show you how I do it.  I'm not saying it is the best or only way but dry ageing beef at home like this has worked very well for me.

    Which beef cuts can be used?

    The answer is any. This is obviously an expensive joint of four rib but you could do the same with less expensive joints if you just want to try the method out.

    A bit of warning...

    You can see the results I got using this method. Dry ageing beef at home gets amazing flavour. But do this at your own risk.

    As I said, I've been dry ageing my own beef for ten years but be careful. The meat should smell like well aged meat and not death. If yours doesn't smell right, it isn't.

    The best way to dry age your meat is on a rubber rack. I've never got around to buying one so I wrap a metal rack with plastic and it works just fine. The most important thing is that the juices from the meat drip into the rock salt below. Never place your meat directly on a metal rack.

    Dry ageing beef
    I started with a rib roast which had been aged for 14 days.

    If you like this recipe, you might like to try some of these recipes too...

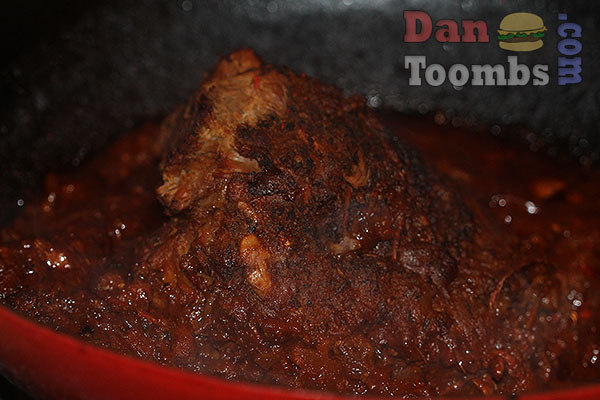
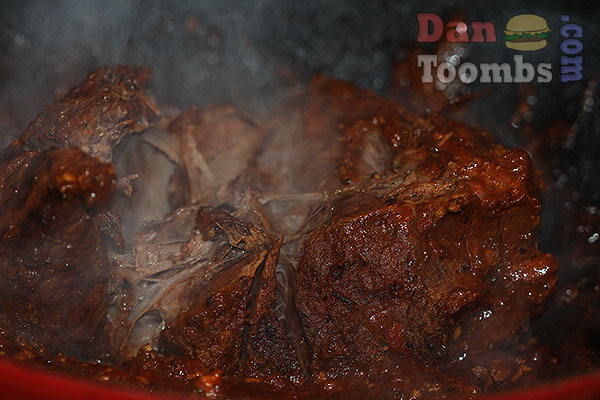
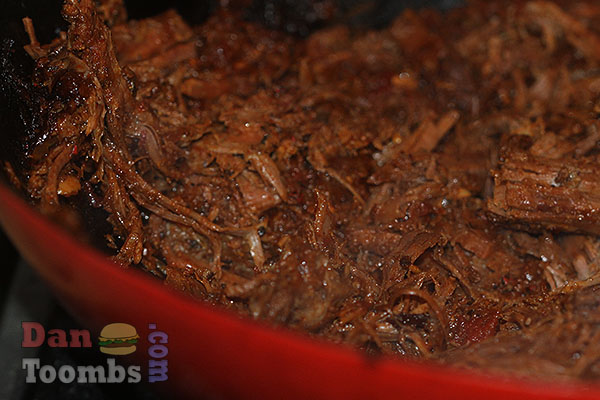
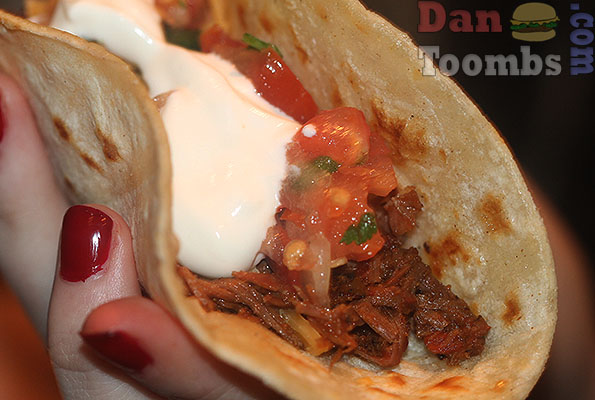
    Slow cooked shredded beef tacos
    Teriyaki marinade
    Steak and stout pie


    Recipe

    How To Dry Age Your Own Beef

    How To Dry Age Your Own Beef

    Ingredients

    • 1 standing rib roast or other cut of your choice
    • 4 cups - (1 litre) small rock salt
    • 1 rubber rack or a metal rack rapped tightly with clingfilm. It is very important that the liquid from the meat can drain into the salt. It must not get caught on the plastic or it will mould.

    Instructions

    1. Pour the salt into a large tray and place the rack on top with the meat.
    2. Place the meat in a fridge - preferably one that isn't used often. I only checked my beef once a week.
    3. You want the temperature to be between 34 and 37F (2.2 and 3.3C).
    4. While the meat stands there over the salt, it will lose about 20% of its weight as the liquid goes into the salt.
    5. After 15 to 28 days ( the longer the better) trim of the hard black outer. You may think this sounds wasteful but believe me it's worth it. You will only need to trim about 3mm from the outside as it will be too dry and tough to eat.
    6. What's inside is properly aged beef which you can cook as a rib roast or cut into the most awesome steaks you'll ever have the pleasure of enjoying.
    © Dan Toombs
    Cuisine: American / Category: Preparation

     I hope you enjoy dry ageing beef at home. If you do try this method, leave a comment. I'd love to hear from you. 

    Honey Mustard Salad Dressing Recipe

    January 28, 2015 By Dan

    honey and mustard dressing

    honey and mustard dressing
    You are going to love this honey mustard salad dressing recipe.


    Talk about easy! Salad dressings really couldn't be any easier or more delicious than this honey mustard salad dressing.

    This honey mustard salad dressing can be made in minutes and tastes great on lettuce or any veg really. In fact, I like to use it as a marinade for chicken. Give it a try... you will too.

    It's particularly nice on wild lettuce greens tossed with red onion, tomato, cucumber and/or baby onions. The thought of this is making me hungry.

    You could also use this dressing as a dip for fresh vegetables like carrots, chillies or radishes at your next party. I predict there won't be any left.

    Really, the only thing better than this is a pizza with extra cheese and pepperoni. Come to think about it, this dressing would be quite tasty on that pizza too.

    How easy is it?

    As salad dressings go, this really couldn't be any easier.

    All you have to do is gather the ingredients and whisk or shake them into a dressing. 

    Not much to it. 

    That said, the flavours will be amazing even if it is really easy to make. I think this honey mustard salad dressing is proof that recipes needn't be difficult to be amazing.

    How to serve...

    In the recipe I recommend placing your forks and plates in the freezer before tossing your salad.

    This might seem like a bit of a faff on but believe me, it makes a huge difference.

    Salads are simply better when served this way. 

    honey and mustard dressing
    Looking good!

    honey and mustard dressing salad
    Dig in!

    If you like this honey mustard salad dressing, you might also like to try these recipes...

    Caprese salad
    Easy chickpea and carrot salad
    Ceasar salad
    Green goddess salad dressing

    Recipe

    Dan's Famous Honey & Mustard Dressing

    Dan's Famous Honey & Mustard Dressing

    Yield: 4
    Prep Time: 2 minutes
    Total Time: 2 minutes

    Ingredients

    • 2 tablespoons honey
    • 2 tablespoons vegetable oil
    • 2 tablespoons white wine vinegar
    • 2 tablespoons Dijon or wholegrain mustard
    • Salt and pepper to taste

    Instructions

    1. Place all of the ingredients in a bowl.
    2. Whisk until nicely blended.
    3. Stick the dressing in the fridge for about half an hour.
    4. For best results, put your salad plates and forks in the freezer at the same time.
    5. Enjoy.
    © Dan Toombs
    Cuisine: American / Category: Side Dish

     I hope you enjoy this salad dressing recipe. If you do try it, please leave a comment. I'd love to hear from you. 

    Steak and Ale Pie

    January 28, 2015 By Caroline

    Serving the steak and ale pie.


    When Dan moved to the UK back in 1993, there were a few British recipes he'd never tried before and this steak and ale pie was one of them. This is my family recipe for steak and ale pie which goes back generations. It has always been a big hit with Dan and the whole family. I hope you enjoy it as much as we do.

    Beef and ale pie on a serving plate with polenta.

    About this recipe.

    Steak and ale pie is a hugely popular dish served at pubs all around the UK. It's even better when you cook it at home. For us, this has always been a wintertime dish and as wintertime dishes go, they don't come much better.

    The beef is first browned in oil and then slowly simmered with the other ingredients. It becomes mouthwateringly tender and that sauce is to die for.

    Of course you could just serve it as a stew on its own but it's the puff pastry topping that make it all the more special. That said, it the steak and ale stew are delicious served over mashed potatoes.

    [feast_advanced_jump_to]

    Ingredients

    The ingredients for this steak and ale recipe can be found at most supermarkets. Nothing special but they sure taste amazing when cooked together. Get all your ingredients together before you start and it will be a lot easier.

    The ingredients for the recipe laid out on a counter top.
    • dried porcini mushrooms – soaked for about 20 minutes in hot water
    • olive oil
    • beef rump
    • ox kindey
    • onion
    • baby onions
    • carrots
    • sugar
    • plain white flour
    • stout or another good ale
    • beef or veal stock
    • small bunch each thyme, bay leaf, rosemary and parsley - tied together
    • smoked bacon lardons
    • egg yolk - beaten
    • packet of puff pastry

    See recipe card for quantities.

    Instructions

    As you will see from the step by step photos below, this steak and ale pie could not be easier.

    The cubed beef, kidney and lardons browning in oil in a pot.
    1. Step 1: Brown the cubed beef, kidney and lardons in the oil in a pot over a medium-high heat and then transfer with a slotted spoon to a bowl.
    Frying the chopped onion, baby whole onions and carrots in the pot until soft and lightly browned.
    1. Step 2: Add the chopped onions, whole baby onions and carrots to the pot and fry them until soft and lightly browned.
    Adding chopped mushrooms to the pot.
    1. Step 3: Chop the mushrooms and add them to the other vegetables.
    Stirring flour and a little sugar into the vegetables.
    1. Step 4: Cook in oven for x minutes at 400 degrees

    Returning the meat to the vegetables in the pot and stirring it all together.
    1. Step 5: Return the browned meat to the pot and stir well to combine.
    Adding the stout and the reserved liquid from soaking the dried mushrooms to the pot.
    1. Step 6: Pour in the ale and some of the reserved liquid from the soaked, dried mushrooms.
    Adding the herbs to the pot and stirring them in.
    1. Step 7: Stir in the bouquet garni.
    Bring to a simmer to cover and cook for 2 hours or until the meat is tender.
    1. Step 8: Bring to a simmer and then cover to simmer over a medium heat for 2 hours or until the meat is tender.

    Filling a pie dish with the meaty sauce.
    1. Step 9: Grease a suitably sized pie dish with butter and pour the beef stew into it.
    Covering the pie dish with the pasty.
    1. Step 10: Slice a few thin pieces of puff pastry and line the side of the dish. Then cover it all with the pastry sheet.
    The steak and ale pie covered with the pastry and pinched at the seams.
    1. Step 11: Using a knife, cut around the pastry so that it is round like the dish and then press your thumb around the edges to secure the meat inside.
    Placing a pastry decoration on top of the pie and slicing two holes into the top.
    1. Step 12: If you like, you can make a decoration for the top. You don't need to be an artist to do this! Then make a couple of small holes in the top with a knife.

    Brushing the top of the pie with whisked egg.
    1. Step 13: Brush the egg yolk all over the top.
    The pie ready to go into the oven.
    1. Step 14: Do as best you can to make it a thin layer all over but it really doesn't make a huge difference.
    Steak and ale pie just out of the oven.
    1. Step 15: Bake in a preheated over at 200°C/400F for about 40 minutes or until the pastry is a golden brown,
    Serving the steak and ale pie.
    1. Step 14: Leave to rest for about 10 minutes before slicing into it to serve.

    Substitutions

    You don't have to cook this recipe exactly as written. Here are a few substitute ingredients you can use.

    • For the ale - I use stout which is a type of ale. I like it for its dark colouring but you can use any good ale.
    • Non alcoholic - If you are looking for a non-alcoholic option, try root beer or ginger ale. Both will work in this recipe but you might want to not add the sugar.
    • Vegetarian - This recipe can be made vegetarian by leaving out the meat adding a selection of wild and domestic mushrooms and potatoes all cooked in vegetable stock or a stock made with meatless beef stock cubes.

    Equipment

    A heavy bottomed: Any good, heavy pot is really all you need for cooking the beef stew.

    A pie dish or casserole dish: You can bake the steak and ale pie in a pie dish or casserole dish. Either will do, depending on the presentation you would like.

    A basting brush: This will come in handy when for brushing the top of the pie with the egg yolk but you could just use a spoon.

    Storage

    You can store the unbaked steak and ale pie, covered tightly in the fridge for 3 to 4 days before baking. If you like, you can also freeze it before baking. Just let it defrost completely before baking. It will freeze for up to 3 months.

    Top Tip

    Watch the steak and ale pie carefully when you bake it. Ovens do vary and you don’t want to burn the top!

    FAQ

    What cut of beef is best for steak and ale pie?

    I use rump steak but you aren’t limited to that. You can use any good quality beef cuts such as chuck, braising steak and shin. Just don’t opt for more expensive cuts like sirloin or ribeye. The cheaper cuts are find here!

    Can you make steak and ale pie in advance?

    Yes! You can make the filling up to a few days ahead of baking and store it, covered in the fridge. You can also assemble the pie before baking it and then let it defrost and bake.

    What type of ale works best?

    Personally, I like a dark ale or stout which adds a deep and rich flavour. Avoid using overly bitter ales.

    Related

    Looking for other recipes like this? Try these:

    • Hungarian goulash over pasta.
      Hungarian Goulash
    • cassoulet on a serving plate with crusty French bread and salad.
      Cassoulet
    • Finished asparagus risotto
      Asparagus Risotto
    • Homemade Tuscan chicken plated up
      Tuscan Chicken

    Recipe

    Serving the steak and ale pie.

    Steak and Ale Pie

    Yield: 6
    Prep Time: 20 minutes
    Cook Time: 3 hours
    Total Time: 3 hours 20 minutes

    Steak and ale pie is a delicious dish especially in the wintertime but it's good any time of year. This traditional recipe has been in my family for decades. I hope you enjoy it!

    Ingredients

    • 20g dried porcini mushrooms – soaked for about 20 minutes in hot water and rinsed. Retain the mushroom stock
    • 2 tablespoons olive oil
    • 1kg beef rump cut into small pieces
    • 1 ox kindey - cut into small pieces (optional but very tasty in the broth)
    • 1 large onion - roughly chopped
    • 20 baby onions
    • 2 carrots – finely choppped
    • 2 teaspoons sugar
    • 4 tablespoons plain white flour
    • 300ml stout
    • 400ml beef or veal stock
    • small bunch each thyme, bay leaf, rosemary and parsley - tied together
    • 250g smoked bacon lardons
    • 1 egg yolk - beaten
    • 1 packet of puff pastry

    Instructions

    1. Heat the oil in a large casserole dish and brown the beef lardons and kidney (if using). You may need to do this in batches. Remove the meat from the casserole dish and set aside.
    2. Add the chopped onion, baby whole onions and the carrots to the pan and fry over medium heat until the onions are soft and lightly browned.
    3. Meanwhile take your porcini mushrooms from the water they have been soaking in and cut them into small pieces.
    4. Add the soaked mushrooms to the pan and sizzle for about 30 seconds before adding the sugar and plain flour.
    5. Stir continuously until the flour turns a light brown.
    6. Return the meat and any juices to the pan and stir it all up to combine.
    7. Pour in the beer, stock and porcini soaking liquid. Be careful not to pour in any of the dirt that is often left behind from the porcini mushrooms.
    8. Season with salt and pepper and then add the herbs. Bring back to a simmer.
    9. Cover the casserole and simmer over medium heat for about two hours until the meat is pull apart tender.
    10. The stew part of your steak and ale pie is ready. This can be kept in the fridge for two days if you’re working ahead. In fact it improves the flavour.
    11. When you are ready to make your pie, bring the stew back up to a simmer. I like to make one large pie for the family but when I’m cooking for friends, I usually give everyone their own individual pies as I did in the photograph.
    12. I’ll leave that one up to you.
    13. Preheat your oven to 200c (400f)
    14. Grease your cooking dish (or small dishes) with the butter.
    15. Roll out your puff pasty in the shape of your dish/dishes and cover.
    16. Brush the pastry with the egg yolk. Trim any rough edges. You can use these trimming to make decorations but I tend to through them to my pastry loving dog.
    17. Place the dish/dishes on a baking tray and place in the oven for about 45 minutes until the pastry is golden and puffed up.
    18. Remove from the oven and allow to settle for about ten minutes before serving.
    Nutrition Information:
    Yield: 6 Serving Size: 1
    Amount Per Serving: Calories: 1020Total Fat: 63gSaturated Fat: 23gTrans Fat: 1gUnsaturated Fat: 35gCholesterol: 291mgSodium: 1003mgCarbohydrates: 21gFiber: 2gSugar: 7gProtein: 83g
    © Caroline
    Cuisine: British / Category: British

    10 Tips To Making The Perfect Hamburger

    January 28, 2015 By Dan

    Massive cheese burger

    Hamburger by Food Blogger Dan Toombs
    The perfect burger must include a fresh homemade hamburger bun!

    10 Tips For Making The Perfect Hamburger

    I have literally cooked thousands of homemade hamburgers over the years. I have also tried lots of burgers at restaurants that were cooked to perfection.

    Unfortunately, there are a lot of chefs out there who need to read this list of burger tips before they attempt another.

    As you can see from the recipes I’ve posted on my site, I do enjoy copying the best and also most famous burgers. Just because a hamburger is famous doesn’t mean it’s actually all that good however.

    Often, I end up placing the ingredients in the same sequence as the original but stick to my own rules about how to make the burger awesome.

    The secret to hamburger success is all in the ingredients you use and of course how you cook your beef.

    This was driven home to me through my many visits to the most popular American burger joints and restaurants. Follow these tips and you will be in burger heaven every time you decide to indulge in one of America’s most popular inventions.

    Definition of a hamburger

    Let’s get one thing straight. A hamburger is not made with chicken. It also isn’t made with fish, pork or lamb. No, to be a true hamburger, it’s got to be made with beef and served in a hamburger bun!

    Any other concoction is simply a sandwhich.

    So then… now that we have that straight, let’s look at the most important tips for making your hamburgers the best in the neighbourhood if not the world.

    Homemade burger by Food Blogger Dan Toombs
    Top your burger with your favourite toppings and don't forget the homemade bun.

    1) Use only the best well aged beef

    I purchase only the best well aged minced beef from good butchers. Often I ask the butcher to mince specific cuts such chuck, sirloin, skirt or a mixture of them all.

    My favourite mixture is 80% chuck and 20% minced skirt steak.

    I usually ask for a meat to fat ratio of 80% meat and 20% fat which always tastes amazing. Use chuck and skirt and you will get pretty close to that.

    Some popular diners and restaurants use a 60% to 40% ratio which is to die for. Very juicy but perhaps not all that good for you.

    It is important to use 100% beef. Don’t ever mix with bread crumbs or egg as so many chefs do. You’ll end up with a hard formed tasteless burger.

    2) If seasoning, season generously

    Good quality beef doesn’t need to be seasoned at all as I explain in my 5 Guys burger copycat recipe.

    You can just let the meat do the talking. I tend to season my homemade patties generously, however with salt and pepper on both sides of the patty. I just like my burgers that way.

    3) Get Your pan as hot as you can get it

    Never place your burger in a pan that has not been heated until super hot.

    This is how you achieve that amazing char on the exterior of the patty. The same rule applies when grilling your meat on a barbecue. No lubrication such as oil is needed when your pan is fiery hot. It is a good idea to lightly grease your barbecue grate though.

    4) Make Your own buns

    Those burger buns available in the plastic bags at supermarkets are usually stale and tasteless. Don’t go there! If you happen to live somewhere where you can purchase homemade hamburger buns from a baker, you could use them. I have a great local baker I use.

    I do prefer to make my own, however. There is simply no substitute for homemade hamburger buns, fresh and fluffy right out of the oven. Here's my recipe.

    5) Hand form you patties

    Most fast food chains use machine made – pre-formed burgers that all look identical. Usually they are supplied frozen and then heated up on the grill or in a microwave.

    If you are trying to do a copycat burger recipe, you may wish to form your patties in this way but for best results, form them by hand.

    I like to shape my patties into balls that are then pressed down with a heavy spatula. This brings a delicious texture to the burger patty. If grilling on a barbecue this isn’t a good idea. Just form the patties so they are flat so that they cook evenly.

    Homemade hamburger
    Pressing burgers

    The spatula method is my favourite because you achieve so many different textures in the patty. It is more compact in the centre but the sides are loosely formed making the periphery meat crispier. This is how it’s done at the best diners.

    I don't know about you but those diners are the place I go to get the perfect hamburger.

    6) Cook to your preferred doneness

    I would never recommend doing this with supermarket minced beef. If you have a good butcher who is happy to mince your preferred cuts for you, then you are dealing with fresh steak and the meat can be treated as so.

    I prefer my patties to be cooked to medium rare 56c. For rare, shoot for an inside temperature of 50c when using a meat thermometer.

    Burgers that are charred on the exterior but still slightly red and juicy are amazing. That's my idea of the perfect hamburger.

    7) Only flip once

    You really only need to flip your burgers once! Sear on one side to perfection and then flip it over and continue cooking until your patty is done to your preferred doneness.

    8) Form your patties to the right size

    When forming your patties, try to make them a little larger than the bun you are using. As the patty cooks it will reduce in size so that it is the same size as the bun.

    You want to have a bit of burger and bun in every mouthful. Mmmm! The perfect hamburger!

    Homemade Burger King Double Whopper With Cheese
    My homemade BK Double Whopper with cheese.

    9) Only use the freshest, crispest vegetables

    You need to look for the freshest iceberg lettuce and crispest pickles and onions you can find if you want the perfect hamburger. In-n-Out Burger in the US does this right. In fact they only use the leaves from the centre of the head of lettuce to ensure the lettuce is crunch and crisp.

    It makes a the difference in the world!

    10) Prepare your buns so you can eat immediately

    I always prepare my buns while the meat is on the grill. For best results, toast the buns too with a little butter.

    Make sure that when you take your hot burger off the grill, your bun is ready to house it. Eat immediately.

    <h2>Want to try some perfect hamburger recipes? Try some of these...</h2>

    Easy Roasted Potatoes

    January 26, 2015 By Dan

    Roast potatoes
    Easy roasted potatoes...The perfect Sunday dinner side dish.

    Although I did try roast potatoes long before I moved to Britain, I consider them to be a British thing.

    Almost every country has a roast potato dish but for me roast potatoes are the essential side to a British Sunday dinner.

    I've experimented a lot to get them just right. You can use either goose fat or olive oil. I tend to use goose fat on special occasions for these easy roasted potatoes.

    Occasions like Christmas when my wife doesn't watch my diet so closely. At other times of year I use a good quality extra virgin olive oil. That's what I did today.

    Roast potatoes need to be crispy on the outside and nice and fluffy in the centre. You'll achieve exactly that if you follow this recipe.

    Making roast potatoes
    Test a potato with a fork.

    If you like this easy roasted potatoes recipe, you might like to try some of these recipes too...

    Twice baked potatoes
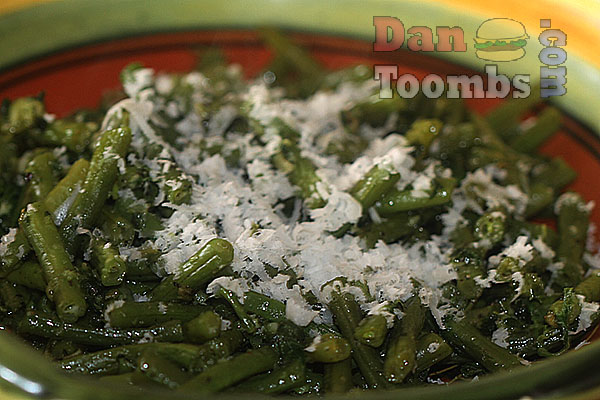
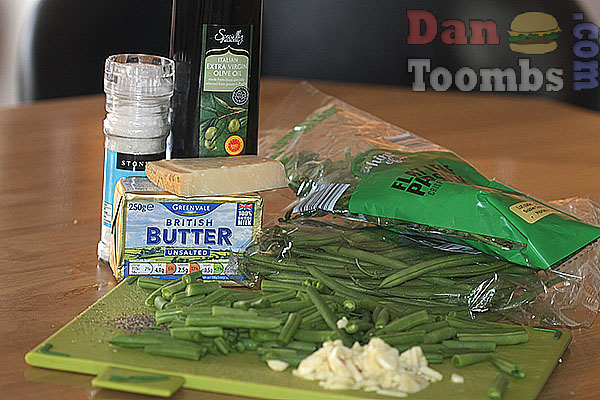
    Italian style green beans
    Salmon and broccoli pasta bake
    Baked haloumi and tomatoes

    Recipe

    Dan's Perfect Roast Potatoes

    Dan's Perfect Roast Potatoes

    Yield: 6
    Prep Time: 10 minutes
    Cook Time: 1 hour
    Total Time: 1 hour 10 minutes

    Ingredients

    • 6 large potatoes - peeled and cut into two inch pieces
    • 125ml olive oil
    • Maldon (or another flaky salt) to taste
    • 1 teaspoon dried rosemary
    • 4 cloves garlic - smashed
    • 2 teaspoons plain white flour
    • Freshly cracked black pepper

    Instructions

    1. Preheat your oven to it's highest temperature
    2. Bring a large pot of salty water to a boil
    3. When boiling, toss in your spuds and simmer for about eight minutes. To check for doneness, you should be able to easily scrape into a potato with a fork but the centre should still be quite hard.
    4. Drain completely and return to the pot.
    5. Now sprinkle in the flour and give the potatoes a few good hard shakes so that they fluff up on the outside.
    6. Heat a large frying pan over medium high heat and pour in about 100ml of the oil.
    7. When hot, pour the potatoes in and brown them all over for a few minutes. Season with the rosemary, salt and pepper.
    8. Now place the pan in your oven to continue cooking. About 40 minutes should do the trick. Be sure to give the potatoes a good shake every ten minutes or so.
    9. Serve immediately.
    © Dan Toombs
    Cuisine: British / Category: Side Dish


    • « Previous Page
    • 1
    • …
    • 17
    • 18
    • 19
    • 20
    • 21
    • …
    • 24
    • Next Page »
    For Those About To Cook

    Welcome To For Those About To Cook

    We're a family-run food blog sharing brand-new recipes every week. From easy weeknight staples to indulgent weekend favorites. We're a team of five: Dan (The Curry Guy), Caroline, Joe, Shannon, and Jennifer, bringing you a wide variety of dishes inspired by Europe, the Mediterranean, the Americas, and more.

    This site focuses on Western-inspired recipes, while Eastern flavors are covered in depth over at greatcurryrecipes.net Between the two, you'll find everything you need to cook up something amazing so don't forget to subscribe!

    Subscribe

    Footer

    Contact Privacy Policy

    Subscribe for weekly updates!

    Subscribe
    ↑ back to top

    Copyright © 2024 For Those About to Cook