For Those About To Cook

  • Home
  • About Us
  • All Recipes
  • Subscribe
menu icon
go to homepage
  • Home
  • About Us
  • All Recipes
  • Subscribe
    • Facebook
    • Instagram
    • Pinterest
  • search icon
    Homepage link
    • Home
    • About Us
    • All Recipes
    • Subscribe
    • Facebook
    • Instagram
    • Pinterest
  • ×
    Home

    Cheese Dosa Recipe

    January 23, 2015 By Dan

    cheese and onion dosa
    cheese and onion dosa
    This simple cheese dosa recipe is great with a selection of chutneys.

    You don't think of sharp Cheddar cheese being used in authentic Indian cooking. Most recipes call for the much milder paneer. That said, at my local dosa restaurant Cheddar cheese dosas are very popular.
    Here I have copied the recipe so that I could make this popular dosa at home. I could even enjoy a few beers and not need to drive or pay for a taxi! Bonus.

    Many dosa restaurants use a packet batter which works well but it doesn't compare with the real thing.

    I learned to make my batter at the award winning Prashad restaurant in Bradford. You can try it here.

    It really is the best dosa batter recipes I've tried.

    Warning...

    It does take some practice to get the recipe down so don't be too hard on yourself if your cheese dosas don't look perfect the first time.

    I wouldn't feature this cheese dosa recipe if I thought it was too difficult. Even it your first attempts don't look like expected, they will still taste incredible using my dosa batter recipe.

    I like to serve this Cheddar cheese dosa recipe with a variety of homemade chutneys. Why not try my sesame and coriander chutney, coconut chutney and/or red chilli chutney.

    Having a few homemade chutneys at the table makes this dish so much more interesting.

    Cheese and onion dosa
    Not quite done. Let the cheese melt.

    Recipe

    Dosa With Fried Onion and Cheddar

    Dosa With Fried Onion and Cheddar

    Yield: 2 - 3
    Prep Time: 5 minutes
    Cook Time: 20 minutes
    Total Time: 25 minutes

    Ingredients

    • One batch of dosa batter (See link above)
    • 1 red onion - finely chopped
    • 1 clove garlic - smashed
    • ½ teaspoon sugar
    • 1 tablespoon unsalted butter
    • 200g Cheddar cheese - grated. (I like sharp Cheddar with this)
    • Salt and pepper to taste

    Instructions

    1. Make your dosas as per your own recipe or mine. You will find a link to my recipe above.
    2. Melt the butter in a pan over very low heat.
    3. When the butter has melted, add the chopped red onion and garlic clove and stir to combine.
    4. Add the sugar and allow to fry slowly in the butter until the onion is translucent and soft. About 20 minutes.
    5. Season with salt and pepper to taste.
    6. Remove the garlic clove and spoon about two tablespoons of this onion mixture over a dosa. Top with a bit of Cheddar cheese and then fold the dosa over.
    7. Keep the dosa on a hot pan until the cheese melts.
    © Dan Toombs
    Cuisine: Indian / Category: Main

    I hope you enjoy this cheese dosa recipe. If you do give it a try, please leave a comment. I'd love to hear from you.

    Pork Pasta with Paprika and Garlic

    January 22, 2015 By Dan

    Pork pasta

    I love pork and pasta so this is one of those dishes that I make all the time. I always know the family will devour it.

    It's not just one kind of pork. Oh no! This recipe calls for pork fillets, rindless smoked back bacon and some moorish chorizo. If you love pork, you will be in pork heaven.

    pork and garlic pasta
    You will love this pork pasta! Every bite is a mouthful of deliciousness.

    I like to serve the sauce with large conchiglioni pasta. Mix the sauce well into the pasta and the large shells soak up all the sauce. We're talking one amazing mouthful after another here. Pork pasta just doesn't get any better.

    You could of course make this recipe with simple pork but I do enjoy all the different flavours and textures you get from using pork loin, smoked bacon and Spanish chorizo.

    Making the most of this recipe...

    It goes without saying that fresh and top quality ingredients are essential.

    I use pork, bacon and Spanish chorizo from my local butcher. That is the way I like it.

    In the summer months, I use fresh tomatoes or canned tomatoes. I find the canned tomatoes work best in the winter months.

    As for the paprika, you could use sweet or smoked Spanish paprika. Either will do for this pork pasta. Whichever you prefer. I love the smoky flavour of smoked paprika.

    Pork fillets
    4 x pork loin steaks from Westin Gourmet.
    Chorizo
    Only the best chorizo will do!
    Pork and garlic pasta
    Brown all the meat for a while.
    Pork pasta sauce ready!
    Sauce done!

    Pork pasta

    If you like this recipe, you might like to try some of these too...

    Thai pork belly stew
    German sausages
    Portuguese pork with paprika and white wine sauce
    No fuss camping burritos
    Nduja pasta

    Recipe

    3 x Pork & Garlic Pasta

    3 x Pork & Garlic Pasta

    Yield: 4
    Prep Time: 20 minutes
    Cook Time: 40 minutes
    Total Time: 1 hour

    Ingredients

    • 400g diced pork loin
    • 300g sliced chorizo
    • 6 slices smoked back bacon
    • 500g large conchiglioni
    • 3 tablespoons olive oil
    • 1 teaspoon cinnamon
    • 1 tablespoon smoked paprika
    • 1 onion - finely chopped
    • 6 large loves garlic - smashed and then chopped
    • 250ml (1 cup) chicken stock
    • 600ml tinned or freshly chopped tomatoes
    • 125ml ( ½ cup) white wine vinegar
    • 1 tablespoon Worcestershire sauce
    • 2 - 3 squirts Tabasco
    • Salt and pepper to taste

    Instructions

    1. Heat the olive oil in a large pan or wok and brown all the meat. You might want to do this in batches.
    2. Add the spices and chopped onion and stir to combine.
    3. When the onion is translucent and soft, add the garlic and sizzle for a couple of minutes.
    4. Now pour in the chicken stock and tomatoes, Worcestershire sauce and Tabasco and simmer for about 30 minutes or longer.
    5. Meanwhile cook your conchiglioni as per the instructions on the package.
    6. About ten minutes before serving, add the vinegar.
    7. Season with salt and pepper to taste and serve over the conchiglioni.
    © Dan Toombs
    Cuisine: Italian/American / Category: Main
    If you try this pork pasta recipe, please leave a comment. I'd love to hear from you.

    Salmon Salad Recipe with Tandoori Salmon

    January 21, 2015 By Dan

    Tandoori Salmon Salad
    Tandoori salmon salad
    This is one of my favourite salmon salad recipes.

    Please don’t be scared off by the long list of ingredients for the tandoori marinade.

    Yes, it is quite a long list but once made, you can use it on almost any fish, poultry or meat.

    If you are cooking for a larger group, just double or triple the recipe. It will last in the fridge for up to three days.

    If you decide to use the marinade for poultry or meat, you can let it marinate for eight to 48 hours. The longer the better!

    Here I opted for fresh salmon as I was in the mood for a good salmon salad recipe and thought this might just work. It did!

    Getting the recipe right...

    Salmon and other fish only needs to sit in the marinade for about 20 minutes.

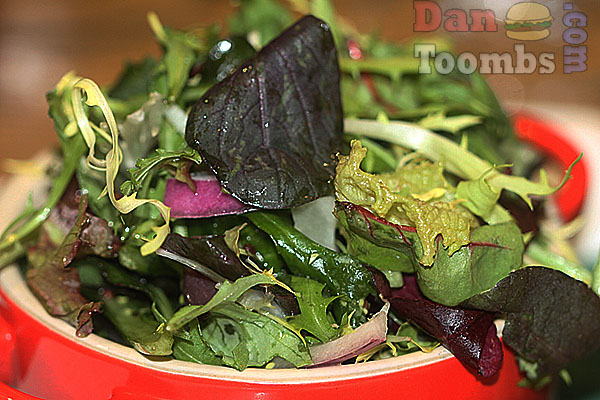
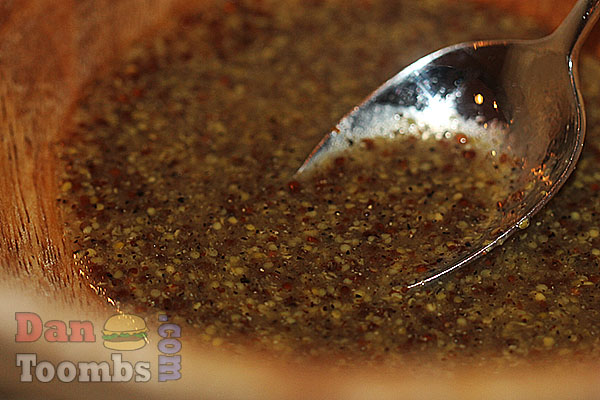
    I served the tandoori salmon with a salad and creamy vinaigrette dressing that really complimented the fish.

    You will notice that I used beetroot powder in the tandoori marinade. This is used to naturally give the fish a tandoori red glow. It has little to no flavour so it is optional.

    Note: you can use a pestle and mortar but for best results use a small food processor.


    Tandoori salmon
    You want to cook the salmon so that it is just cooked through but still quite pink.

    Tandoori Salmon Salad

    Recipe

    Oven Roasted Tandoori Salmon Salad

    Oven Roasted Tandoori Salmon Salad

    Yield: 1 - 2
    Prep Time: 30 minutes
    Cook Time: 20 minutes
    Total Time: 50 minutes

    Ingredients

    • 1 x 250g – skinned
    • Leafy Italian lettuce and any crisp vegetables you fancy
    • FOR THE MARINADE
    • 2 tablespoons plain Greek yogurt
    • 1 teaspoon cumin
    • 1 teaspoon beetroot powder (optional for colouring)
    • 2 cloves garlic
    • 1 x 2cm piece of ginger – roughly chopped
    • 3 green cardamom pods
    • 1 teaspoon paprika
    • ½ teaspoon chilli powder (optional)
    • 1 blade mace
    • A pinch of nutmeg
    • A pinch of fenugreek powder
    • A pinch of turmeric
    • ¼ teaspoon citric acid (optional)
    • ¼ teaspoon cinnamon powder
    • Juice of one lime
    • Salt and pepper to taste
    • FOR THE DRESSING
    • 1 tablespoon mayonnaise
    • 1 tablespoon lowfat sour cream
    • 1 teaspoon olive oil
    • 1 teaspoon brandy
    • 1 clove garlic – finely chopped
    • Juice of one lemon
    • 1 tablespoon fresh coriander leaves
    • Salt and pepper to taste

    Instructions

    1. Pre-heat your oven to 200c
    2. In a small food processor or pestle and mortar, blend the marinade ingredients except for the salt and pepper until you have a very smooth paste.
    3. Try the paste and add salt and pepper to taste.
    4. Cover the salmon fillet with the marinade and let it rest for about 20 minutes.
    5. Meanwhile, make you dressing.
    6. Using a clean food processor, whip up the dressing ingredients until the dressing is creamy smooth. Set aside.
    7. Place your tandoori salmon fillet on a baking tray in a pre-heated oven and roast the fish until it is just cooked through. I like mine to be a little pink inside which takes about 12 to 15 minutes. Aim for 20 minutes if you like yours cooked through.
    8. Toss your salad ingredients with most of the dressing leaving a little to spoon over the salmon.
    9. Place your greens on a chilled plate and then top with the warm salmon and a little more dressing.
    10. Serve immediately.
    © Dan Toombs
    Cuisine: Indian / Category: Main or Side Dish

    I would like to thank Westin Gourmet for sending me the delicious salmon to use in this recipe. I highly recommend their products and service.

    The I.O.Shen Extra Long Blade Bread Knife - Purchase The Best

    January 21, 2015 By Dan

    I.O.Shen Extra Long Blad Bread Knife
    I.O.Shen Extra Long Blad Bread Knife
    Perfect slice - every time! I.O.Shen.

    I have tried and tested each of the knives in the I.O.Shen Knives product range. You know you can always trust I.O.Shen Knives to perform fantastically well. I liked them so much I purchased the whole range and became a distributor! If you are interested in purchasing I.O.Shen Knives online at reduced prices, then read on...

    I.O.Shen knives are the sharpest knives on the market and stay sharp longer between sharpening. The The I.O.Shen Extra Long Bread Knife is the best bread knife I have ever used.

    The I.O.Shen Bread Knife is the only knife in the range doesn't have the Triplex Steel Technology. It isn't needed due to the serrations. You will be amazed at how well this bread knife cuts through even the hardest crusts - neatly and precisely.

    Working as a food blogger as I do, I have tried and tested a lot of bread knives and know I can rely on I.O.Shen every time.

    The long blade makes slicing through freshly baked bread easy regardless of the size of the loaf. It cuts through hard and soft crusts with ease and then straight through leaving you with a picture perfect straight slice every time.

    I.O.Shen Extra Long Blade Bread Knife
    I love my I.O.Shen Knives.

    As with all the other knives in I.O.Shen's fantastic range, the bread knife features a stylish and recognisable heavy handle. If you are used to knives manufactured in the West, you will like this. Most Japanese knives feature lighter handles made from metal, bamboo or wood.

    As you can see from the photographs, this product is not only a pleasure to use but it will also look awesome displayed in your kitchen. You may even decide to purchase the I.O.Shen knife block as I did.

    If you enjoy baking bread as I do, you owe it to yourself to give this knife a try.

    Believe me, once you've tried the I.O.Shen Extra Long Bread Knife you'll never go back.

    You probably don't need me to tell you that baking the perfect loaf is a true art. Ensuring that your work looks the best it can when presented at the table is important.

    Blade of the I.O.Shen Bread Knife
    You can't purchase a better bread knife!

    There's no point going to all that work just to to have it break apart with crumbs everywhere now is there! With this specially designed knife you will be able to make precision cuts and take pride in what you've produced.

    Of course with a RRP of £59.95, this product is not for everyone. For the keen chefs and bakers out there, however it's the only one!

    Handle of the I.O.Shen Bread Knife
    The distinctively designed heavy handle.


    Enchiladas Verdes

    January 20, 2015 By Shannon

    Enchiladas verdes served on salsa verde, topped with cheese and diced onion

    Fresh, vibrant and packed full of flavor. These Enchiladas Verdes are filled with shredded chicken, smothered in Salsa Verde sauce and bursting with flavor. You just have to give these a try!

    Enchiladas verdes served on salsa verde, topped with cheese and diced onion

    About this recipe:

    The star of the show in these Enchiladas Verdes is the Salsa Verde sauce. Salsa Verde (green sauce) can be found in many different cuisines from around the world. This sauce gets its vibrant green color from tomatillos, heaps of cilantro (coriander) and jalapeños, also providing a burst of freshness. You can buy premade jars of Salsa Verde or try our homemade Salsa Verde sauce here. This recipe shows you an easy way of making succulent shredded chicken and how you construct your delicious Enchiladas Verdes.

    Ingredients

    Ingredients for Enchiladas verdes
    • For the Salsa Verde:
    • Tinned tomatillos
    • Jalapeno pepper
    • White Onion
    • Garlic
    • Cilantro
    • Mexican Oregano
    • Lime juice
    • Salt
    • For the Enchiladas:
    • Chicken stock
    • Salsa Verde
    • Chicken breast
    • Tortillas
    • Queso Fresco cheese (any mild, crumbly cheese)
    • Diced white onion
    • Chopped cilantro
    • Sour cream

    See recipe card for quantities.

    Step by step photographs..

    Chicken browning in a pan
    1. Step 1: In a pan with a splash of olive oil on a medium heat, brown both sides of your chicken.
    Chicken stock added to the pan
    1. Step 2: Add ¼ cup of chicken stock (60ml) to your pan.
    Lid covering pan with chicken and chicken stock inside
    1. Step 3: Cover with a lid and allow to poach for 10-12 minutes.
    Chicken stock added to salsa verde
    1. Step 4: Add the rest of your chicken stock (½ cup or 120ml) to your Salsa Verde.
    Oregano added to salsa verde
    1. Step 5: Add your dried oregano.
    Poached chicken shredded in a bowl
    1. Step 6: In a bowl, shred your chicken breasts with a fork.
    Salsa verde added to shredded chicken
    1. Step 7: Add 3 tablespoons of your salsa verde mixture.
    Salsa verde and chicken mixed together
    1. Step 8: Mix well.
    Salsa verde covering plate
    1. Step 9: To a large plate add a thin layer of salsa verde.
    Tortilla filled with salsa verde shredded chicken, cheese and onion
    1. Step 10: Place a tortilla on the plate and add a healthy portion of your shredded chicken.
    Cheese and diced onions added
    1. Step 11: Top with a sprinkle of Queso Fresco cheese and diced onions.
    Enchiladas with verdes added to the pan rolled
    1. Step 12: Add a thin layer of salsa verde to the bottom of an oven proof baking tray. Roll your tortilla and place it in your baking tray. Repeat for the rest of your tortillas.
    Enchiladas smothered in more verdes sauce
    1. Step 13: Top your enchiladas with the remaining salsa verde (reserve a few tablespoons for serving).
    Enchiladas verdes smothered in cheese
    1. Step 14: Top with the rest of your Queso Fresco cheese and bake at 400F/200C for 10-12 minutes.
    Enchiladas topped with diced onions and coriander
    1. Step 15: Spread a thin layer of salsa verde on your plate, add your enchiladas verdes and top with more diced onion and sour cream.
    Enchiladas verdes plated
    1. Step 16: Dig in!

    What about the Salsa Verde?

    You can use premade Salsa Verde, it can be found in a few good food stores and you will need around 1lb 11oz (750ml). Alternatively, for a more authentic, fresh and vibrant Salsa Verde you can make it yourself. Follow this Salsa Verde recipe and you will have the perfect amount of salsa to make your Enchiladas Verdes.

    What about the tomatillos?

    This Salsa Verde recipe calls for tinned tomatillos as you cannot easily source fresh tomatillos in the UK. They can be bought online on a lot of different retailers, including Amazon. The ease with tinned tomatillos is that they are already cooked so can be blended straight away. If you're lucky enough to be able to source fresh tomatillos then I would definitely use them over tinned to get the freshest Salsa Verde possible! Simply remove the husks and the stems, add them to a baking tray and roast in the oven for 15-20 minutes at 400F/200C. Then, add them to your blender with the other ingredients.

    Substitutions

    • Oregano - If you can source Mexican oregano you will end up with a more authentically flavored Enchiladas Verdes. Mexican oregano has slightly bigger, more jagged leaves and provides a citrusy flavor that normal oregano doesn't provide.
    • Tortillas - I used flour tortillas for this recipe and they work perfectly well to soak up the verdes sauce and keep the enchiladas in tact. However, if you can find corn tortillas you will add an extra depth of authentic Mexican flavor to your Enchiladas Verdes.
    • Cheese - If you can source it, Queso Fresco cheese is an authentic cheese to use. Any mild, crumbly cheese will do however. From making plenty of Mexican recipes using ingredients that can be sourced in the UK, I've found that Wensleydale cheese works great. It crumbles beautifully and can be sprinkled on top of tacos without it melting.
    • Chicken stock - If you're running low on good quality chicken stock then vegetable stock will work just as well!

    Equipment

    You don't need any specialist equipment for this recipes. All you need is a pan and a large oven proof dish to bake your Enchiladas Verdes in! It's just that easy!

    Storage

    Refrigeration - Allow to cool completely, remove any sour cream and transfer to an airtight container or cover your baking tray with foil. Refrigerate for up to 4 days. To reheat, bake in the oven at 400F/200C for 20 minutes.

    Freezing - Allow to cool completely, remove any dairy toppings and wrap in foil. Store in an airtight container or freezer bags and keep in the freezer for up to 3 months. To reheat, defrost in the fridge and place the foil wrapped enchiladas in the oven for 20 minutes then uncovered for 5 minutes to crisp.

    Top Tip

    To prevent your Enchiladas Verdes from sticking to your baking tray, add a thin layer of your Salsa Verdes to the bottom of the tray. Place your enchiladas on top and bake as instructed.

    FAQ

    Can I make Enchiladas Verdes ahead of time?

    Yes, enchiladas verdes are perfect for making ahead fo time. You can assemble them up to two days in advance, cover them tightly, and store them in the fridge until you're ready to bake. For longer storage, you can also freeze them (either baked or unbaked) for up to three months

    How spicy are Enchiladas Verdes?

    It's up to you! make them as spicy or as mild as you like. The Salsa Verde is where the kick of spice comes from so if you're making it from scratch then add half the amount of Jalapeños.

    Related

    Looking for other recipes like this? Try these:

    • Salsa verde tacos topped with salsa and cheese
      Salsa Verde Tacos
    • Refried bean taquitos served with chipotle dip
      Refried Bean Taquitos
    • Chipotle chicken taquitos served with chipotle dip
      Chipotle Chicken Taquitos
    • Spicy beef taquitos served with guacamole
      Spicy Beef Taquitos
    • potato chorizo taquitos
      Potato Chorizo Taquitos
    • slow cooker mexican shredded chicken
      Slow Cooker Mexican Shredded Chicken
    • Chipotle chicken recipe
      Chipotle Chicken Recipe
    • pozole verde served in a bowl
      Pozole Verde

    Recipe

    Enchiladas verdes served on salsa verde, topped with cheese and diced onion

    Enchiladas Verdes

    Yield: 3-4
    Prep Time: 5 minutes
    Cook Time: 30 minutes
    Total Time: 35 minutes

    Fresh, vibrant and packed full of flavor. These Enchiladas Verdes are filled with shredded chicken, smothered in Salsa Verde sauce and bursting with flavor.

    Ingredients

    • 3 Chicken Breasts
    • ¾ cups (180ml) chicken stock
    • 3 cups (750ml) Salsa Verde](https://dantoombs.com/2025/07/07/salsa-verde/)
    • 6 large flour tortillas
    • 1 cup (120g) Queso Fresco cheese crumbled
    • 1 white onion diced
    • 1 Tablespoon chopped cilantro (coriander)
    • 2 Tablespoons sour cream

    Instructions

      1. In a pan with a splash of olive oil on a medium heat, brown both sides of your chicken. Add ¼ cup of chicken stock (60ml) to your pan. Cover with a lid and allow to poach for 10-12 minutes.
      2. In a bowl, add the rest of your chicken stock (½ cup or 120ml) to your Salsa Verde. Add your dried oregano.
      3. In a bowl, shred your chicken breasts with a fork. Add 3 tablespoons of your salsa verde mixture and mix well.
      4. To a large plate add a thin layer of salsa verde. Place a tortilla on the plate and add a healthy portion of your shredded chicken. Top with a sprinkle of Wensleydale cheese and diced onions.
      5. Add a thin layer of salsa verde to the bottom of an over proof baking tray. Roll your tortilla and place it in your baking tray. Repeat for the rest of your tortillas. Top your enchiladas with the remaining salsa verde (reserve a few tablespoons for serving). Top with the rest of your Wensleydale cheese.
      6. Bake at 400F/200C for 15-20 minutes.
      7. Spread a thin layer of salsa verde on your plate, add your enchiladas verdes and top with more diced onion and sour cream.
    Nutrition Information:
    Yield: 3 Serving Size: 1
    Amount Per Serving: Calories: 607Total Fat: 17gSaturated Fat: 6gTrans Fat: 0gUnsaturated Fat: 9gCholesterol: 118mgSodium: 708mgCarbohydrates: 61gFiber: 4gSugar: 3gProtein: 50g
    © Shannon
    Cuisine: Mexican / Category: Mexican

    Indian Chutney Recipe with Red Chillies

    January 20, 2015 By Dan

    Indian Red Chilli Chutney

    Indian Red Chilli Chutney
    You are going to love this Indian chutney recipe with red chillies.

    Although I usually make this Indian red chutney recipe with red chillies to serve with dosas, it can be used with so many other dishes too.

    If only making dosas could be as easy as making the chutneys to go with them. This is one easy Indian chutney recipe.

    Yes, red chilli chutney goes great with dosas but it can also be used as a dip or smothered over a burger. The possibilities are endless.

    If you are a chilli and garlic fan, this is definitely one to try.

    Be sure to blend the ingredients until you have a nice smooth paste. There's no point rushing. Those chana dhal lentils can be a bit crunchy if not blended well.

    If you'd like to try my dosa recipe, just click here. They aren't as easy to make but worth the effort.

    That or simply use this Indian chutney recipe on your next taco.

    Roasting channa dhal lentils
    Toasting the channa dhal

    Soaking dried red chillies
    Soaking the dried chillies.

    red chilli chutney
    Quick and easy to make. This is one for spice fans!

    If you like this Indian chutney recipe, you might like to try some of these too...

    Keema dosas
    Sesame seed and cilantro (coriander) chutney
    Spicy Nduja pasta
    Easy chilli con carne
    Raw oysters with chipotle and lime sauce
     

    Recipe

    Fiery Hot Red Chilli Chutney For Dosas

    Fiery Hot Red Chilli Chutney For Dosas

    Yield: 8
    Prep Time: 30 minutes
    Total Time: 30 minutes

    Ingredients

    • 2 tablespoons roasted chana dal
    • 5 cloves garlic - peeled and smashed
    • 4 dry red chilies - soaked in warm water 30 minutes - more or less to taste
    • 1 teaspoon tamarind paste
    • ½ small onion, roughly chopped and soaked in water for ten minutes
    • ½ teaspoon cumin seeds
    • Salt and pepper to taste

    Instructions

    1. Place all of the ingredients in a small spice grinder.
    2. Add just enough water to blend into a paste. All done!
    3. This easy red chilli chutney will last in the fridge for up to three days covered in an air tight container.
    4. Spread it all over your dosas or if you can't take the heat, just dip your dosa into it.
    5. Enjoy.
    © Dan Toombs
    Cuisine: Indian / Category: Side Dish

    Chicken Diavolo - Spicy Italian Roast Chicken

    January 19, 2015 By Dan

    Chicken Diavolo on a bed of polenta with gravy.

    Today we’re heading over to Italy (at least in spirit) for a classic that I think you're going to love: Chicken Diavolo!

    Diavolo means “devil” in Italian, and true to its name, this dish brings the heat.
    It’s all about marinated chicken, grilled or roasted until juicy inside and crisp outside, with a punchy, spicy kick that keeps you going back for more.

    Chicken Diavolo on a bed of polenta with gravy.

    What is Chicken Diavolo?

    Chicken Diavolo (also called Pollo alla Diavola) is a traditional Italian grilled chicken dish, famous for its fiery seasoning and smoky, charred finish.

    The chicken is usually spatchcocked (flattened out) for even cooking, then marinated with chili, garlic, lemon, and herbs before hitting a hot grill or oven.

    The result? Tender, juicy meat with loads of spicy, garlicky flavour, crispy skin, and a hint of citrus to balance it all out.

    In Italy, it’s often served with simple sides like roasted potatoes, green salad, or a crusty loaf of bread to mop up all those delicious juices.

    [feast_advanced_jump_to]

    Ingredients

    The ingredients are simple and you probably have most or all of them already.

    Ingredients for the recipe laid out on a counter top.
    • chicken
    • olive oil
    • red pepper flakes
    • garlic
    • lemons
    • white wine vinegar
    • fresh rosemary
    • thyme
    • oregano
    • smoked paprika
    • Salt and black pepper
    • OPTIONAL
    • unsalted chicken stock
    • dry white wine

    See recipe card for quantities.

    Step by Step Photos

    Recipes don't get much easier than this chicken diavolo. Check out my step by step photos to see how simple this delicious dish is.

    Cutting the back bone off the chicken.
    1. Step 1: Place the chicken breast side down. Using a sharp knife or scissors, cut out the back bone. Save it if you like and roast it with the chicken to flavour the gravy if you are making it.
    Pressing the chicken down to flatten it.
    1. Step 2: Flip the chicken over and press it down hard on the breast bone to break it and flatten the chicken.
    Rubbing a finger between the skin and meat of the chicken.
    1. Step 3: For best results, work your finger between the meat and the skin.
    Mixing the marinade ingredients together and adding salt to taste.
    1. Step 4: Whisk the marinade ingredients together.
    The chicken rubbed with all the marinade.
    1. Step 5: Then rub the marinade all over the chicken and under the skin if you took that step.
    The chicken breast side down on a rack in a baking tray.
    1. Step 6: Preheat the oven to 220°C (425°F). Place the chicken on a wire rack over a baking tray. Roast for about 40–45 minutes, breast side down, turning once halfway through, until golden, crispy, and cooked through. Be sure to baste often with the marinade. For grilling method, see the recipe card below.
    Adding the stock and wine to the roasting pan.
    1. Step 7: If making the gravy, pour the wine and chicken stock into the tray about 20 minutes into the cook. You can add the backbone of the chicken too for additional flavour.
    The cooked Chicken Diavolo ready to transfer to a plate to rest and then carve.
    1. Step 8: Transfer the chicken to a carving board and allow to rest for 5 to 10 minutes before carving.In that order)
    Cooking the sauce down over a medium-high heat in the roasting tray.
    1. Step 9: Place the roasting tray over a medium-high heat and reduce by half.
    Chicken Diavolo on a serving plate over polenta with the gravy.
    1. Step 10: Carve the chicken into suitable sized pieces and serve with lemon wedges and the gravy if you made it. I always add a few more dried chili flakes to mine.

    How do you spatchcock a chicken?

    Spatchcocking sounds fancy, but it’s dead easy — and it helps the chicken cook faster and more evenly.

    Here’s how:

    1. Place the chicken breast-side down on a cutting board.
    2. Using kitchen shears or a sharp knife, cut along each side of the backbone and remove it.
    3. Flip the chicken over and press down firmly on the breastbone to flatten it.

    Done!
    It’s a game-changer for juicy, evenly cooked chicken.

    Variations

    Extra Spicy: Add a splash of hot sauce or a teaspoon of cayenne pepper to the marinade.

    Herby Version: Mix in fresh thyme, basil, or flat-leaf parsley for a more herbal, less fiery version.

    Butterflied Chicken Thighs: No whole chicken? Boneless thighs work brilliantly too — just adjust the cooking time.

    Equipment

    You don't need any special equipment to make chicken diavolo. The following will help though.

    Sharp knife or kitchen shears (for spatchcocking) and chopping

    Large mixing bowl - for mixing the marinade ingredients.

    Grill or griddle pan (or oven if roasting).

    Basting brush - for basting the chicken as it cooks.

    Tongs - For turning the chicken and transferring it to a plate.

    Storage

    If you have any leftovers, you can store them in an airtight container for up to 4 days in the fridge. The meat can be served cold or hot in a sandwich or stirred into paste.

    This might be Italian chicken but it is a little spicy and would be great stirred into a curry too. I have a lot of curry recipes for you on my other blog here.

    Final Thoughts

    If you love bold, fiery, no-fuss recipes (and if you’re reading this, I’m guessing you do!), Chicken Diavolo needs to be on your menu.

    It’s easy, full of big Italian flavours, and just a brilliant way to shake up your usual grilled chicken routine.

    Give it a go — and don’t forget a big squeeze of lemon before you tuck in!

    Top Tip

    Baste often! Every time you turn the chicken, brush it with a bit more marinade or juices. It keeps it juicy and loaded with flavour.

    FAQ

    Can you cook chicken diavolo on a barbecue?

    Yes and in my opinion, it's even better. The cooking instructions and heat are the same. For grilled chicken, cook it over medium heat coals until golden brown and charred in places. If cooking over indirect heat (roasting) fire up your barbecue and get it up to heat and then let the chicken cook over the cooler side of the barbecue until cooked through. Either way, be sure to baste the chicken often while cooking.

    Do you have to use a whole chicken?

    No. I recommend using chicken thighs as they are juicier than breast meat. The cooking time might vary some. Just make sure your chicken is cooked to 165°F/75°C before resting and serving.

    Related

    Looking for a light Mediterranean lunch or something you can serve with your chicken diavolo leftovers?

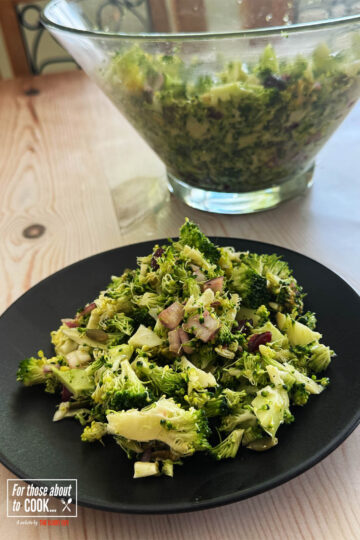
    • Broccoli Salad on a serving plate.
      Broccoli Salad
    • Hot canned tuna recipe served up with vegetables and bread.
      Canned Tuna Recipe
    • Garlic soup in a serving bowl.
      Garlic Soup

    Once you've tried this chicken diavolo, you might like to dig into these too.

    Try all of these. You'll love them!

    • All Italian burger finished
      The All Italian Burger
    • Ribeye steak with garlic butter served with loaded potato and broccoli
      Ribeye Steaks
    • The cooked fish on a serving platter drizzled with the herb mixture.
      Mediterranean Fish - Grilled
    • Bowl of chicken and chorizo risotto garnished with parsley
      Chicken and Chorizo Risotto
    • Finished asparagus risotto
      Asparagus Risotto
    • Steak Pizzaiola in the dish it was cooked in.
      Steak Pizzaiola
    • tomato and mascarpone pasta
      Tomato and Mascarpone Pasta
    • Homemade easy pesto pasta
      Easy Pesto Pasta
    • Homemade Tuscan chicken plated up
      Tuscan Chicken
    • gnocchi with brown butter and sage
      Gnocchi With Brown Butter And Sage
    • Italian Gnocchi Recipe
      Italian Gnocchi Recipe
    • homemade basil pesto
      Basil Pesto

    Recipe

    Chicken Diavolo on a bed of polenta with gravy.

    Chicken Diavolo

    Yield: 2 to 4
    Prep Time: 15 minutes
    Cook Time: 50 minutes
    Total Time: 1 hour 5 minutes

    The cooking time below is for the oven roast method. Grilling the chicken is equally as good but more hands-on and is a bit faster. You are going to love this chicken diavolo!

    Ingredients

    • 1 x 3lb. (⅕kg) chicken, spatchcocked (flattened)
    • 3 tablespoon olive oil
    • 2 teaspoon red pepper flakes
    • 6 garlic cloves, minced
    • Juice of 2 lemons
    • 1 tablespoon white wine vinegar
    • 1 tablespoon fresh rosemary, finely chopped
    • 1 tablespoon fresh thyme or 1 teaspoon dried thyme
    • 1 teaspoon dried oregano
    • 2 teaspoon smoked paprika (optional)
    • Salt and black pepper
    • OPTIONAL
    • 1 cup (250ml) unsalted chicken stock
    • ½ cup (125ml) dry white wine

    Instructions

    1. Whisk the marinade ingredients together. Give it a taste. You want it to have a bit of a kick and taste garlicky, spicy and fresh. You can adjust the flavors at this point.
    2. Rub the marinade all over the chicken. If you have time, try to get as much marinade under the skin as you can. To do this, carefully, move your finger between the skin and meat and try not to rip the skin as you do.
    3. Then rub the marinade on the meat under the skin. Rub some on top too.
    4. If you’ve got time, let it marinate for at least 2 hours and no more than 4 hours. If you’re short on time, 30 minutes at room temperature will still give you good results.
      GRILL METHOD
    5. Preheat your grill to medium-high.
    6. Place the chicken skin-side down and grill for about 10 minutes.
    7. Flip and cook for another 25–30 minutes, basting with extra marinade, until the skin is charred and a meat thermometer reads 75°C (165°F) at the thickest part.
      OVEN METHOD:
    8. Preheat the oven to 220°C (425°F).
    9. Place the chicken on a wire rack over a baking tray.
    10. Roast for about 40–45 minutes, turning once halfway through, until golden, crispy, and cooked through.
    11. Whichever way you cook it, let the chicken rest for 5–10 minutes before carving.
    12. If you would like to make an optional gravy, pour the chicken stock and wine into the tray with the chicken for the last 30 minutes of cooking. Then reduce it down by half when the chicken is resting before serving.
    13. To Serve, place the chicken on serving plates. If you prepared the optional gravy, drizzle it over the chicken and be sure to serve it with lemon wedges which can be squeezed over the chicken to taste at the table.
    14. A sprinkle of extra chilli flakes and a handful of chopped parsley never hurt either!
    Nutrition Information:
    Yield: 2 Serving Size: 1
    Amount Per Serving: Calories: 376Total Fat: 23gSaturated Fat: 3gTrans Fat: 0gUnsaturated Fat: 18gCholesterol: 4mgSodium: 543mgCarbohydrates: 36gFiber: 5gSugar: 19gProtein: 6g
    © Dan
    Cuisine: Italian / Category: Italian

    Fiery Hot Chilli Olive Oil

    January 19, 2015 By Dan

    making spicy chilli olive oil

    making spicy chilli olive oil
    Making chilli olive oil

    There are a lot of chilli oils on the market but few are spicy enough for my liking. They offer more of a zing than a zap. So I tend to make a lot of my spice oils at home.

    This one is great for adding a bit of spice to any meal. Pour if over your steak or chicken. Use it to dip your vegetables in. The sky's the limit.

    You will need to start this one a day or two before using but it keeps for up to two weeks.

    My wife and daughters aren't all that crazy about spicy food so this chilli olive oil offers my son and me a way of spicing up a dish that is a little on the mild side.

    Just drizzle a little over your recipe of choice. You can also use it as a marinade.

    I know from experience what the oil looks like when it's ready. You may need an oil thermometer the first few times you make the oil. Bring the oil slowly up to 77c (170f) give or take a few degrees.

    Store in an air tight container in a cool dark cupboard.

    Hot chilli olive oil


    Recipe

    Fiery Chilli Olive Oil

    Fiery Chilli Olive Oil

    Yield: 15
    Prep Time: 10 minutes
    Cook Time: 20 minutes
    Total Time: 30 minutes

    Ingredients

    • 500ml (2 cups) olive oil
    • 10 green or red chillies of choice - seeded and roughly chopped
    • 2 tablespoons red chilli flakes
    • 1 tablespoon hot smoked paprika

    Instructions

    1. Place all of the ingredients in a saucepan and bring up to 77c. Don't rush this. Take you time.
    2. When the oil reaches 77c or there abouts, remove from the heat and allow to cool.
    3. Pour into an air-tight container and let sit for one to two days in a cool cupboard.
    4. Run through a sieve. You can use the oil for up to two weeks without any great loss of flavour.
    © Dan Toombs
    Cuisine: American / Category: Side


    Seared Sea Bass With Coriander and Coconut Sauce

    January 19, 2015 By Dan

    Sea bass with coriander chutney

    Sea Bass with coriander chutney
    This is a really quick and easy, delicious dish. Give it a go!

    I'm a big fan of seared sea bass especially with this coriander and coconut sauce. The flavours go so well together.

    Today, I decided to make this for my wife for lunch. The weather was too good to sit inside eating cheese sandwiches.

    Serving the pan seared sea bass with the flavoursome sauce really takes a plain fish dish and makes it special.

    The whole meal only took 15 minutes from start to finish to prepare.

    How to get seared sea bass just right...

    When frying sea bass fillets it is important to get all of the moisture out of the skin.

    If you don’t, the skin will not get nice and crispy.

    To do this, take a sharp knife and press it against the skin at the head end. Then scrape it down the fillet toward the tail end.

    Do this a couple of times and you will be left with dry skin that is perfect for searing.

    And that tasty sauce...

    It seems that each time that I make this coriander sauce (chutney), I make it differently.

    Today’s coriander chutney was made with a few easy to find products that I had on hand. It worked really well and complimented the flavour of the fresh sea bass perfectly.

    The coconut may not be to everyone's liking but I love it. You can leave it out if you want.

    Sometimes the simplest dishes are best.

    Sea Bass
    The fresh sea bass from Westin Gourmet is delicious.

    Searing Sea bass
    Searing the fillets.

    searing sea bass
    Press the fillets down so that the skin crisps evenly.

    Seared sea bass with coriander and coconut chutney
    All ready!

    If you like this recipe, you might like to try some of these too...

    Pan seared sea bass with chorizo and chickpeas
    Rainbow Trout poached in white wine
    San Francisco cioppino
    Seafood pancakes with lobster
    Normandy style seafood stew.

    Recipe

    Seared Sea Bass With Coriander and Coconut Chutney

    Seared Sea Bass With Coriander and Coconut Chutney

    Yield: 2
    Prep Time: 5 minutes
    Cook Time: 10 minutes
    Total Time: 15 minutes

    Ingredients

    • 2 fresh sea bass fillets
    • 2 tablespoons olive oil
    • Salt and pepper to taste
    • 1 roughly chopped birds-eye green chilli (optional)
    • 2 tablespoons olive oil
    • FOR THE CORIANDER CHUTNEY
    • 1 small bunch fresh coriander leaves and fine stems
    • 3 tablespoons fresh chopped parsley
    • 1 clove garlic – smashed and roughly chopped
    • 3 tablespoons fresh grated coconut or frozen
    • 2 tablespoons toasted almond flakes
    • 1 tablespoon plain Greek yogurt
    • 1 roughly chopped green chilli
    • 2 tablespoons olive oil

    Instructions

    1. Start by making the coriander chutney.
    2. Place all of the raita ingredients in a food processor and blend until smooth. You could also do this in a pestle and mortar but it takes a while longer. Set aside.
    3. Now heat the olive oil for the sea bass in a large frying pan over medium high heat until hot but not smoking.
    4. Season your bass fillets on both side with salt and pepper.
    5. Place the fillets skin side down and press them down with your finger or a spatula so that the skin fries evenly.
    6. When the sea bass is about 80% cooked through, carefully flip them over and fry for about another minute.
    7. Place the sea bass fillets skin side up on a warmed plate. Drizzle with a little bit of the chutney and spoon the rest of the raita next to the sea bass.
    8. Serve with limes, chopped birds-eye chile (if using) and a green salad.
    © Dan Toombs
    Cuisine: Indian / Category: Main

    I hope you enjoy this seared sea bass recipe. I you do try it, please leave a comment. I'd love to hear from you.

    Cheesy Garlic Bread Recipe Made Easy

    January 19, 2015 By Dan

    garlic bread

    garlic bread
    Not good for you but this cheesy garlic bread recipe is very tasty.

    I'm sure you'll agree with me that garlic bread is amazing. I wish I was younger and I could still eat as much of the stuff as I like. Oh well... I still enjoy it often but in moderation.

    This is an easy recipe but it does help to have a good food processor. I like to add the garlic cloves with the skin on as it add more flavour. It all gets processed into a paste anyway.

    It is important to find a good loaf of crusty sourdough bread. When I lived in California, San Francisco sourdough was the only way to go.

    You can now purchase it here in the UK but any good quality sourdough loaf will do just fine.

    Usually I use Parmesan in the mix but this time I used Pecorino. It made a nice change and very delicious too.

    Working ahead...

    Of course you want to use sour dough bread that is as fresh as can be.

    The garlic butter mixture, however can be made a few days ahead of time though.

    Simply blend it up in a food processor and store it in the fridge, covered until ready to use.

    ingredients for garlic bread
    You can prepare the ingredients ahead of time. They keep in the fridge.

    garlic cloves
    Use skin-on garlic cloves for added flavour.

    Making garlic bread
    Blend it all up into a garlic butter paste

    garlic bread.
    Spread the garlic butter over your bread and bake for about 15 minutes. Done!

    If you like this recipe, you might like to try some of these too...

    San Francisco Cioppino
    Italian style green bean recipe
    Chicken and chorizo risotto
    Penne pasta - Penne alla puttanesca
    Tandoori salmon salad

    Recipe

    The Ultimate Garlic Bread Recipe

    The Ultimate Garlic Bread Recipe

    Yield: 6
    Prep Time: 5 minutes
    Cook Time: 15 minutes
    Total Time: 20 minutes

    Ingredients

    • 1 loaf of crusty sourdough bread - sliced down the centre
    • ½ cup of lightly salted butter
    • 2 tablespoons olive oil
    • 12 cloves garlic - smashed
    • 200g (7oz) Parmesan or Pecorino cheese - grated
    • A small bunch of parsley - chopped

    Instructions

    1. Pre-heat your oven to 200c (400f)
    2. Place the butter, garlic, olive oil, cheese and parsley in a food processor and blend until you have a smooth paste.
    3. Spead this over your bread and place in the oven for about 10 to 15 minutes. Cooking times do vary so watch it the first time you make this recipe.
    4. Your garlic bread it ready when the top of the bread is nicely browned but the centre is still soft and buttery.
    © Dan Toombs
    Cuisine: American / Category: Side

    I hope you enjoy this cheesy garlic bread recipe. If you do try it, please leave a comment. I'd love to hear from you.

    • « Previous Page
    • 1
    • …
    • 18
    • 19
    • 20
    • 21
    • 22
    • …
    • 24
    • Next Page »
    For Those About To Cook

    Welcome To For Those About To Cook

    We're a family-run food blog sharing brand-new recipes every week. From easy weeknight staples to indulgent weekend favorites. We're a team of five: Dan (The Curry Guy), Caroline, Joe, Shannon, and Jennifer, bringing you a wide variety of dishes inspired by Europe, the Mediterranean, the Americas, and more.

    This site focuses on Western-inspired recipes, while Eastern flavors are covered in depth over at greatcurryrecipes.net Between the two, you'll find everything you need to cook up something amazing so don't forget to subscribe!

    Subscribe

    Footer

    Contact Privacy Policy

    Subscribe for weekly updates!

    Subscribe
    ↑ back to top

    Copyright © 2024 For Those About to Cook