For Those About To Cook

  • Home
  • About Us
  • All Recipes
  • Subscribe
menu icon
go to homepage
  • Home
  • About Us
  • All Recipes
  • Subscribe
    • Facebook
    • Instagram
    • Pinterest
  • search icon
    Homepage link
    • Home
    • About Us
    • All Recipes
    • Subscribe
    • Facebook
    • Instagram
    • Pinterest
  • ×
    Home

    My Basic Spätzle Recipe

    January 11, 2015 By Dan

    spätzle

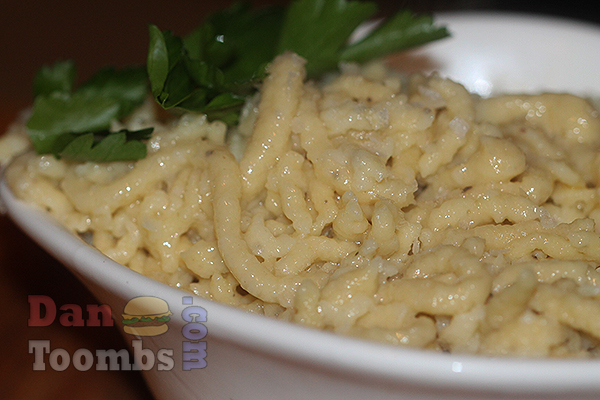
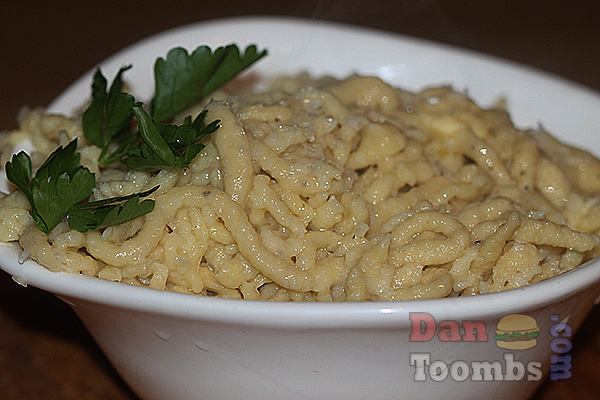
    This spätzle recipe will get you fantastic results every time!

    Fresh homemade spätzle

    One of the main reasons I first started writing my curry blog was that I wanted to get my kids in the kitchen and cooking. If you can cook well, you also get to eat well and that, for me is one of the great enjoyments of life. This späzle recipe is one I turn to all the time.

    Getting my kids involved in the kitchen worked for my two younger kids. My eldest daughter Katy loves the food but isn't all that keen on cooking it. Oh well, at least she knows a good meal.

    I first learned to cook spaetzle while studying in Germany back in 1986.

    This Spätzle recipe in one form or another was on almost every restaurant menu and I couldn't get enough of the stuff. As I was on a quite low student budget, it made sense to learn how to make it myself.

    My German friends were happy to show me how to make this delicious pasta dish.

    Now my son and younger daughter make it too which is quite handy. I simply call them up and ask them to whip up a batch for dinner. I'm telling you, once you try this spätzle recipe you'll want to eat it often.

    What to eat späzle with...

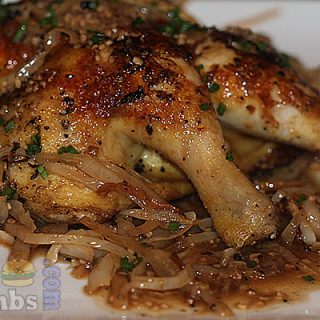
    Spätzle goes well with so many different meals and it is also awesome served on it's own with butter and garlic or in its more popular form as Käse Spätzle - a German pasta and cheese dish.

    You might also like to eat it with this homemade beef Sauerbraten! I think that's my favourite way to enjoy späzle.

    Next time you're thinking about cooking up some pasta, why not try this one? Fresh homemade Spätzle may be German but it tastes fantastic topped with Italian sauces too.

    Making Spätzle
    The batter should be thick so that it doesn't pour through the holes of your press without pushing it through.
    Making spätzle
    Pressing the batter into the boiling water.
    spätzle
    All ready.

    Recipe

    My Basic Spätzle Recipe

    My Basic Spätzle Recipe

    Yield: 4
    Prep Time: 10 minutes
    Cook Time: 5 minutes
    Total Time: 15 minutes

    Ingredients

    • 2 cups ( 250 g 9 oz ) Plain all purpose flour
    • 4 eggs
    • ½ cup (125ml) milk
    • 1 teaspoon salt
    • ½ teaspoon ground nutmeg (optional)
    • 2 tablespoons butter
    • Salt and pepper to taste

    Instructions

    1. Bring a large pot of mildly salted water to a boil.
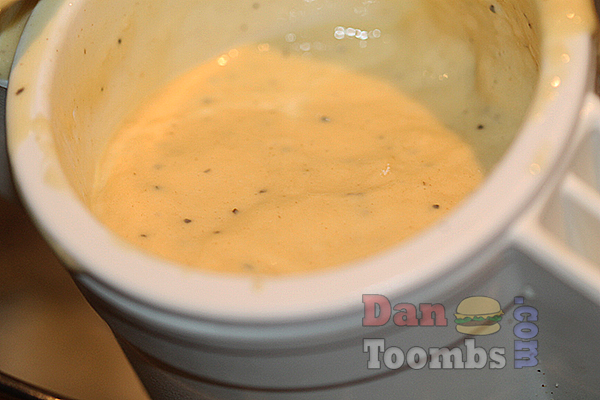
    2. Meanwhile make you batter.
    3. Mix the flour, eggs, milk, nutmeg (if using) and a pinch of salt and pepper in a large bowl until you have a smooth, thick paste.
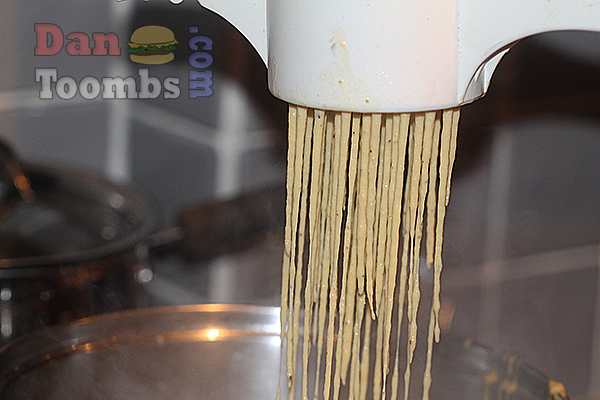
    4. If you are using a spätzle press, spoon a little of you batter in. If it is falling through the holes on its own, your batter is too thin. Add a little flour if this happens.
    5. If you are not using a spätzle press, you could use a colander or something similar and then press the batter through the wholes.
    6. Working in batches, press the batter through the holes of your swätzle press or colander.
    7. The spätzle pieces will hit the boiling water and then float to the top. Remove the floating spätzle from the water and keep warm in a bowl.
    8. When all the spätzle is made, stir in the butter and check for seasoning.
    9. Serve hot, on it's own or with your preferred stew or sauce.
    © Dan Toombs
    Cuisine: German / Category: Main or Side Dish


    Salad Nicoise With Creamy Vinaigrette Dressing

    January 10, 2015 By Dan

    Salad Nicoise
    Salad Nicoise
    You are going to love this salad nicoise recipe!

    Salad Nicoise is one of my all time favourite Summertime salads. Come to think about it, it's pretty good in Wintertime too. I guess that's why I decided to whip one up today.

    Don't be fooled by the photograph. It may look sunny and nice outside but I froze my butt off getting that photo.

    Just after shooting the picture, it began to snow quite heavily and my salad was covered in white stuff by the time I got it indoors.

    That's just one of the negatives of food blogging. I'm not complaining though. There are a lot more positives than there are negatives.

    How to get this salad nicoise recipe right...

    Try to find the freshest tuna available. The steaks I used were sashimi grade so I almost hated to cook them at all. The flavour and texture of tuna that fresh is out of this world.

    Obviously, it is also really important to use the freshest veggies you can get your hands on. Oh, and only use free range eggs. Barn eggs just won't do.

    I like to chill everything before serving including the plates and fork. Get you plates and forks in the freezer and you will notice the amazing results.

    So then, here you go. This is really quite an easy salad, as salads go. Enjoy.

    salad nicoise

    TIP: Never ever use canned tuna! It's great in a sandwich but when preparing a salad nicoise, only fresh tuna steaks will do.

    Salad Nicouse


    Salad Nicoise
    All ready!

    If you like this recipe, you might like to try some of these too.
    Ceasar Salad
    Tandoori Salmon Salad
    Capresi Salad
    Classic California Ranch Dressing

    Recipe

    Salad Nicoise With Creamy Vinaigrette Dressing

    Salad Nicoise With Creamy Vinaigrette Dressing

    Yield: 4
    Prep Time: 10 minutes
    Cook Time: 20 minutes
    Total Time: 30 minutes

    Ingredients

    • 10 Cherry Tomatoes – halved or quartered
    • 4 eggs – Boiled for 8 minutes (exactly)
    • 8 new potatoes – boiled until tender
    • 2 x 250g fresh tuna steaks
    • Olives – Nice juicy ones – as many as you can eat
    • 200g Green beans – trimmed and boiled until tender
    • Lettuce – As much as you want
    • 4 pieces of streaky bacon – fried until crisp
    • FOR THE DRESSING
    • 3 tablespoons mayonnaise
    • 3 tablespoons butter milk
    • 2 tablespoons olive oil
    • 2 tablespoons white wine vinegar
    • 1 clove garlic – minced
    • 2 spring onions – finely chopped
    • 3 tablespoons grated Parmesan cheese
    • 20 capers
    • 3 tablespoon – finely chopped parsley
    • 1 tablespoon brandy

    Instructions

    1. Start by making your dressing.
    2. Simply whisk all the dressing ingredients together and then chill for about an hour in the fridge.
    3. Heat a large pot of lightly salted water. When boiling, add the new potatoes and eggs. Remember to remove the eggs after eight minutes. Peel the shells of the eggs and cut into quarters.
    4. Continue cooking the potatoes until they are tender and then remove from the water.
    5. Place the green beans in the water and simmer until tender. This should only take a few minutes.
    6. When the beans are cooked, drain and set aside to cool.
    7. Now you are ready to cook the tuna steaks, heat a frying pan with about two tablespoons of olive oil until very hot.
    8. Season the tuna steaks on both sides with salt and pepper and then sear for about one minute per side. The centre should be nice and rare.
    9. Carve the tuna steaks into thin slices and set aside to rest while you build your salad.
    10. You don’t really need me to tell you how to build your salad now do you. Just place the ingredients you like on a plate. Tell your guests to do the same.
    11. Top with the tuna slices and dig in.
    12. I like to top the tuna with a little left over salad dressing if there is any.
    © Dan Toombs
    Cuisine: American/French / Category: Salad


    I hope you enjoy this salad nicoise recipe as much as my family and I do. If you do give it a try, don't be a stranger! Leave a comment. I would love to hear from you.

    Clam Dip Recipe

    January 7, 2015 By Dan

    A hand picking up a potato chip and dipping it into the clam dip.

    This clam dip recipe is one of my all time favourites. Fresh dips are essential at my parties. I've just never gotten into those store bought disasters that are mass produced and sold in the shops.  It’s a simple family recipe I’ve been making for decades.

    Clam dip on a potato chip with a bowl of potato chips in the background

    What is clam dip?

    Clam dip is a creamy, savory dip made with minced or chopped clams, cream cheese or sour cream, and seasonings like garlic, lemon juice, Worcestershire sauce, and sometimes hot sauce like Tabasco. It’s often served with crackers, chips, or vegetable sticks.

    I keep my clam dip recipe simple. In my opinion, the recipe can have too many ingredients in it that just aren't needed. So you will find that the ingredients are kept to a minimum but feel free to add some of the above mentioned if you want.

    Where did clam dip originate?

    I recently heard that it is from the North East coast of the US where fresh clams are abundant. I only recently used fresh clams out of necessity because you can't purchase canned clams where I live. It was amazing but this is the version of clam dip made at homes across the US using canned clams.

    Clam dip gained popularity in the 1950s and 1960s after the recipe appeared on a Philadelphia Cream Cheese package. It sure was popular at our family gatherings in the 70s, 80s and 90s. When I return home to visit, it is always on offer as a pre-dinner snack.

    [feast_advanced_jump_to]

    Ingredients

    In the photo below you will see what goes into my family recipe for clam dip. To this you can add other ingredients like Worcestershire sauce and lemon juice but personally, I think it gives the dip too many different flavours. Even the chopped scallions are optional but I like them so in they go.

    The ingredients for the recipe laid out on a counter top.
    • ingredient 1
    • ingredient 2
    • ingredient 3

    See recipe card for quantities.

    Step by step photographs

    As you will see in the photos below, There really isn't much to this clam dip recipe. You can literally make it in minutes!

    Whisking the cream cheese until smooth.
    1. Step 1: Whisk the cream cheese in a bowl until smooth.
    Adding the garlic and spring onions (scallions) to the bowl.
    1. Step 2: Add the sour cream, garlic and scallions and whisk them all in with a fork to combine.
    Stirring in the clams with some of the clam juice to thin the dip.
    1. Step 3: Stir in the canned clams and some of the broth in the can. You should add this to preference. The more you add, the thinner the clam dip will be. For a bit of a kick, add a few squirts of Tabasco.
    Whisking it all together to complete the recipe and adding salt to taste.
    1. Step 4: Whisk it all together and season with salt to taste.
    A bowl of clam dip next to potato chips
    1. Step 5: That's it. We're talking simple deliciousness here.
    A hand picking up a potato chip and dipping it into the clam dip.
    1. Step 6: Enjoy!

    Variations

    As I mentioned above, you can add other ingredients to your clam dip.

    • Spicy - Some do like it spicy. You can add Tabasco to taste or try any of your favorite hot sauces to taste.
    • Garlicky - I do love my garlic but keep it to a minimum when I make clam dip. Feel free to add more to taste.
    • Worcestershire Sauce - Many connoisseurs of clam dip love the umami flavor that Worcestershire sauce gives the dip. I don't add it to mine but it is nice.
    • Lemon juice - Everyone knows that lemon juice goes nicely with seafood. Add some to taste to give the dip a sour flavour that is popular in many households.

    Equipment

    A mixing bowl: Use a good sized bowl so that you can really get in there and whisk the ingredients together to combine into a smooth dip.

    A Fork: This is all you need to whisk.

    A Serving Bowl: Find a nice bowl for presentation. It just adds to the experience.

    Storage

    You can store your clam dip, covered in the fridge for 2 to 3 days. Be sure to whisk it some before serving as it is likely to separate some in the fridge.

    Top Tip

    Taste as you go. The perfect clam dip is the way you like it. Feel free to add some of the above mentioned ingredients. If it sounds good to you, it probably will be.

    FAQ

    Can I use fresh clams instead of canned clams?

    Yes! Steam fresh clams in about 2 inches of water until they open, then remove the meat and chop it finely. Save some of the clam juice for added flavor in the dip.

    What do you serve with clam dip?

    Potato chips are the most popular accompaniment but you can serve the dip with crakers, warm bread or crispy crudites if you like.

    Related

    Here are a few other dips and sauces you might like to try:

    • Homemade Guacamole in a serving bowl next to corn chips.
      Guacamole Recipe
    • The finished dish
      Creamy Salsa for Fish
    • Pico de gallo in a serving bowl next to homemade corn chips.
      How to Make Pico de Gallo
    • Finished Garlic Dip
      Garlic Dip - Indian Garlic Chutney

    Pairing

    Clam dip and chips is the perfect appetizer for any of these main dishes:

    • homemade big mac recipe
      How To Make A Homemade Big Mac
    • homemade croque monsieur
      Croque Monsieur
    • Homemade Tuscan chicken plated up
      Tuscan Chicken
    • cassoulet on a serving plate with crusty French bread and salad.
      Cassoulet
    • Hungarian goulash over pasta.
      Hungarian Goulash
    • Finished asparagus risotto
      Asparagus Risotto
    • Serving the steak and ale pie.
      Steak and Ale Pie
    • Lancashire Hot Pot
      Lancashire Hot Pot Recipe


    Recipe

    A hand picking up a potato chip and dipping it into the clam dip.

    Clam Dip Recipe

    Yield: 8
    Prep Time: 10 minutes
    Total Time: 10 minutes

    Clam dip is the perfect appetizer for any occasion. It's really easy to prepare and can be made in about 10 minutes too.

    Ingredients

    • 8oz (225g) cream cheese
    • ½ cup (125ml) sour cream
    • 3 squirts of Tabasco
    • 1 squirt Worcestershire sauce (optional)
    • 1 spring onion - finely chopped
    • 1 clove garlic - finely chopped
    • 1 can chopped clams or 30 fresh clams
    • Salt to taste

    Instructions

    1. If using live clams, heat about 200ml (¾ cup) water in a small pot that has a lid.
    2. Bring the water to a boil and then add the clams.
    3. Cover for about 3 minutes until the shells steam open.
    4. Remove the clams from the water to cool. Retain about 1 tablespoon of the cooking stock.
    5. When the clams have cooled, remove the meat from the shells and chop the meat finely.
    6. Now combine the cream cheese, sour cream, mayonnaise, Tabasco, Worcestershire sauce, spring onion and garlic in a large bowl and smash it all with a fork until smooth enough to dip a potato chip in without breaking it.
    7. Stir in the cooked or canned clams with one tablespoon of the stock that is in the can or the cooking stock.
    8. Serve with potato crisps or fresh raw vegetables.
    Nutrition Information:
    Yield: 8 Serving Size: 1
    Amount Per Serving: Calories: 59Total Fat: 4gSaturated Fat: 2gTrans Fat: 0gUnsaturated Fat: 1gCholesterol: 19mgSodium: 211mgCarbohydrates: 2gFiber: 0gSugar: 1gProtein: 3g
    © Dan Toombs
    Cuisine: American

    Oysters Rockefeller Recipe

    January 7, 2015 By Dan

    Oysters Rockefeller

    Oysters Rockefeller
    You are going to love this oysters rockefeller recipe.

    This is a family recipe I was afraid to try when I was younger. It just didn't appeal to me. Oysters can be quite scary when you're young.

    My grandparents used to always whip up this oysters rockefeller recipe on Christmas day. Although I didn't partake, it sure did smell nice.

    I always have love the aroma of garlic and there's a lot of it in this recipe.

    Nowadays I tend to just make this mouthwatering oysters rockefeller recipe for wife and me. Or every so often I get a chance to make it for people I know will love it.

    You can easily double or triple this recipe if you would like to make them for a crowd.

    You haven't tried oysters rockefeller until you've tried this recipe!

    I love the crispy bread crumbs that top two sauces and an oyster that is still raw but warm. My family doesn't include the hot sauce but I like it so that's that.

    Enjoy.

    Oysters Rockefeller
    Spoon the first sauce into each shell.

    Oysters Rockefeller
    Place an oyster on top.

    Oysters Rockefeller
    Top with a good dose of the spinach mixture.

    Oysters Rockefeller
    Place the shells on the hot rock salt and top with the bread crumbs and a little hot sauce.

    Oysters Rockefeller
    Great for sharing. Just get a couple small spoons and dig in.

    Oysters Rockefeller
    This one's mine!

    Oysters Rockefeller
    All done!

    Recipe

    Oysters Rockefeller

    Oysters Rockefeller

    Yield: 2 - 4
    Prep Time: 15 minutes
    Cook Time: 15 minutes
    Total Time: 30 minutes

    Ingredients

    • 8 oysters
    • 2 tablespoons Pernod
    • 4 cloves finely minced garlic
    • 1 tablespoon hot sauce
    • 8 tablespoons ( or more) sour cream
    • 1 large bunch (one cup) fresh chopped spinach
    • ½ teaspoon fennel seeds
    • 2 tablespoons white wine
    • Salt and freshly ground pepper to taste
    • 3 tablespoons freshly grated Parmesan cheese
    • Bread crumbs sauteed in butter until browned.
    • 500g (1lb) rock salt

    Instructions

    1. Blend the salt, pepper, garlic, hot sauce and about four tablespoons of sour cream.
    2. Spoon one tablespoon of this mixture in each shell.
    3. Now blend the spinach with four tablespoons of sour cream, the wine, fennel seeds and the Parmesan cheese. Add salt and pepper to taste.
    4. Place an oyster on top of the first sauce and then top with the spinach sauce.
    5. Sprinkle with the bread crumbs.
    6. Heat your grill to it's highest setting and heat the rock salt until very hot.
    7. Set the oyster shells on the hot rock salt and place under the grill for about ten minutes until heated through.
    8. If you're a hot sauce fan, top the bread crumbs with a drop or two before placing in the oven.
    © Dan Toombs
    Cuisine: American / Category: Appetizer


    I hope you enjoy this, my family's oysters rockefeller recipe. If you do try it, please leave a comment. I'd love to hear from you.

    Leek and Potato Soup

    January 6, 2015 By Shannon

    Leek and potato soup finished with cream

    Creamy, comforting and classic! This incredible Leek and Potato soup is a British staple and is perfect for warming you up in the colder months.

    Leek and potato soup finished with cream

    About this recipe:

    Leek and potato soup is a comforting and hearty dish. It originates from European peasant cooking however its country of origin is unknown. It has traditional routes in British and Welsh cooking with the leek being the national symbol of Wales. This recipe makes leeks the star of the show, pairing it with the humble potato to create a silky smooth and creamy soup! You have to try this warming and rustic Leek and Potato soup!

    Ingredients

    Ingredients for leek and potato soup
    • Leeks
    • Vegetable stock
    • Potatoes
    • Garlic
    • Rosemary
    • Cream
    • Butter
    • Olive oil

    See recipe card for quantities.

    Step by step pictures:

    Melting butter in a pan
    1. Step 1: Over a low heat, melt the butter in a pan.
    Leeks and salt and pepper added to a pan
    1. Step 2: Add your sliced leeks, garlic and rosemary.
    Salt and pepper added to soup
    1. Step 3: Season with salt and pepper.
    Stock added to soup
    1. Step 4: Add your vegetable stock.
    Potatoes added to the pot
    1. Step 5: Add your potatoes and simmer for 40 minutes.
    Soup blended with a hand blender
    1. Step 6: Take off the heat and use a blender to blend into a smooth consistency.

    Which potatoes are best for soup?

    The best potatoes are definitely starchy potatoes as they create a natural creaminess when boiled and blended. UK options are Maris Piper or King Edward potatoes. US options are Russet (Idaho) potatoes or Yukon Gold.

    Avoid waxy potatoes as they don't break down well and will leave you with a lumpy, gritty soup!

    Substitutions

    The traditional recipe for Leek and Potato soup is as written above, however there are a few substitutions you can make to use up any ingredients you might have in your refrigerator:

    • Leeks - I don't recommend completely replacing the leeks in this recipe as it will create a completely different dish, however you can swap out a handful of leeks for onions or shallots.
    • Potato - For a low carb alternative, cauliflower works well to keep the creamy texture.
    • Cream - For a daily free alternative you can substitute it for coconut cream or you can leave out the cream altogether!

    Variations

    Leek and Potato soup is perfectly balanced and delicious, however there are a few variations you can make to the recipe. Here are my suggestions:

    • Pancetta - Add a cup of pancetta to your pot when sautéing your leeks to create a smoky, heartier soup.
    • Cheese - stir in a handful of cheddar or Gruyere at the end of the cooking process. Perfect with crusty bread!
    • Spicy - For those spice lovers who can't make a recipe without it, try adding a tablespoon of chili powder and teaspoon of paprika when sautéing your leeks.

    Equipment

    You don't need any fancy equipment to make this Leek and Potato soup! I recommend using a large pot to cook your soup in so that the potatoes have room to simmer. When blending your soup, I recommend using a hand blender like I have in the step by steps pictures however you can use a standing blender but may need to blend your soup in batches!

    Storage

    If you have any leftover soup or are just working ahead of time, here's how you can store your soup:

    Refrigeration: Allow your soup to cool completely. Store in an airtight container and transfer to the fridge. Good for up to 4 days. Reheat in a saucepan until piping hot or heat through in the microwave.

    Freezing: Allow your soup to cool completely. Store in an airtight container and transfer to the freezer. Good for up to 3 months. Allow to defrost in the fridge overnight before reheating on a stove or in the microwave until piping hot. Alternatively, add frozen to a large pot and heat through, stirring often.

    Top Tip

    When sautéing your leeks, its always best to go low and slow - cooking on a low heat to really release the flavor. You're almost caramelising them but without them losing their glorious white and green color.

    FAQ

    Do I have to use garlic?

    No! Its all down to personal taste, I like a slight garlicky flavor to my soup however the leeks have enough flavor themselves without having to add it!

    Should I peel the potatoes?

    For the smoothest, creamiest soup possible I would recommend peeling your potatoes.

    Related

    Looking for other recipes like this? Try these:

    • Cottage pie served with garden peas
      Cottage Pie Recipe
    • Chicken potato bake served from the baking dish
      Chicken Potato Bake
    • Final butternut squash soup picture with crusty bread
      Roasted Butternut Squash Soup
    • Chili cheese naan breads stacked and topped with garlic butter and chillies
      Chili Cheese Naan

    Pairing

    These are my favorite dishes to serve with leek and potato soup:

    • Finished roasted chickpea salad
      Roasted Chickpea Salad
    • Caesar salad finished with dressing tossed in a bowl
      Caesar Salad
    • Finished arugula salad with parmesan and balsamic dressing
      Arugula salad
    • Big mac salad
      Big Mac Salad

    Recipe

    Leek and potato soup finished with cream

    Leek and Potato Soup

    Yield: 4
    Prep Time: 5 minutes
    Cook Time: 45 minutes
    Total Time: 50 minutes

    Creamy, comforting and classic! This incredible Leek and Potato soup is a British staple and is perfect for warming you up in the colder months.

    Ingredients

    • 6 cups (600g) leeks
    • 3 cups (450g) potatoes
    • 1.2 litres vegetable stock
    • 2 Garlic cloves minced
    • 2 sprigs Rosemary
    • 200ml Whole Cream
    • 2 tablespoons Butter
    • 1 tablespoon Olive oil

    Instructions

    1. In a large pot, over a low heat, melt your butter and add your olive oil.
    2. Add your sliced leeks, garlic and rosemary and sauté for 5 minutes. Season with salt and pepper.
    3. Add your vegetable stock and potatoes. Bring to a boil then reduce to a simmer for 40 minutes.
    4. Take off the heat and use a blender to blend to your desired consistency.
    5. Finish with your cream and a sprinkle of white pepper.
    Nutrition Information:
    Yield: 4 Serving Size: 1
    Amount Per Serving: Calories: 273Total Fat: 28gSaturated Fat: 16gTrans Fat: 1gUnsaturated Fat: 10gCholesterol: 72mgSodium: 905mgCarbohydrates: 5gFiber: 0gSugar: 3gProtein: 2g
    © Shannon
    Cuisine: British / Category: Soup

    Spatchcocked Poussin With Garlic and Madeira

    January 6, 2015 By Dan

    Poussin with Garlic and Madeira

    I love poussin. When cooked correctly it is so much nicer than chicken. The meat is so tender and juicy. You'll be seeing a lot more spatchcocked poussin recipes here in future.

    Poussin with Garlic and Madeira
    This kind of meal always makes me hungry.

    They are perfect for the BBQ but today it was just a bit too cold outside to do the BBQ thing so I made these in the kitchen. Actually, that's a lie. I barbecue in the snow. I just couldn't be bothered to get the thing fired up and ready.

    This recipe is best cooked indoors anyway so no one was disappointed. 🙂

    Removing the back bone of the poussin is quite easy. Nothing goes to waste in my house so I used them to make a poussin stock for tomorrow night's dinner -  pea soup.

    If want to skip the boning stage, that's not a problem. Just cook them as they were made. I like to serve my poussin flat though. I don't really know why. I just do.

    Preparing Poussin
    Carefully remove the bone with a sharp knife.

    Preparing Poussin
    Season generously.

    Preparing poussin
    Brown the poussin in the hot olive oil.

    Cooking Poussin
    Stir fry your cabbage and then place the poussin on top for the oven.

    Cooking Poussin
    Remove the poussin and pour in the Madeira and butter to deglaze the pan.

    Poussin with garlic and Madeira
    All done!


    Recipe

    Spatchcocked Poussin With Garlic and Madeira

    Spatchcocked Poussin With Garlic and Madeira

    Yield: 2
    Prep Time: 15 minutes
    Cook Time: 20 minutes
    Total Time: 35 minutes

    Ingredients

    • 2 poussin, backbone removed and flattened
    • ½ cabbage (any type) shredded
    • 5 cloves garlic, finely chopped
    • 100 ml Madeira
    • 2 tablespoons unsalted butter
    • 2 tablespoons olive oil
    • 1 teaspoon red chilli flakes
    • Salt and pepper to taste

    Instructions

    1. Season the poussin generously with salt and pepper and the red chilli flakes.
    2. Heat the olive oil in a large frying pan and brown the poussin skin side down.
    3. Flip the poussin over and add the chopped garlic and cabbage.
    4. Roast in the oven for about 10 minutes until the poussin is cooked through.
    5. Remove the cooked poussin from the pan to rest and deglaze the pan with the Madeira.
    6. Stir in the butter and then remove from the heat.
    7. Top with the poussin, check for seasoning and serve immediately drizzled with some of the pan sauce.
    © Dan Toombs
    Cuisine: Italian / Category: Main


    Italian Chickpea Recipe with Fennel and Lardons

    January 5, 2015 By Dan

    chickpeas, fennel and lardons

    chickpeas, fennel and lardons
    You will love this Italian chickpea recipe with fennel and crispy lardons. Quick, easy and delicious.

    I'd like to start this one off by saying that you can use tinned chickpeas. I just prefer the texture of dried chickpeas that have been simmered until tender. The cooking broth has a lot of flavour too.

    That said, I'd hate for you not to try this Italian chickpea recipe just because you can't be bothered to soak your chickpeas.

    As you can see, there are very few ingredients in this dish. I do have some variations with a few more ingredients but this version is the one I make most often.

    This authentic Italian chickpea recipe is perfect served as a side dish for a multi course Italian feast. In fact, you might just like to make it for an easy lunch. Why not?

    Showing how to cut the veggies and lardons.
    The lardons and fennel should be about the same size. (roughly that is)

    Soaking up the dish with crusty bread.
    Soak that up with some crusty bread!

    If you like this recipe, you might like to try some of these too...

    Italian green bean recipe
    Nduja pasta
    Rainbow trout poached in white wine
    Salmon and broccoli pasta bake

    Recipe

    Chickpeas, Fennel and Crispy Lardons

    Chickpeas, Fennel and Crispy Lardons

    Yield: 4 - 6
    Prep Time: 10 minutes
    Cook Time: 15 minutes
    Total Time: 25 minutes

    Ingredients

    • 500g dried chickpeas - soaked overnight, rinsed and then simmered until tender (reserve cooking stock)
    • 2 tablespoons olive oil
    • 2 cloves garlic - finely chopped
    • 1 tablespoon fresh thyme - finely chopped
    • 1 - 2 medium sized fennel bulb - finely chopped
    • 100g smoked lardons
    • Salt and pepper to taste
    • chopped chives to garnish

    Instructions

    1. Heat a small casserole pan over medium high heat.
    2. Pour in the oil and add the lardons and brown them for three to five minutes.
    3. Now add the chopped garlic and fennel and fry for about three minutes.
    4. Pour in the chickpeas and enough of their cooking stock to cover.
    5. Simmer for a further five minutes and then season to taste with salt and pepper.
    6. Garnish with the chopped chives and serve.
    © Dan Toombs
    Cuisine: Italian / Category: Side Dish

    I hope you enjoy this Italian chickpea recipe. If you do try it, please leave a comment. I'd love to hear from you.

    Pan Fried Cavolo Nero in Garlic and Chilli

    January 5, 2015 By Dan

    Cavolo Nero

    Cavolo Nero isn't all that easy to come by here in the UK but I happened to find some the other day in my neighbours garden. As they were on holiday in a sunny location, I decided they wouldn't mind if I helped myself. So I did. [Read more...]

    Lancashire Hot Pot Recipe

    January 4, 2015 By Dan

    Lancashire Hot Pot

    Lancashire Hot Pot
    Homemade Lancashire Hot Pot recipe! You are going to love this.

    This Lancashire hot pot recipe is one of my all time favourites, especially during the Winter months.

    This is my wife Caroline's recipe from when she was growing up. She used to be asked to make it by her family at least once a month and I can totally understand why. It's amazing.

    Now she makes it for our family and we're so glad she does.

    Although it is equally as delicious in the Spring time, I love this dish when it's cold outside and the lamb is closer to mutton in flavour. We only buy our meat locally so it tastes like mutton because it probably is this time of year.

    Lancashire Hot Pot

    Lancashire Hot Pot

    lh3


    Lancashire Hot Pot

    If you like this recipe, you might like to try some of these too...

    Normandy Style Turbot and Sole Stew
    Seafood Pancakes with Lobster and Garlic Confit
    Barbecued Burritos - Hobo Style
    Portuguese Pork with Paprika and Wine Sauce
    The Best Macaroni and Cheese Ever
    Roast Leg of Lamb with Chimichurri Sauce
    Authentic Fish Tacos
    German Sausages
    N'duja Pasta
    Raw Oysters with Chipotle and Lime Sauce

    Recipe

    Lancashire Hot Pot

    Lancashire Hot Pot

    Yield: 6
    Prep Time: 15 minutes
    Cook Time: 1 hour 20 minutes
    Total Time: 1 hour 35 minutes

    Ingredients

    • 1 leg of lamb - cut into bite sized pieces - save the bone
    • 2 lambs' kidneys - finely diced
    • 1 - 2 litres lamb, chicken or game stock
    • 3 carrots - diced
    • 2 onions - finely chopped
    • 5 potatoes - sliced wafer thin
    • Plain flour for dusting the meat
    • 5 tablespoons olive oil
    • 3 tablespoons unsalted butter
    • 3 tablespoons finely chopped rosemary
    • 6 sprigs thyme
    • 3 tablespoons finely chopped parley
    • 2 bay leaves
    • Salt and pepper to taste

    Instructions

    1. Dust the lamb and kidney pieces with the flour and brush off any excess.
    2. In a heavy bottomed pot, heat 3 tablespoons of the olive oil.
    3. When hot, brown the meat. You may want to do this in batches.
    4. Remove all the meat to a bowl and fry the onion until soft and translucent. Add more oil as required.
    5. Now add the garlic and diced carrots and fry for a further couple of minutes.
    6. Pour in enough stock to cover and add the herbs and salt and pepper to tastes..
    7. Simmer until the meat is tender.
    8. Meanwhile, slice your potatoes. I use a food processor to get them as thin as possible and to save time.
    9. Pour the meat and liquid into the oven ready dish you plan to serve in and then layer the potatoes over the stew. You should get about five layers of potatoes but this will vary depending on the size of your serving dish.
    10. Be sure to add a little butter and oil to each layer so that it crisps right up.
    11. When ready to bake, pre-heat your oven to 200c (400f) and bake until the stew is hot and the layered potatoes are crispy and browned on top.
    12. Remove from the oven and allow to settle for about ten minutes before serving.
    13. Season with a little salt and pepper and serve.
    © Dan Toombs
    Cuisine: British


    4x4 Burger

    January 4, 2015 By Dan

    4x4

    An unapologetic, towering stack of smash burgers and cheese! This is the ultimate indulgence for burger lovers everywhere. Four perfectly seared smash burgers topped with four slices of American cheese, you have to try this 4x4 Burger!

    4x4 burger

    About this 4x4 burger:

    As the name suggests, this towering burger consists of 4 perfectly seared smash burgers topped with 4 slices of cheese - hence the name 4x4 burger! I first came across this mighty burger when visiting a famous American burger restaurant and couldn't believe how magnificent it was! This is the ultimate indulgence and is perfect for burger lovers everywhere. Forget about doubles or triples, its all about the 4x4 burger!

    Ingredients

    Ingredients for 4x4 burger
    • 280g Ground beef (split into 4 equal balls)
    • Seeded burger bun
    • Slices red onion
    • Slice of tomato
    • Butter
    • Salt & pepper
    • Slices jalapeno
    • Yellow mustard
    • Dill pickled slices
    • Iceberg lettuce
    • American cheese
    • Hot pepper cheddar
    • Burger sauce

    See recipe card for quantities.

    Step by step photographs:

    toasting the bun and frying the onions
    1. Step 1: In a pan on medium heat, toast your burger buns with a tablespoon of butter along with your sliced red onion.
    frying the patties for 4x4 burger
    1. Step 2: Turn the heat up until your pan is smoking hot. Add the four ground beef balls and smash them down as flat as you can get them with a burger press or spatula. To avoid the meat sticking to your press or spatula, slide it under the patty rather than lift. Add a pinch of salt.
    topping the 4x4 beef patties with mustard
    1. Step 3: When you see that the patties are almost cooked on one side, top with a squirt of mustard then flip over.
    cheese on patties
    1. Step 4: Now add a slice of cheese to each patty.
    stacking the patties
    1. Step 5: Stack your beef patties, top with the top burger bun and cover with a burger dome. Reduce the heat and let the patties and bun steam for about a minute to soften the bun and further melt the cheese.
    topping burger bun with sauce and vegetables
    1. Step 6: Slather a generous amount of burger sauce over the bottom bun and top with dill pickles and your quick fried onion slices.
    adding pickles, and tomato
    1. Step 7: Add the remaining ingredients (jalapeños, tomato and shredded lettuce)
    4x4 burger
    1. Step 8: Finally, add the top half of your burger to the bottom half. Now this is a burger! Enjoy!

    What about the burger sauce?

    You can use burger sauce that you can buy from any convenience store, however I highly recommend making my Big Mac Sauce to add an extra level of flavor to this mighty 4x4 burger!

    What beef should I use for the patty?

    The perfect burger patty needs to have a 70/30 meat to fat ratio. This allows the beef to remain succulent and juicy when cooked and adds a depth of flavor that low fat beef just can't match.

    Which buns can I use for this recipe?

    I have paired this burger with a simple burger bun, the easy recipe can be found here: Homemade Hamburger Buns.

    Alternatively, you can definitely use a brioche burger bun, the recipe can be found here: Brioche Hamburger Buns recipe.

    Substitutions

    This 4x4 burger is already stacked with amazing toppings. However, if you want to use up other items you have in your refrigerator then here are some ideas:

    • Vegetarian - the beef hamburger can be replaced with a plant-based burger to make this vegetarian
    • Cheese - instead of using a slice of American cheese, an Aged cheddar will melt perfectly or a slice of Mozzarella.
    • Bun - use gluten free buns instead of white bread buns to make this gluten free

    Variations

    • Onions- why not go all out and have your burger 'Animal style' by topping with these incredible caramelized onions.
    • Spicy - add an extra burst of flavor by topping with this unbelievable chili jam!
    • Bacon - missing your bacon fix with this 4x4 burger? Not to worry, try this delicious bacon jam!

    Equipment

    All you need to make this recipe perfect is a pan and pan lid. Instead of using a burger dome, simply use the lid for your pan to perfectly steam your buns and melt your cheese to perfection. You can easily fry your burgers in a pan, or be a star chef and grill on an iron skillet or griddle.

    Storage

    Store the wet ingredients from your 4x4 Burger (mustard, lettuce, pickles, tomato, cheese and onions) separately from the dry ingredients (buns) in the fridge, and recombine when ready. Good for 2-3 days.

    Refrigeration: You can store your burger patties raw in the fridge for up to 2-3 days before you want to cook them. Always store in an airtight container and keep away from cooked meat products. You can store cooked patties in the refrigerator for 3-4 days in an airtight container, keep away from any raw meat in your fridge.

    Frozen: You can freeze your raw or cooked patties for up to 3 months, ensure they are separated by parchment paper so they don’t stick together and store in freezer bags to prevent freezer burn.

    Reheating: To reheat your raw patties, simply thaw out overnight in the refrigerator and fry as instructed above. If you’re reheating cooked patties, heat them in a pan or skillet until they are heated through. Finally, recombine with your buns, mustard, lettuce, pickles, tomato, cheese and onions as instructed above.

    Top Tip

    The key to making this towering 4x4 burger is the perfect structure. Make sure you carefully follow the steps, adding the lettuce, pickles and tomato at the bottom to create a stable base! You don't want it to topple over!

    FAQ

    How big is a 4x4 burger?

    Its BIG! HUGE! ENORMOUS! Counting all the patties, toppings and buns it weighs in at a whopping 1 pound (450g)! Best not to look at the calorie count for this burger!

    How can I smash my beef patty?

    For my smash burgers, I use a smasher which is a flat, heavy tool. However, you can use a sturdy spatula with no holes to smash down your burgers.

    Related

    Looking for other recipes like this? Try these:

    • Chicken Chukauni served with rice and naan in a bowl
      Chicken Chukauni
    • Kerala tawa prawns on a bed of curry leaves
      Kerala Tawa Prawn Fry
    • Chicken Achaar finished in the pan
      Chicken Achaar
    • Lasagne served on a plate with rocket salad
      Lasagne

    Recipe

    4x4

    4x4 Burger

    Yield: 1
    Prep Time: 5 minutes
    Cook Time: 15 minutes
    Total Time: 20 minutes

    An unapologetic, towering stack of smash burgers and cheese! This is the ultimate indulgence for burger lovers everywhere. Four perfectly seared smash burgers topped with four slices of American cheese, you have to try this 4x4 Burger!

    Ingredients

    • 10 oz (280g) Ground beef (split into 4 equal balls)
    • 1 Seeded burger bun
    • 2 slices red onion
    • 1 slice tomato
    • 1 tablespoon butter
    • Pinch of salt & pepper
    • 5 jalapeno slices
    • 2 tablespoons yellow mustard
    • 5 dill pickled slices
    • Handful of iceberg lettuce
    • 2 slices American cheese
    • 2 slices Hot pepper cheddar
    • 1 tablespoon Burger sauce

    Instructions

    1. In a pan, on medium-low heat, melt your butter and toast your burger buns until golden along with your red onion slices.
    2. Remove the buns and onion, turn the heat to high and add your ground beef balls. Smash your balls down as thinly as you can using a burger smasher or a spatula with no holes. Fry on one side for 3 minutes.
    3. When you see that the patties are almost cooked, season with salt and pepper and top with a squirt of mustard. Flip your patties with a metal spatula and a scraping motion.
    4. Add a slice of cheese to each patty and cover with a burger dome or pan lid to melt the cheese.
    5. When the cheese has melted, stack your 4 patties on-top of one another and add your top burger bun. Cover with a burger dome or pan lid and steam the bun for a few minutes.
    6. Meanwhile, slather your bottom bun with a generous helping of burger sauce, add your dill pickles, jalapeños and red onion. Top with your slice of tomato and shredded lettuce.
    7. Finally, add the top half of your burger to the bottom half. Enjoy!
    Nutrition Information:
    Yield: 1 Serving Size: 1
    Amount Per Serving: Calories: 2858Total Fat: 183gSaturated Fat: 77gTrans Fat: 6gUnsaturated Fat: 87gCholesterol: 835mgSodium: 2109mgCarbohydrates: 50gFiber: 7gSugar: 20gProtein: 245g
    © Shannon
    Cuisine: American / Category: Burger Recipes
    • « Previous Page
    • 1
    • …
    • 20
    • 21
    • 22
    • 23
    • 24
    • Next Page »
    For Those About To Cook

    Welcome To For Those About To Cook

    We're a family-run food blog sharing brand-new recipes every week. From easy weeknight staples to indulgent weekend favorites. We're a team of five: Dan (The Curry Guy), Caroline, Joe, Shannon, and Jennifer, bringing you a wide variety of dishes inspired by Europe, the Mediterranean, the Americas, and more.

    This site focuses on Western-inspired recipes, while Eastern flavors are covered in depth over at greatcurryrecipes.net Between the two, you'll find everything you need to cook up something amazing so don't forget to subscribe!

    Subscribe

    Footer

    Contact Privacy Policy

    Subscribe for weekly updates!

    Subscribe
    ↑ back to top

    Copyright © 2024 For Those About to Cook