For Those About To Cook

  • Home
  • About Us
  • All Recipes
  • Subscribe
menu icon
go to homepage
  • Home
  • About Us
  • All Recipes
  • Subscribe
    • Facebook
    • Instagram
    • Pinterest
  • search icon
    Homepage link
    • Home
    • About Us
    • All Recipes
    • Subscribe
    • Facebook
    • Instagram
    • Pinterest
  • ×
    Home

    San Francisco Cioppino - Fish Stew At Its Best

    January 19, 2015 By Dan

    cioppino
    The world's best! San Francisco cioppino!

    My family cioppino recipe!

    When I was growing up, the annual family cioppino feed was a big deal.

    We'd all meet up at my grandparent's house and there were usually a lot of other friends/neighbours there too. My grandparents would order plenty of plain white bibs. It is a messy dish after all.

    Everyone who was invited would have to design their own bib with a selection of felt tip coloured pens.

    It was a prerequisite to getting to enjoy the amazing cioppino on offer. I have to say it was a lot of fun for all, especially the adults who got to enjoy the vast selection of Italian wines on offer.

    Cioppino is quite similar to any Italian fish stew but it does have quite a lot of west coast American influence.

    The stew is traditionally made with the catch of the day and living in California meant we always got a nice catch.

    Clams, mussels, crab, squid, anchovies and cod were brought in every day. Sometimes we would even go out to the beach to dredge for our own clams.

    Those were good times and the San Franciso cioppino was all the better for it.

    So here you have it. This is my family's cioppino recipe. Enjoy and be sure to let me know what you think.

    What to eat your cioppino with...

    Cioppino goes great with a crusty loaf of San Francisco sour dough bread. You can actually purchase it here in the UK now. Any sour dough bread will do though especially when prepared as garlic bread as I do here.

    Garlic bread has to be the best invention since the wheel.

    Dig in!
    Dig in!
    cioppino
    Any good fish stock will do. I made mine with lobster shells from last night's dinner.
    cioppino
    the awesome Italian/American tomato sauce
    cioppino
    Steaming the clams and mussels. Looks like a prawn found its way in there too.
    cioppino ingredients
    For ease, get all your sauce ingredients together and prepared before starting to cook.
    cioppino ingredients
    The catch of the day.


    Note: Use live mussels and clams if available. Be sure to rinse them and debeard the mussels. Throw away any mussels or clams that are not closed. They're dead.

    Recipe

    Cioppino - My Family's American/Italian Fish Stew Recipe

    Cioppino - My Family's American/Italian Fish Stew Recipe

    Yield: 6 - 8
    Prep Time: 30 minutes
    Cook Time: 3 hours
    Total Time: 3 hours 30 minutes

    Ingredients

    • CIOPPINO SAUCE
    • 2 tablespoons olive oil
    • 1 tennis ball sized onion – finely chopped
    • 1 tin of anchovies - finely chopped
    • 6 cloves garlic – finely chopped
    • 3 bay leaves
    • 2 tablespoons fennel seeds
    • 1 small bunch parsley – finely chopped
    • A few sprigs of thyme and rosemary – finely chopped
    • 3 tins of chopped tomatoes
    • 3 tablespoons tomato paste
    • Fish stock – as much as you like
    • A few squirts Tabasco sauce
    • A few squirts Worcestershire sauce
    • 1 teaspoon. brown sugar
    • Black pepper, to taste
    • Crushed red pepper, to taste
    • Kosher salt, to taste
    • FOR THE FISH
    • 2 tablespoons olive oil
    • 1 tablespoon butter
    • 2 cloves garlic – finely chopped
    • 125ml (½ cup) dry white wine
    • 20 baby clams
    • 20 small mussels
    • A few squirts Worcestershire sauce
    • 1 small dressed crab or about a cup of white crab meat
    • 20 small to medium sized prawns
    • 3 baby squid – cut into rings
    • 250g ( ½lb) cod or meaty fish of your choice
    • 20 queen scallops

    Instructions

    1. Start by making your sauce. Heat two tablespoons olive oil in a large pot over medium heat.
    2. Add the chopped onion and anchovies to the hot oil and allow it to cook until the onions is translucent and soft and the anchovies have become a paste.
    3. Pour in the rest of the sauce ingredients and simmer for about two hours. Add fish stock to taste. I usually add about a litre while the sauce cooks. The sauce should be quite thick.
    4. Just before serving, prepare your fish.
    5. Throw your clams and mussels into the sauce. They are ready when they open. Throw away any shells that don't open.
    6. In a frying pan, heat a couple teaspoons of olive oil until very hot.
    7. Sear the prawns until pink and then add them to the sauce.
    8. Now sear the squid rings and scallops for about a minute. Don't over cook them or they will become tough. Add these to the sauce.
    9. Stir the crab meat and cod chunks into the cioppino and simmer until the cod is cooked through.
    10. Serve immediately with crusty bread and some good red wine.
    © Dan Toombs
    Cuisine: American / Category: Main


    I hope you enjoy this San Francisco cioppino recipe. If you do try it, please leave a comment. I'd love to hear from you.

    Baked Mac and Cheese

    January 16, 2015 By Dan

    Baked mac and cheese

    This Baked Mac and Cheese recipe is creamy, cheesy and baked with golden, crispy breadcrumbs. Whether you're making an easy weeknight dinner, serving up a feast along side some steak, or even loading up a mac and cheese burger, this recipe is the ultimate comfort food.

    Baked mac and cheese

    About this Baked Mac and Cheese Recipe

    It all starts with the roux! The secret to this recipe is the added smoked paprika in the roux. Just before adding the flour to the butter to form a roux, add a tablespoon of smoked paprika. You'll soon see why - the flavour is out of this world.

    It's not only the ingredients that make this cheesy baked mac and cheese unbelievably tasty, it's also the process... This recipe talks you through each step to making a perfectly creamy mac and cheese. Creamy results, even after baking in the oven.

    [feast_advanced_jump_to]

    Ingredients

    Cheese, cheese, cheese and more cheese. This recipe asks for four types of cheese. I suggest, Mozzarella, Cheddar, Red Leicester and Gruyere, but you can switch them out depending on what's available in your local grocery store. Most stores now stock a 4 cheese blend, already grated and that would be perfect. See what else you will need below...

    Ingredients for mac and cheese
    • Macaroni
    • Grated Red Leicester
    • Grade Cheddar
    • Grated Gruyere
    • Grated (or chopped small) Mozzarella
    • Unsalted butter
    • Smoked paprika
    • White pepper
    • Flour
    • Milk
    • Heavy cream
    • Dijon mustard

    See recipe card for quantities.

    Instructions

    Follow each step for the perfect, creamy baked mac and cheese.

    Cooking the macaroni
    1. Step 1: Cook the pasta according to the package instructions minus 2 minutes. Set aside with a touch of olive oil or butter to avoid them sticking together.
    Making the roux
    1. Step 2: In a pan, over a medium-low heat, melt the butter then stir in the paprika and white pepper.
    Making the roux for baked mac and cheese
    1. Step 3: Gradually whisk in the flour. Make sure you whisk continuously when you add the flour so it does not burn. Do this for about 1 minute.
    Gradually adding the milk
    1. Step 4: Gradually add the milk, whisking continuously again. This step should take between 3-5 minutes, adding the milk slowly. The thick sauce should start coming together.
    Whisking in the cream
    1. Step 5: Continue whisking over a low heat for a further 3 minutes, then add the heavy cream.
    Adding cheese and mustard
    1. Step 6: Add ⅔ of the cheese as well as the Dijon mustard and Worcester sauce. Stir into the sauce.
    Super oozy cheese sauce
    1. Step 7: Giving that you have used the same cheese as suggested in the recipe card, you should have a delightful cheese pull like photographed.
    Mixing the pasta and sauce
    1. Step 8: Pre-heat your oven to 400F/200C. In an oven safe dish, transfer your pasta and sauce and mix well together.
    Topping with cheese and breadcrumbs
    1. Step 9: Top with the remaining cheese and breadcrumbs. Cover with foil or oven dish lid. Place in the preheated oven for 15 minutes, remove the foil then allow a further 10 minutes cooking time uncovered.
    Baked mac and cheese crispy
    1. Step 10: You're aiming for a golden crust like this one. Leave to cool for 10 minutes then dig in!

    Hint: For extra creaminess, undercook your pasta by 2-3 minutes. This way, it will continue cooking when mixed with the sauce and avoid your pasta from turning soggy and overcooked.

    Substitutions

    It is super easy to substitute ingredients in this baked mac and cheese recipe. Here are some suggestions.

    • Cheese - I used a flavour packed four cheese mix, to create a rich and bold flavour, milder cheeses mixed with mature cheddars, I find work well. You can switch out any of the suggested cheeses. For example, swap gruyere for emmental or swiss cheese. Similarly swap mozzarella for fontina or provolone and swap red Leicester for double Gloucester or a mild cheddar.
    • Gluten Free - Simply swap for your favourite gluten free pasta and thicken the sauce with a gluten free flour blend. You can skip breadcrumbs entirely or add crushed cornflakes.
    • Dairy Free or vegan - swap the milk for oat or almond milk, use plant based butter and go for your favorite melty vegan cheeses.

    Variations

    There are so many variations of mac and cheese. You can use this recipe as a base and vary it up in so many ways. Here are my favourite.

    • Nduja - For an extra special mouthful sensation, add a healthy portion of nduja to the top before baking. You will not regret it.
    • Bacon - You could load your mac and cheese with a dollop of bacon jam or similarly , In a pan, over a low heat, fry up some bacon, allowing the fat to render first, then after 5 minutes turn up the heat to crisp up. Crispy bacon loaded mac and cheese is insanely good.
    • Pesto - For a hint of freshness, add a layer of fresh basil pesto, in small dollops, before adding breadcrumbs and baking. This levels up the taste.
    • Spicy - Fry up some chillies, add a touch of sugar and create your own chilli jam to layer on top of your mac and cheese.

    Equipment

    This section highlights equipment that is either essential or especially helpful the more common kitchen equipment.

    Oven proof dish with a lid - Not essential but especially useful. During the baking process, you place the mac and cheese in covered before giving it time to crisp up uncovered. You can use foil.

    Storage

    For best results once reheated, I recommend storing the sauce and pasta separately, or similarly cook the pasta fresh when ready to serve. store in the refrigerator separately for up to 3 days or freeze the sauce (not the pasta) for no longer than 3 months. Defrost fully before reheating. To reheat, stir through some hot pasta or heat on low for 5 minutes.

    If you have already mixed the sauce and pasta, I do not recommend freezing but you can refrigerate for up to 3 days. heat up in the microwave for 3-5 minutes.

    Top Tip

    To make this already creamy baked mac and cheese even creamier, add tablespoon (or more) of cream cheese.

    FAQ

    Can I work ahead of time?

    Yes of course! Prepare the cheese sauce ahead of time and store in the refrigerator for up to 3 days. When ready to serve, cook some pasta and stir in the sauce.

    How do I avoid the sauce drying up?

    To make sure you have a creamy sauce, especially after baking, undercook the pasta by 2-3 minutes as it will continue cooking in the oven. Don't use any more pasta than the recipe recommends unless increasing the quantity of all ingredients.

    Love Baked Mac and Cheese?

    Looking for other recipes like this? Try these:

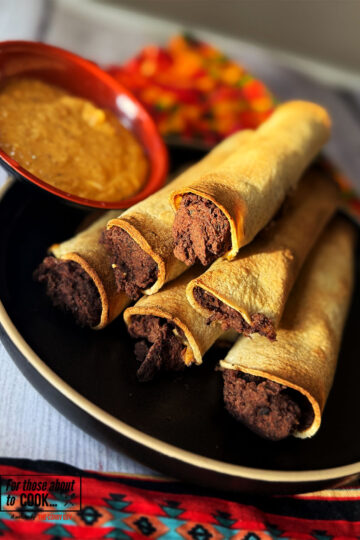
    • Refried bean taquitos served with chipotle dip
      Refried Bean Taquitos
    • Philly Cheesesteak Recipe
      Philly Cheesesteak Recipe
    • Chipotle mayo served in a bowl
      Chipotle Mayo
    • Cheeseburger tacos topped with big mac sauce
      Smash Burger Tacos

    Pairing

    These are my favorite dishes to serve with baked mac and cheese:

    • Ribeye steak with garlic butter served with loaded potato and broccoli
      Ribeye Steaks

    Recipe

    Baked mac and cheese

    Baked Mac and Cheese

    Yield: 4
    Prep Time: 10 minutes
    Cook Time: 25 minutes
    Total Time: 35 minutes

    Indulge in this baked mac and cheese recipe, featuring creamy cheese and crispy breadcrumbs for ultimate comfort food.

    Ingredients

    • 16oz (500g) Macaroni
    • 7oz (200g) Grated Red Leicester
    • 7oz (200g) Grated Cheddar
    • 7oz (200g) Grated Gruyere
    • 7oz (200g) Grated (or chopped small) Mozzarella
    • 2 tablespoons (30g) Unsalted butter
    • 1 tablespoon Smoked paprika
    • 1 teaspoon White pepper
    • ¼ cup (30g) Flour
    • 2 ½ cups (600ml) Milk
    • ⅔ cup (150ml) Heavy cream
    • 1 tablespoon Dijon mustard
    • 1 cup breadcrumbs.

    Instructions

    1. In a pan of boiling water, add your pasta noodles and cook according to the package instructions minus 2 minutes.
    2. Once the pasta has cooked for the recommended time, drain with a colander and set aside. Mix with a touch of butter or olive oil to avoid the noodles sticking together.
    3. In a pan, over medium- low heat, melt your butter then stir in your paprika and white pepper/
    4. Gradually whisk in your flour. Make sure you whisk continuously to stop the flour from burning. The whole process should take 1 minute.
    5. Next, gradually add your milk, again whisking continuously. This process should take around 3-5 minutes when a thick sauce is formed.
    6. Continue whisking for a further 3 minutes to ensure your sauce is evenly mixed then add your heavy cream.
    7. Add ⅔ of your cheese, Dijon mustard and Worcester sauce. Stir to combine.
    8. Whisk until your cheese is melted and you have a silky, smooth cheese sauce.
    9. Pre=heat your oven to 400F/200C. In an oven safe dish, add your cooked pasta and the sauce and stir well to combine.
    10. Top with your remaining cheese and breadcrumbs. Cover your dish with foil or an oven safe lid and place into your oven for 15 minutes.
    11. After 15 minutes, remove the foil or lid then allow to cook for a further 10 minutes to achieve that beautifull golden crust.
    12. Remove from the oven, allow to cool for 10 minutes then dig in!
    Nutrition Information:
    Yield: 4 Serving Size: 1
    Amount Per Serving: Calories: 324Total Fat: 20gSaturated Fat: 12gTrans Fat: 0gUnsaturated Fat: 7gCholesterol: 58mgSodium: 586mgCarbohydrates: 21gFiber: 2gSugar: 2gProtein: 14g
    © Joe
    Cuisine: American / Category: Pasta

    Sambar Recipe - Homemade, Healthy and Delicious

    January 15, 2015 By Dan

    sambar soup

    sambar soup
    This sambar recipe is delicious with dosas or on it's own.

    Sambar is the perfect accompaniment for dosas. I'm a big dosa fan and make them all the time. This sambar soup is always on the menu when I do.

    You can also serve this sambar recipe in other ways. Serve it like you would a soup or over rice. Awesome!

    Sambar can be cooked in about half an hour. Unfortunately, dosas take a bit more time. You need to plan ahead to make dosas as the fermenting process takes 36 hours.

    You can find my dosa recipe here if you would like to combine it with my homemade sambar recipe.

    If you're looking for a delicious  - mildly spiced - soup, give this sambar a go. It's great served on its own too or with a piece of crusty French bread.

    The origin of this sambar recipe...

    Sambar - like the dosas I make - is from Southern India. The original recipe which was sent to me by a friend includes chunks of aubergine (eggplant). I used to include it but I'm not a big fan of the vegetable.

    If you'd like to try it with the aubergine, add it just after your blend the soup.

    In southern India other vegetables are often added too. If it sounds good, add it!

    Working ahead...

    You can make this sambar recipe a few days before serving if more convenient.

    In fact, the flavours will develop with time and it will taste even better. That's one thing I love about recipes like sambar.

    You can make it ahead and then just heat it up before serving.

    Sambar soup
    Make this one today. You'll be glad you did.

    If you like this recipe, you might like to try some of these too...

    Keema dosas
    Plain dosas
    Cheese and onion dosas
    Gluten free double dosa burger
    Coconut curry chicken
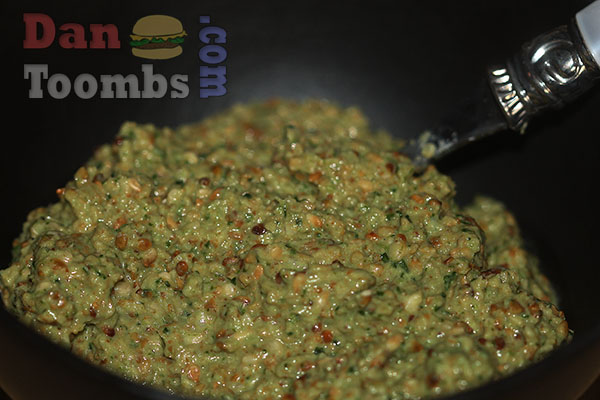
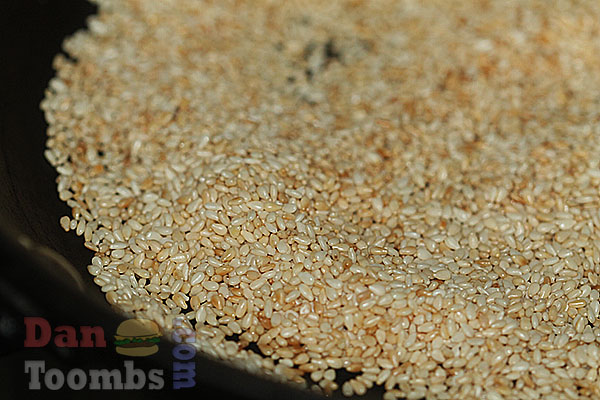
    Sesame and cilantro (coriander) chutney
    Red chilli and garlic chutney

    Recipe

    Sambar Soup

    Sambar Soup

    Yield: 4
    Prep Time: 20 minutes
    Cook Time: 30 minutes
    Total Time: 50 minutes

    Ingredients

    • 250g (½lb) toor dhal (split pigeon pea lentils)
    • 1 teaspoon vegetable oil
    • 4 large chopped tomatoes
    • 1 tablespoon garlic and ginger paste
    • 1 green chilli pepper - chopped
    • 50g fresh or frozen peas
    • 1 teaspoon turmeric powder
    • 1 teaspoon red chilli powder
    • 1 tablespoon sugar
    • 1 teaspoon garam masala
    • 1 small bunch fresh coriander
    • Salt and pepper to taste
    • FOR THE TARKA
    • 60ml vegetable oil
    • 1 teaspoon brown mustard seeds
    • 1 teaspoon cumin seeds
    • A pinch of asafoetida
    • 20 fresh curry leaves

    Instructions

    1. Soak the split pigeon peas in hot water for 20 minutes.
    2. Drain and rinse and then pour into a large saucepan.
    3. Add 1½ litres water and heat over high heat.
    4. As you do this, a foam will raise to the top. Skim this off until no foam remains and reduce the heat to a simmer.
    5. Simmer for about 30 minutes until the pigeon peas are soft.
    6. Add the chopped tomatoes, ginger and ginger paste and green chilli and bring to a boil for about 3 minutes.
    7. Now, using a hand held blender (or any blender) blend until smooth. I do this for about five minutes.
    8. Add the rest of the ingredients up to the tarka ingredients and simmer for a further 15 minutes.
    9. Remove the sambar from the heat while you make your tarka.
    10. In a small saucepan, heat the oil until hot but not yet boiling.
    11. Toss in the mustard seeds and cumin seeds. When the mustard seeds begin to pop, throw in the curry leaves and sprinkle in the asafoetida.
    12. Very carefully, add this seasoned oil to the sambar. The oil may spit some so I do suggest standing back a little when you do this.
    13. Stir in into the sambar and bring back up to heat.
    14. Serve hot with dosas or on its own
    © Dan Toombs
    Cuisine: Indian / Category: Side dish or main


    Dosa Batter Recipe

    January 15, 2015 By Dan

    dosa

    dosa
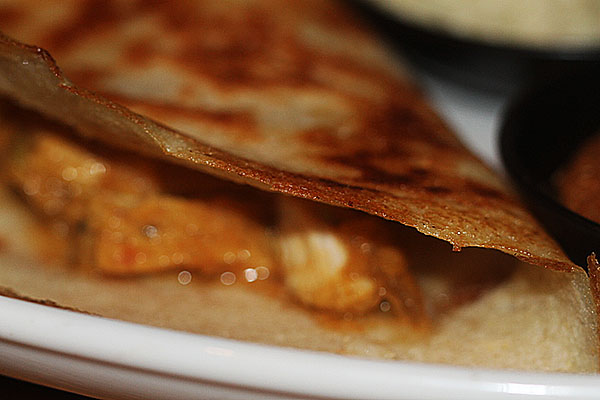
    With this homemade dosa batter recipe, you can make the most tasty dosas.

    Dosas are a real favourite around our house. This is a recipe I learned when I visited the award winning Prashad restaurant in Bradford.

    It's amazing watching the professionals there do it. They all turn out so perfect.

    Home cooks may find making dosas a bit difficult and time consuming. This batter batter recipe takes ages to make.

    You need to blend the rice and dhal for about 5 minutes per batch so that the resulting batter is creamy smooth.

    The batter then needs to ferment for a good 24 hours. Have I scared you off making my dosa batter recipe yet?

    Believe me, the homemade dosas are worth it!

    Tips for using this dosa batter recipe...

    One thing I did wrong the first time I made dosas at home was overheat my pan.

    The pan should be hot but not flaming hot. You'll know if your pan is too hot as the batter will lump up and you will be left with a real mess.

    When a drop of water evaporates immediately when hitting the pan, it is the right heat.

    If this happens, lower the heat and start again. Good luck with this one. With a little practice, you will master dosa making. I promise.

    Dosa batter ingredients
    Dosa batter ingredients ready to be blended

    Dosa batter
    The finished dosa batter


    Making dosas
    Get yourself a non stick pan. It's a lot easier.

    Recipe

    Dosa Recipe

    Dosa Recipe

    Yield: 4
    Prep Time: 1 day 12 hours
    Cook Time: 20 minutes
    Total Time: 1 day 12 hours 20 minutes

    Ingredients

    • 300g broken rice
    • 75g urad dhal lentils
    • 1 teaspoon fenugreek seeds
    • 1 teaspoon Maldon sea salt
    • 1 teaspoon sugar
    • 3 tablespoons sunflower oil
    • ½ onion

    Instructions

    1. Combine the rice, lentils and fenugreek seeds in a large bowl and rinse three times with water.
    2. Pour enough warm water into the bowl to cover and soak for 12 hours or overnight.
    3. When ready to make your batter, drain the water.
    4. Place half of the rice mixture into a food processor with about 100ml of water and blend for at least five minutes until very smooth.
    5. You do not want to rush this. It is an essential part of making the batter.
    6. Repeat with the rest of the rice mixture adding another 100ml of water.
    7. Combine the two batters and add the salt and sugar. Whisk thoroughly.
    8. Now place the batter in a air-tight container and leave in the fridge to ferment for 24 hours.
    9. When ready to cook, place a non-stick - or normal frying pan over low heat.
    10. The pan is ready when a drop of water sizzles away almost immediately.
    11. Rub your half onion over the pan. This adds flavour and also ensures the dosas don't stick. Do this before you make each dosa.
    12. Using a ladle, pour about 150ml of batter into the centre of the pan.
    13. Then working very quickly and working from the centre, take the bottom of your ladle and move the batter in circular motions outward so that it is flat and not thick.
    14. Turn the heat up a little. The sides of the dosa will begin to brown and move away from the pan after a few minutes.
    15. When this happens, trickle about ½ tablespoon of the oil around the edges of the dosa.
    16. When the dosa is browned on the under side, flip it and brown the other side for about a minute.
    17. Flip over again and the fold into the shape as above.
    18. Repeat until all of the batter is used.
    © Dan Toombs
    Cuisine: Indian / Category: Main


    40 Clove Garlic Chicken Recipe

    January 14, 2015 By Caroline

    40 clove garlic chicken in the bowl it was cooked in.


    Let’s talk about garlic. Not one clove. Not even a generous handful. I’m talking about 40 cloves of the stuff to make this 40 clove garlic chicken. Sounds like a vampire's worst nightmare—but trust me, this dish is anything but scary. It’s bold, aromatic, buttery, and downright addictive.

    40 clove garlic chicken in the bowl it was cooked in.

    What is 40 clove garlic chicken?

    This French bistro-style recipe has been making rounds for generations, and with good reason. It’s easy, rustic, and bursting with comforting, deep flavors. But I’ve put my own spin on it—simplifying the method without compromising the punch. Because if there’s one thing I believe in, it’s big flavor without faff.

    So, if you’ve got a few heads of garlic, a chicken, and a little patience, you're about to make magic in a pot. This dish is amazing served simply with crusty French bread, mashed potatoes, rice, pasta or even Italian gnocchi to soak up all that incredible sauce.

    What Makes 40 Clove Garlic Chicken So Special?

    Here’s the thing: when you cook garlic low and slow, it mellows, becomes sweet, and practically melts in your mouth. No sharp bite, no overkill—just silky cloves that spoon like butter. And when they’re swimming in a savory sauce with golden chicken and fragrant herbs? Game over.

    The real charm lies in the simplicity. A handful of ingredients, one pot, and a dish that tastes like you’ve been slaving over it all day. Although you can simply serve the sauce as many do, just as it comes, I like to blend it.

    It's a little trick inspired by a restaurant called The Stinking Rose that I used to frequent in San Francisco. It's an Italian restaurant but they sure did perfect this French classic.

    Ingredients

    40 clove garlic chicken is a simple dish and there aren't a lot of ingredients. It's all about that garlic that blends so well with the other ingredients.

    Ingredients for the recipe laid out on a counter top.
    • chicken
    • flour
    • olive oil
    • onion
    • carrot
    • rosemary
    • thyme
    • garlic
    • butter, optional
    • chicken stock
    • dry white wine
    • double cream
    • Salt and pepper to taste

    See recipe card for quantities.

    Step by step instructions

    Check out the following step by step photos and see just how incredibly easy it is to make this classic one pot dish.

    Dusting a piece of bone in chicken with the flours.
    1. Step 1: Cut your chicken into about 8 pieces and then dust each piece with the flour. Be sure to shake off any excess flour.
    Frying the four dusted chicken in the olive oil.
    1. Step 2: Heat the olive oil in a pan over a medium-high heat. When the oil begins to shimmer, add the chicken. You might need to do this in batches. Don’t overcrowd your pan.
    The browned chicken in the pan before transferring it to a plate to carry on with the recipe.
    1. Step 3: Fry the chicken on both sides for about 5 minutes total. Then transfer the lightly browned chicken to a plate and set aside.
    Adding the chopped shallots and carrots to the pan to fry for a few minutes.
    1. Step 4: Using the same oil, add the onions and carrots to the pan and fry for 5 minutes total soften.

    Stirring the garlic cloves and herbs into the onion and carrot mixture in the pan.
    1. Step 3: Add the garlic, rosemary, bay leaf and thyme and give it all a good stir for a couple of minutes.
    Covering the vegetables, herbs and garlic with the wine and stock to bring to a simmer.
    1. Step 4: Pour in the white and chicken broth and bring to a simmer.

    Adding the chicken back to the pan.
    1. Step 3: Return the chicken to the pan with the skin facing upwards.
    Roasting in the oven until the chicken is cooked through.
    1. Step 4: Preheat your oven to 400°F/200°C and roast it all for between 45 and 60 minutes or until the chicken is golden brown and cooked through.

    The chicken and sauce after roasting in the oven.
    1. Step 3: Remove the pan from the oven and transfer the chicken to a plate.
    The sauce in a blender ready to blend.
    1. Step 4: Pour the liquid from the pan into a blender. This step is optional but I like to do it.

    Blending the sauce until smooth.
    1. Step 3: Blend until the sauce is smooth.
    Returning the sauce to the pan and seasoning with salt and pepper to taste.
    1. Step 4: Pour the sauce back into the pan over a medium-high heat and stir in cream to taste. You don’t have to add all the cream in the recipe.

    Returning the chicken to the smooth blended sauce.
    1. Step 3: Return the chicken to the pan and garnish with more herbs if you like. Season with salt and pepper to taste.
    The finished 40 clove garlic chicken
    1. Step 4: Now all you need to do is take this masterpiece meal to the table and enjoy!

    Variations

    Although you will find many different ways to make 40 clove garlic chicken, they really are quite similar. Following are other ways I have seen this dish served.

    • Cook a whole chicken - This isn’t exactly fancy food but it always tastes pretty spectacular. Often a whole chicken is roasted in the sauce rather than cutting it up and frying first. It will take about an hour to roast a whole chicken using this recipe.
    • Don’t blend the sauce - Blending the sauce is more restaurant style. In home kitchens the sauce is often left as it is. The garlic and other vegetables become so soft while cooking, you really don’t need to blend them.
    • Leave out the cream - Cream isn’t always added to 40 clove garlic chicken. It’s quite a rich dish even without the addition of cream.

    Equipment

    A heavy based pot or pan: 40 clove garlic chicken is one pot cooking at its very best. Get yourself a good quality, heavy bottomed pan or pot.

    A blender: If you want to blend the sauce, you will need a good countertop or stick blender.

    Storage

    You can store any leftover, covered in the fridge for 3 to 4 days. If you don’t add the cream, you can also freeze your 40 clove garlic chicken for up to 3 months.

    If freezing, be sure to label and date the container.

    To reheat, you could just place it all in your microwave for a few minutes. Or, if you have a lot leftover, reheat gently over a medium heat in a pan or pot on the stove.

    What kind of a dish is 40 clove garlic chicken?

    40 clove garlic chicken might sound like a statement dish—and it is—but it’s also a humble, weeknight-friendly one-pot meal.

    Whether you’re feeding the family or showing off for friends, this is a dish that proves garlic is not a seasoning - it’s the star.

    So go ahead, peel those cloves, trust the process, and let garlic do its thing. You’re about to discover why this dish has stood the test of time.

    Top Tip

    Blending the sauce is optional and you probably won't see 40 clove garlic chicken served this way in France. That said, I highly recommend giving it a try. It takes the dish up a notch or two.

    FAQ

    Do you really need 40 cloves of garlic? Isn’t that too much?

    It sounds like a lot (and it is), but when garlic is slow-cooked, it becomes sweet, creamy, and mild, not sharp or overpowering. The 40 cloves melt into the sauce and infuse the chicken with rich, mellow depth. So yes—please trust me here! It’s not as intense as it sounds.

    Do you have to peel the garlic?

    Some recipes call for the garlic to be peeled. It really isn't necessary though. I don't peel my garlic.

    Do you have to cut up a whole chicken?

    No but that is the cheapest way to purchase chicken. You can use bone in thighs, legs or breasts, cut in half if that is what you have.

    Pairing

    All of the following will go very nicely served with 40 clove garlic chicken.

    • A bowl of perfect creamy mashed potatoes topped with melting butter.
      Perfect Creamy Mashed Potatoes
    • Italian Gnocchi Recipe
      Italian Gnocchi Recipe
    • gnocchi with brown butter and sage
      Gnocchi With Brown Butter And Sage
    • Serving the Padron peppers on a serving plate.
      Padron Peppers

    Recipe

    40 clove garlic chicken in the bowl it was cooked in.

    40 Clove Garlic Chicken

    Yield: 4
    Prep Time: 15 minutes
    Cook Time: 1 hour
    Total Time: 1 hour 15 minutes

    Ingredients

    • 1 free range chicken, cut into 8 pieces
    • flour for dusting the chicken
    • 4 tablespoons olive oil
    • 4 - 5 branches rosemary - leaves removed
    • 3 tablespoons fresh thyme leaves
    • 40 cloves garlic
    • 2 tablespoons butter, optional
    • 1 cup (250ml) chicken stock
    • 1 cup (250ml) dry white wine
    • 1 cup (250ml) double cream
    • Salt and pepper to taste

    Instructions

    1. Preheat your oven to 200c (400f)
    2. Dust the chicken pieces in the flour and shake off any excess flour.
    3. Heat the olive oil over medium high heat until bubbling but not smoking and add the chicken pieces to the hot oil. Let the chicken brown all over in the oil for about 5 minutes and then transfer it to a plate and set aside.
    4. Stir in the chopped onions and carrots and fry for another 5 minutes or until soft. Then stir in the garlic cloves, rosemary and thyme and fry it all for another couple of minutes.
    5. Now add the butter, if using and then stir in the chicken stock and wine and bring to a simmer.
    6. Place the browned chicken skin side up over the stock and place in the oven for about have an hour or until the chicken is crisp and cooked through.
    7. Remove the chicken from the pan and pour the sauce into a blender. This is optional but I like a smooth sauce.
    8. Blend until you have a smooth sauce. Return to the pan and season with salt and pepper to taste.
    9. Place the chicken back on top of the sauce and serve.
    Nutrition Information:
    Yield: 4 Serving Size: 1
    Amount Per Serving: Calories: 506Total Fat: 29gSaturated Fat: 9gTrans Fat: 0gUnsaturated Fat: 18gCholesterol: 65mgSodium: 246mgCarbohydrates: 39gFiber: 2gSugar: 2gProtein: 17g
    © Dan Toombs
    Cuisine: French / Category: European

    Ranch Dressing Recipe

    January 14, 2015 By Dan

    ranch dressing

    Ranch Dressing
    I love this ranch dressing recipe on top of a wedge salad.


    It's hard to beat a homemade ranch dressing. That's especially so when it's on top of a wedge of cold iceberg lettuce with all the fixings. Crisp red onions, chickpeas and kidney beans are a must.

    I also like a bit of smoked bacon or fried chunks of Parma Ham. The chunks of Parma ham are a bit more difficult to come by but God are they good.

    That's what I used in the wedge salad above.

    We brought a leg of Parma ham back with us from our last trip to Italy and believe me, cutting small chunks off of it are a lot easier than those more traditional paper thin slices.

    I've been making this same ranch dressing since I was a kid. Little has changed. There's just no need to change a thing. Hope you agree with that one.

    Working ahead...

    As with most good salad dressing, this ranch dressing recipe can be made a few days in advance.

    In fact if you do that, it will come out of the fridge nice and cold which is the way ranch should be served.

    Just be sure to whisk or shake it up well before serving.

    So are you ready to get started>

    This ranch dressing recipe is so delicious and easy to make. Don't wait another minute! Make this now and enjoy.


    Ranch dressing
    So creamy and smooth... salad dressing don't get much better than this.

    Ranch dressing
    So much better than store bought ranch.

    Ranch Dressing

    Ranch dressing

    If you like this recipe, you might like to try some of these too...

    Caprese salad
    Ceasar salad
    Green goddess salad
    Salad nicoise
     

    Recipe

    Dan's Classic California Ranch Dressing

    Dan's Classic California Ranch Dressing

    Yield: 4
    Prep Time: 10 minutes
    Total Time: 10 minutes

    Ingredients

    • 1 cup (250ml) Mayonnaise
    • ½ cup (125ml) buttermilk
    • 1 shallot - finely chopped
    • 1 clove garlic - finely chopped
    • A small bunch of chives - finely chopped
    • 1 tablespoon white wine vinegar
    • 3 tablespoons Parmesan cheese
    • 1 teaspoon dried oregano
    • 2 tablespoons chopped fresh parsley
    • Salt and freshly cracked black pepper to taste
    • 1 - 2 squirts of Tabasco
    • 1 - 2 squirts of Worcestershire sauce

    Instructions

    1. Whisk all of the ingredients together in a large bowl until creamy smooth.
    2. Place in the fridge for about an hour before using (optional).
    © Dan Toombs
    Cuisine: American / Category: Side Dish

    I hope you enjoy this ranch dressing recipe. If you do try it, please leave a comment. I'd love to hear from you.

    Juicy Lucy Burger Recipe

    January 14, 2015 By Dan

    Burger by Dan Toombs

    Burger by Dan Toombs
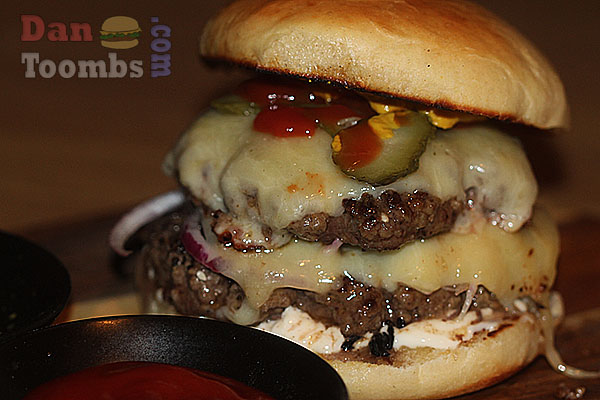
    You are going to love this Juicy Lucy burger recipe!

    A hamburger is not a hamburger without a hamburger bun. Without the bun, it's just a hamburger sandwich. A nice fluffy bun keeps all those amazing juices in so that you get to enjoy them in your mouth and not regret them on your hands and clothing.

    Your buns will come in very handy when you sink your teeth into this Juicy Lucy burger recipe. This mouthwatering burger needs to be served in the best bun you can find.

    I recommend making your own as they are so much fresher and spongier than anything available at the supermarket. Here is my bun recipe should you wish to give it a go. You'll be glad you did.

    This burger just plain gets it. It oozes gorgeousness. Use the best 80%/20% beef mince you can find. Get yourself some goose fat and your favourite herbs and you are on your way to hamburger heaven.

    I made this Juicy Lucy burger with strong cave aged Cheddar but you can use whatever cheese you like. My wife prefers a good Stilton. I love smoked applewood Cheddar.Try this with buffalo mozzarella for an Italian-Amercian touch.

    Burgers are so much nicer with slow fried onions. I made sure they were on mine. Don't forget to try them on yours.

    burger by Dan Toombs
    You start with two ⅓lb patties.

    Burger by Dan Toombs
    Place your favourite cheese on one side.

    Burger by Dan Toombs
    Place the other half on top and seal shut.

    Burger by Dan Toombs
    Throw in a nice healthy dose of goose fat.

    Burger by Dan Toombs
    While the burger is cooking, add butter and herbs.

    Burger by Dan Toombs
    Prepare your toasted bun with whatever you fancy. Don't forget the fried onions.

    Burger by Dan Toombs
    Allow your burger to rest for a minute while you prepare you buns.

    Burger by Dan Toombs
    With this many calories, I'll have to share this one with my wife.

    If you like this recipe, you might like to try some of these too...

    Double Whopper with Cheese
    Homemade Hamburger Buns
    The Famous Fat Burger

    Recipe

    The Gooey Cheesy Goose Fat Beefy Burger

    The Gooey Cheesy Goose Fat Beefy Burger

    Yield: 1
    Prep Time: 10 minutes
    Cook Time: 10 minutes
    Total Time: 20 minutes

    Ingredients

    • 2 x ⅓lb hand formed burger patties
    • 1 tablespoon goose fat
    • 2 tablespoons butter
    • ½ onion - sliced and chopped
    • Herbs - such as thyme and rosemary
    • 1 - 2 cloves garlic
    • 1 hamburger bun - fresh homemade is best for this juicy burger - Toasted on both sides.
    • Ketchup
    • Mayonnaise
    • Dill pickle slices
    • Cheese of choice
    • Salt and pepper to taste

    Instructions

    1. Form your beef patties as pictured.
    2. Place the cheese on one have and then top with the other patty. Seal tightly.
    3. Now heat one tablespoon of the butter in a large frying pan and saute the onion over medium heat until soft and translucent. Sprinkle a bit of salt on the fried onion if you like. Remove from the pan and keep warm.
    4. Now season the beef patty generously with salt and pepper on both sides.
    5. Increase the heat to high.
    6. When the pan is about as hot as you can get it, throw in the goose fat.
    7. Place the beef patty in the melted goose fat and let it sizzle for about five minutes without turning.
    8. Flip it over and then add more butter to the pan along with some herbs and garlic.
    9. Cook the patty until you have it to preferred doneness and until the cheese is melted inside. You may need to lower the temperature so that you don't burn your herbs and garlic.
    10. Baste the meat as it cooks with the butter and goose fat herbs and garlic.
    11. Prepare you bun as photographed or with anything else you fancy.
    12. I usually turn the heat off and allow the burger to just sit there and rest while the cheese melts a bit more for about two minutes.
    13. Serve immediately.
    © Dan Toombs
    Cuisine: American

    I hope you enjoy this juicy Lucy burger recipe. If you do try it, please leave a comment. I'd love to hear from you.

    Penne Pasta Recipe - Penne alla Puttanesca

    January 12, 2015 By Dan

    Penne alla Puttanesca

    Penne Pasta
    This authentic Italian penne pasta recipe is out of this world delicious. Easy too!

    Puttanesca sauce is one of those pasta sauces I truly love. I don't have it often but when I need to empty the store cupboard and fridge, it's usually on the menu.

    It seems I always have the ingredients but I use them in other dishes. When the caper, olive and chilli supplies begin to dry up, however they are brought out to cook this penna pasta recipe.

    Most Italian recipes are pretty easy. As tasty as they may be, there isn't usually a lot to them. Their deliciousness is in their simplicity.

    Even the most novice of chefs can cook up a good puttanesca sauce.

    In Italy, where they have so many amazing food markets and delis, I use the best, freshest ingredients I can find for this recipe. Here I tend to use up what I have. I hate waste.

    Why use penna pasta for this recipe?

    Penne is a very popular pasta all over the world.

    It is available both with a smooth and ribbed surface as shown in this penne pasta recipe. Personally I prefer the ribbed surface for my recipes.

    The cylindrical shape of the pasta along with the ribbed edges allows the pasta to adhere to the sauce. Not only that, the sauce gets into the center making every mouthful amazing.

    What makes the sauce a puttanesca sauce?

    This penna pasta recipe is hugely popular for its simplicity. Sharp tasting ingredients like anchovies, capers, olives, garlic and tomatoes are all used.

    You might think that with all those rather strong flavours, the sauce would be overpowering but it's not. The Italians know their ingredients and how to use them!

    Penne alla Puttanesca
    Start by frying your garlid. I eat them later but you can throw them away if you must.

    Adding anchovies to sauce.
    Add the chilli and anchovies.

    Adding remaining ingredients to penne pasta.
    Add the rest of the ingredients

    Stirring pasta to serve.
    Stir in your pasta and serve.

    Penne alla Puttanesca

    If you like this recipe, you might also like to try some of these...

    Italian style pan seared ribeye steaks
    Nduja pasta
    Spaghetti with lardo and artichokes
    Pasta Bolognese
    Pork pasta with paprika and garlic
    Caprese salad

    Recipe

    Penne alla Puttanesca

    Penne alla Puttanesca

    Yield: 4
    Prep Time: 5 minutes
    Cook Time: 15 minutes
    Total Time: 20 minutes

    Ingredients

    • 500g (1lb) fresh penne pasta or the pasta of your choice
    • 3 tablespoon olive oil
    • 6 anchovy fillets - cut into pieces
    • 2 cloves whole garlic
    • 3 tablespoons capers
    • 1 green chilli pepper - sliced thinly
    • 10 olives - sliced - whatever kind you like
    • 20 cherry tomatoes
    • 3 tablespoons fresh parsley - finely chopped
    • 1 tablespoon butter

    Instructions

    1. Cook your penne pasta as per the instructions on the packet. I like to serve mine al dente.
    2. Drain, rinse and stir in the butter. Set aside and keep warm.
    3. In a large pan or wok, heat the olive oil.
    4. When hot, toss in the garlic cloves and move them around in the oil for a few seconds.
    5. Add the anchovies and sliced chilli pepper and sautè for about 30 seconds.
    6. Now stir in the tomatoes, capers and olives and simmer until you have a thick sauce.
    7. Stir this into your pasta and serve immediately.
    © Dan Toombs
    Cuisine: Italian / Category: Main


    Pasta Bolognese Recipe

    January 12, 2015 By Dan

    Pasta Bolognese

    Pasta Bolognese
    You are going to love this pasta bolognese recipe!


    This was my grandfather's pasta bolognese recipe. Before him, it was his Italian aunt's.

    So this pasta bolognese recipe has been enjoyed around our family table for easily over a hundred years.

    I never understand why people purchase those jarred bolognese sauces at the supermarket. Bolognese sauces are so easy to cook and they do make the house smell so nice while they're cooking.

    The secret to this sauce is the dried porcini mushrooms. My kids aren't exactly mushroom fans so I cut the dried porcini up into small, unrecognisable pieces and they love it.

    This pasta bolognese recipe should be enjoyed with pasta but not spaghetti! Or at least that was what I was told growing up and have since confirmed in my travels to Italy.

    Meat sauces like this need to be enjoyed with pasta that will soak them and actually adhere to the sauce.

    Pasta such as that you see above or penna would work perfectly.

    Leave the spaghetti for your next seafood pasta. Far better.


    Bolognese Sauce
    Bolognese Sauce - The longer it simmers the better. To a point that is. 🙂

    If you like this recipe, you might like to try some of these too...

    Baked haloumi
    Salmon and broccoli pasta bake
    Spaghetti with lardo and artichokes
    Caprese salad


    Recipe

    Pasta bolognese in a serving bowl.

    Pasta Bolognese

    Yield: 8
    Prep Time: 20 minutes
    Cook Time: 1 hour
    Total Time: 1 hour 20 minutes

    Ingredients

    • 1 kilo (2lb) minced beef and veal mix
    • 3 tablespoons olive oil
    • 300g pork lardons
    • 10 dried porcini mushrooms soaked in hot water for a half hour (retain water)
    • 2 onions - finely chopped
    • 10 cloves garlic - finely chopped
    • 1 teaspoon each of dried oregano, thyme, rosemary
    • ½ bottle of red wine
    • A spash or two Worcestershire sauce
    • 1 litre (4 cups) chopped tomatoes
    • The end of a chunk of Parmesan (optional)
    • Salt and pepper to taste
    • 3 tablespoons fresh parsley - finely chopped
    • 3 tablespoons fresh basel - finely chopped

    Instructions

    1. Soak your dried porcini in about 500ml (2 cups) hot water for about 30 minutes.
    2. Remove the porcini and cut into very small pieces. Retain the soaking liquid.
    3. Heat the oil in a large pot over medium high heat.
    4. When good and hot, add the lardons and fry until lightly browned.
    5. Now add the minced beef and continue frying until cooked through. You will need to move the meat around in the pot from time to time.
    6. Add the chopped garlic and onion and stir it into the meat. Continue cooking for about ten more minutes. Don't worry about burning the meat. It won't.
    7. Pour the bottle of wine over the cooked meat followed by a couple splashes of Worcestershire sauce.
    8. Now add the chopped tomatoes, chopped porcini mushrooms and the dried herbs and stir it all up nicely. If you are adding a Parmesan chunk, do it now.
    9. Carefully add the soaking liquid from the mushrooms. There will be some dirt at the bottom of the bowl so try not to add that too.
    10. Allow to simmer for at least an hour or all day if you like.
    11. Season with salt and pepper to taste and add the chopped fresh herbs to serve.
    © Dan Toombs
    Cuisine: Italian


    Italian Fried Cauliflower With Anchovies and Garlic

    January 12, 2015 By Dan

    Italian fried cauliflower with Anchovies and garlic in a frying pan.

    If you know me, you know I’m a huge fan of simple dishes that deliver massive flavour without hours of work. Today’s recipe is exactly that: Italian caramelised Fried Cauliflower with Garlic and anchovies.

    Honestly... you’re in for a treat. Golden, crispy, garlicky... it’s everything you want in a snack, side, or even a full-on vegetarian meal if you like.

    Italian fried cauliflower with Anchovies and garlic in a frying pan.

    About this fried cauliflower recipe.

    This recipe is straight-up Italian comfort food, and once you try it, you’ll find yourself making it on repeat.

    Insalata di Cavolfiore Calda or hot Italian fried cauliflower salad, is on the menu at so many of the gorgeous restaurants in Tuscan and Latium.

    Usually it's prepared in large batches ahead of time and then portions are warmed up as requested. This is my family sized portion.

    It's amazing served as a side dish with steak pizzaiola, basil pesto or tomato and mascarponi pasta or Tuscan chicken. You might also like to have it as part of a light meal with broccoli salad, garlic soup or even this hot canned tuna recipe.

    Ingredients

    There aren't a lot of ingredients in this delicious fried cauliflower recipe. You can throw this together in about 20 minutes.

    The ingredients for the recipe laid out in a frying pan.
    • olive oil
    • anchovies
    • dried red chilli flakes
    • garlic
    • scallions (spring onions)
    • cauliflower
    • Dijon (or similar) mustard
    • Salt and pepper to taste
    • parsley

    See recipe card for quantities.

    Step by Step Photos

    Check out my step by step photographs below and see just how easy it is to throw this together.

    Frying the anchovies and chili flakes in olive oil over a medium heat.
    1. Step 1: Heat the olive oil over a medium heat and stir in the anchovies and chili flakes. Fry for about 30 seconds.
    Stirring in the chopped garlic and spring onions to fry for another minute.
    1. Step 2: Stir in the chopped garlic and scallions (spring onions) and fry for another minute.
    Adding the cauliflower and Dijon mustard.
    1. Step 3: Turn the heat up to medium-high and add the cauliflower and Dijon mustard.
    Browning the cauliflower in the pan.
    1. Step 4: Cook for about 5 minutes or until the cauliflower is just cooked through and turning a golden brown. Stir often so that it cooks evenly.
    The finished Italian fried cauliflower with anchovies and garlic.
    1. Step 5: Season with salt and pepper to taste and garnish with the chopped parsley.

    Why You’ll Love Italian Fried Cauliflower

    • It’s fast. We’re talking about 20 minutes from start to finish.
    • It’s simple. Basic, affordable ingredients you probably already have.
    • It’s insanely moreish. Crispy edges, tender inside, and that hit of garlic and anchovies.
    • It’s versatile. Serve it as a snack, a side dish, or pile it into sandwiches or wraps.

    In Italy, especially down south, you’ll find variations of fried cauliflower everywhere. Sometimes battered, sometimes just dusted with flour — always delicious.

    Today, I’ll show you a version that’s light, crispy, and absolutely packed with flavor.

    Variations

    Want to mix it up a bit? Here are a few of the other versions I have come across.

    Cheesy version: Grate over a little Parmesan right before serving. (Not traditional, but delicious!)e! (placeholder for in-content link)

    Spicy version: Add fresh red chilies instead of or with the dried chili flakes. Make it as spicy as you like.

    Herby version: Mix chopped fresh basil, thyme, or oregano with the parsley.

    Equipment

    All you need for this fried cauliflower recipe is a frying pan and spatula. A good, sharp knife will come in handy for chopping the garlic and scallions and cutting the cauliflower.

    Storage

    If you have leftovers, you can store them covered with cling film in the fridge for 3 to 4 days. You can serve this cold or heat it up in a pan until hot which I recommend.

    Top Tip

    Watch the cauliflower as it cooks. You don't want to overcook it. The fried cauliflower is ready when tender but it should not be mushy and still have a bit of a bit to it.

    Related

    For a light lunch, team this fried cauliflower with one of these.

    • Broccoli Salad on a serving plate.
      Broccoli Salad
    • Hot canned tuna recipe served up with vegetables and bread.
      Canned Tuna Recipe
    • Garlic soup in a serving bowl.
      Garlic Soup

    Looking for a good main dish to go with your fried cauliflower?

    Try all of these. You'll love them!

    • All Italian burger finished
      The All Italian Burger
    • Ribeye steak with garlic butter served with loaded potato and broccoli
      Ribeye Steaks
    • The cooked fish on a serving platter drizzled with the herb mixture.
      Mediterranean Fish - Grilled
    • Bowl of chicken and chorizo risotto garnished with parsley
      Chicken and Chorizo Risotto
    • Finished asparagus risotto
      Asparagus Risotto
    • Steak Pizzaiola in the dish it was cooked in.
      Steak Pizzaiola
    • tomato and mascarpone pasta
      Tomato and Mascarpone Pasta
    • Homemade easy pesto pasta
      Easy Pesto Pasta
    • Homemade Tuscan chicken plated up
      Tuscan Chicken
    • gnocchi with brown butter and sage
      Gnocchi With Brown Butter And Sage
    • Italian Gnocchi Recipe
      Italian Gnocchi Recipe
    • homemade basil pesto
      Basil Pesto

    Recipe

    Italian fried cauliflower with Anchovies and garlic in a frying pan.

    Italian Fried Cauliflower With Anchovies and Garlic

    Yield: 4 - 6
    Prep Time: 10 minutes
    Cook Time: 15 minutes
    Total Time: 25 minutes

    Ingredients

    • 3 tablespoon olive oil
    • 6 anchovies, finely chopped
    • 1 teaspoon dried red chilli flakes
    • 6 cloves garlic - finely chopped
    • 2 scallions (spring onions) - finely chopped
    • 1 head of cauliflower - cut into bite sized pieces
    • 1 tablespoon Dijon (or similar) mustard
    • Salt and pepper to taste
    • 3 tablespoon parsley - finely chopped

    Instructions

    1. Heat the oil over medium high heat.
    2. When hot, add the anchovies and red chilli flakes.
    3. Fry until the anchovies break down into a paste and then add the garlic and spring onions.
    4. Stir this all up to combine and toss in the cauliflower and Dijon mustard.
    5. Continue frying until the cauliflower is cooked through but not soft. It should still have some bite to it.
    6. Season with salt and pepper to taste and sprinkle in the parsley.
    7. Serve immediately or set aside until you are ready to serve. You can make this salad a few hours ahead of time and then just heat it up.
    Nutrition Information:
    Yield: 4 Serving Size: 1
    Amount Per Serving: Calories: 146Total Fat: 11gSaturated Fat: 2gTrans Fat: 0gUnsaturated Fat: 9gCholesterol: 5mgSodium: 324mgCarbohydrates: 8gFiber: 4gSugar: 3gProtein: 5g
    © Dan
    Cuisine: Italian / Category: Italian
    • « Previous Page
    • 1
    • …
    • 19
    • 20
    • 21
    • 22
    • 23
    • 24
    • Next Page »
    For Those About To Cook

    Welcome To For Those About To Cook

    We're a family-run food blog sharing brand-new recipes every week. From easy weeknight staples to indulgent weekend favorites. We're a team of five: Dan (The Curry Guy), Caroline, Joe, Shannon, and Jennifer, bringing you a wide variety of dishes inspired by Europe, the Mediterranean, the Americas, and more.

    This site focuses on Western-inspired recipes, while Eastern flavors are covered in depth over at greatcurryrecipes.net Between the two, you'll find everything you need to cook up something amazing so don't forget to subscribe!

    Subscribe

    Footer

    Contact Privacy Policy

    Subscribe for weekly updates!

    Subscribe
    ↑ back to top

    Copyright © 2024 For Those About to Cook