For Those About To Cook

  • Home
  • About Us
  • All Recipes
  • Subscribe
menu icon
go to homepage
  • Home
  • About Us
  • All Recipes
  • Subscribe
    • Facebook
    • Instagram
    • Pinterest
  • search icon
    Homepage link
    • Home
    • About Us
    • All Recipes
    • Subscribe
    • Facebook
    • Instagram
    • Pinterest
  • ×
    Home

    Paella Valenciana

    August 2, 2025 By Dan

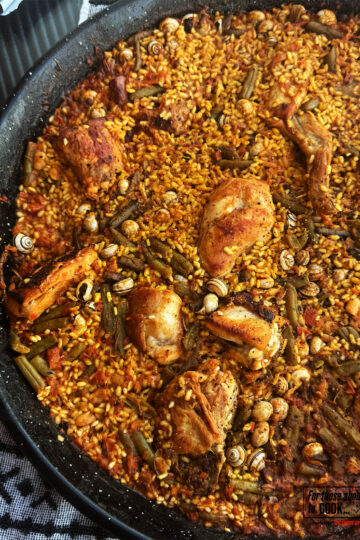
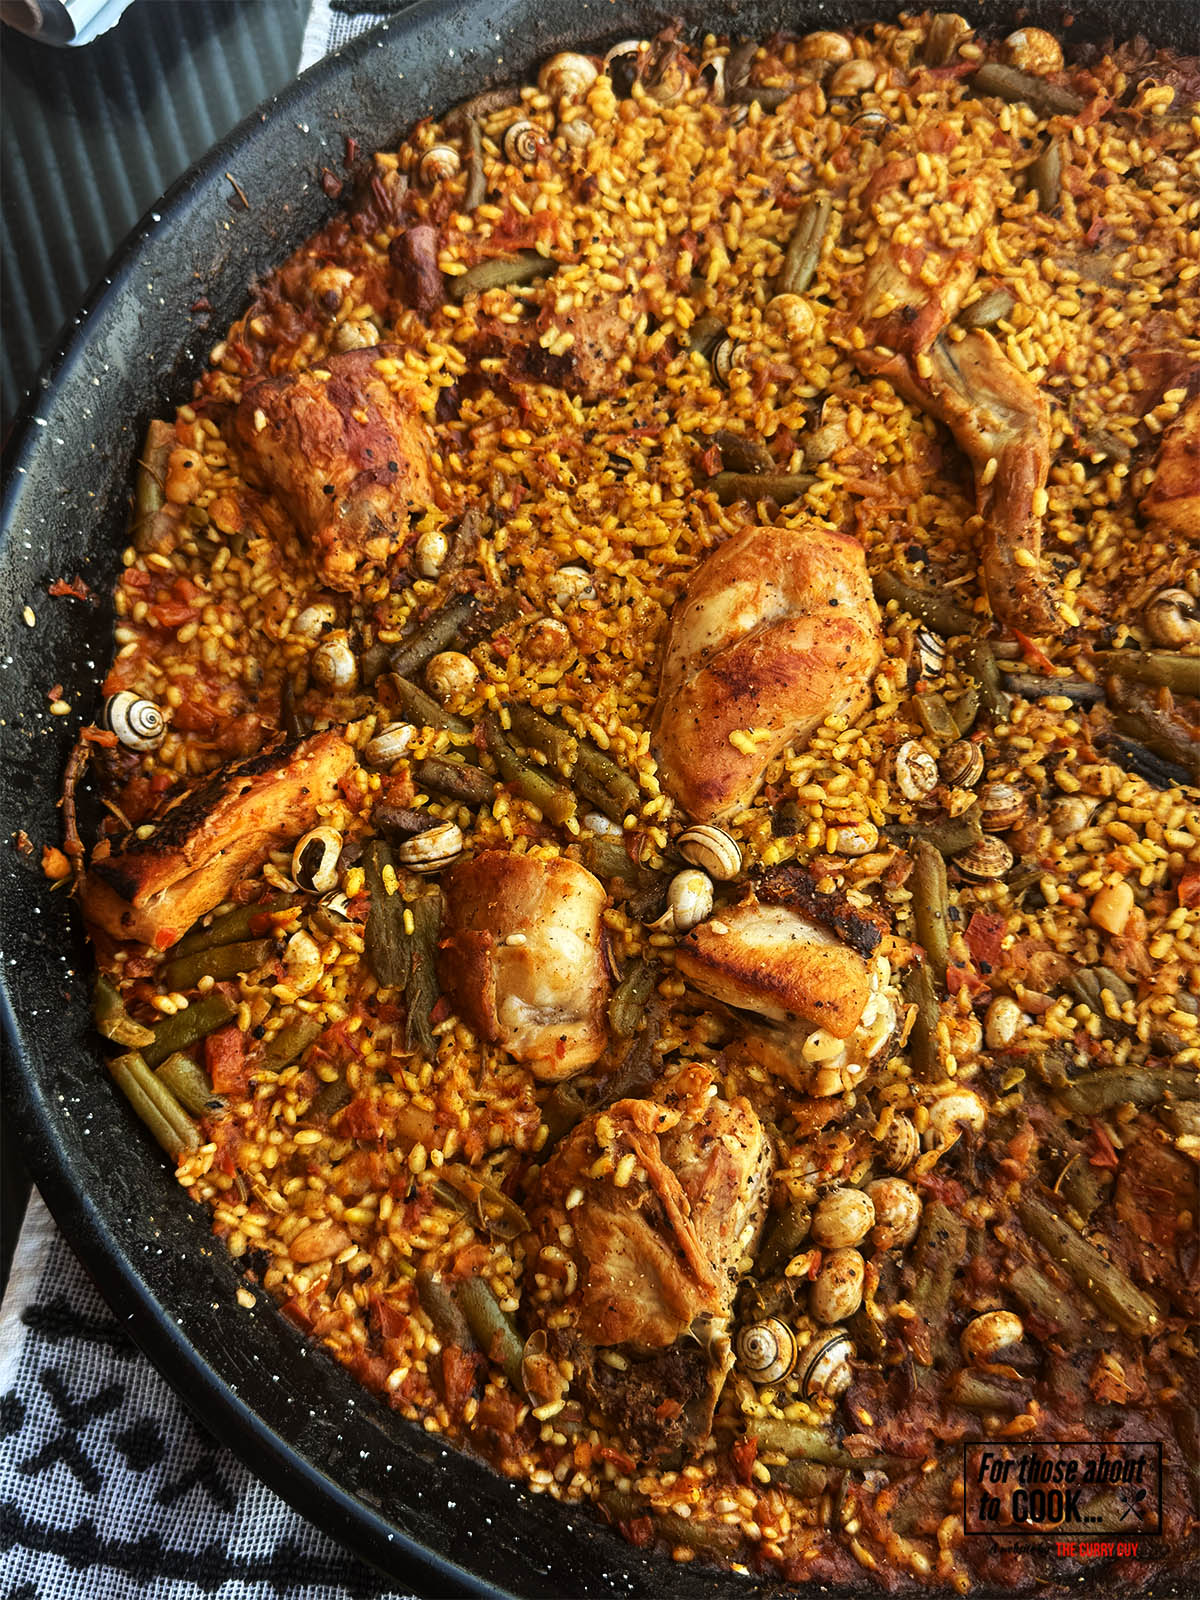
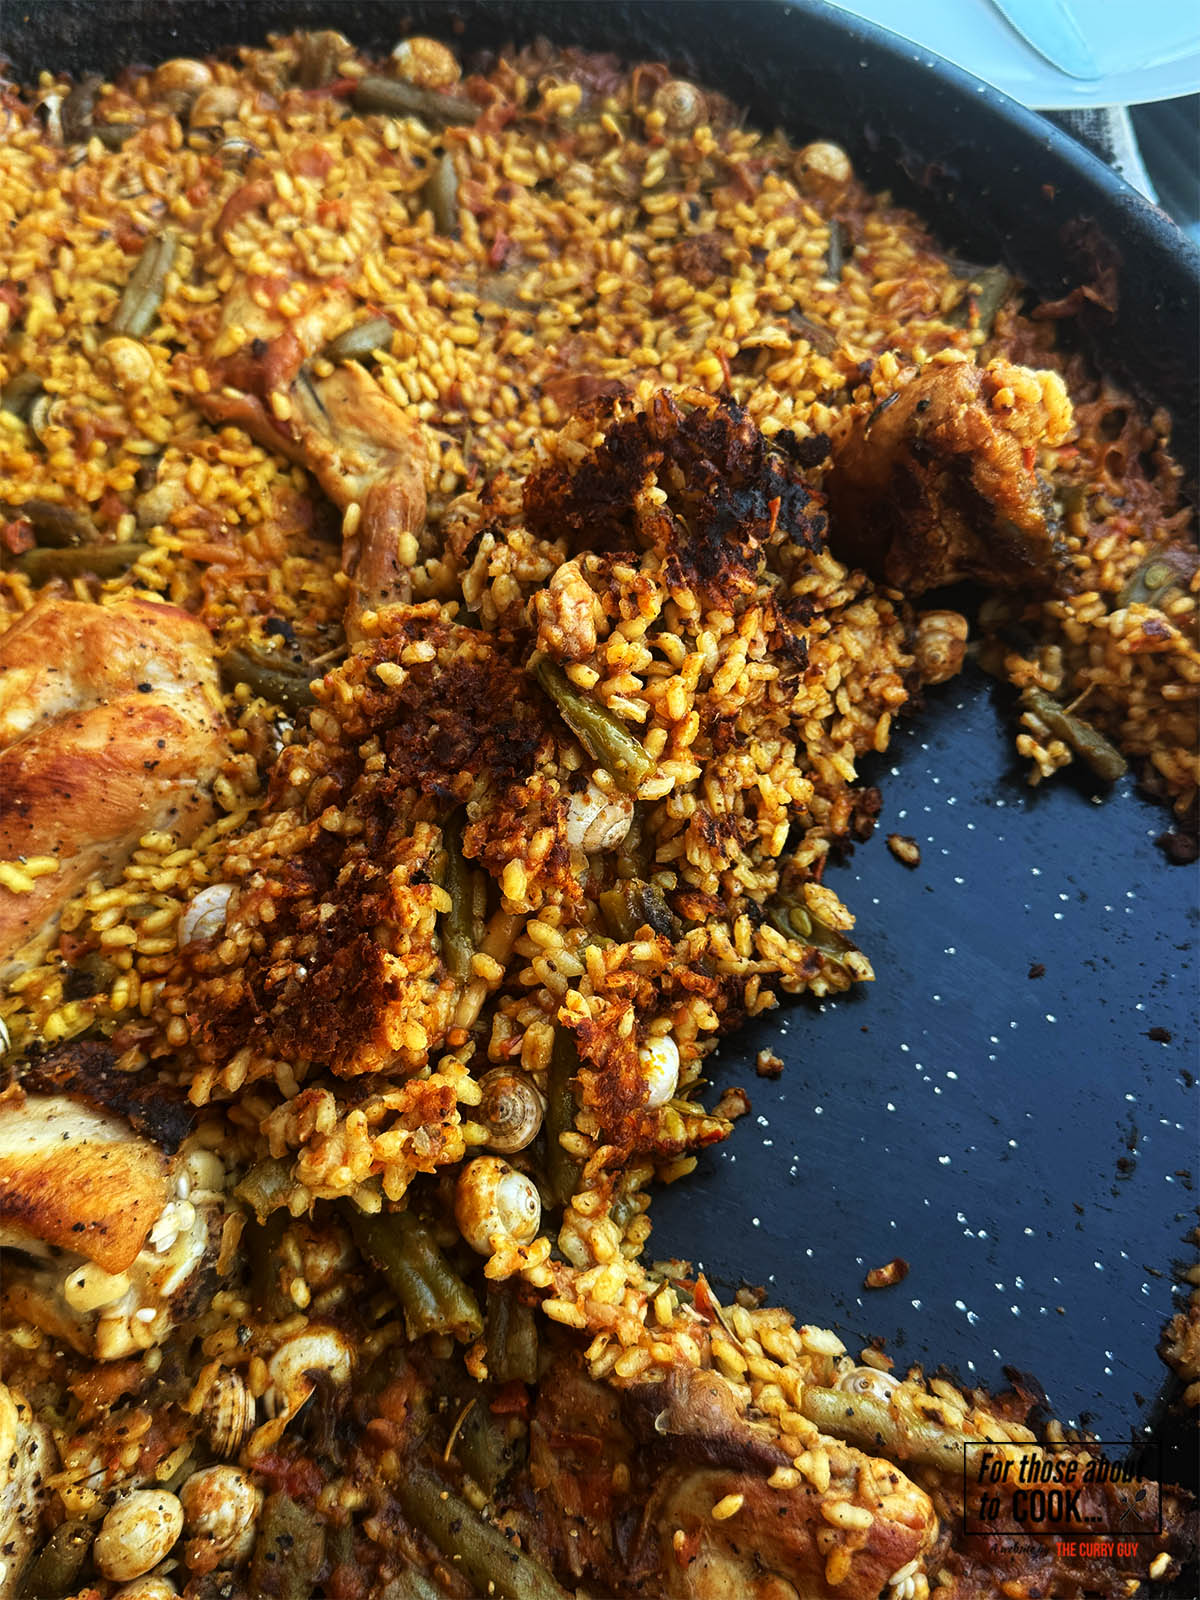
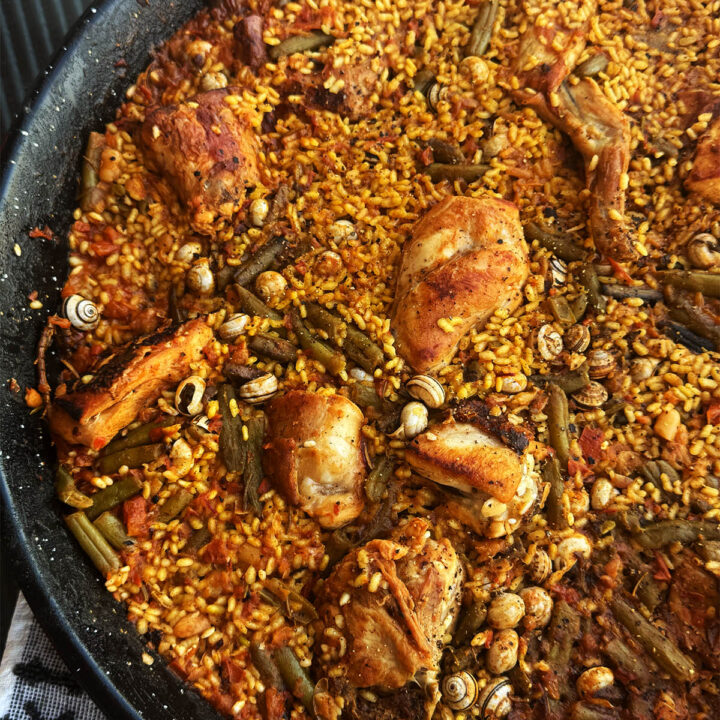
    Paella Valenciana in a paella pan.

    Paella Valenciana is one of the most misunderstood and misrepresented dishes in global cuisine. While countless variations of "paella" exist worldwide, often overloaded with seafood, chorizo, or even pineapple (yes, really) — the original, traditional Valencian paella (Paella Valenciana) is something much simpler, yet deeply rooted in history, culture, and regional pride.

    In this post, we’ll take you through the history of Valencian paella, its authentic ingredients, the step-by-step cooking process, and offer expert tips, recommended equipment, and storage advice. If you want to make a real Valencian paella at home — the way it’s done in its birthplace — this is your definitive guide

    Paella Valenciana in a paella pan.

    A Brief History of Paella Valenciana

    Paella was born in the countryside of Valencia, on Spain’s eastern Mediterranean coast. In the 18th and 19th centuries, local farmers and day laborers would cook rice in a wide pan over an open fire, using what they had on hand — typically rabbit, chicken, snails, and local vegetables like green beans and butter beans (garrofón). It was a communal dish, meant to feed a group, often cooked outdoors in orchards or fields.

    Unlike the seafood-packed “paella marinera” served in tourist hotspots, paella Valenciana is a land-based dish, representing the bounty of the Huerta Valenciana — the fertile farmland around the city. It’s about balance, restraint, and letting each ingredient shine in harmony with the rice.

    In 2012, the local government in Valencia even defined an official recipe for paella Valenciana, which includes 10 core ingredients and excludes anything not traditionally used (sorry, chorizo).


    The Key Ingredients in Traditional Paella Valenciana

    To make a true Valencian paella, you need specific ingredients. While some substitutes are acceptable, sticking to the classics ensures authenticity.

    1. Rice

    • Type: Use a short-grain Spanish variety like Bomba or Calasparra. These absorb liquid without becoming mushy.
    • Why it matters: The rice is the star of the dish, not just a filler.

    2. Meat

    • Rabbit and chicken are the traditional proteins. Some versions include snails (cargols), though they’re optional if not to your taste.
    • Use bone-in cuts for flavor.

    3. Vegetables

    • Green beans (judía verde) — flat Romano-style green beans are ideal.
    • Butter beans (garrofón) — large white beans unique to the region. If you can’t find them, use lima beans or fava beans as a substitute.

    4. Tomato

    • Used to make the sofrito (base). Use fresh grated tomato or high-quality canned tomatoes.

    5. Olive Oil

    • Use Spanish extra virgin olive oil for sautéing and flavor.

    6. Paprika and Saffron

    • Sweet smoked paprika (pimentón dulce) adds depth.
    • Saffron gives the paella its signature golden hue and aroma.

    7. Water and Salt

    • Surprisingly, traditional paella uses water, not stock. The flavor comes from the meat and vegetables themselves.

    Ingredients

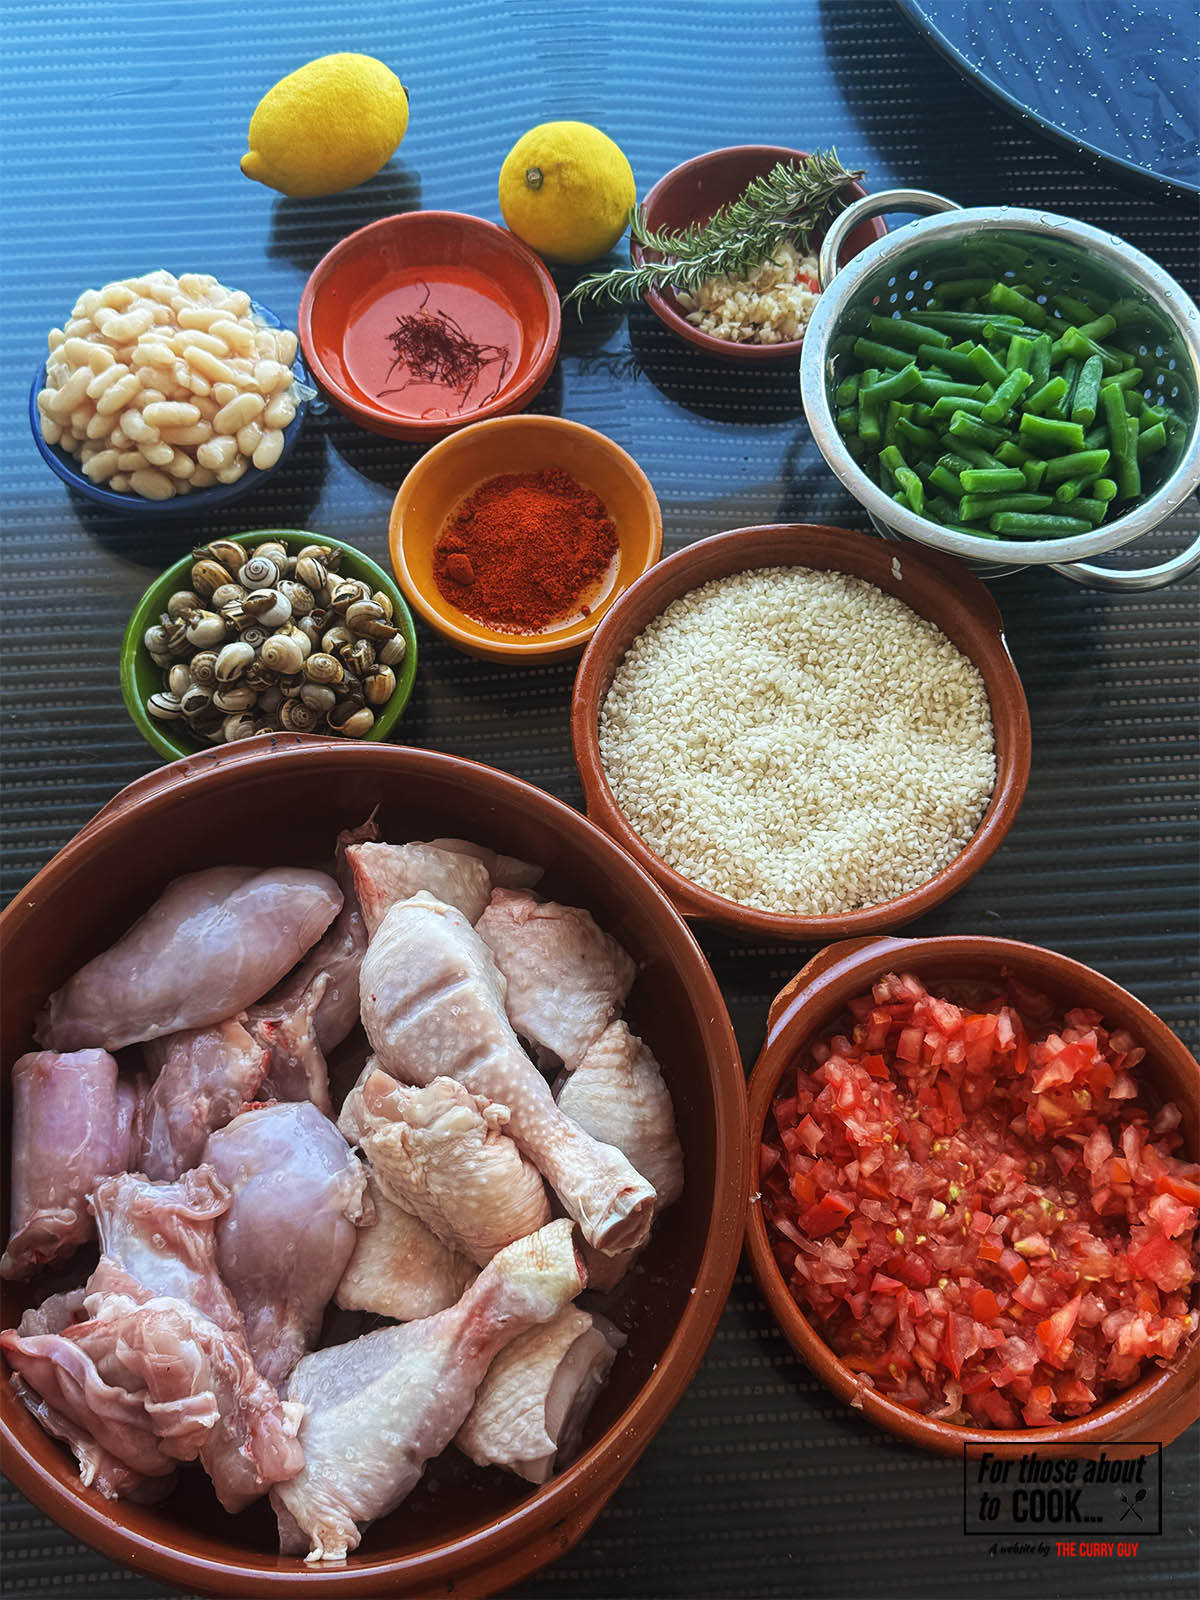
    Below you will see the ingredients I use to make my Paella Valenciana. You will find the exact ingredient measurements in the recipe card at the bottom of this page. Get everything ready and prepared before you start cooking.
    Ingredients for the recipe on a counter top.
    • Extra virgin olive oil
    • Bone-in chicken pieces (thighs or drumsticks)
    • Rabbit, (or more chicken if unavailable)
    • Green beans
    • Lima or butter beans
    • Tomatoes, grated
    • Garlic
    • Sweet paprika
    • Saffron (soaked in warm water)
    • Water
    • Salt to taste
    • Bomba or Calasparra rice
    • Optional: a sprig of fresh rosemary
    • Optional: land snails, cleaned

    See recipe card for quantities.


    Instructions

    Check out my step by step photos. You can use these to help cook your Valencian Paella to perfection. The full written recipe is in the recipe card at the bottom of the page.

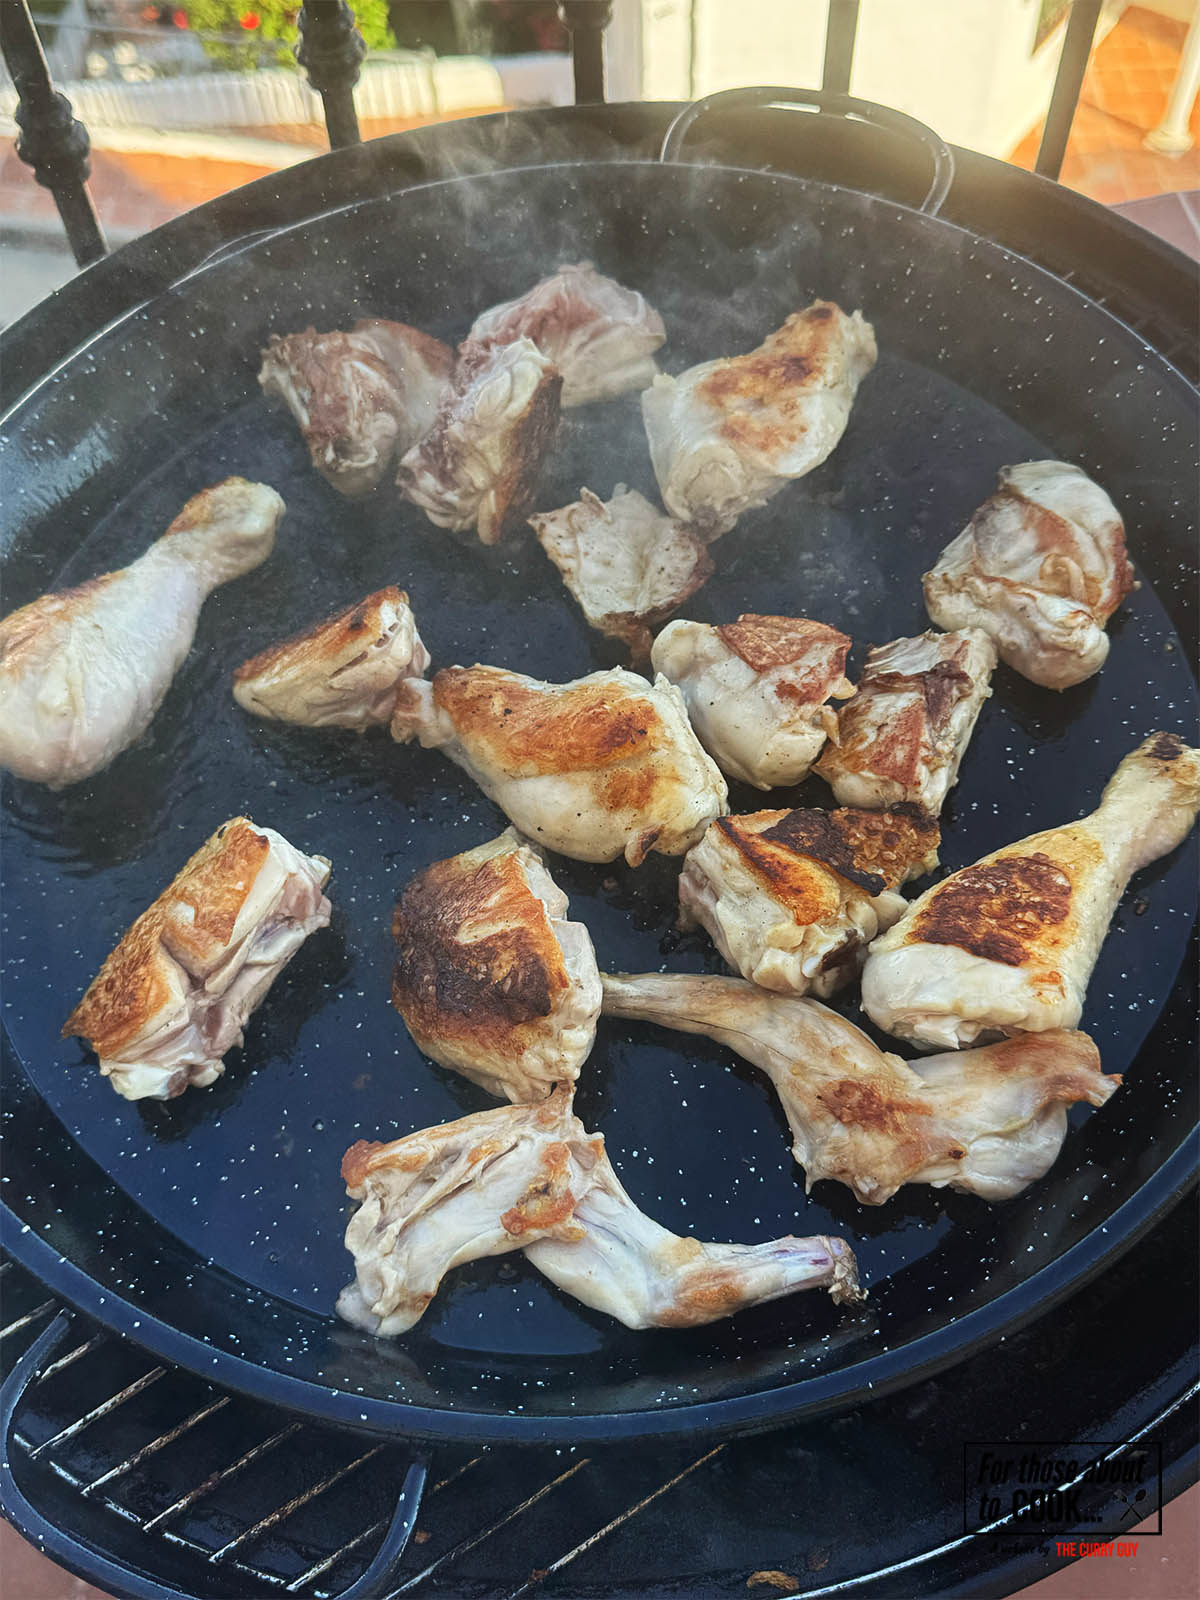
    Frying the rabbit and chicken pieces in olive oil in a paella pan.
    1. Step 1: Heat the olive oil in your paella pan over medium-high heat. When hot, add the chicken and rabbit pieces, seasoned with salt. Sear until golden on all sides. This can take 10–15 minutes. Browning the meat is essential for developing deep flavor.
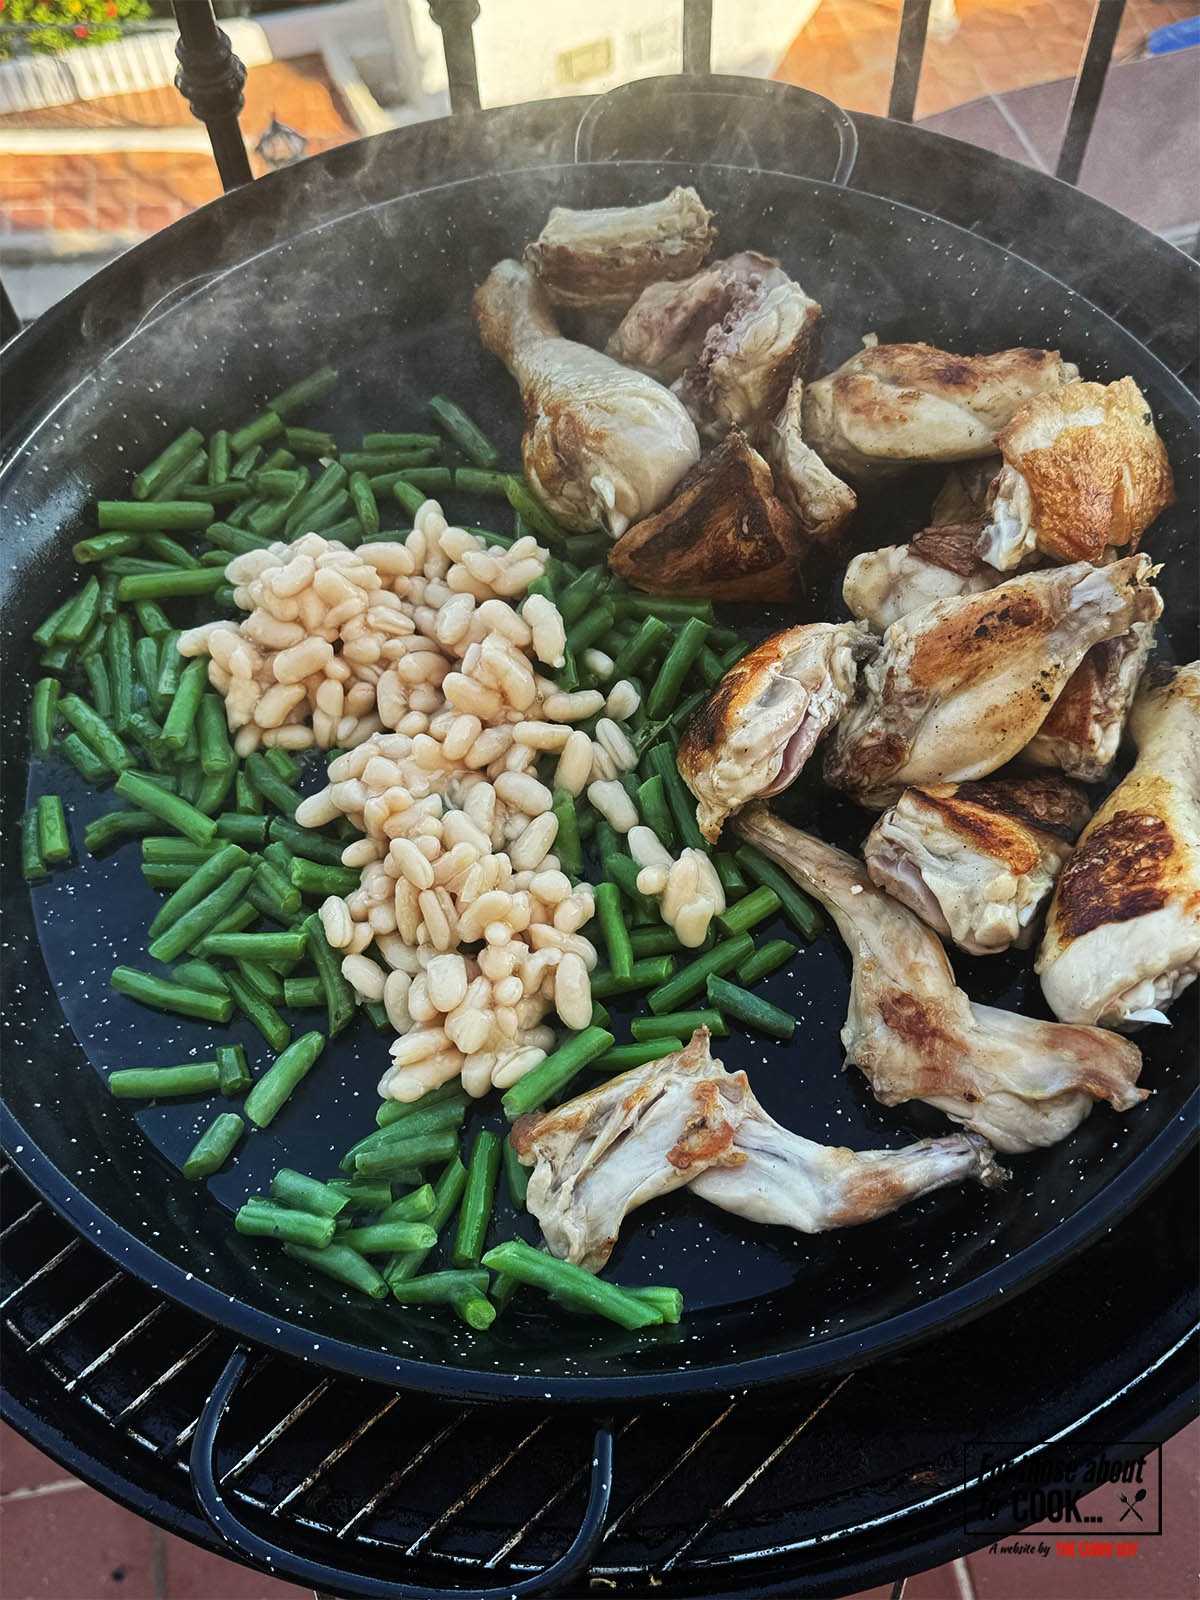
    Adding the green beans and butter beans to fry for a couple of minutes in the pan.
    1. Step 2: Add the green beans and fava or butter beans to the pan. Sauté for a few minutes until they soften slightly and take on some color.

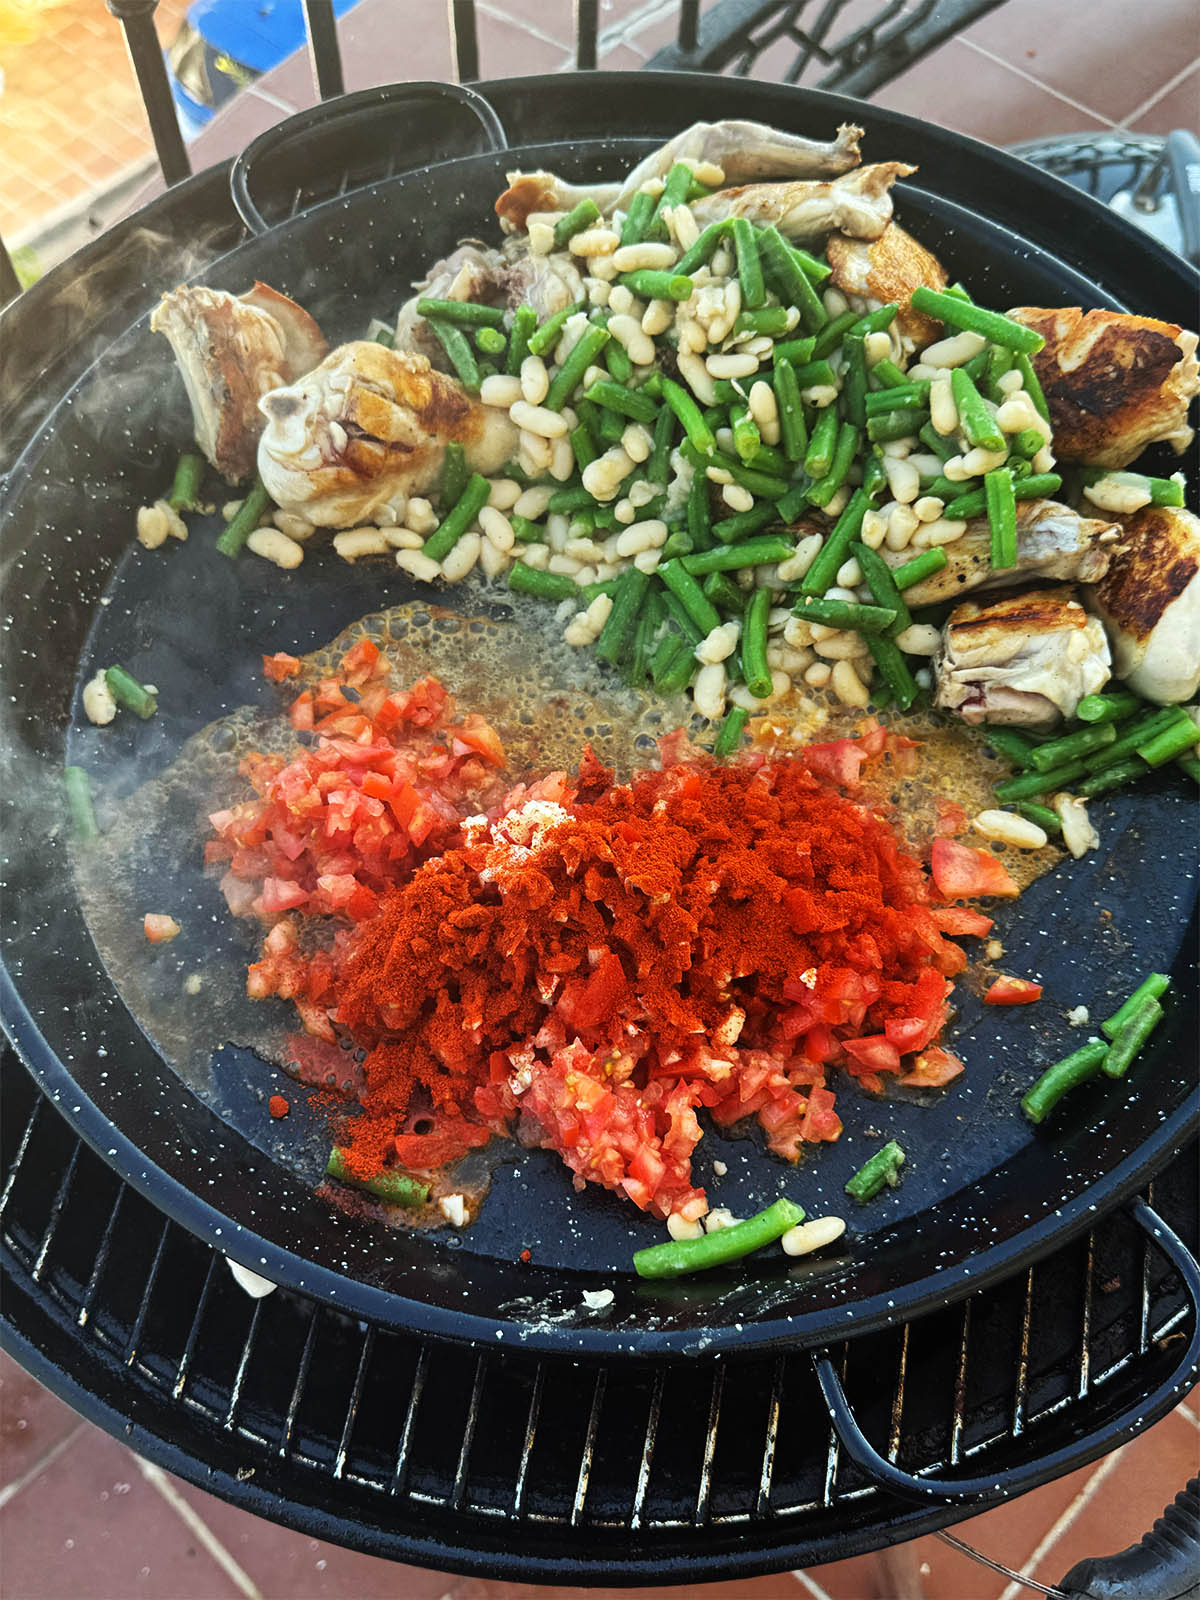
    Adding the chopped tomatoes and paprika.
    1. Step 3: Push the meat and vegetables to the sides of the pan. Add the grated tomato, garlic and paprika to the center. Let it cook down for 5 minutes, stirring occasionally to create a rich, thick base.
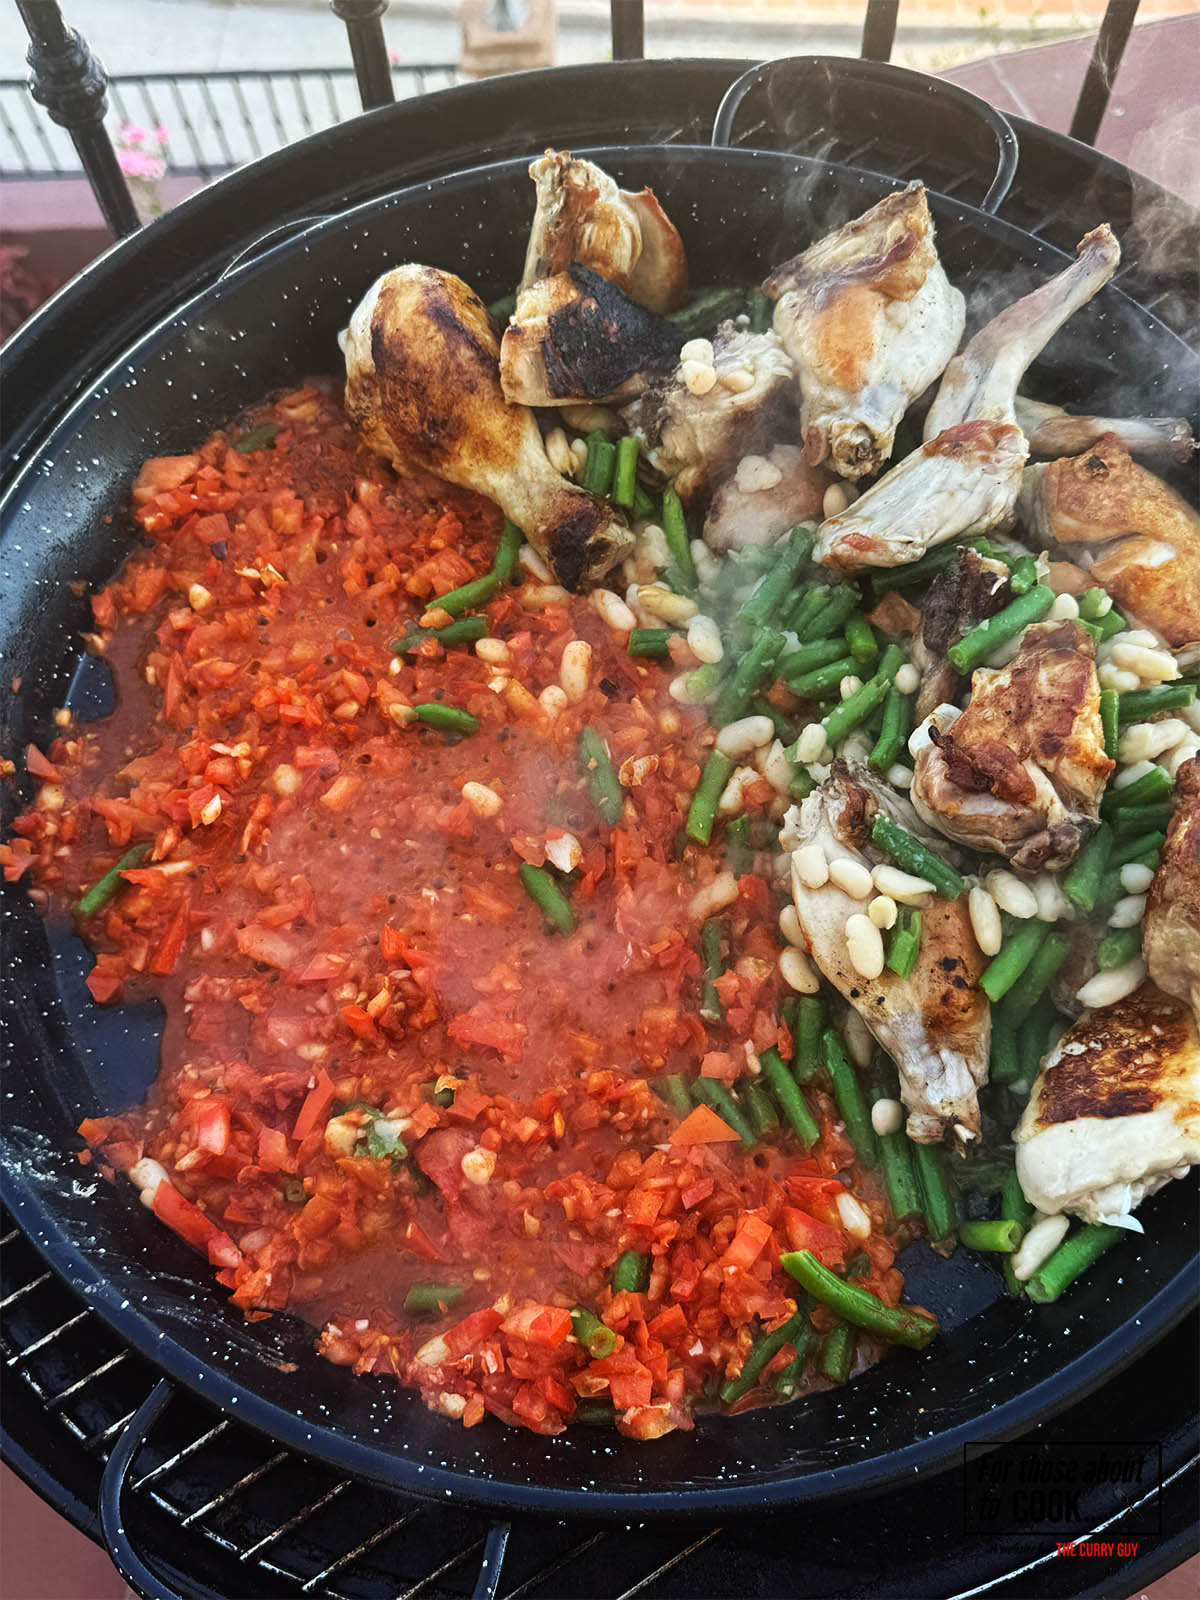
    The tomatoes bubbling hot and breaking down.
    1. Step 4: Pour in enough water to cover all the ingredients — about 1.5 liters. Bring to a boil. Simmer for 30–40 minutes, allowing the meat to fully cook and the broth to develop flavor. Top up with more water if needed.

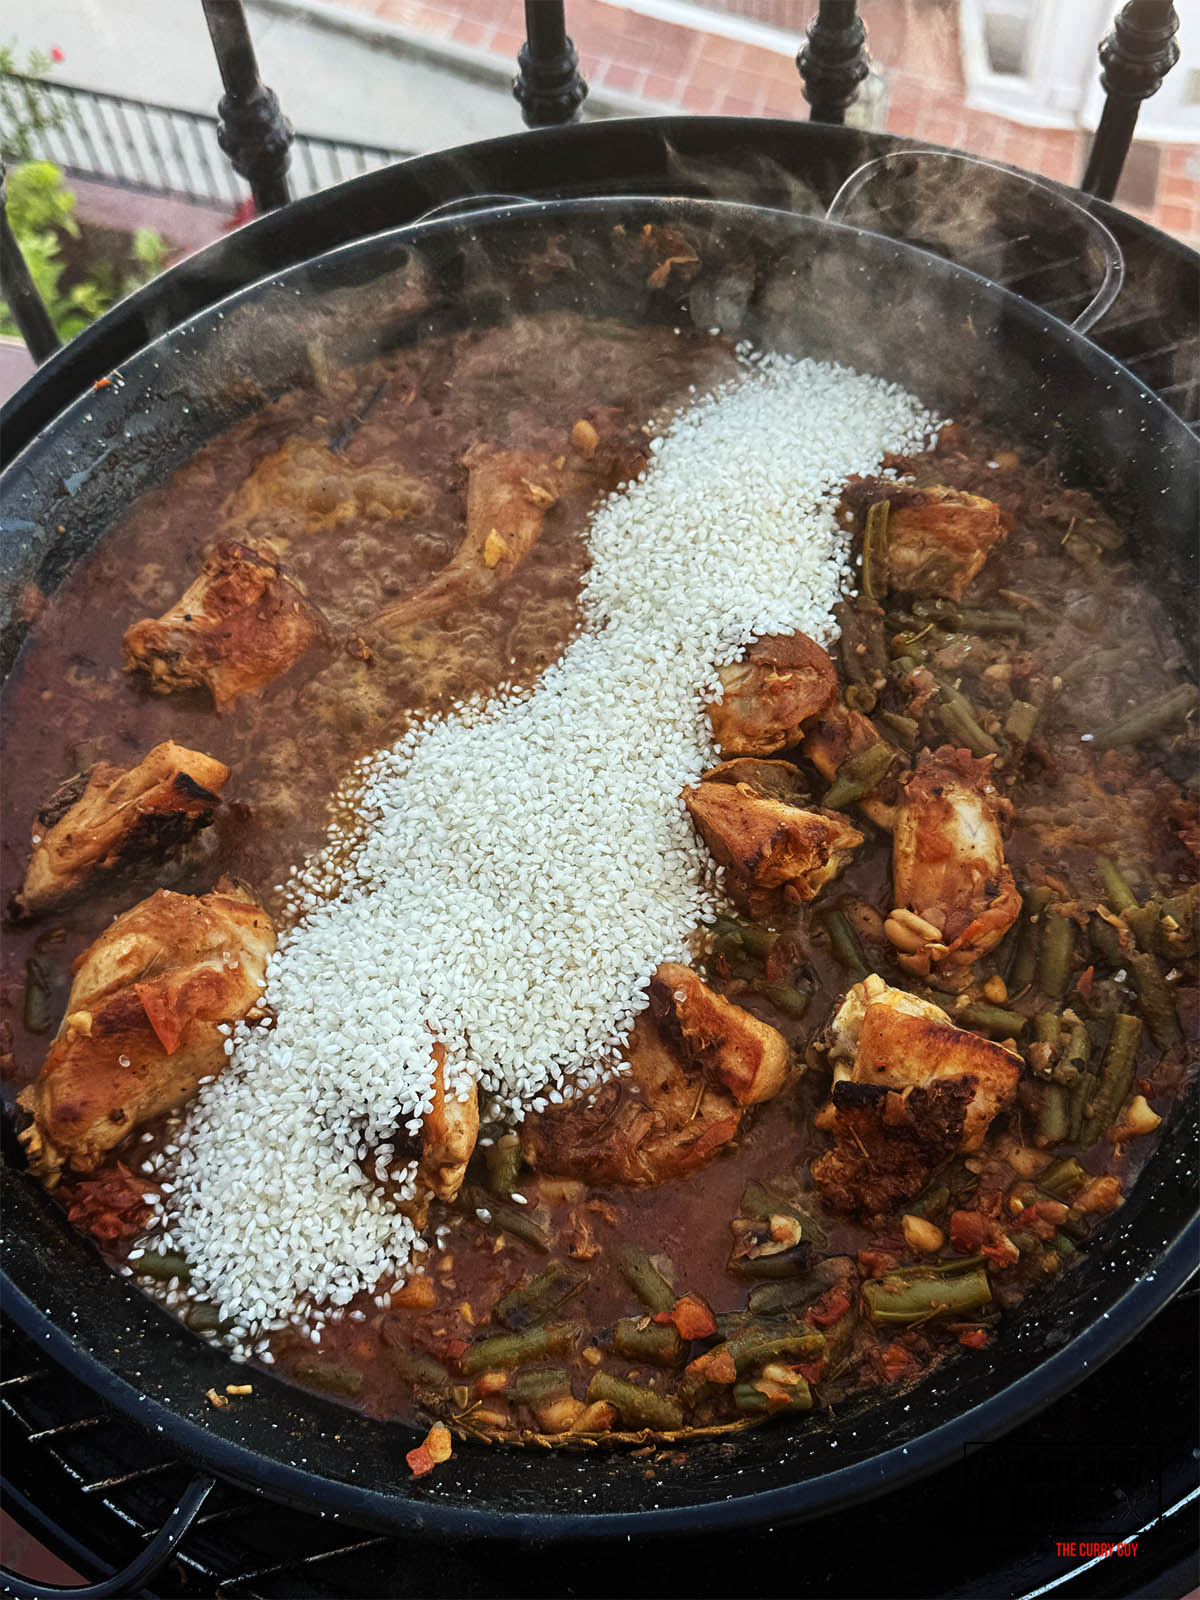
    Adding the rice to the paella pan.
    1. Step 5: Taste the broth for salt. It should be slightly salty as the rice will absorb it. Add the soaked saffron and any remaining soaking liquid. Then, add the rice in a straight line across the diameter of the pan and spread it evenly without stirring.
    Letting the ingredients in the pan simmer.
    1. Step 6: Let it cook on a medium-high boil for the first 8 minutes, then reduce to a medium simmer for another 10 minutes. Rotate the pan if necessary to ensure even cooking.

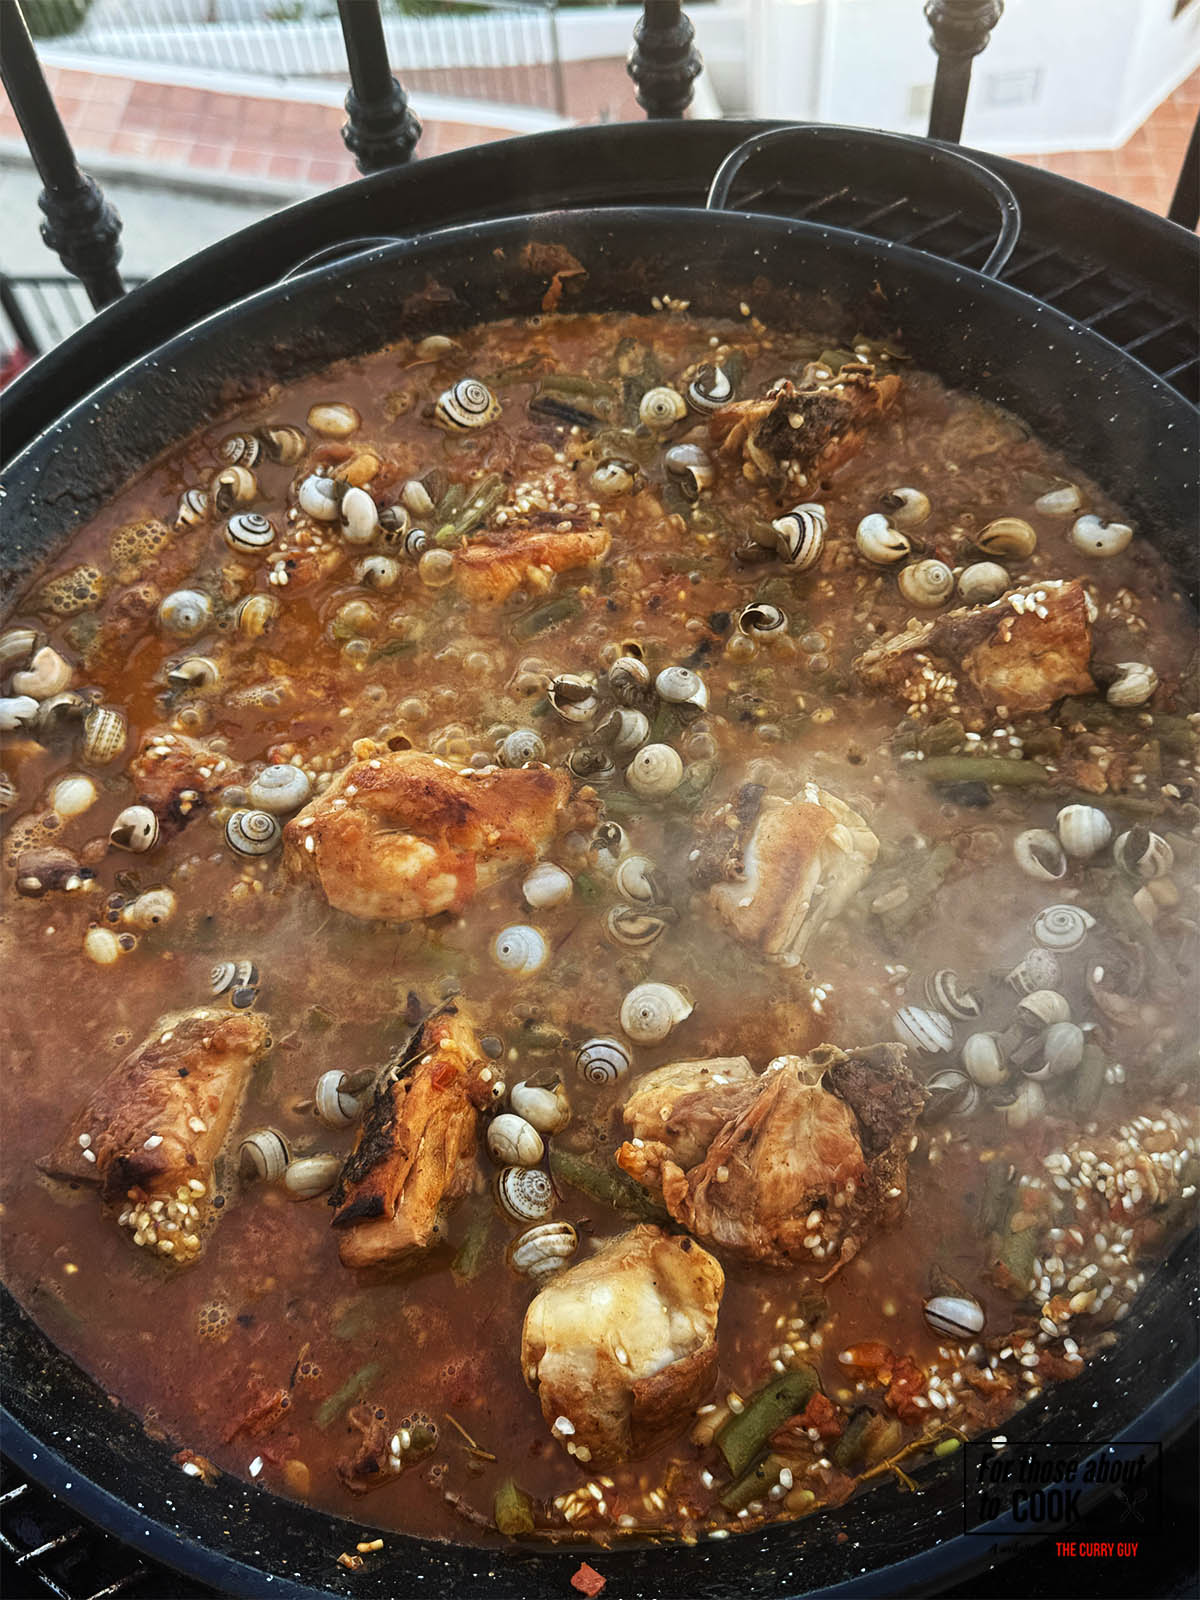
    Adding the snails to the pan to simmer and heat up.
    1. Step 7: After about 18–20 minutes, the liquid should be absorbed. Just before it is, stir in the snails if using. Increase the heat for the final 1–2 minutes to form the socarrat— the crunchy layer at the bottom. You’ll hear it crackle. Don’t stir!
    The finished paella showing the socarrat.
    1. Step 8: Remove from heat. Cover the pan with a clean dish towel or foil and rest for 5–10 minutes before serving. This step is crucial for settling the rice and enhancing flavor. The socarrat will continue to form as it rests. That is the browned base you can see when scraped off the bottom.

    What’s NOT Authentic Paella Valenciana

    Let’s clear up a few myths:

    • No seafood — that’s a different dish (paella de mariscos).
    • No chorizo — this British addition is considered blasphemy in Valencia.
    • No peas, onions, or bell peppers — they are not traditional in paella Valenciana.

    No stirring after the rice is added — repeat after me!


    What’s NOT Authentic in Valencian Paella

    Let’s clear up a few myths:

    • No seafood — that’s a different dish (paella de mariscos).
    • No chorizo — this British addition is considered blasphemy in Valencia.
    • No peas, onions, or bell peppers — they are not traditional in paella Valenciana.
    • No stirring after the rice is added — repeat after me!

    Essential Equipment

    A paella pan, or paellera, is essential for cooking Valencian paella properly. Its wide, shallow design ensures:

    • Even rice cooking
    • Efficient evaporation of liquid
    • Formation of the prized socarrat — the crispy bottom crust

    Choose a pan sized for the number of servings. A 38–40 cm pan is perfect for 4–6 people.

    Heat Source Options:

    Stovetop (use your largest burner and rotate the pan if needed).

    Gas burner or paella burner for even heat.

    Charcoal or wood fire for traditional flavor and ambiance.


    Storing and Reheating Leftovers

    Storage

    • Fridge: Transfer leftovers to an airtight container. Store for up to 3 days.
    • Freezer: You can freeze paella, though the rice texture will soften slightly. Store for up to 2 months.

    Reheating

    Oven: Reheat at 180°C (350°F) covered for 10–15 minutes.

    Best method: Heat a nonstick skillet with a touch of olive oil and fry the rice to restore some crispness.

    Microwave: Add a tablespoon of water, cover loosely, and microwave until hot.


    Top Tip

    Cook over fire for smoky authenticity if possible — orange or olive wood is traditional but you can use any aged wood or charcoal.


    Final Thoughts

    Authentic paella Valenciana is a dish steeped in history, culture, and regional pride. It’s not just a recipe — it’s a ritual that brings people together. When made properly, each spoonful delivers a symphony of flavor: tender meat, slightly firm rice, aromatic saffron, and the caramelized crunch of socarrat.

    Once you’ve tried making it the real way, you’ll understand why Valencians guard this dish so closely. It’s not just food — it’s heritage in a pan.

    FAQ


    Do you have to use a paella pan?

    No, but you will find it easier and you will get more authentic results if you do. If you love paella, consider purchasing a paella pan. If you must, you can use a wide, flat not stick pan to make this paella.


    Related

    Looking for other recipes like this? Try these:

    • Paella Valenciana in a paella pan.
      Paella Valenciana
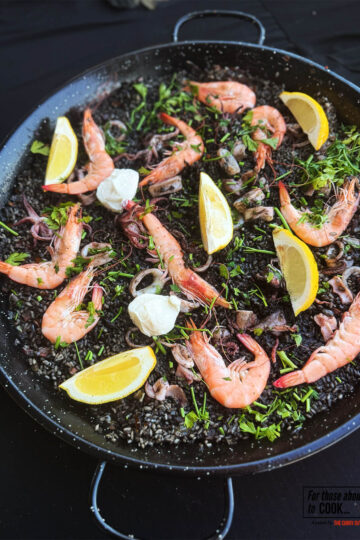
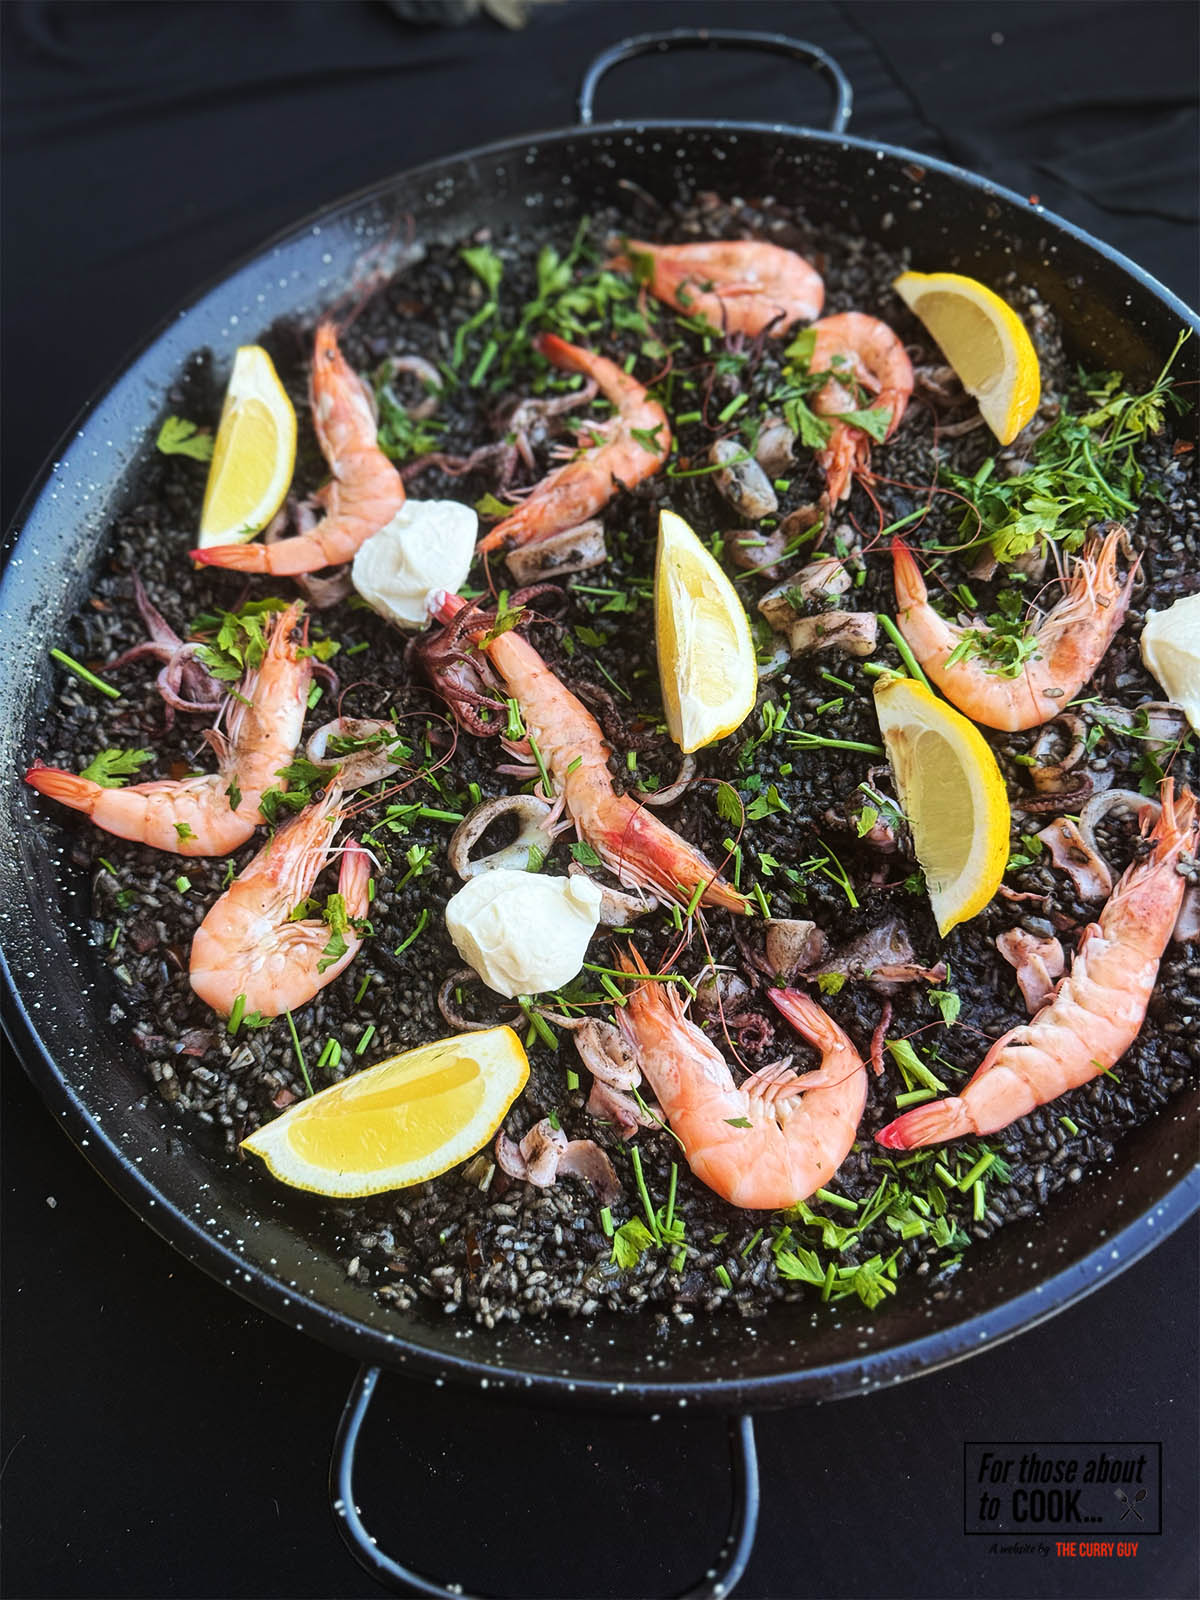
    • Black paella served in a paella pan
      Black Paella - Arroz Negre
    • Chicken paella being served up on a plate.
      Chicken Paella

    Pairing

    These are my favorite dishes to serve with Paella Valenciana:

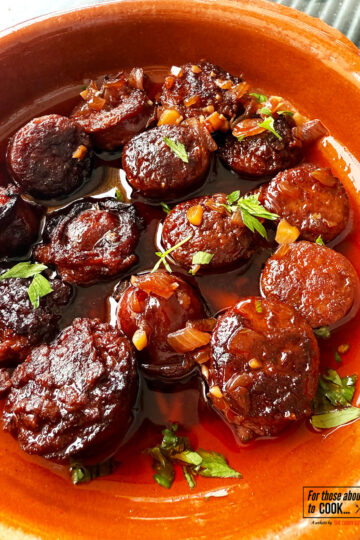
    • Chorizo in red wine served in a tapas dish
      Chorizo Al Vino
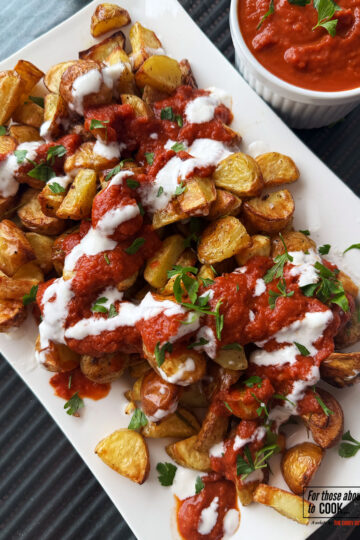
    • Patatas bravas served with a spicy tomato sauce
      Patatas Bravas
    • Albondigas in a tapas dish topped with parsley
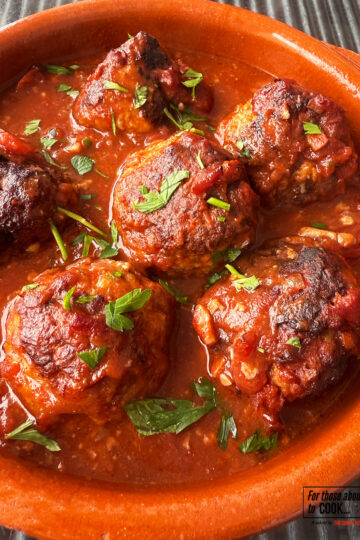
      Albondigas (Spanish Meatballs)
    • Grilled sardines with salt served on a plate with lemon wedges.
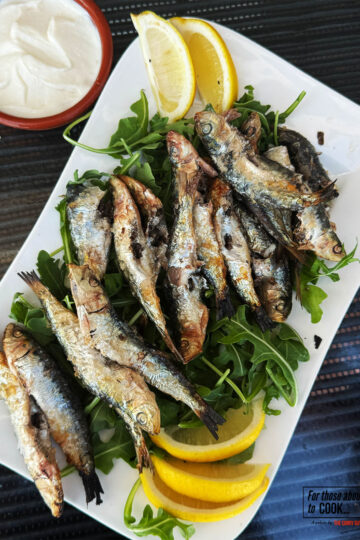
      Grilled Sardines with Salt

    Recipe

    Paella Valenciana in a paella pan.

    Valencian Paella

    Yield: 4 to 6
    Prep Time: 15 minutes
    Cook Time: 1 hour
    Total Time: 1 hour 15 minutes

    This is an authentic Valencian Paella. It might be like no paella you have tried before and I think you are going to love it! Give it a try soon.

    5.0 Stars (1 Review)

    Ingredients

    • 400g (2 cups) Bomba or Calasparra rice
    • 500g bone-in chicken pieces (thighs or drumsticks)
    • 400g rabbit, chopped (or more chicken if unavailable)
    • 150g flat green beans (Romano or runner beans), chopped
    • 100g garrofón (or frozen lima/fava beans)
    • 2 medium ripe tomatoes, grated (or 200g canned crushed tomato)
    • 1 teaspoon sweet paprika
    • A few strands of saffron (soaked in warm water)
    • 100ml extra virgin olive oil
    • 1.2–1.5 liters of water
    • Salt to taste
    • Optional: a sprig of fresh rosemary for the final 5 minutes
    • Optional: 6–8 land snails, cleaned

    Instructions

    1. Heat the olive oil in your paella pan over medium-high heat. When hot, add the chicken and rabbit pieces, seasoned with salt. Sear until golden on all sides. This can take 10–15 minutes. Browning the meat is essential for developing deep flavor.
    2. Add the green beans and fava or butter beans to the pan. Sauté for a few minutes until they soften slightly and take on some color.
    3. Push the meat and vegetables to the sides of the pan. Add the grated tomato and paprika to the center. Let it cook down for 5 minutes, stirring occasionally to create a rich, thick base.
    4. Pour in enough water to cover all the ingredients — about 1.5 liters. Bring to a boil. Simmer for 30–40 minutes, allowing the meat to fully cook and the broth to develop flavor. Top up with more water if needed.
    5. Taste the broth for salt. It should be slightly salty as the rice will absorb it. Add the soaked saffron and any remaining soaking liquid. Then, add the rice in a straight line across the diameter of the pan and spread it evenly without stirring.
    6. Let it cook on a medium-high boil for the first 8 minutes, then reduce to a medium simmer for another 10 minutes. Rotate the pan if necessary to ensure even cooking.
    7. After about 18–20 minutes, the liquid should be absorbed. Increase the heat for the final 1–2 minutes to form the socarrat— the crunchy layer at the bottom. You’ll hear it crackle. Don’t stir!
    8. Remove from heat. Cover the pan with a clean dish towel or foil and rest for 5–10 minutes before serving. This step is crucial for settling the rice and enhancing flavor.
    Nutrition Information:
    Yield: 6 Serving Size: 1
    Amount Per Serving: Calories: 1354Total Fat: 42gSaturated Fat: 9gTrans Fat: 0gUnsaturated Fat: 25gCholesterol: 636mgSodium: 881mgCarbohydrates: 31gFiber: 2gSugar: 2gProtein: 199g
    © Dan
    Cuisine: Spanish / Category: Spanish

    Black Paella - Arroz Negre

    August 2, 2025 By Dan

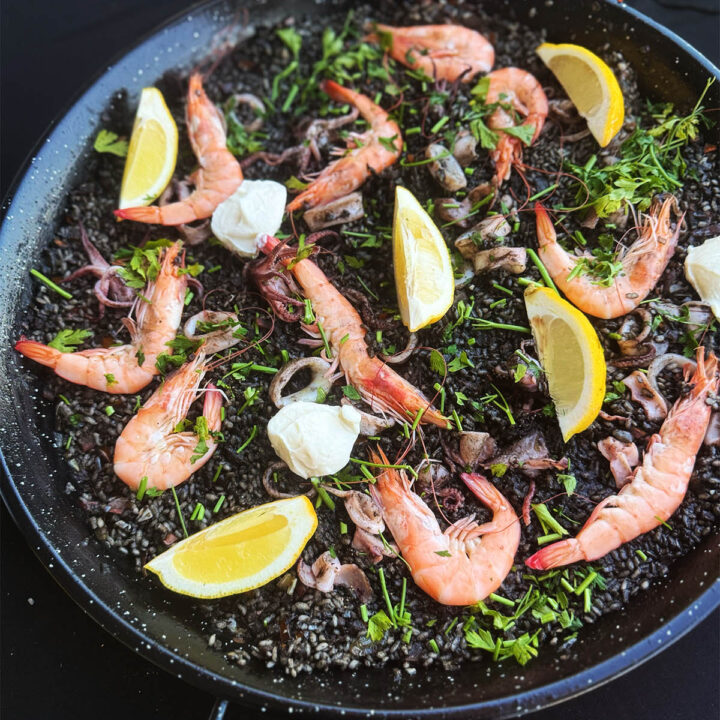
    Black paella served in a paella pan

    If you’ve ever wandered the coastal towns of Valencia or Catalonia, you may have encountered a dramatic-looking rice dish, jet black in color, served steaming in wide shallow pans. This is Arros Negre — also known as Black Paella.

    Rich with the briny flavor of squid ink, this dish is a culinary showstopper with a surprisingly simple ingredient list. In this post, I'll walk you through how to make it at home and get it just right.

    Black paella served in a paella pan

    What Is Black Paella - Arros Negre?

    Black paella or Arros Negre (pronounced ah-ros neh-greh), literally "black rice," is a traditional Spanish dish made with short-grain rice, squid or cuttlefish, fish stock, and squid ink, which gives the dish its signature jet-black color.

    Despite often being labeled “black paella,” it's technically not a paella in the strict Valencian sense, but it shares the same foundational technique… dry cooking rice in a wide, shallow pan over high heat with a flavorful broth.

    The flavor of arros negre is deeply umami-rich, with briny marine notes from the squid ink and a background sweetness from slowly sautéed onions, garlic, and tomatoes. It's earthy, savory, and deeply satisfying.

    Why is arroz negre not actually a paella?

    While arroz negre may look like a paella and is even cooked in the same kind of pan, it’s technically categorized as a Spanish rice dish (arroz seco) rather than a true paella. Think of it as a cousin rather than a sibling to paella, deeply delicious, historically rich, but standing on its own.

    Black paella is more closely related to arroz a banda or other “arroces marineros” (fisherman rice dishes) from the coastal regions of Catalonia and Valencia. While paella can include seafood in modern interpretations (like paella de mariscos), traditionalists maintain that true paella doesn't include seafood or squid ink.

    A Brief History of Arros Negre

    While arros negre is often associated with Valencia, its roots lie further up the coast in Catalonia. Historically, this dish was a humble fisherman’s meal. Fishermen would use whatever they caught — typically small squid or cuttlefish — and cook them with rice in a single pan onboard their boats.

    Nothing went to waste, not even the ink sacs. What started as a practical way to stretch a catch has since become a gourmet dish found in restaurants across Spain and beyond.

    Today, you’ll find many regional variations, sometimes, like my version, including prawns, mussels, or clams. But the core essence remains the same: rice, seafood, squid ink, and rich broth cooked together in harmony.

    Ingredients

    You don’t need loads of ingredients to make this black paella. The key to perfection is in the freshness of the ingredients. The exact measurements of ingredients I use in this recipe are in the recipe card at the bottome of the page.

    The ingredients for the recipe laid out on a countertop.
    • Short-grain rice (Bomba or Arborio)
    • Cleaned squid or cuttlefish
    • Onion, finely chopped
    • Garlic
    • Tomatoes
    • Fish stock
    • Squid ink (8–10g)
    • Olive oil
    • Salt to taste
    • Lemon wedges and aioli, to serve
    • Optional Garnishes:
    • Cooked prawns or mussels
    • Chopped parsley

    See recipe card for quantities.

    What are the key ingredients and Preparation Tips?

    To make an authentic arros negre, you don’t need many ingredients, but quality matters. Here’s a more thorough list of you’ll need, plus tips for getting the best flavor and texture.

    1. Squid or Cuttlefish

    • Tip: Clean the squid yourself if you want to extract the ink sacs, but most home cooks buy cleaned squid and use store-bought squid ink.
    • Tenderizing: Squid becomes tough if overcooked, so we’ll briefly sauté it at the beginning and then let it cook gently with the rice. For extra tenderness, you can marinate the squid in a little lemon juice and olive oil for 30 minutes beforehand, but it’s optional.

    2. Squid Ink

    • Where to get it: Most fishmongers or Spanish grocery shops sell packets of squid ink. You’ll need 2–3 sachets (about 8–10g) for a deep, rich black color.
    • When to add it: Squid ink is added with the broth, not sautéed with the sofrito. This preserves its flavor and helps evenly color the rice.

    3. Rice

    • Best type: Use Bomba, Calasparra, or Arborio rice. These short-grain varieties absorb liquid well without going mushy.
    • Ratio: Use a 1:3 ratio of rice to broth, so for 300g rice, use about 900ml of stock.

    4. Fish or Shellfish Stock

    • A good stock is the backbone of this dish. You can make your own from fish bones, prawn shells, and aromatics, or use a high-quality store-bought version. For extra punch, add a splash of white wine.

    5. Sofrito (Tomato-Onion Base)

    • This classic Spanish base is made by slowly cooking onion, garlic, and tomatoes until jammy and sweet. Don’t rush this step — it lays the foundation for the whole dish.

    Step by step photos

    It isn’t difficult to make black paella. Check out my step by step photos. This is a fun and impressive recipe to make!

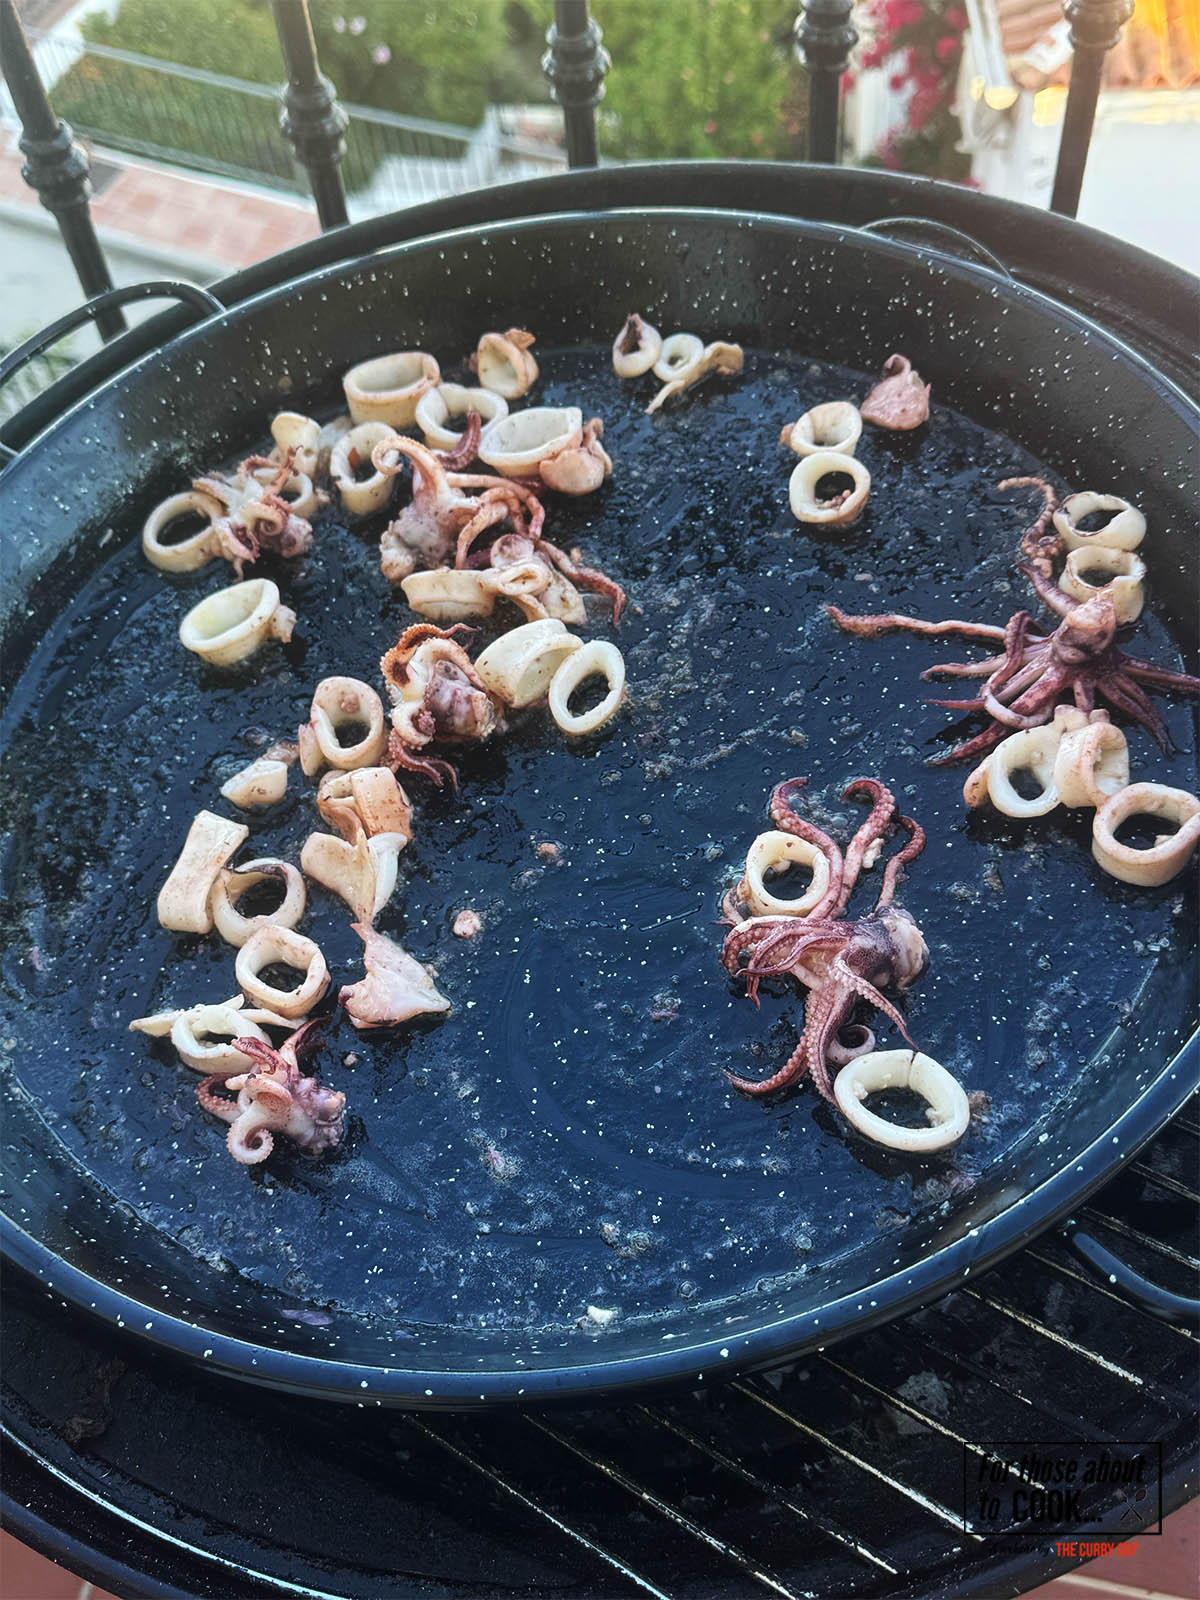
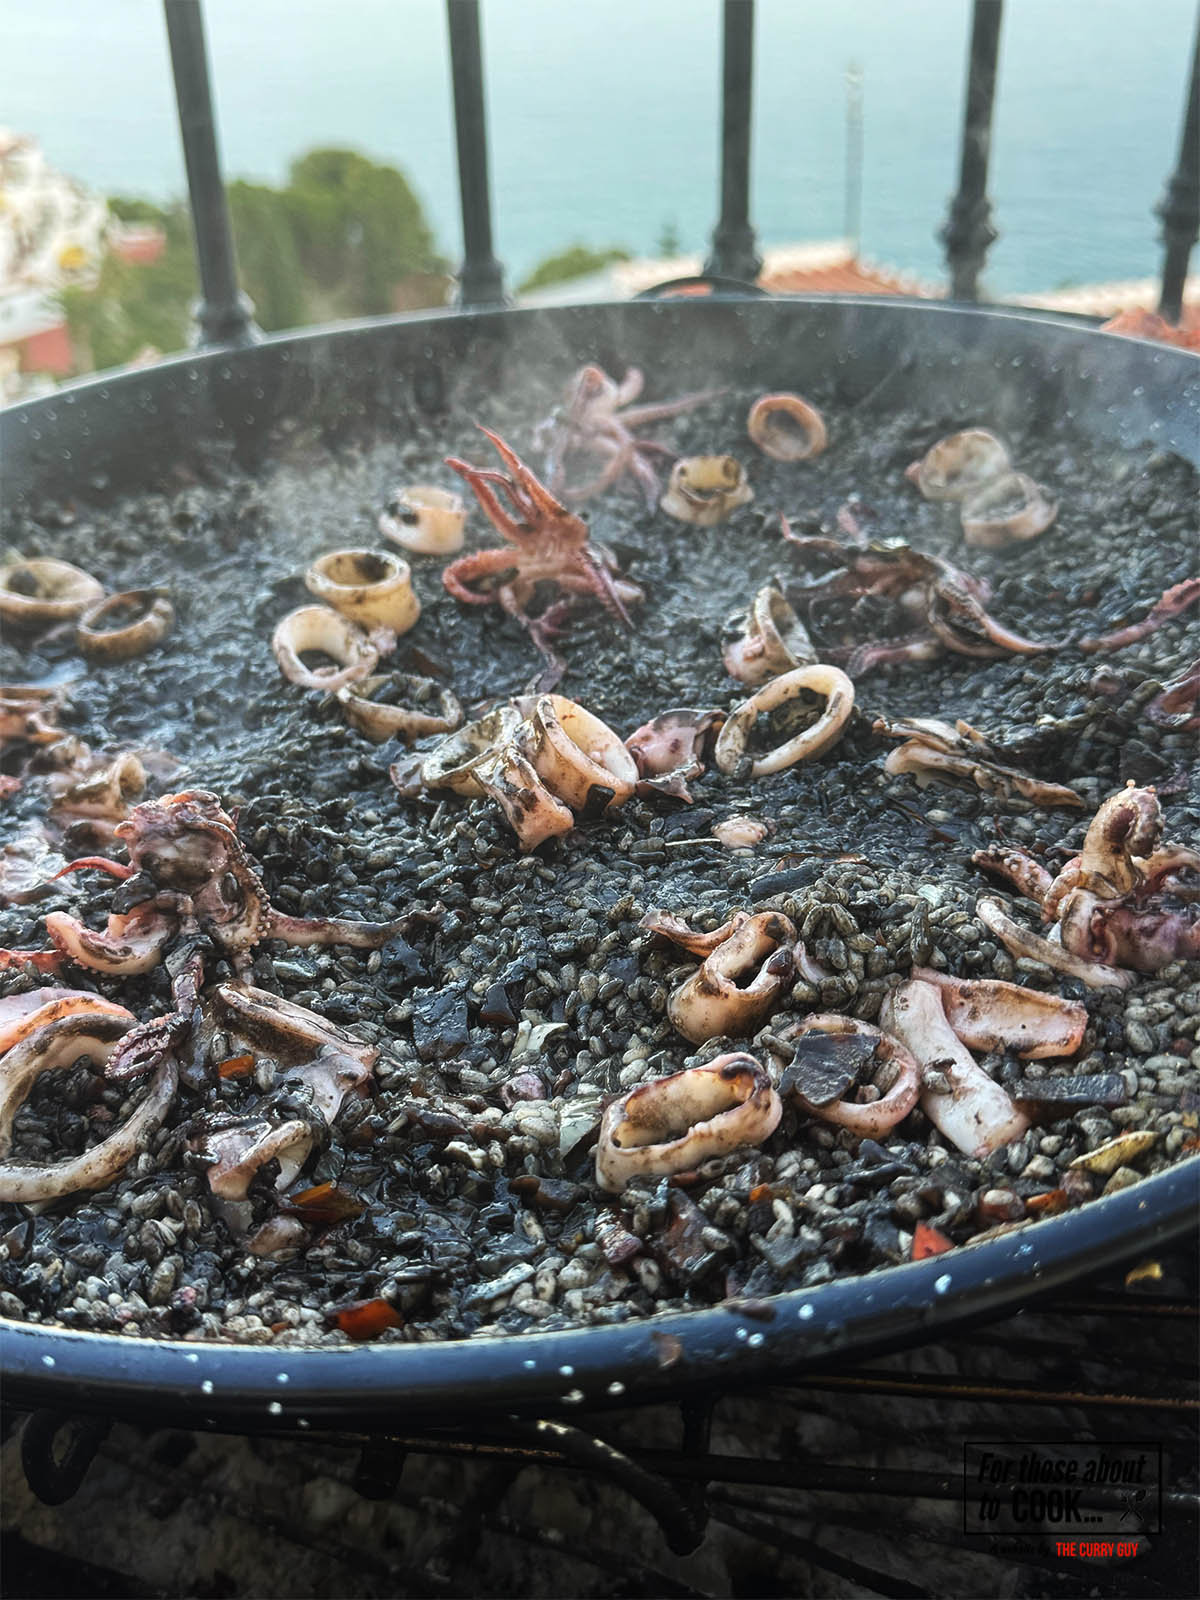
    Frying squid over a medium-high heat in a paella pan.
    1. Step 1: Heat about a tablespoon of olive oil in a wide pan (ideally a paella pan) over medium heat. Stir in the squid or cuttlefish and fry for about 2 minutes or until opaque. Then transfer to a plate and set aside.
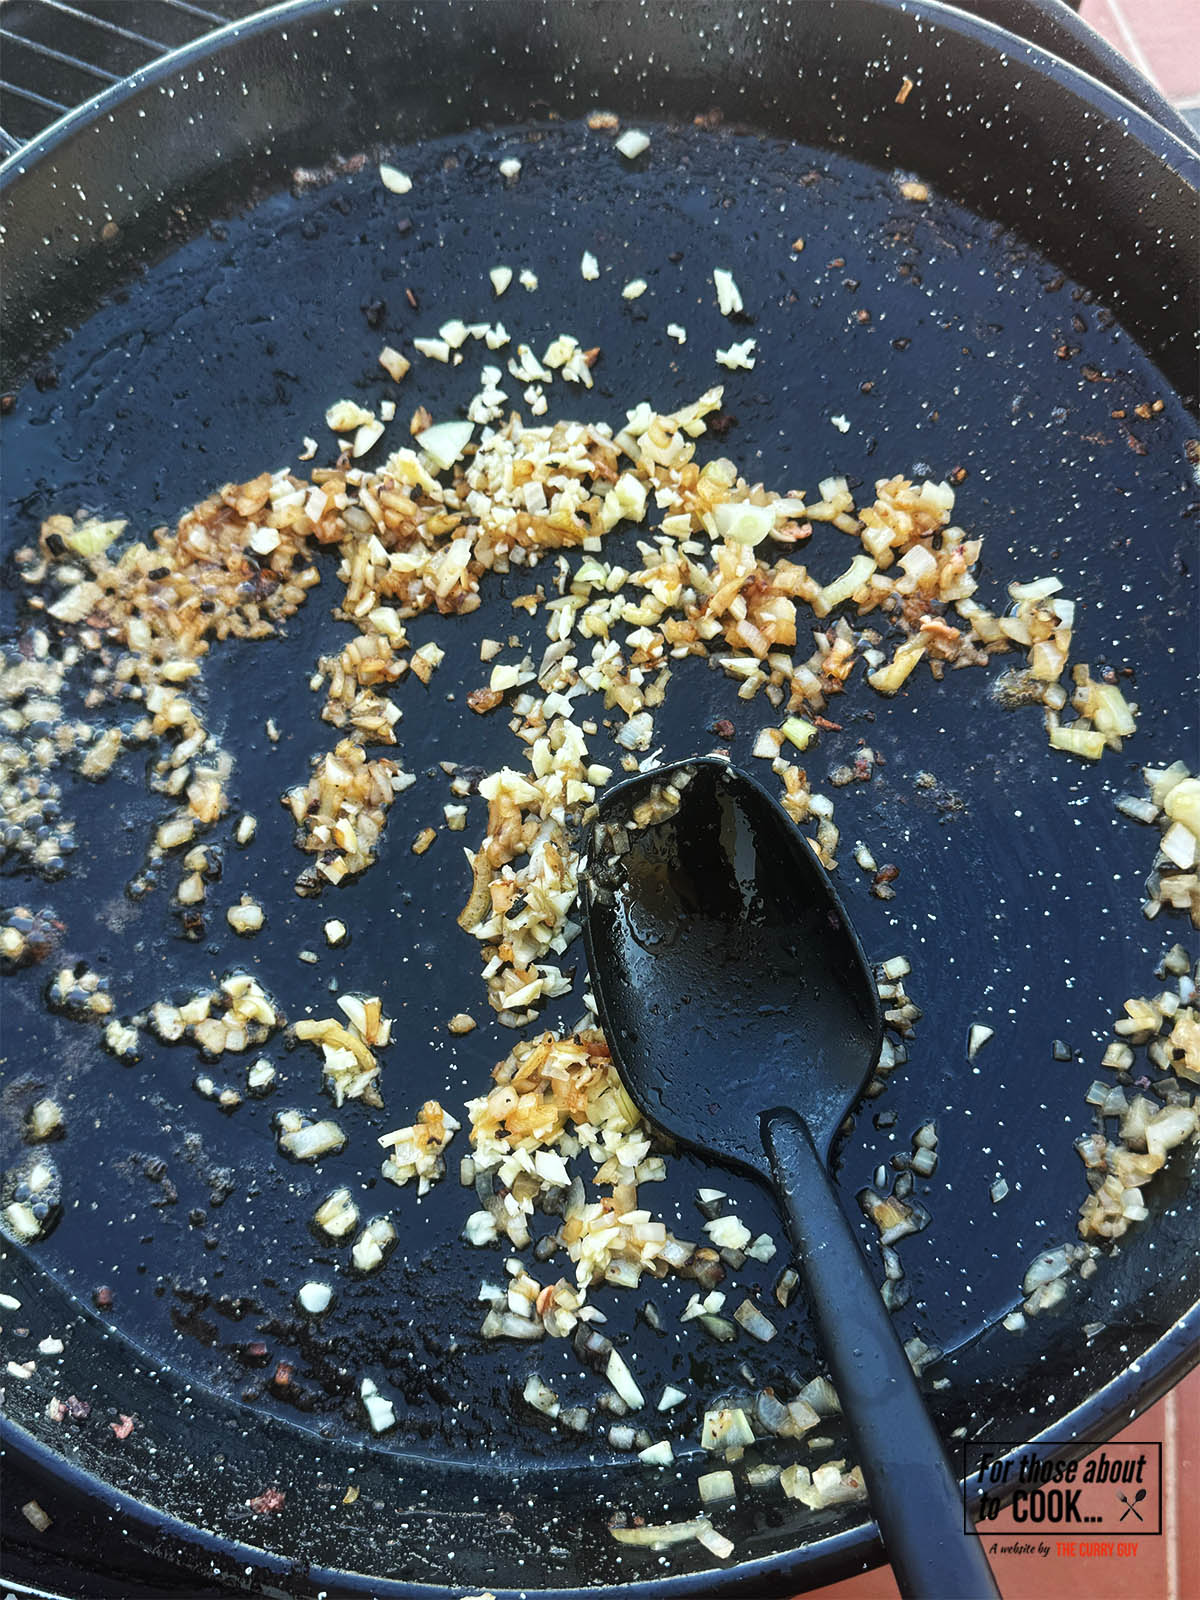
    Frying the onions and garlic in the paella pan.
    1. Step 2: Add the remaining olive oil and about a teaspoon of salt. When the oil begins to bubble a bit, stir in the chopped onion and cook slowly until translucent and soft (about 10 minutes). Add the garlic and cook another minute.

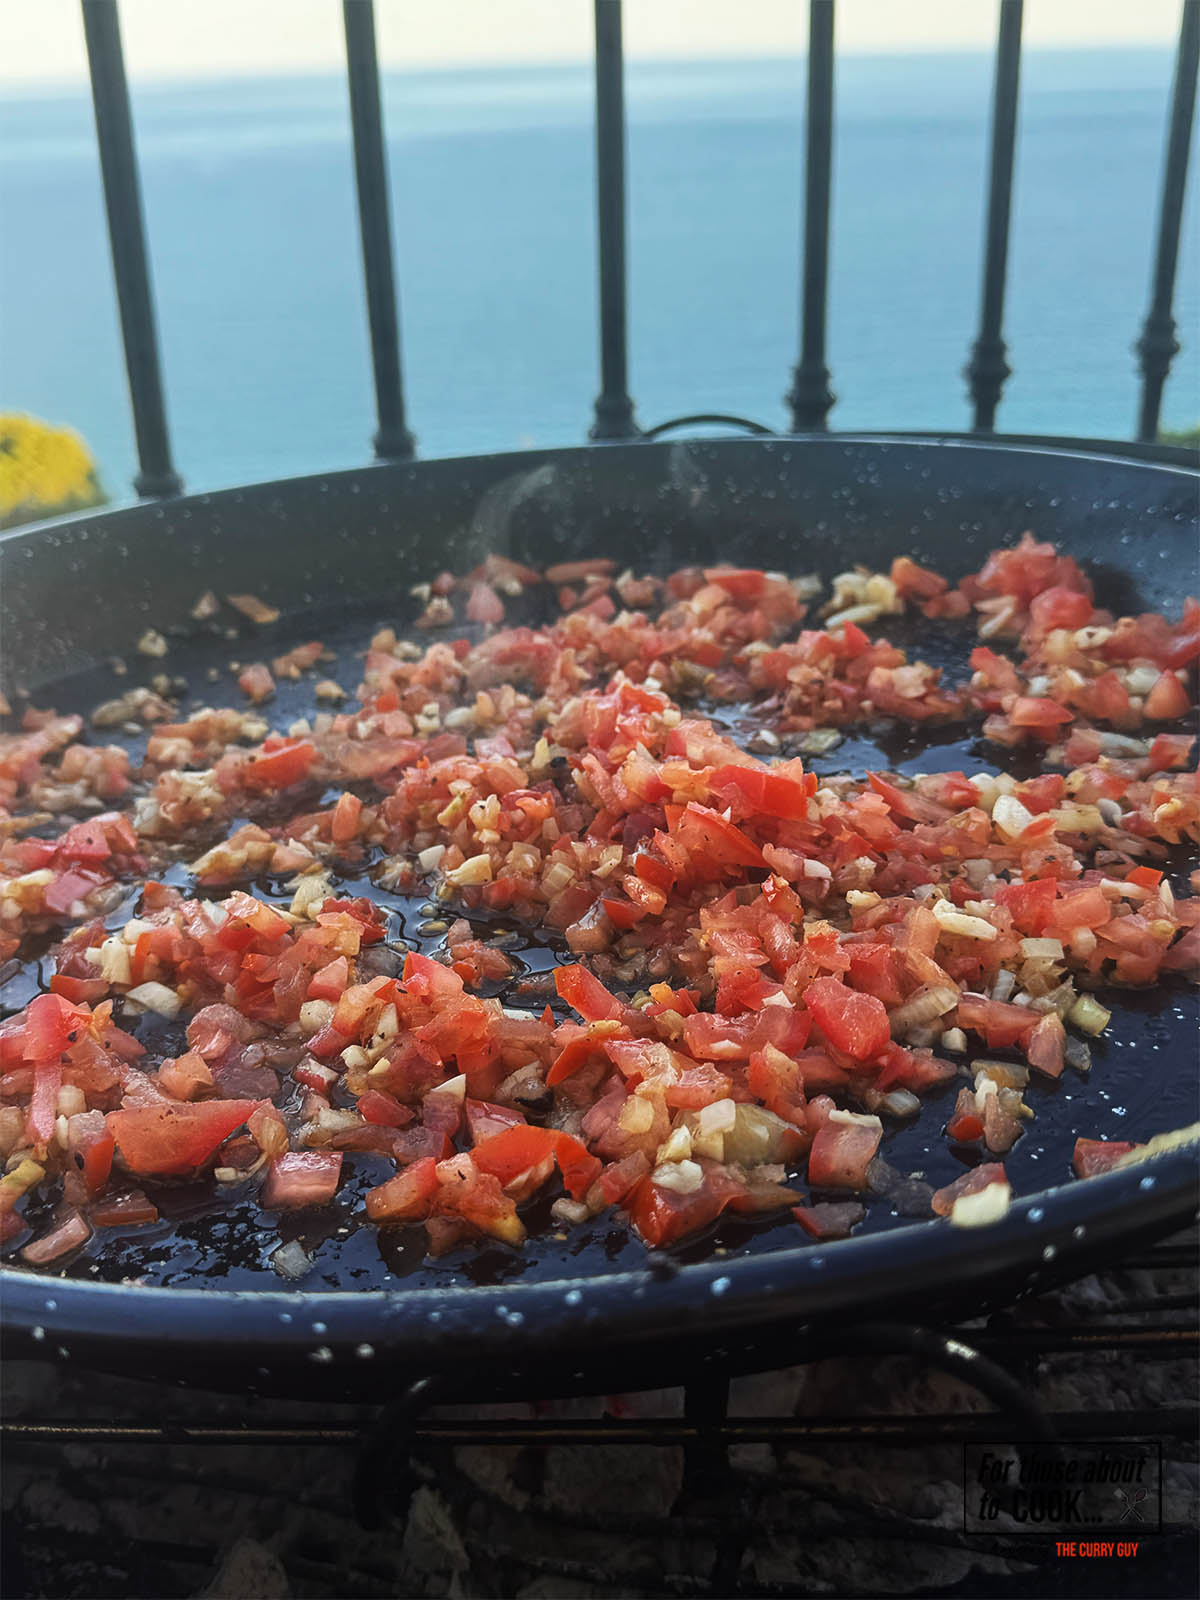
    Adding the chopped tomatoes to the pan.
    1. Step 3: Add the chopped tomatoes. Cook down until the mixture is thick and reduced, about 5-10 minutes. If you feel the sofrito is reducing too quickly, reduced the cooking heat. Cooking the sofrito down slowly is essential to the amazing flavor of black paella.
    Adding the rice to the pan.
    1. Step 4: Stir in the rice and let it toast for a couple of minutes. This helps coat the grains in flavor.

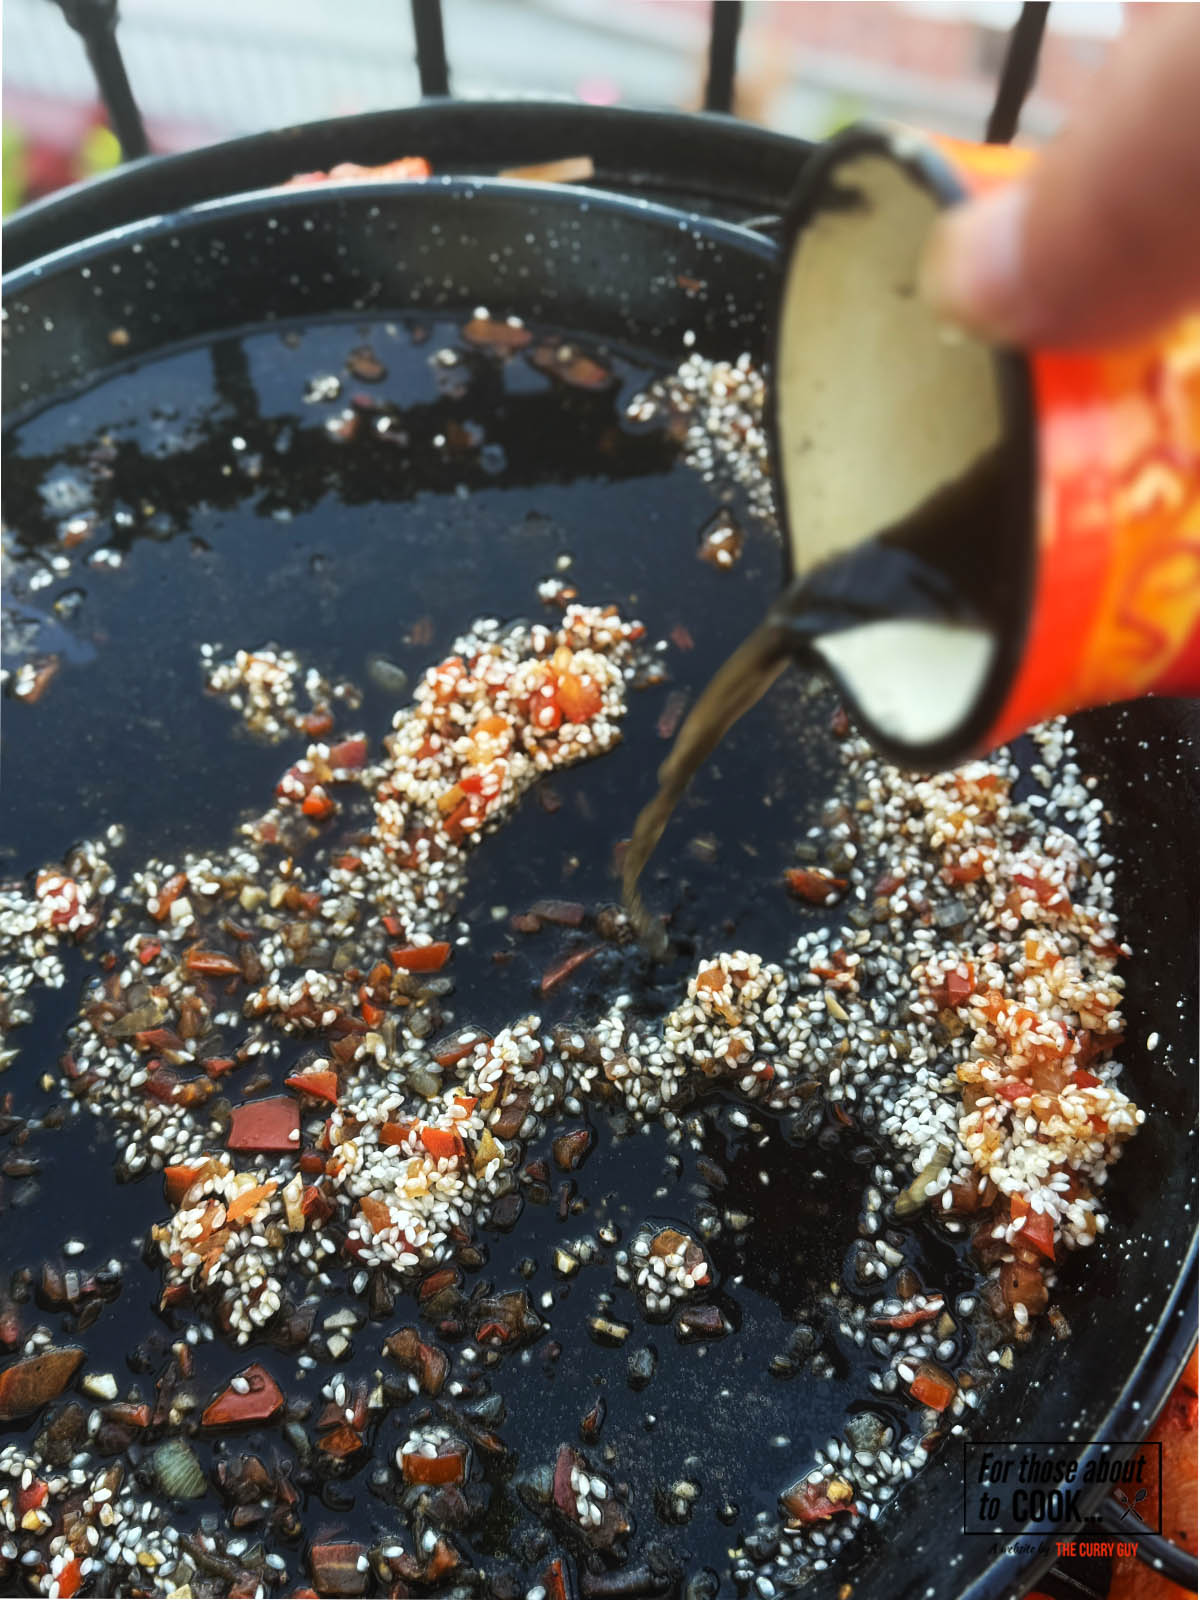
    Pouring the seafood stock and squid ink mixture over the rice in the pan.
    1. Step 3: Mix the squid ink into the warm fish stock. Pour this into the pan with the rice and stir once to combine.
    Returning the cooked squid to the black paella.
    1. Step 4: Bring to a boil, then reduce to a simmer. Let the rice cook undisturbed for 18–20 minutes. If needed, add a splash more hot stock or water.

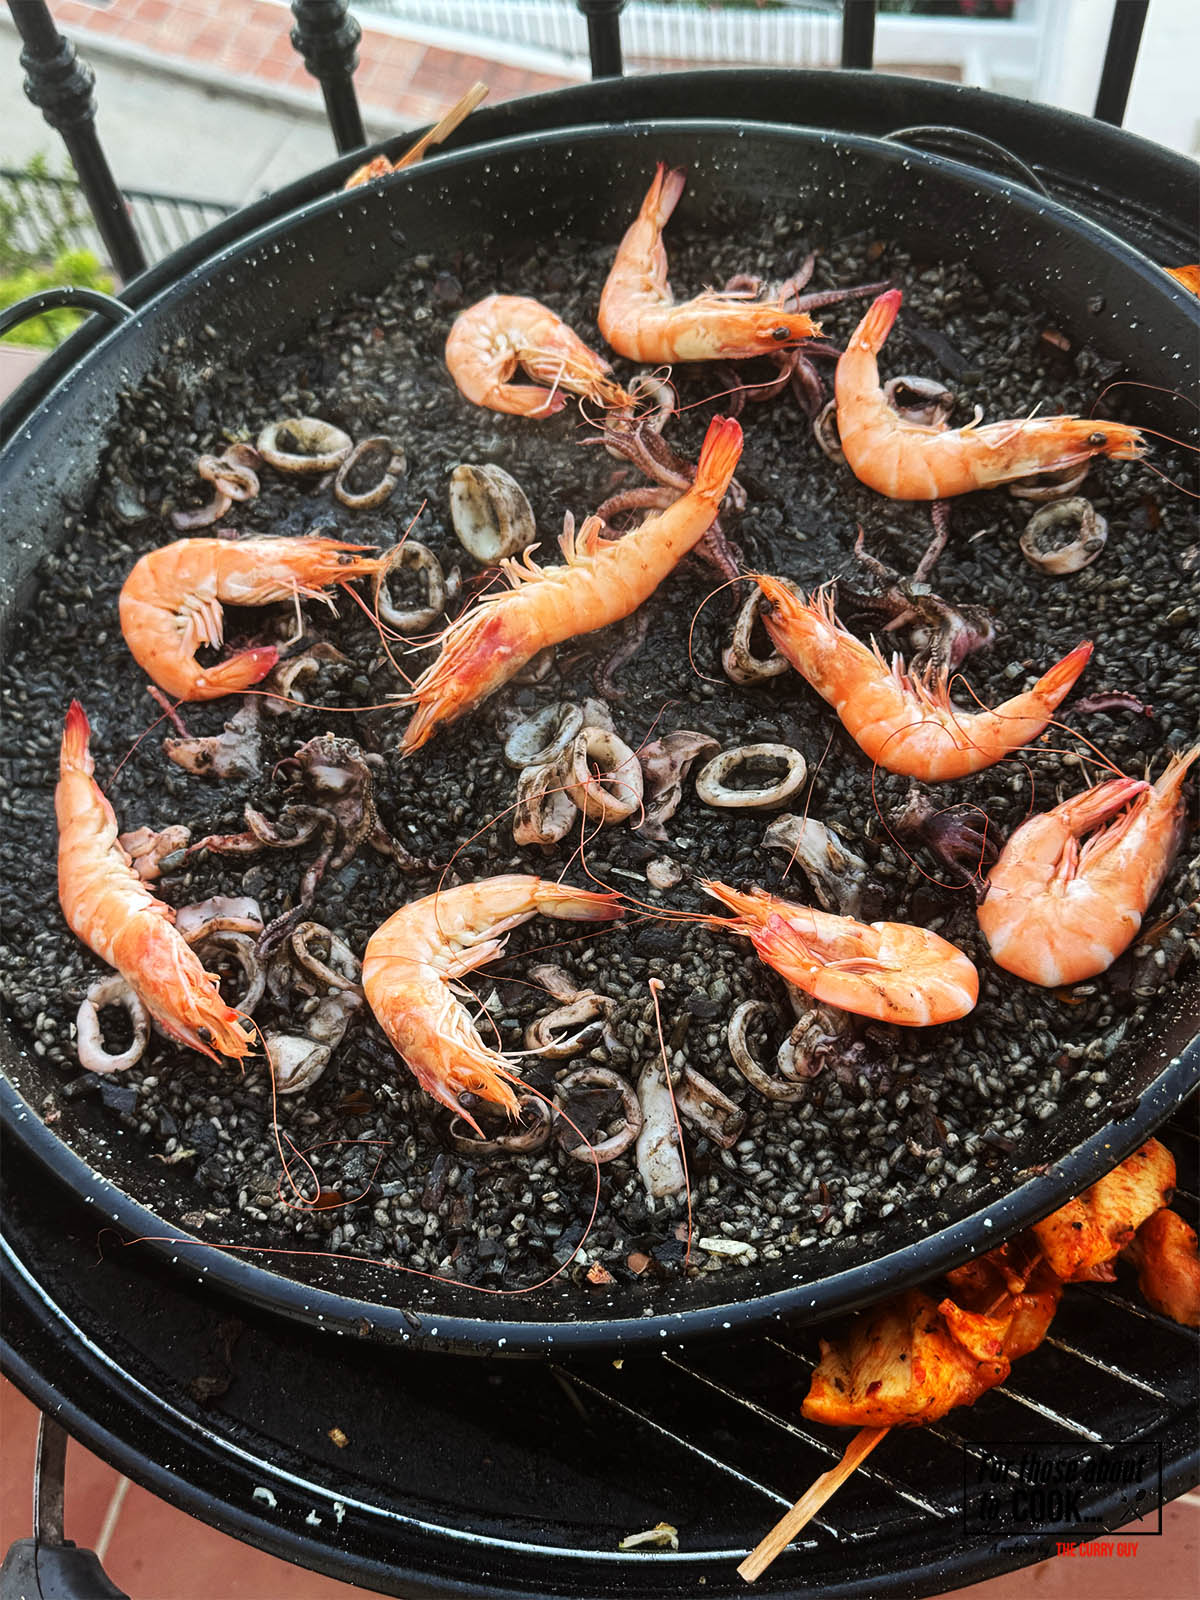
    Adding cooked prawns to the paella before covering to rest for 5 minutes.
    1. Step 3: When the liquid is absorbed and the rice is al dente, add the squid or cuttlfish back to the pan and push them right into he rice. You can also add a few cooked prawns or mussels if you like. Cover the pan with a clean kitchen towel and let it rest for 5 minutes.
    The finished black paella in the paella pan topped with garlic mayo.
    1. Step 4: Serve with lemon wedges and a dollop of garlicky aioli for contrast.

    Useful Equipment for Cooking Arros Negre

    1. Paella Pan (Paellera) A traditional paella pan is wide and shallow, allowing the rice to cook evenly and develop the coveted bottom crust (socarrat). A 34–38cm pan works well for 4 servings.

    2. Heat Source A gas burner or outdoor paella burner gives you better heat control than a stove, but you can also use your largest burner on the stovetop or finish it in the oven. The traditional way to cook a paella is over fire so a barbecue will work perfectly.

    3. Fine Mesh Strainer If you make your own fish stock, strain it through a fine sieve to keep the broth clear and debris-free.

    4. Wooden SpoonUseful for sautéing the sofrito and stirring the rice before the simmer.

    Storage and Reheating Tips

    While black paella arros negre is best eaten fresh, leftovers can still be delicious. Here’s how to store and reheat your leftovers without losing too much texture.

    Storage

    • Refrigerate: Transfer leftovers to an airtight container and refrigerate for up to 3 days.
    • Freeze: You can freeze arros negre, but be warned… the texture of the rice will become softer upon thawing. Freeze in single-portion containers for best results.

    Reheating

    • Microwave: Splash a little fish stock or water over the rice, cover loosely, and microwave until hot.
    • Stovetop: Add a splash of water or stock to a pan, add the rice, and reheat over low heat, stirring occasionally.
    • Oven (best for crispy bottom): Spread the rice in an oven-safe dish, cover with foil, and heat at 180°C (350°F) for 15 minutes.

    Pro tip: Reheating in a nonstick skillet can re-crisp the bottom slightly, mimicking fresh socarrat.

    Top Tip

    Flash fry the squid or cuttlefish: If you fry the squid or cuttlefish too long, it will become chewy and tough. I recommend frying it at the beginning for no longer than a minute. Transfer to a plate and add it back to the black paella at the end to heat through.

    Final Thoughts

    Arros Negre is one of Spain’s most iconic and visually striking dishes — a celebration of the sea, simplicity, and bold flavor. Whether you’re cooking it for a family dinner or a weekend gathering with friends, it’s guaranteed to impress. Mastering this dish at home means unlocking a little piece of the Mediterranean on your plate, complete with its sun, salt, and soul.

    Once you’ve made it, don’t be surprised if it becomes your new favorite rice dish. Because sometimes, the best food isn’t golden — it’s black as ink.

    FAQ

    Can you make arroz negre without a paella pan?

    Yes, though a traditional paella pan is ideal due to its wide, shallow shape, you can still make a great arros negre in a large nonstick or stainless steel skillet. Choose the widest pan you own, so the rice spreads out in a thin layer — this promotes even cooking and helps form the prized crispy bottom layer called socarrat which, by the way is not as important in this dish as paella.

    How do you cook the rice to the perfect texture?

    The key to perfect arros negre rice lies in using the right variety and not stirring during cooking. Use short-grain rice like Bomba, Calasparra, or Arborio, which absorb liquid evenly and retain some bite. Maintain a rice-to-broth ratio of 1:3, and cook uncovered over a steady simmer for 18–20 minutes. Once the liquid is absorbed, rest the dish off heat for 5 minutes under a cloth or lid. This lets the steam finish cooking the rice evenly.

    Related

    Looking for other recipes like this? Try these:

    • Paella Valenciana in a paella pan.
      Paella Valenciana
    • Black paella served in a paella pan
      Black Paella - Arroz Negre
    • Chicken paella being served up on a plate.
      Chicken Paella

    Pairing

    These are my favorite dishes to serve with [this recipe]:

    • Serving the Padron peppers on a serving plate.
      Padron Peppers

    Recipe

    Black paella served in a paella pan

    Black Paella

    Yield: 4
    Prep Time: 15 minutes
    Cook Time: 40 minutes
    Total Time: 55 minutes

    You are in for a real treat with this black paella recipe. It isn’t difficult to make so why not give it a try soon?

    5.0 Stars (1 Review)

    Ingredients

    • 300g short-grain rice (Bomba or Arborio)
    • 500g cleaned squid or cuttlefish, chopped into bite-sized pieces
    • 1 small onion, finely chopped
    • 4 garlic cloves, minced
    • 2 ripe tomatoes, finely chopped
    • 1L (4 cups) fish stock
    • 2–3 sachets squid ink (8–10g)
    • Olive oil
    • Salt to taste
    • Lemon wedges and aioli, to serve
    • Optional Garnishes:
    • Cooked prawns or mussels
    • Chopped parsley

    Instructions

    1. Heat about a tablespoon of olive oil in a wide pan (ideally a paella pan) over medium heat. Stir in the squid or cuttlefish and fry for about 2 minutes or until opaque. Then transfer to a plate and set aside.
    2. Add the remaining olive oil and about a teaspoon of salt. When the oil begins to bubble a bit, stir in the chopped onion and cook slowly until translucent and soft (about 10 minutes). Add the garlic and cook another minute.
    3. Add the chopped tomatoes. Cook down until the mixture is thick and reduced, about 5-10 minutes. If you feel the sofrito is reducing too quickly, reduced the cooking heat. Cooking the sofrito down slowly is essential to the amazing flavor of black paella.
    4. Stir in the rice and let it toast for a couple of minutes. This helps coat the grains in flavor.
    5. Mix the squid ink into the warm fish stock. Pour this into the pan with the rice and stir once to combine.
    6. Bring to a boil, then reduce to a simmer. Let the rice cook undisturbed for 18–20 minutes. If needed, add a splash more hot stock or water.
    7. When the liquid is absorbed and the rice is al dente, add the squid or cuttlfish back to the pan and push them right into he rice. You can also add a few cooked prawns or mussels if you like. Cover the pan with a clean kitchen towel and let it rest for 5 minutes.
    8. Serve with lemon wedges and a dollop of garlicky aioli for contrast.
    Nutrition Information:
    Yield: 4 Serving Size: 1
    Amount Per Serving: Calories: 404Total Fat: 10gSaturated Fat: 2gTrans Fat: 0gUnsaturated Fat: 7gCholesterol: 360mgSodium: 3937mgCarbohydrates: 38gFiber: 2gSugar: 5gProtein: 39g
    © Dan
    Cuisine: Spanish / Category: One pot

    Tzatziki

    August 2, 2025 By Dan

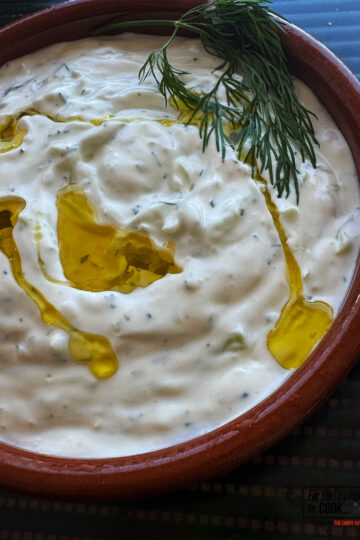
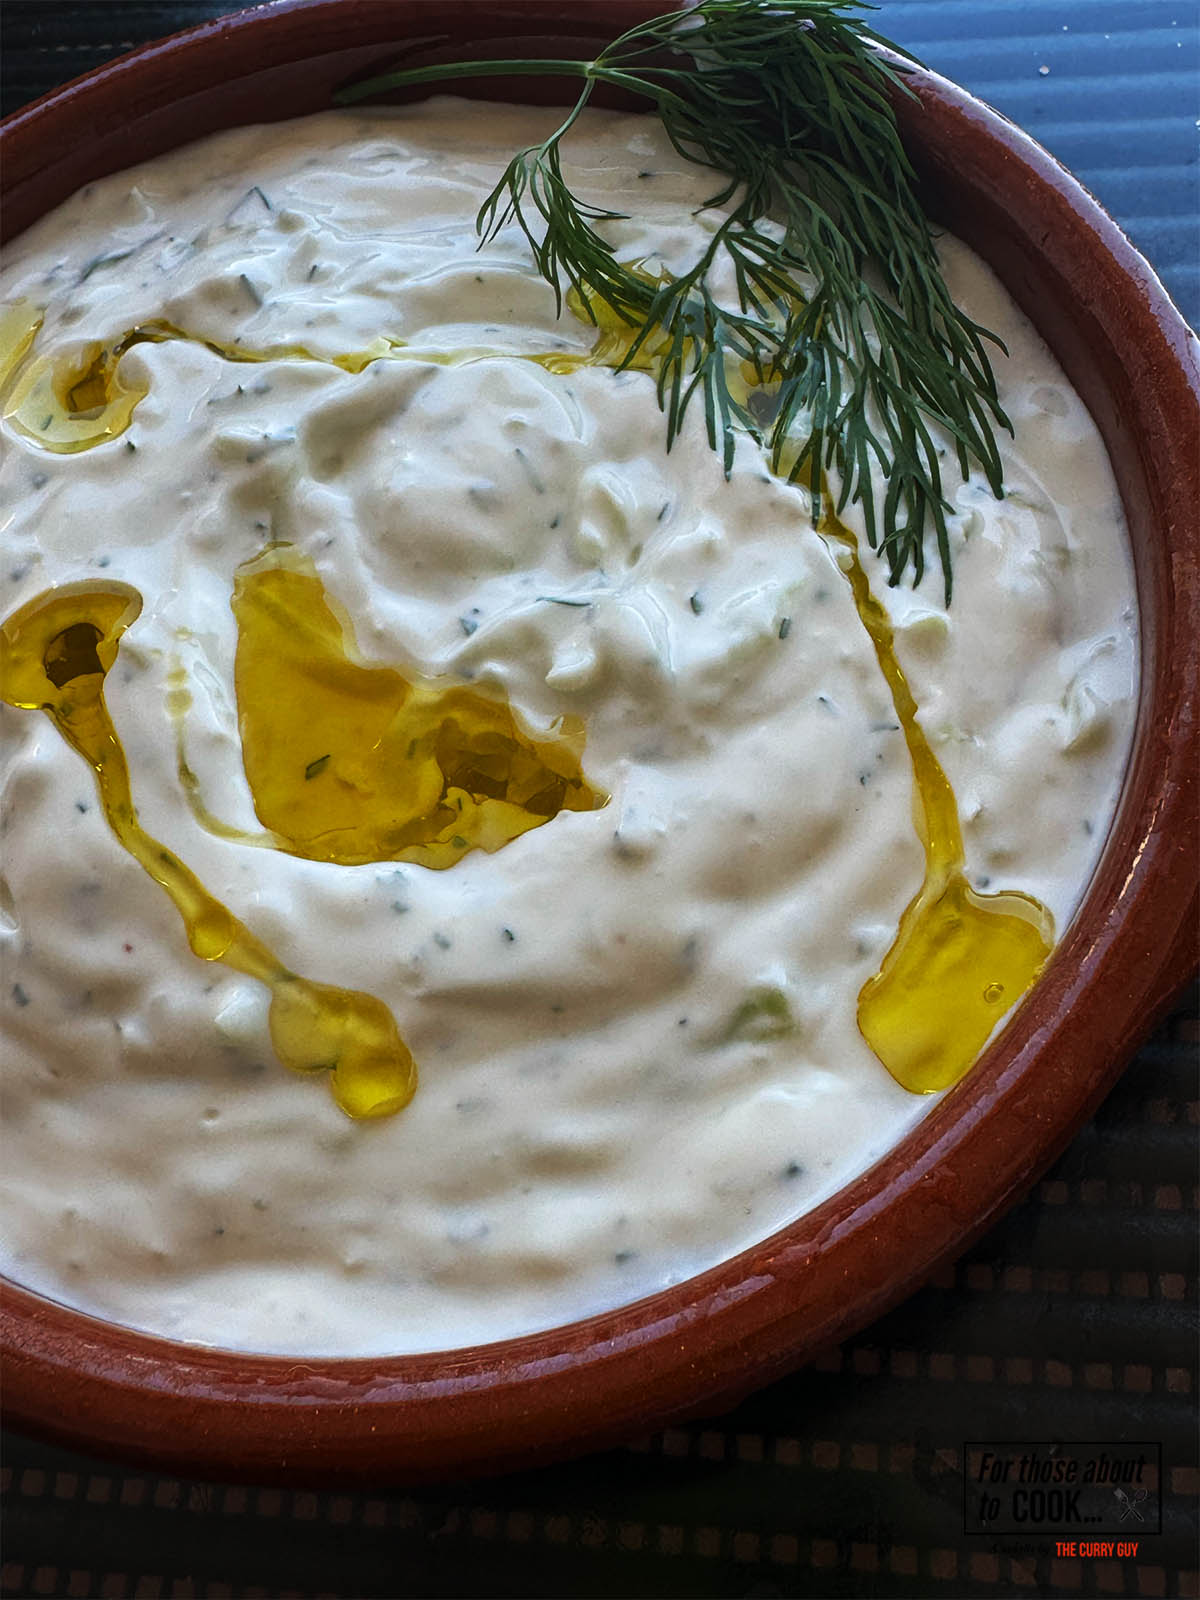
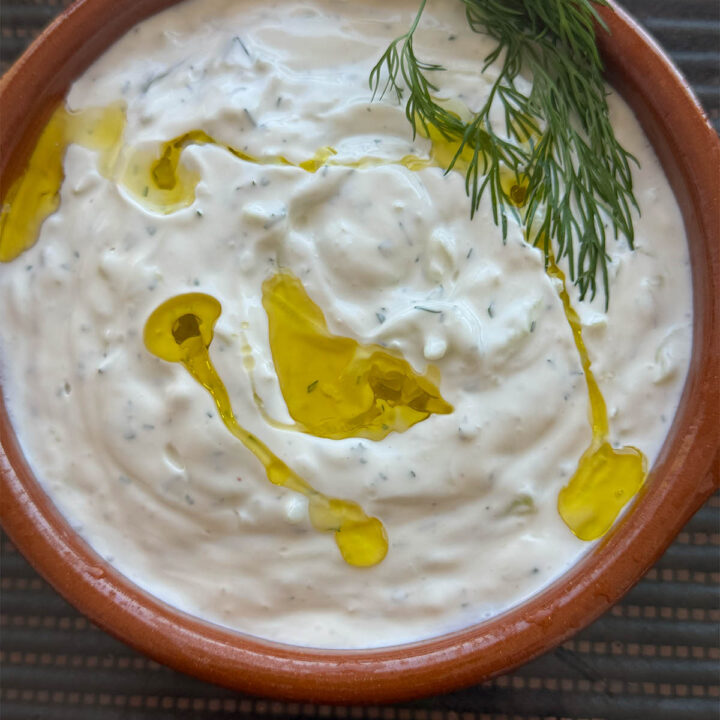
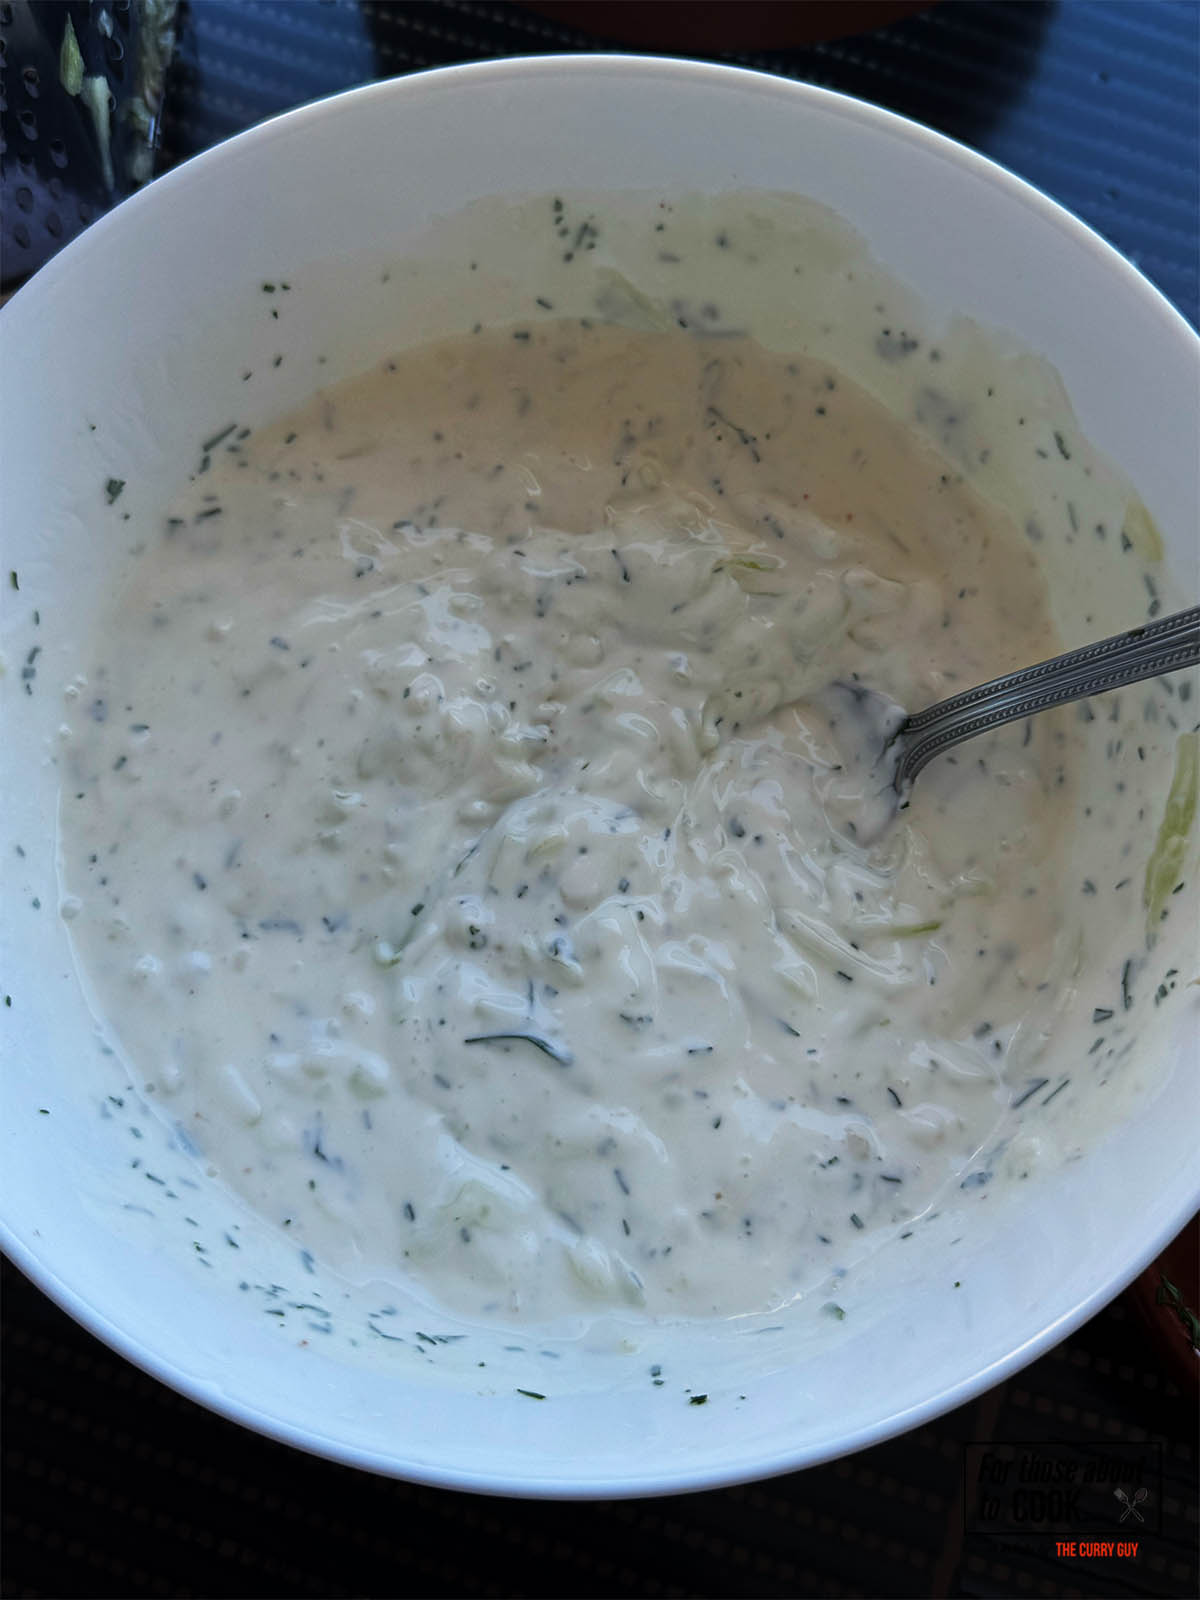
    Tzatziki in a serving bowl

    Few condiments manage to be as refreshing, versatile, and iconic as tzatziki. This creamy Greek yogurt and cucumber sauce is the cornerstone of Mediterranean flavor — cooling, tangy, and laced with garlic and herbs. Whether it’s served with grilled meats, tucked inside a pita wrap, or spooned over roasted vegetables, tzatziki brings brightness and balance to just about any dish.

    In this post, I’ll tell you everything you need to know to get it just right!

    Tzatziki in a serving bowl

    What Is Tzatziki?

    Tzatziki (pronounced tsa-TSEE-kee) is a cold, creamy sauce made from strained yogurt, cucumber, garlic, olive oil, vinegar or lemon juice, and fresh herbs, typically dill or mint. It's a classic part of Greek cuisine, though versions of it appear throughout the eastern Mediterranean and the Middle East.

    Tzatziki is traditionally served:

    • As a dip with pita bread
    • As a condiment for grilled meats like souvlaki, gyros, or kebabs
    • As part of a mezze spread alongside hummus, olives, and dolmades
    • With fried or roasted vegetables like zucchini, eggplant, or potatoes

    It’s creamy yet light, tangy yet garlicky — a sauce that punches well above its weight in flavor.

    Ingredients

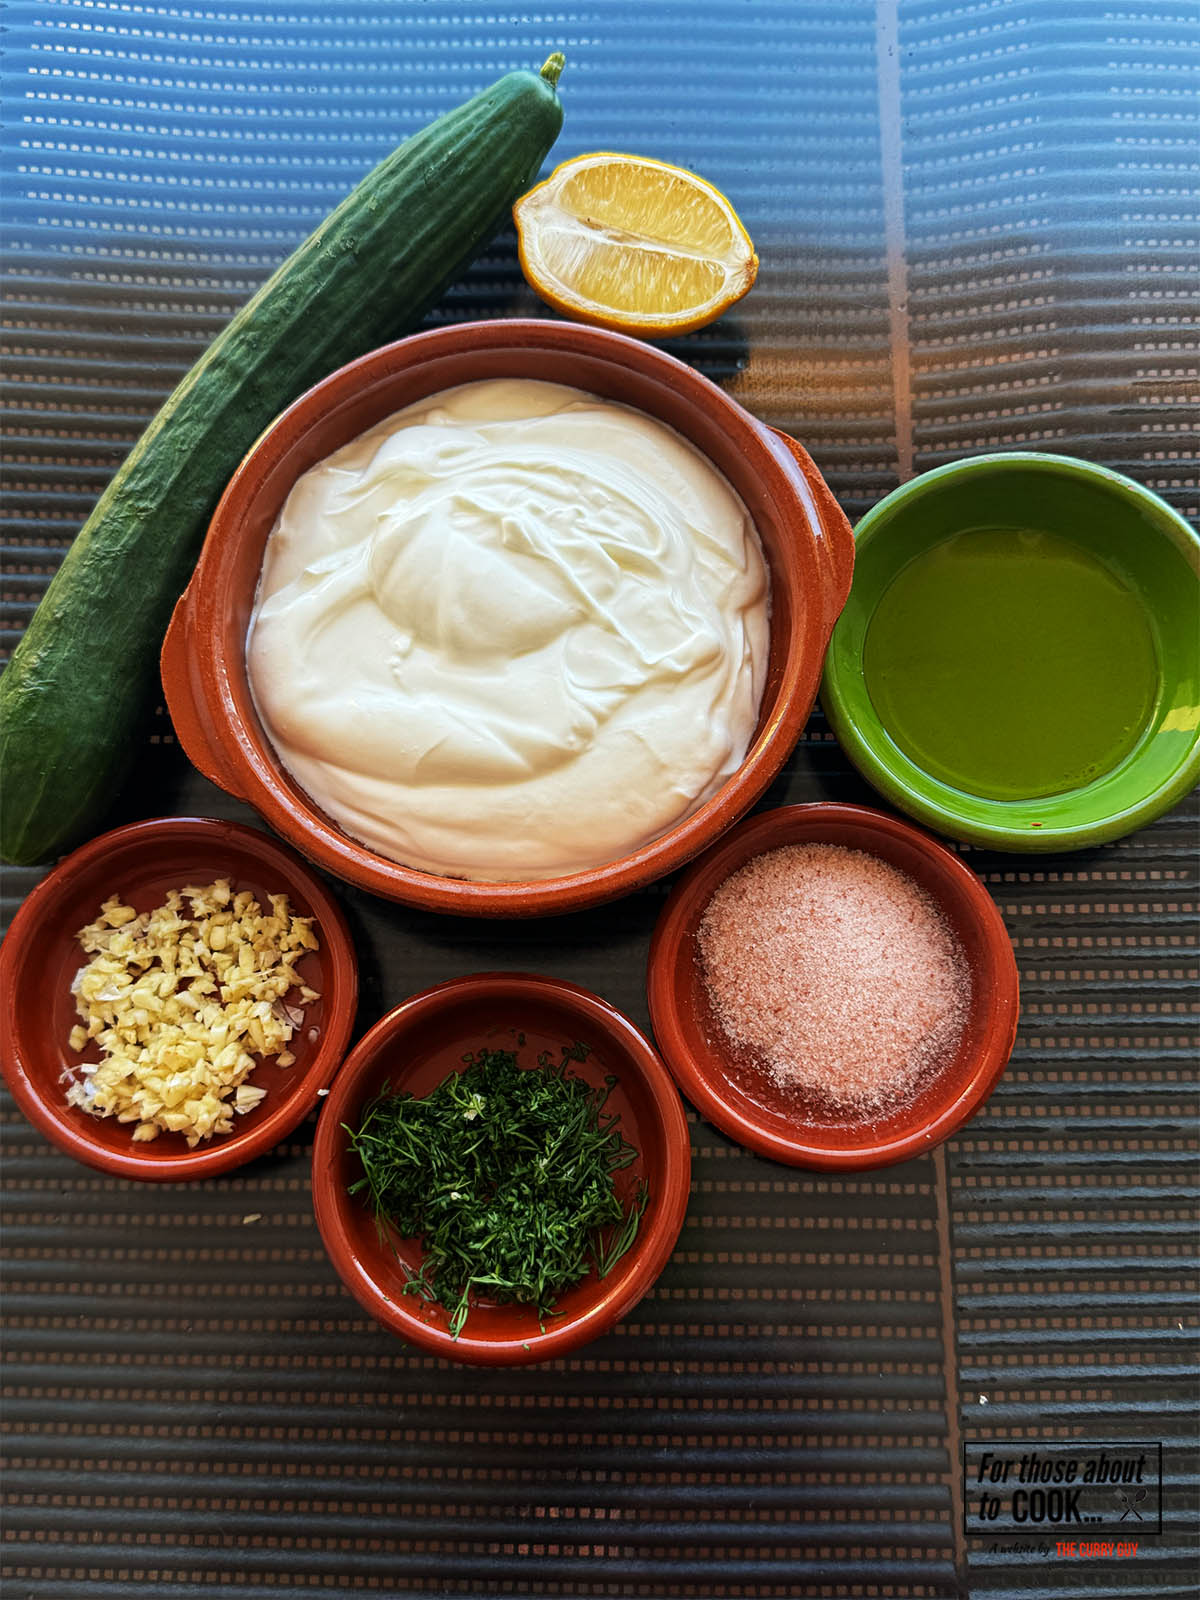
    There aren’t a lot of ingredients in a traditional tzatziki. Freshness and quality are key. The exact ingredient measurements I use are in the recipe card at the bottom of this page.
    Ingredients for the recipe on a counter top.
    • English cucumber
    • Greek yogurt
    • Lemon juice
    • Fresh dill
    • Extra-virgin olive oil
    • Garlic
    • Salt

    See recipe card for quantities.

    Step by step photos.

    You can whip up this authentic tzatziki in under 10 minutes. Check out my step by step photos to see just how easy it is.

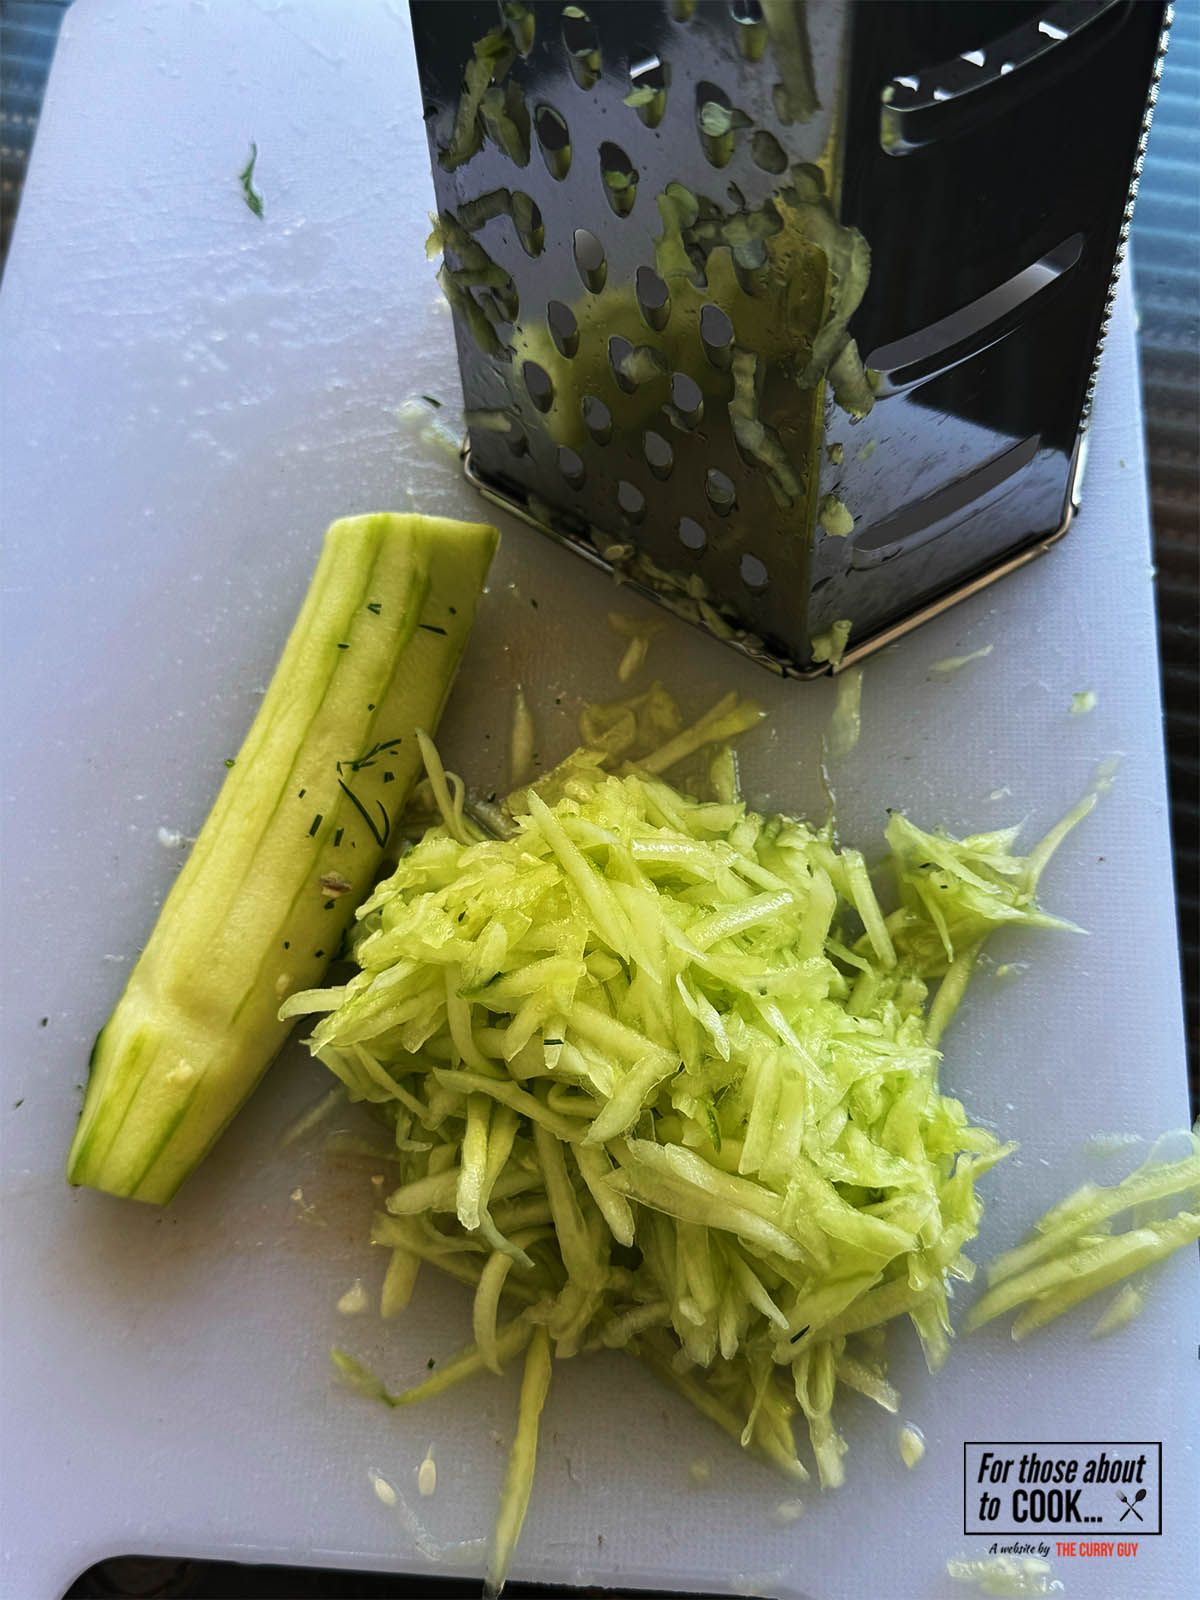
    Peeling and grating the cucumber.
    1. Step 1: Peel the cucumber and then slice it down the center lengthwise. Remove the seed with a knife or spoon and then grate it.
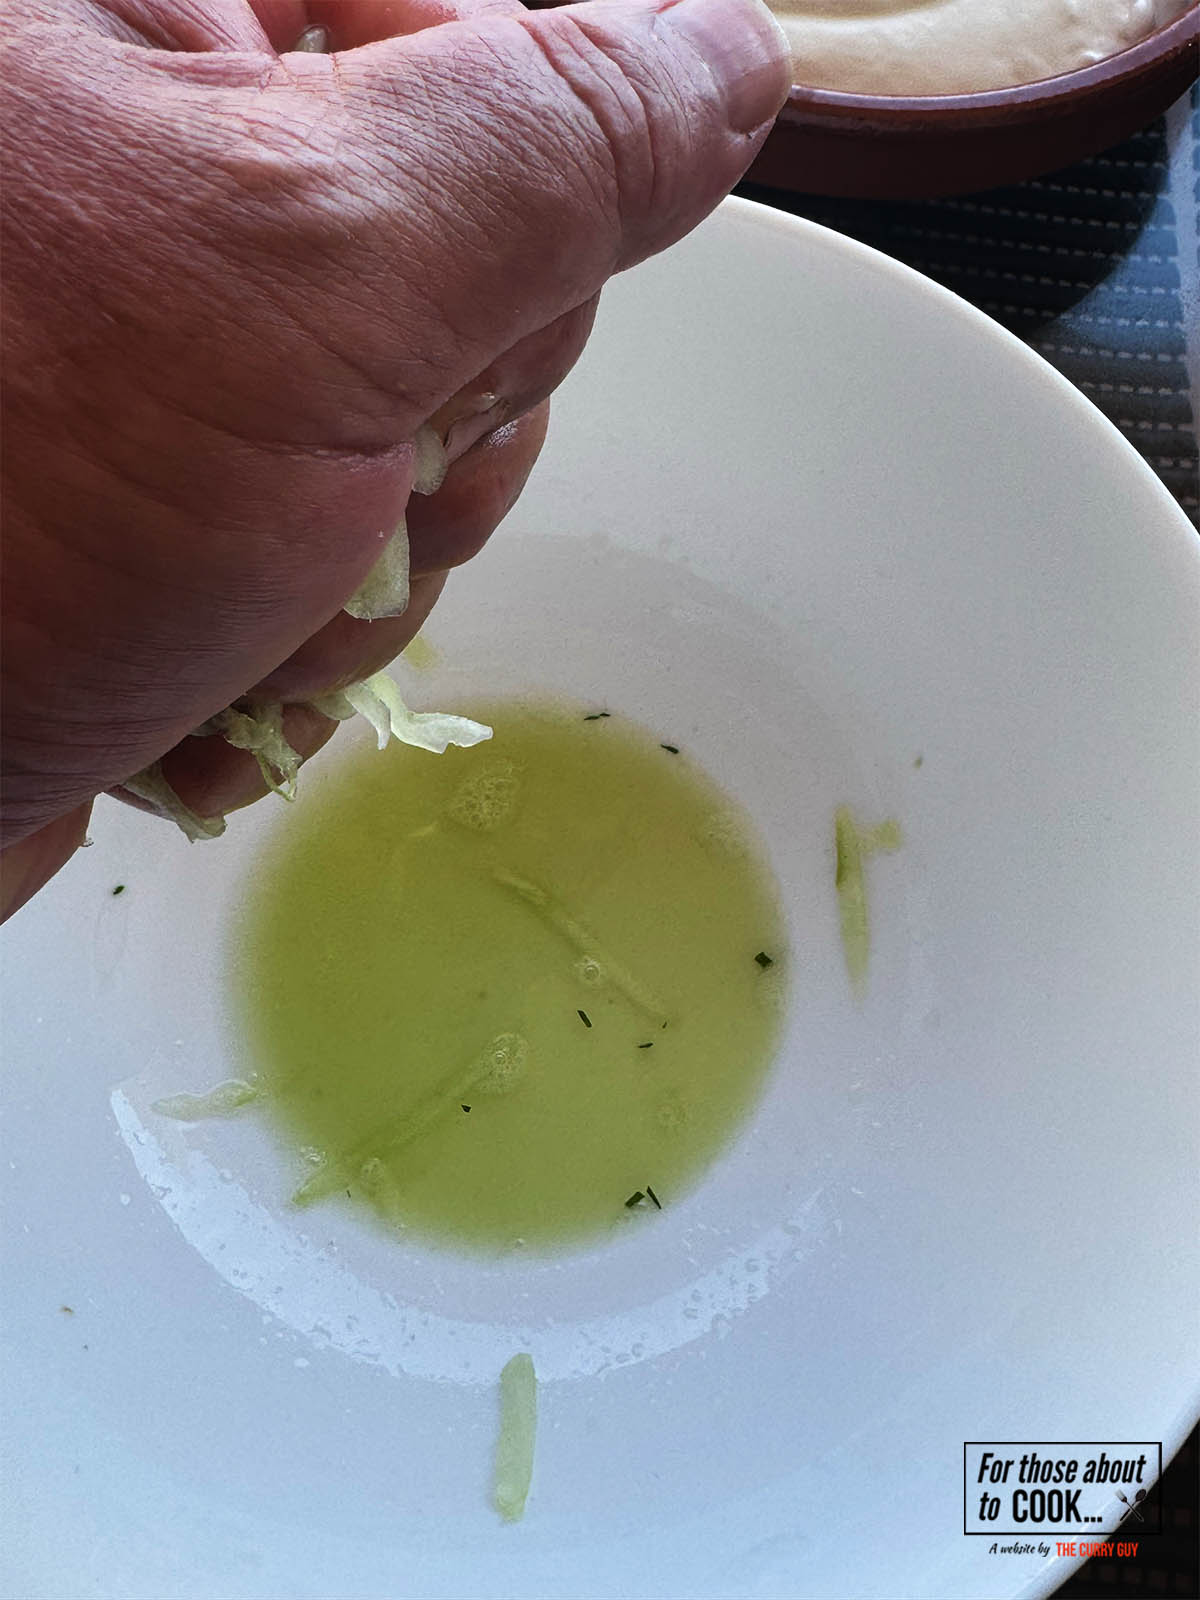
    Squeezing the excess moisture from the grated cucumber.
    1. Step 2: Squeeze the excess moisture from the grated cucumber into a bowl. You can discard any liquid you squeeze into the bowl.

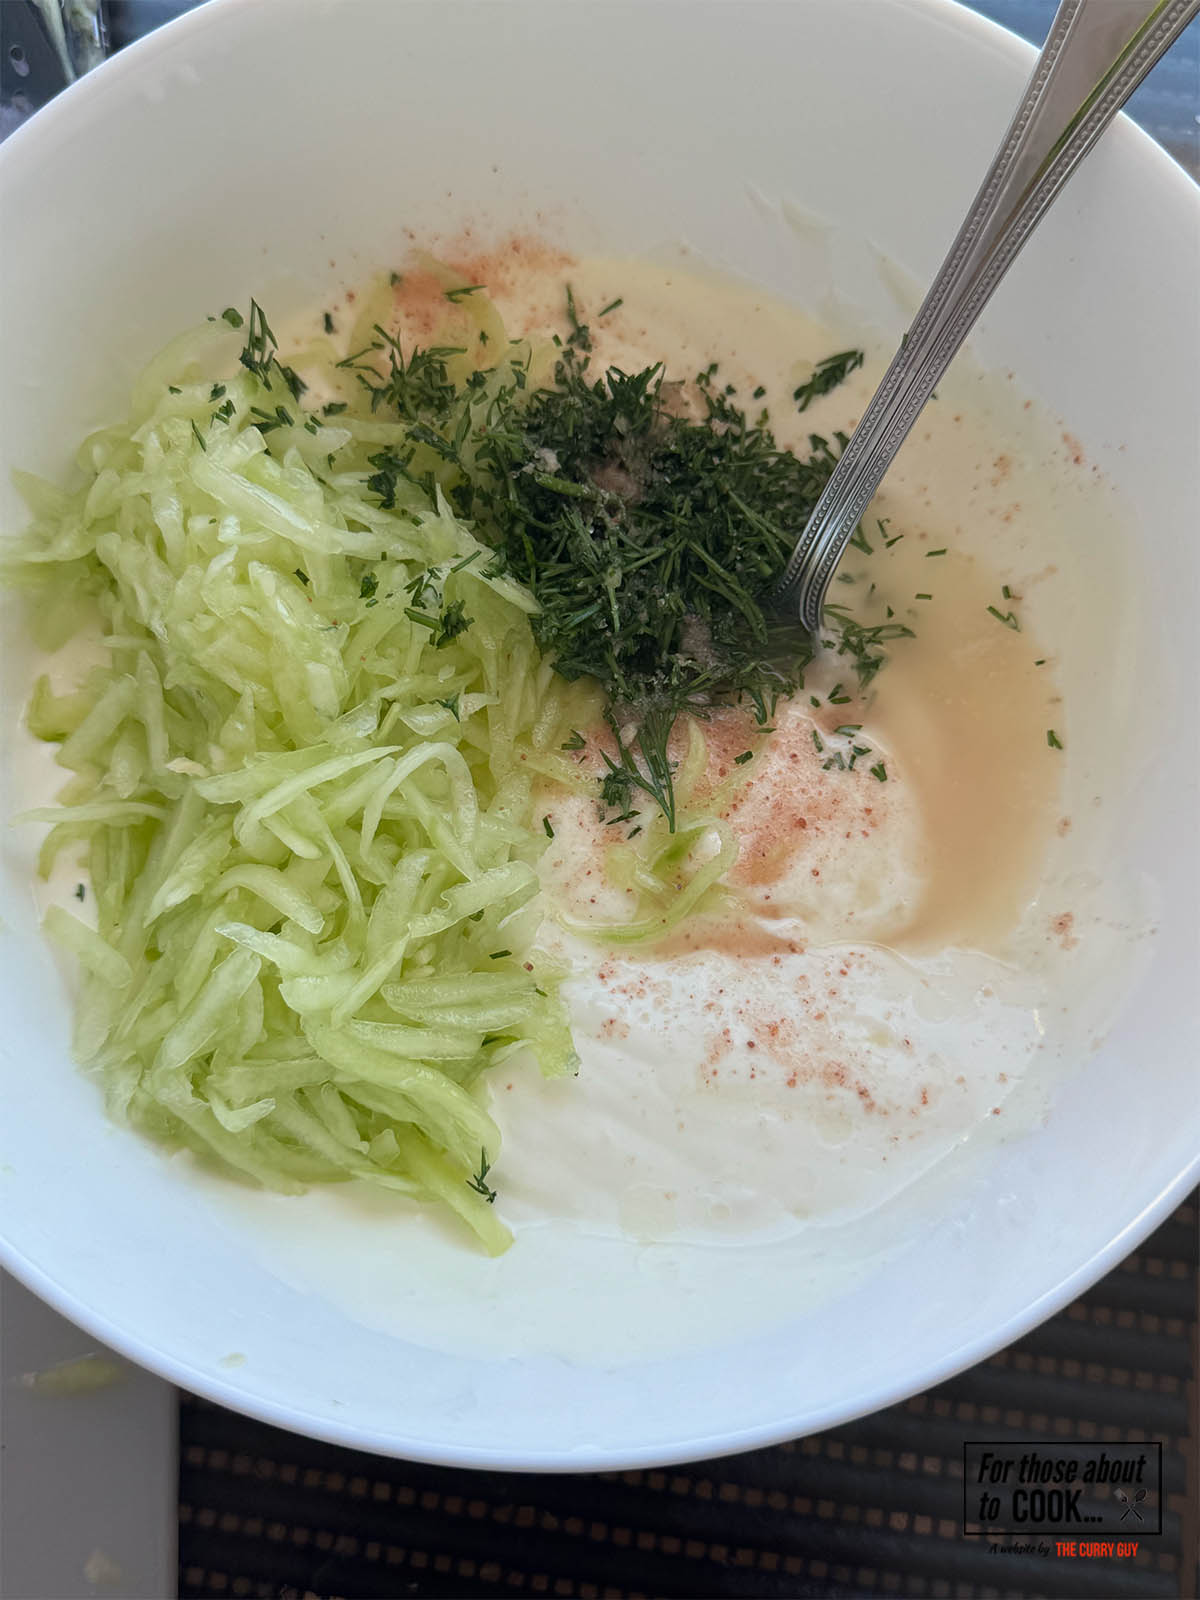
    Adding all the ingredients except for the olive oil to a mixing bowl.
    1. Step 3: Put all of the ingredients for the tzatziki in a mixing bowl except for the olive oil.
    Whisking it all until smooth.
    1. Step 4: Whisk it well to combine until smooth.

    The finished tzatziki in a serving bowl drizzled with extra virgin olive oil.
    1. Step 3: Try it and add more salt or lemon juice if needed to taste. Then drizzle with good quality extra virgin olive oil to serve.

    A Brief History of Tzatziki

    Tzatziki has ancient roots that stretch back thousands of years. Its origin lies in the Ottoman Empire, and it shares similarities with other yogurt-based sauces and dips across the region, such as:

    • Cacık (Turkey)
    • Mast-o-khiar (Iran)
    • Raita (India)

    The Greek version as we know it today solidified in the 19th and 20th centuries, especially after yogurt became a culinary staple in modern Greek cuisine. The name “tzatziki” comes from the Turkish word cacık, but its preparation and identity are now uniquely Greek — especially when made with thick yogurt and served with lemony grilled meats.

    Common Mistakes to Avoid

    1. Using Unstrained Yogurt

    Unstrained yogurt leads to runny tzatziki. If you don’t have Greek yogurt, strain your regular yogurt through cheesecloth in the fridge for 4–6 hours.

    2. Not Draining the Cucumber

    This is one of the biggest causes of watery tzatziki. Squeeze out as much moisture as possible after grating.

    3. Overloading with Garlic

    Tzatziki should be garlicky, but not overpowering. Raw garlic gets stronger over time, so if you're making it ahead, err on the side of caution.

    4. Skipping the Chill Time

    Letting tzatziki chill allows the flavors to meld. A minimum of 30 minutes makes a noticeable difference.

    Variations on Tzatziki

    Tzatziki is traditionally made with the ingredients listed above, but you can experiment with different herbs and flavorings while staying true to its spirit.

    Herb Variations:

    • Use mint instead of dill for a more refreshing, summery flavor.
    • Try parsley or chives for a subtle twist.

    Texture Tweaks:

    • Blend the sauce in a food processor for a smooth, creamy texture.
    • Leave it chunky if you prefer a rustic, homemade look.

    Additions:

    Crumbled feta for added richness and tang.

    A pinch of ground cumin for a Middle Eastern edge.

    A few chopped olives or capers for saltiness.

    How to Store Tzatziki

    Tzatziki should be stored in an airtight container in the fridge.

    • Shelf life: Up to 3–4 days
    • Freezing? Not recommended — the yogurt and cucumber separate when thawed, leading to a watery texture.

    Tip: Give your tzatziki a quick stir before serving if it's been sitting — some natural separation is normal.

    Top Tip

    Don’t go crazy with the garlic. I have been tempted on occasion but tzatziki is usually served with other garlicky things so sometimes less is more.

    Final Thoughts

    Tzatziki is more than just a sauce — it’s a staple of Greek culture and Mediterranean hospitality. With just a few simple ingredients, you can whip up a dip that brings brightness, depth, and creaminess to any meal. Whether you’re hosting a summer BBQ, building a mezze platter, or just need something to dip your pita in at midnight, tzatziki has your back.

    Make it once, and you’ll wonder how your fridge ever lived without it.

    FAQ

    Can you use regular yoghurt instead of Greek yoghurt?

    Yes, you can use regular plain yogurt, but you'll need to strain it first to remove excess water. Greek yogurt is naturally thick due to straining, which gives tzatziki its signature creamy texture. To strain regular yogurt, place it in a cheesecloth-lined sieve over a bowl in the fridge for a few hours.

    How do you stop your tzatziki from being watery?

    The two biggest culprits are unstrained cucumber and thin yogurt. To prevent watery tzatziki:
    Grate the cucumber and squeeze out all the liquid using a clean kitchen towel or cheesecloth.
    Use thick, full-fat Greek yogurt or strain regular yogurt.

    Can you make tzatziki ahead of time?

    Absolutely. In fact, it’s even better when made ahead. Letting tzatziki rest in the fridge for at least 30 minutes (or up to 24 hours) helps the flavors meld. Just stir it before serving if any liquid has separated.

    Can you freeze tzatziki?

    Freezing tzatziki is not recommended. The yogurt and cucumber will separate when thawed, resulting in a watery, grainy texture. It's best enjoyed fresh.

    Related

    Looking for other recipes like this? Try these:
    • fish served up on a plate
      Vietnamese Fish In Banana Leaf
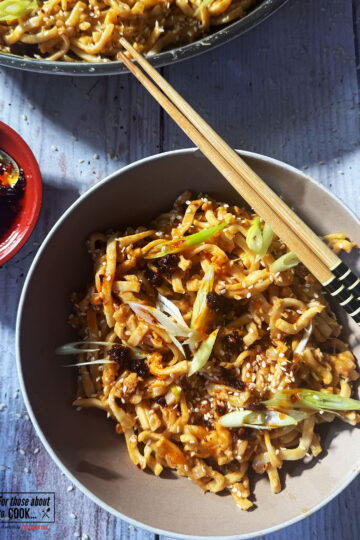
    • Peanut butter noodles served in a bowl topped with spring onion and sesame seeds
      Peanut Butter Noodles
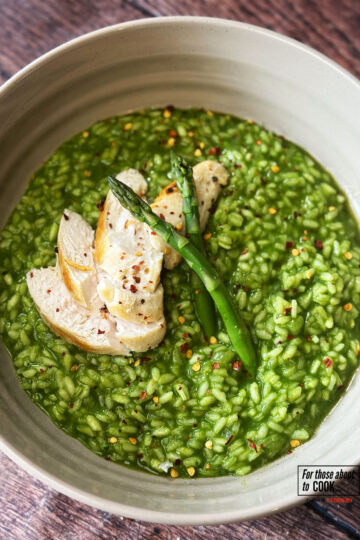
    • Risotto verde served with sliced chicken and asparagus sprigs
      Risotto Verde
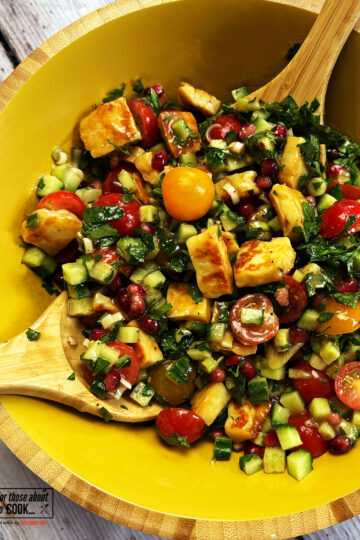
    • Halloumi Salad served in a large bowl with tahini dressing
      Halloumi Salad

    Pairing

    These are my favorite dishes to serve with [this recipe]:

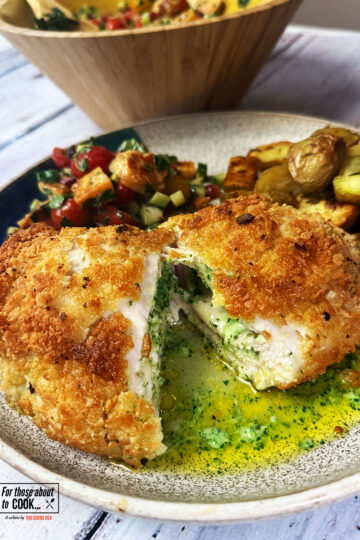
    • Chicken Kiev recipe plated up with garlic butter oozing out
      Chicken Kiev Recipe
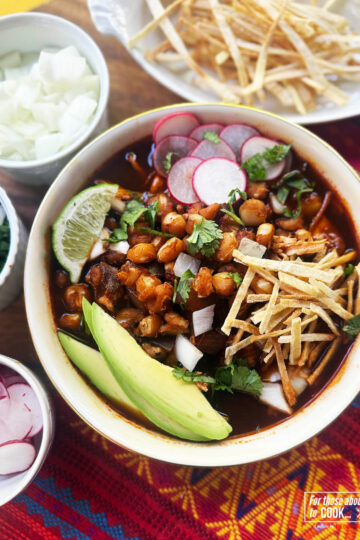
    • Pozole Rojo served up in a bowl with fresh toppings
      Pozole Rojo De Pollo
    • pork carnitas
      Pork Carnitas (Mexican Slow Cooked Pulled Pork)
    • Nizami chicken curry served in the pan with fried onions and coriander
      Nizami Chicken Curry

    Recipe

    The finished tzatziki in a serving bowl drizzled with extra virgin olive oil.

    Tzatziki

    Yield: 6
    Prep Time: 5 minutes
    Cook Time: 5 minutes
    Total Time: 10 minutes

    This is a traditional, easy and delicious tzatziki. Serve it over souvlaki, gyros or simply with warm pitas or crispy veggies.

    No Ratings

    Ingredients

    • 1 English cucumber
    • 2 cups thick Greek yogurt
    • 2 tablespoon lemon juice
    • 2 tablespoon fresh dill
    • 1 tablespoon extra-virgin olive oil
    • 4 garlic cloves, minced
    • Salt to taste

    Instructions

    1. Peel the cucumber and then slice it down the center lengthwise. Remove the seed with a knife or spoon and then grate it.
    2. Squeeze the excess moisture from the grated cucumber into a bowl. You can discard any liquid you squeeze into the bowl.
    3. Put all of the ingredients for the tzatziki in a mixing bowl except for the olive oil. Whisk it well to combine until smooth.
    4. Try it and add more salt or lemon juice if needed to taste. Then drizzle with good quality extra virgin olive oil to serve.
    Nutrition Information:
    Yield: 6 Serving Size: 1
    Amount Per Serving: Calories: 73Total Fat: 3gSaturated Fat: 0gTrans Fat: 0gUnsaturated Fat: 2gCholesterol: 4mgSodium: 126mgCarbohydrates: 5gFiber: 0gSugar: 3gProtein: 8g
    © Dan
    Cuisine: Greek / Category: Greek Recipes

    Pork Souvlaki

    August 2, 2025 By Dan

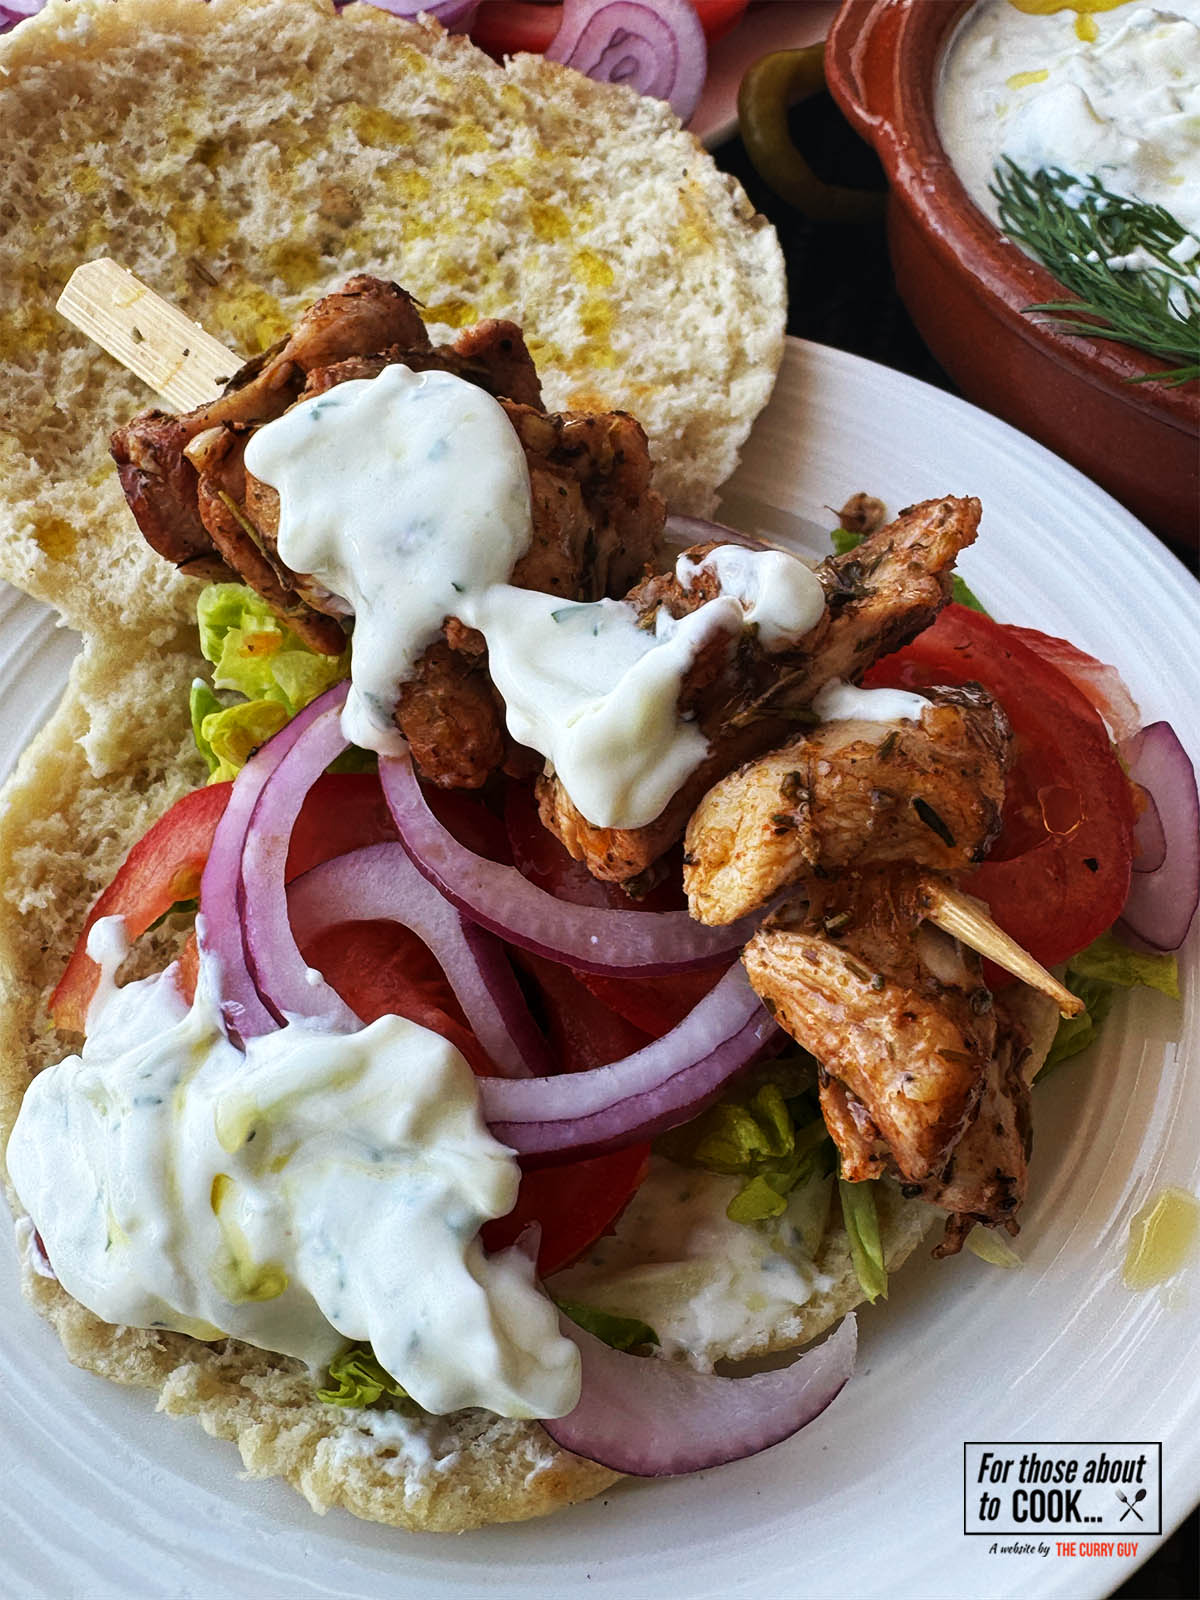
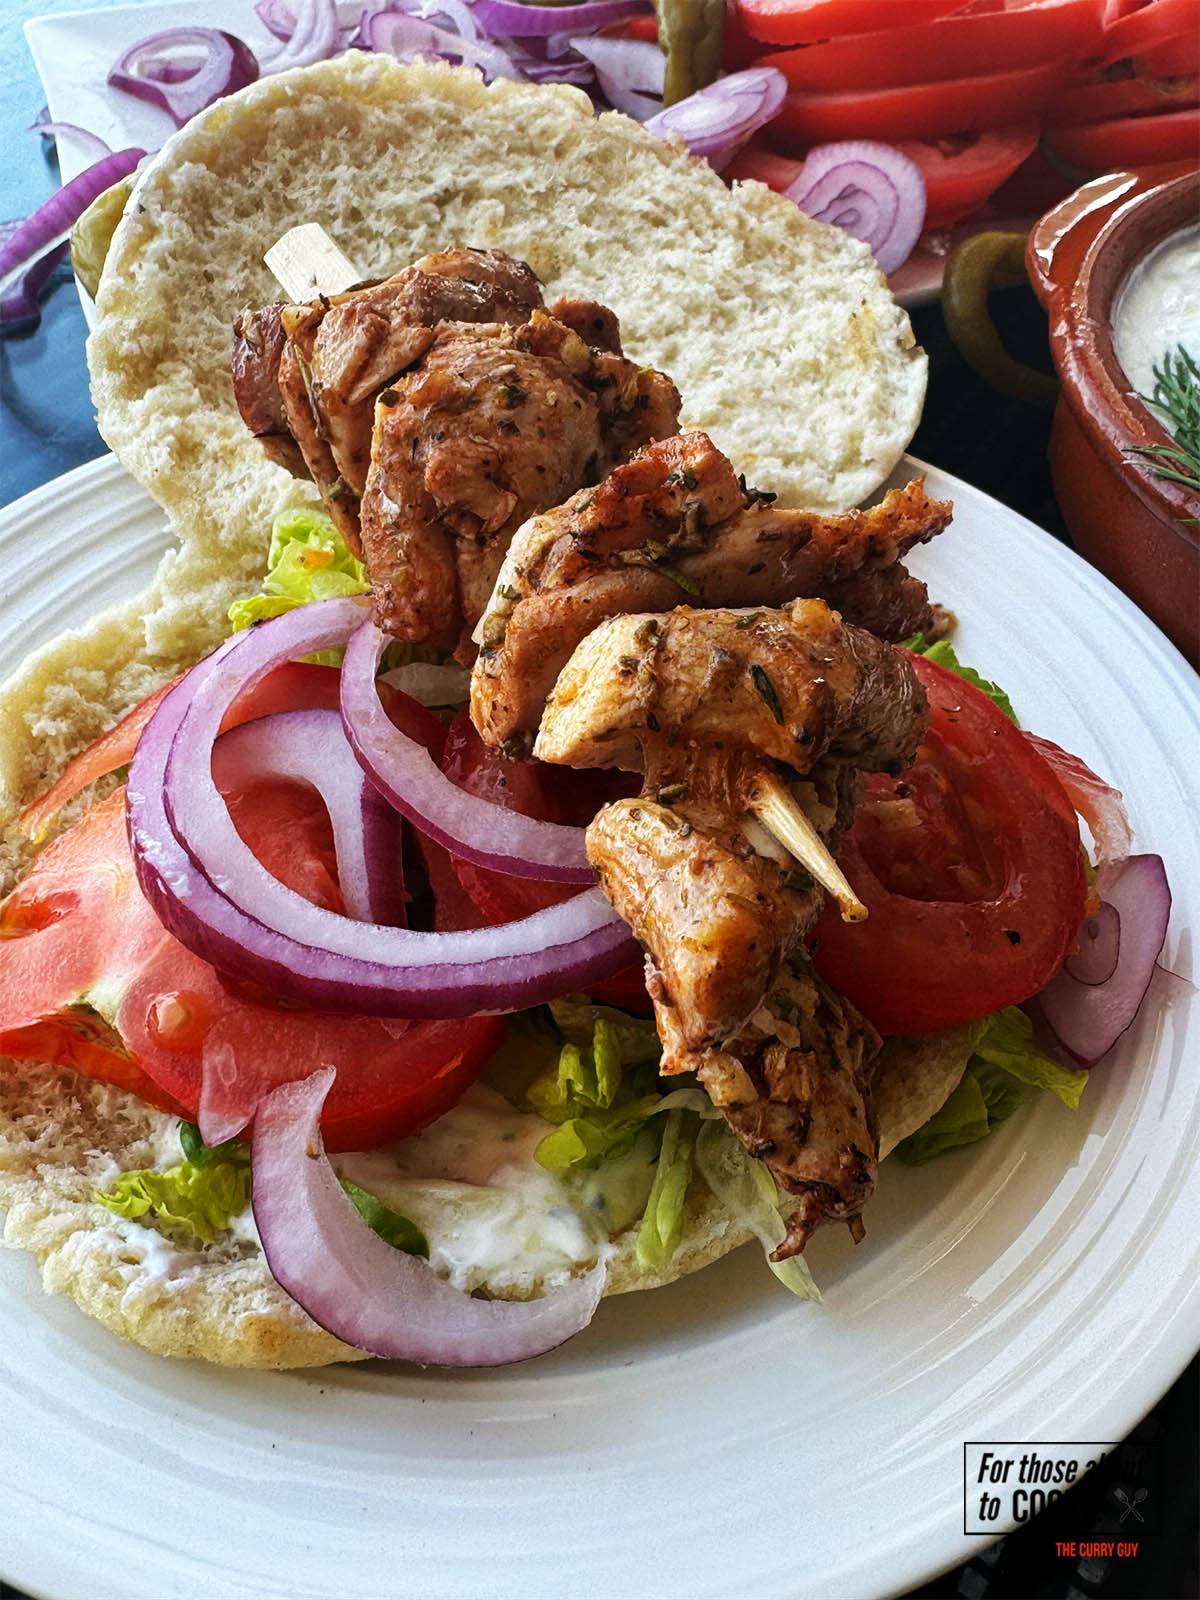
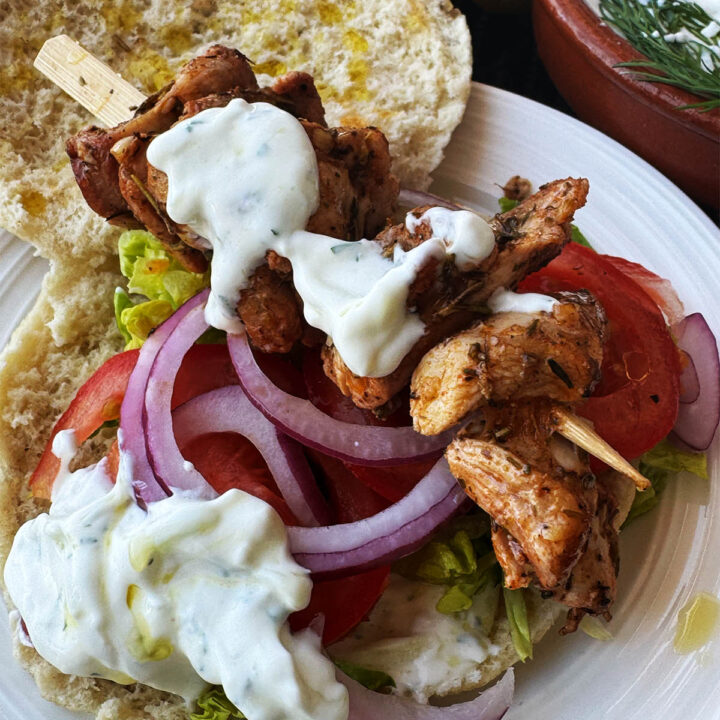
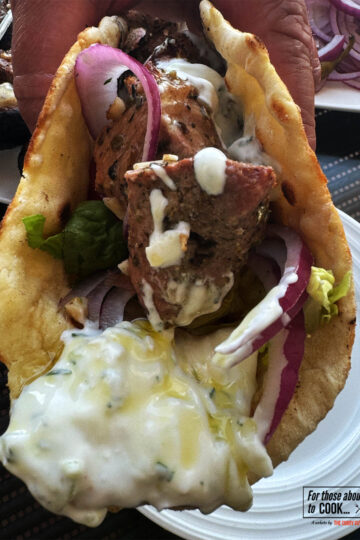
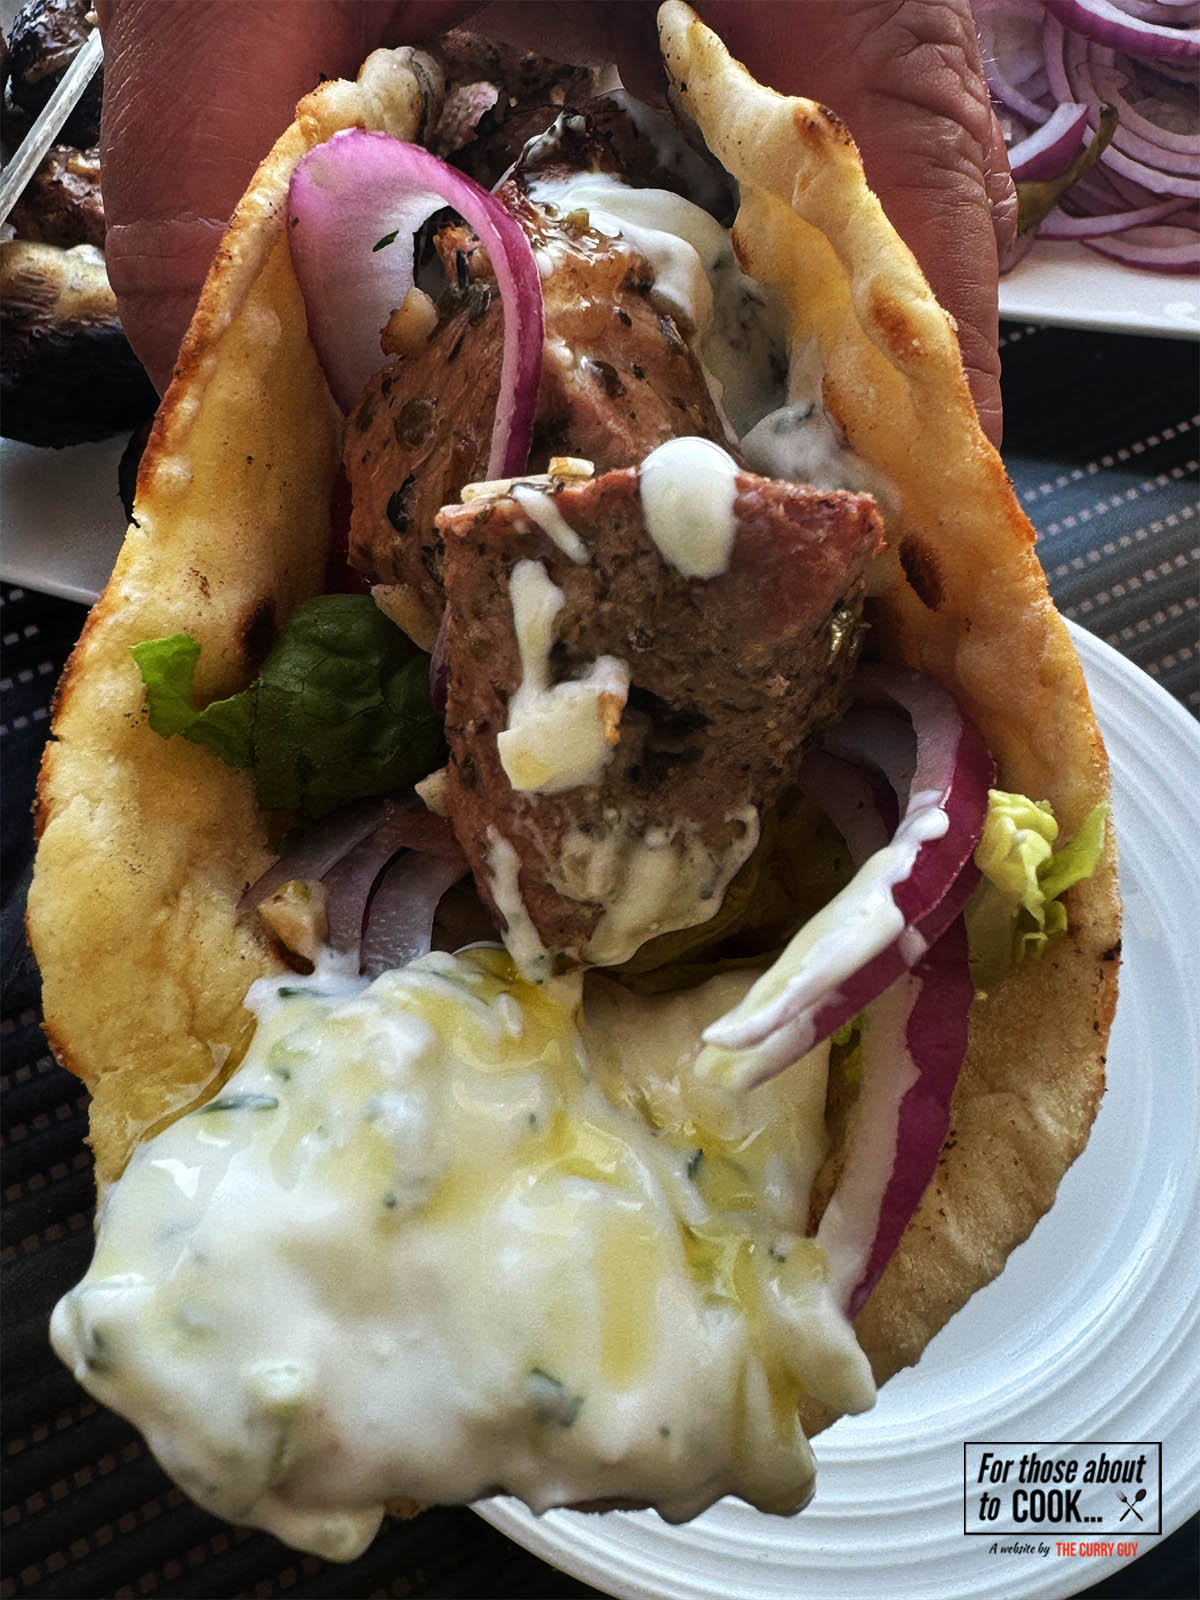
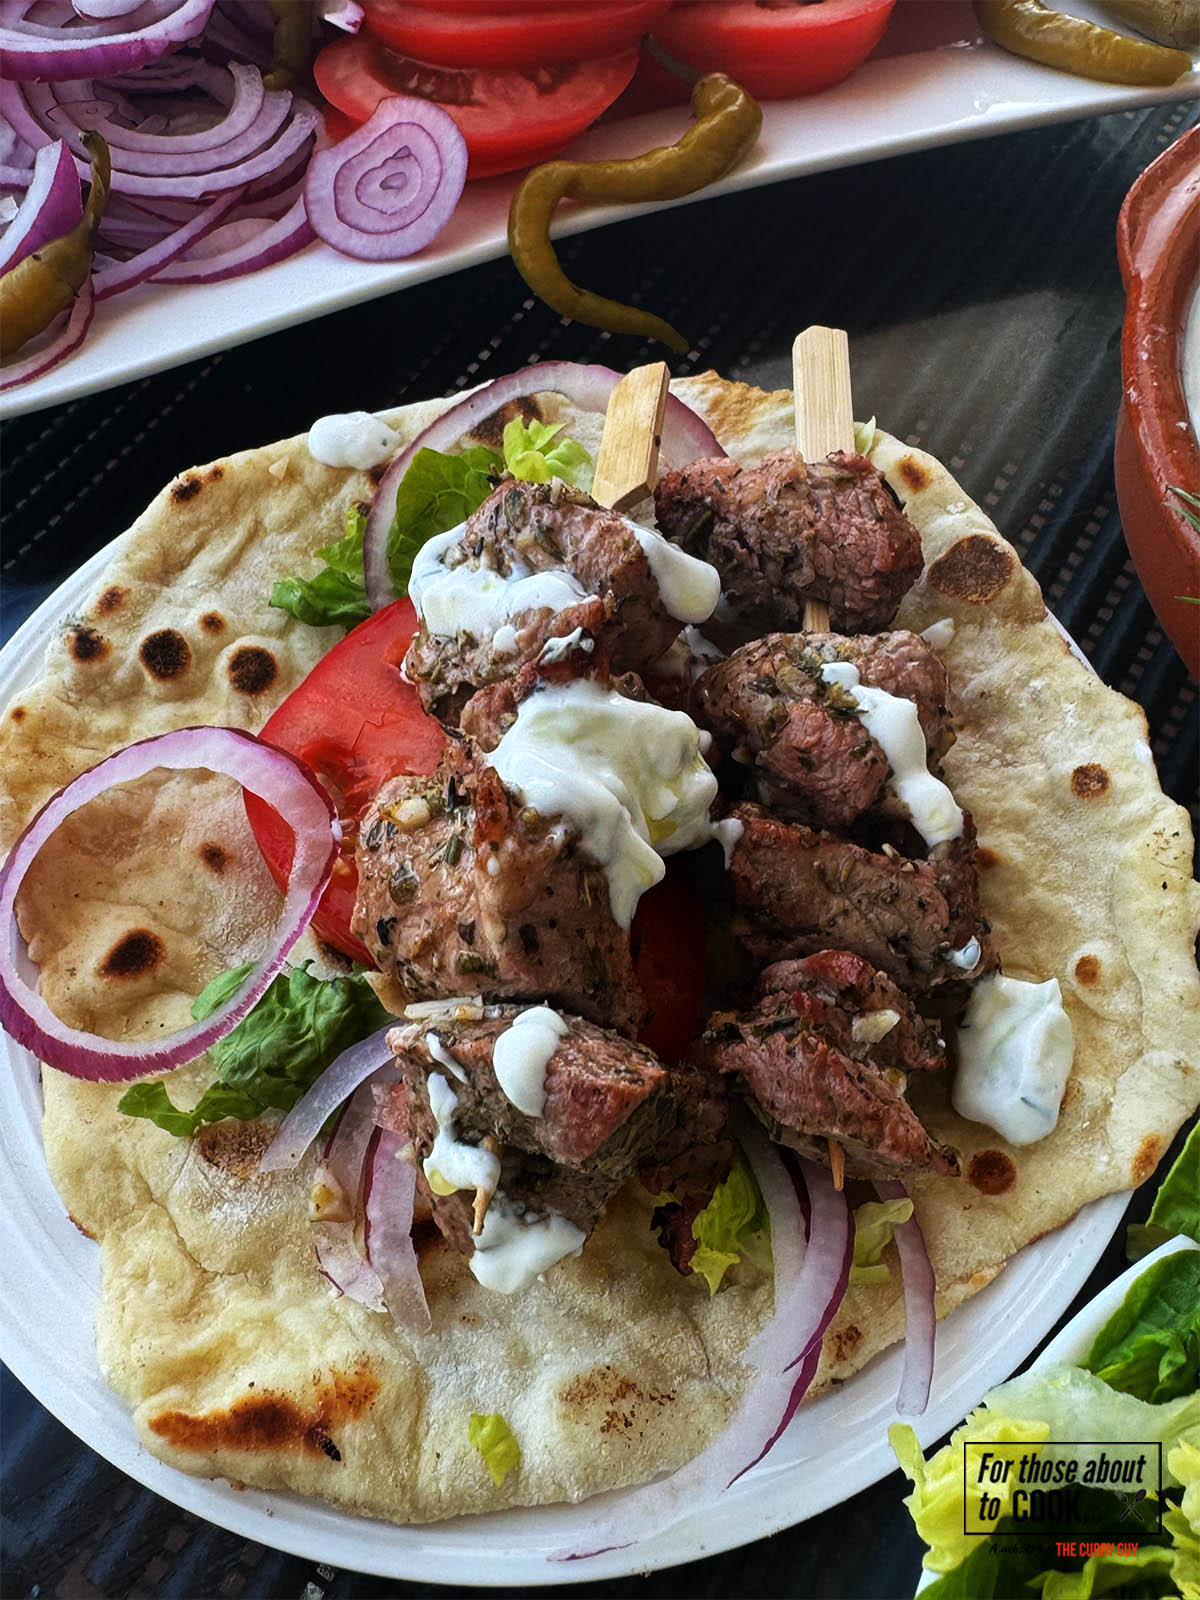
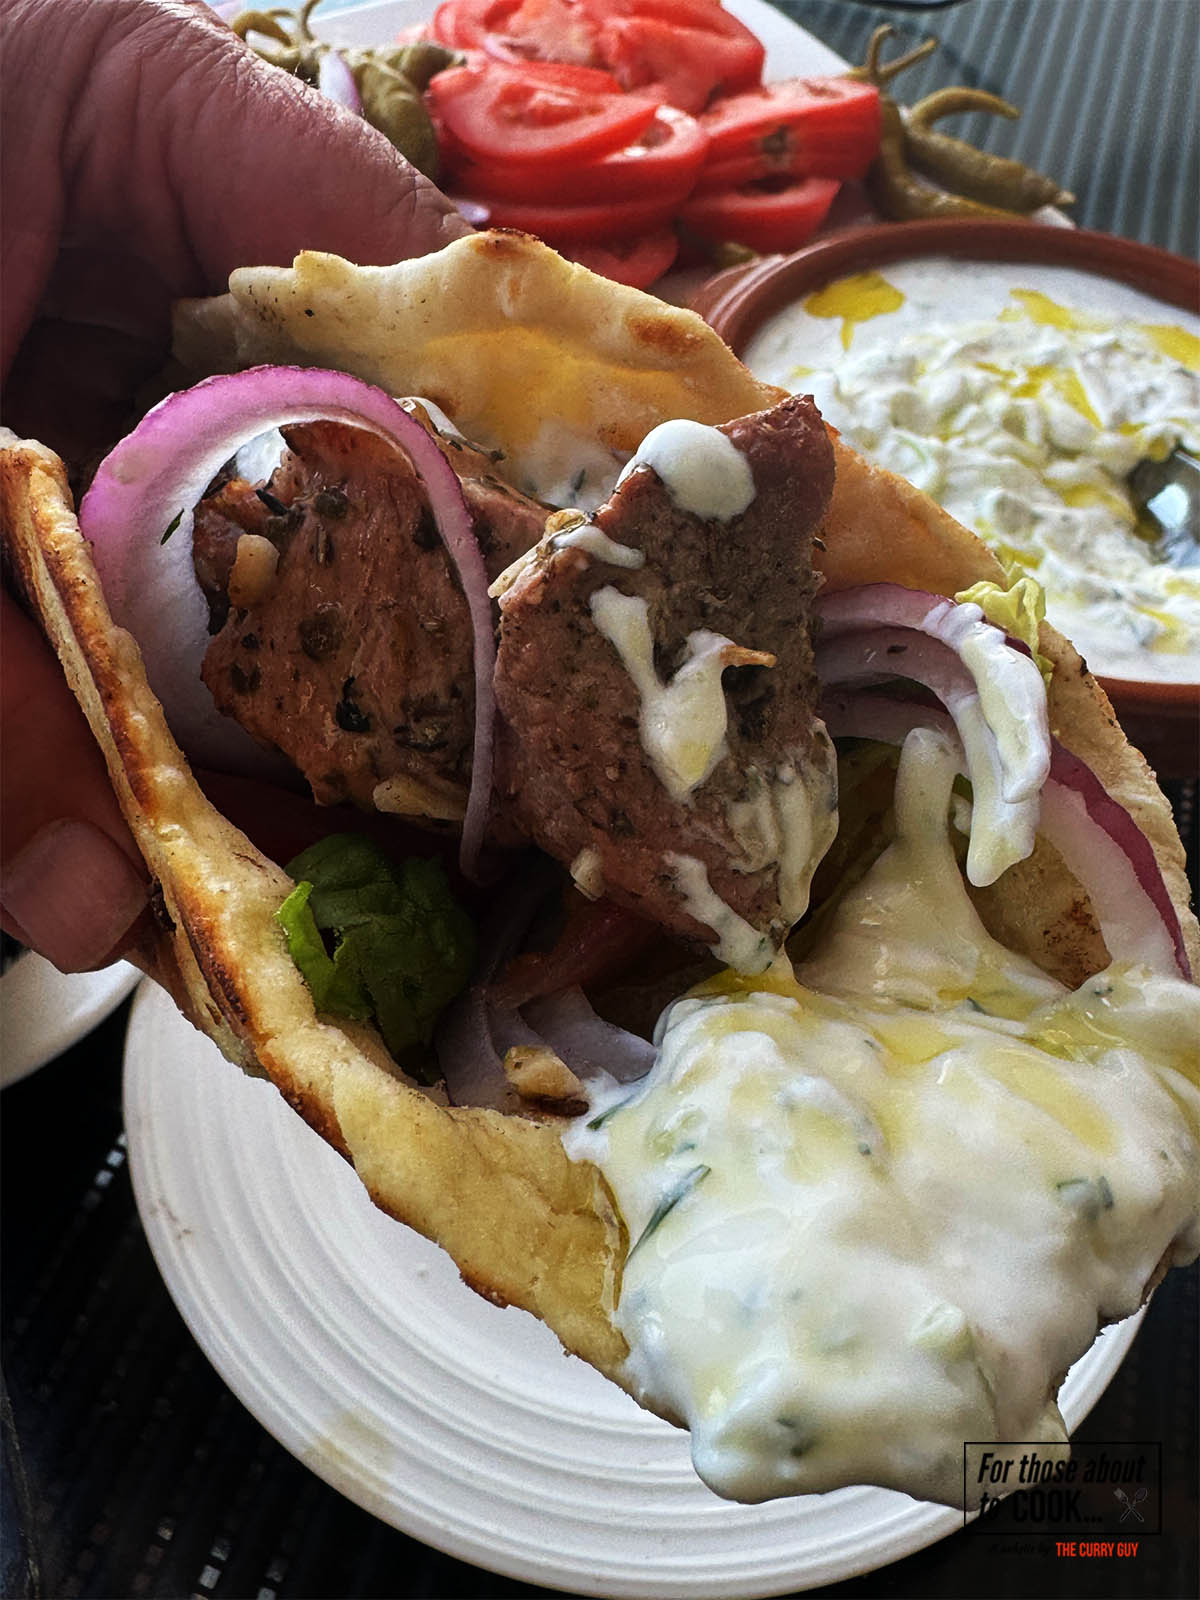
    Pork souvlaki wrapped up in a pita with tzatziki and salad vegetables.

    Few dishes capture the spirit of Greek cuisine like pork souvlaki — juicy, marinated skewers of tender pork grilled over an open flame, wrapped in warm pita, and topped with creamy tzatziki, red onions, ripe tomatoes, and a sprinkle of oregano. It’s a simple dish, but when done right, it’s nothing short of phenomenal.

    In this blog post, I’ll walk you through everything you need to know to make authentic pork souvlaki at home. From the history and cultural background of the dish to marination secrets, grill techniques, and serving tips — this is your complete guide to mastering one of Greece’s most beloved street foods.

    Pork souvlaki wrapped up in a pita with tzatziki and salad vegetables.

    Ingredients

    Although pork souvlaki might taste like it is difficult to make, it really doesn’t require a lot of ingredients. This is simple food that also happens to be incredibly delicious.

    The ingredients for the recipe on a counter top.
    • Pork steak / pork fillet or shoulder
    • Olive oil
    • Lemon juice
    • Garlic
    • Dried thyme
    • Dried oregano
    • Rosemary 
    • Salt 
    • Black pepper

    See recipe card for quantities.

    Instructions

    Check out the following step by step photographs to see how easy it is to make authentic pork souvlaki at home! The ingredient measurements are in the recipe card at the bottom of this page.

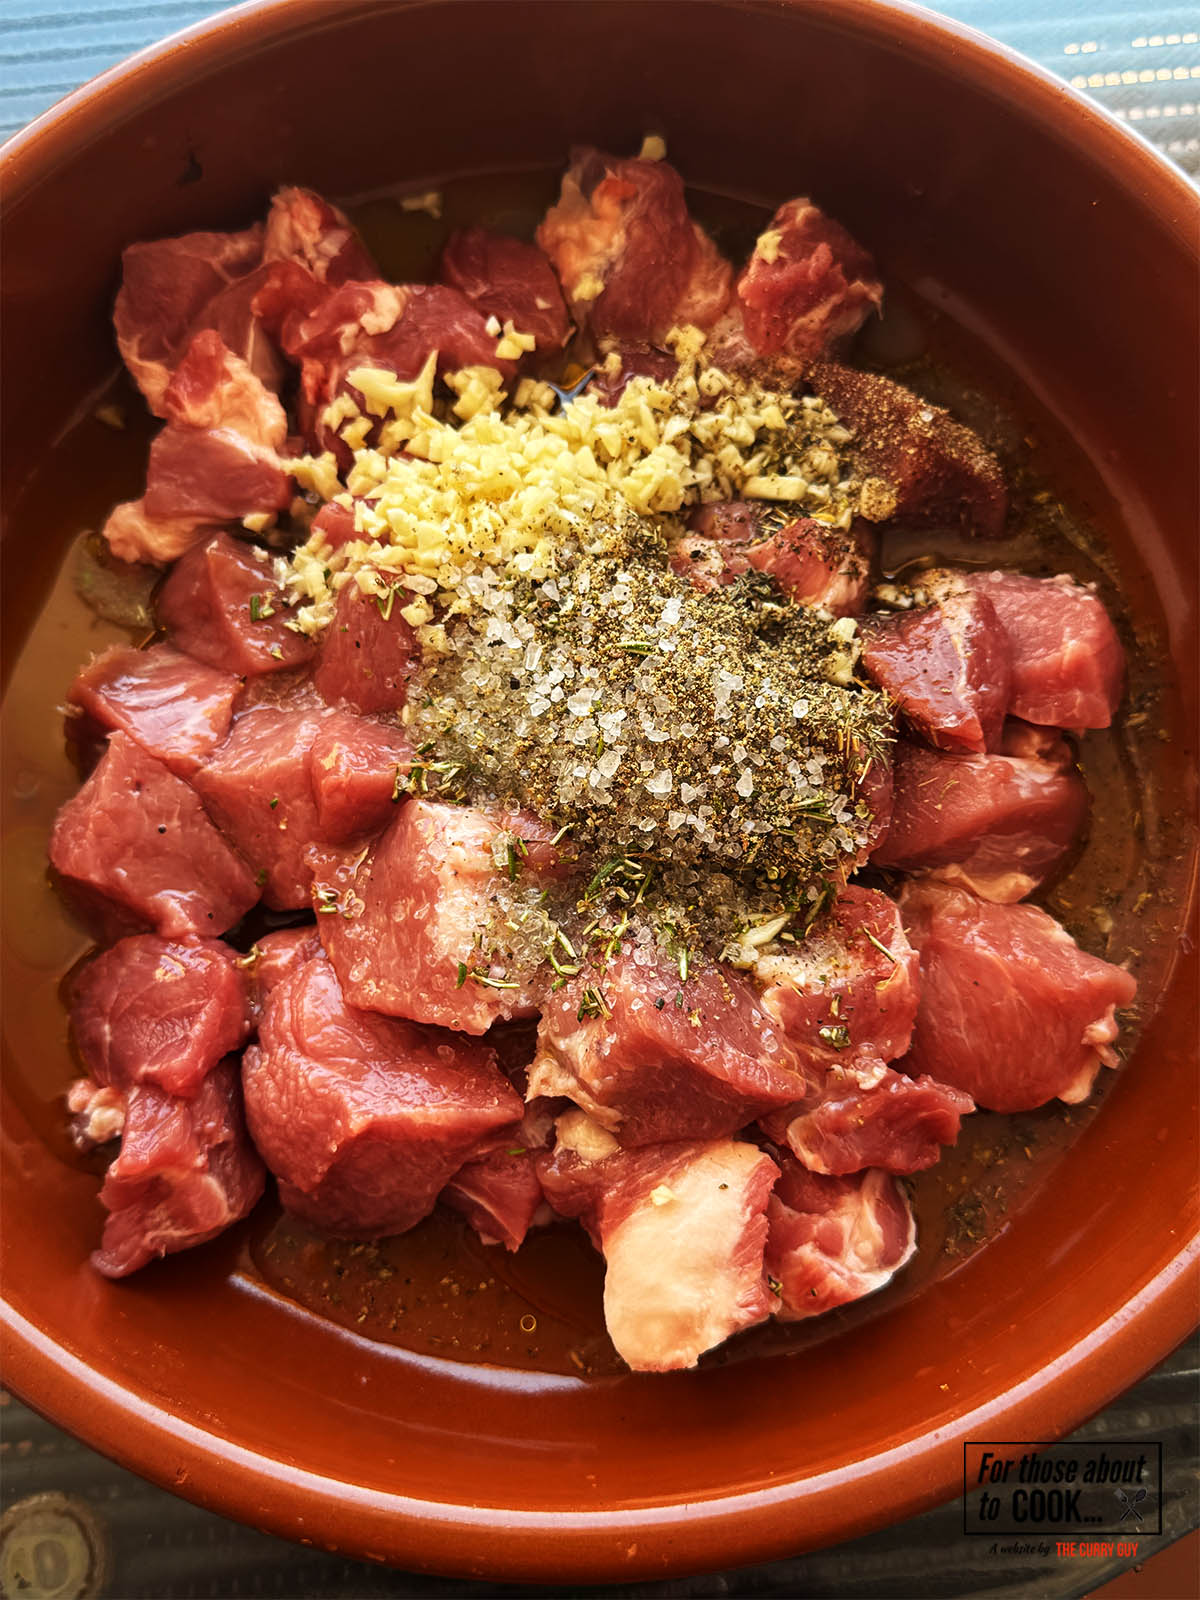
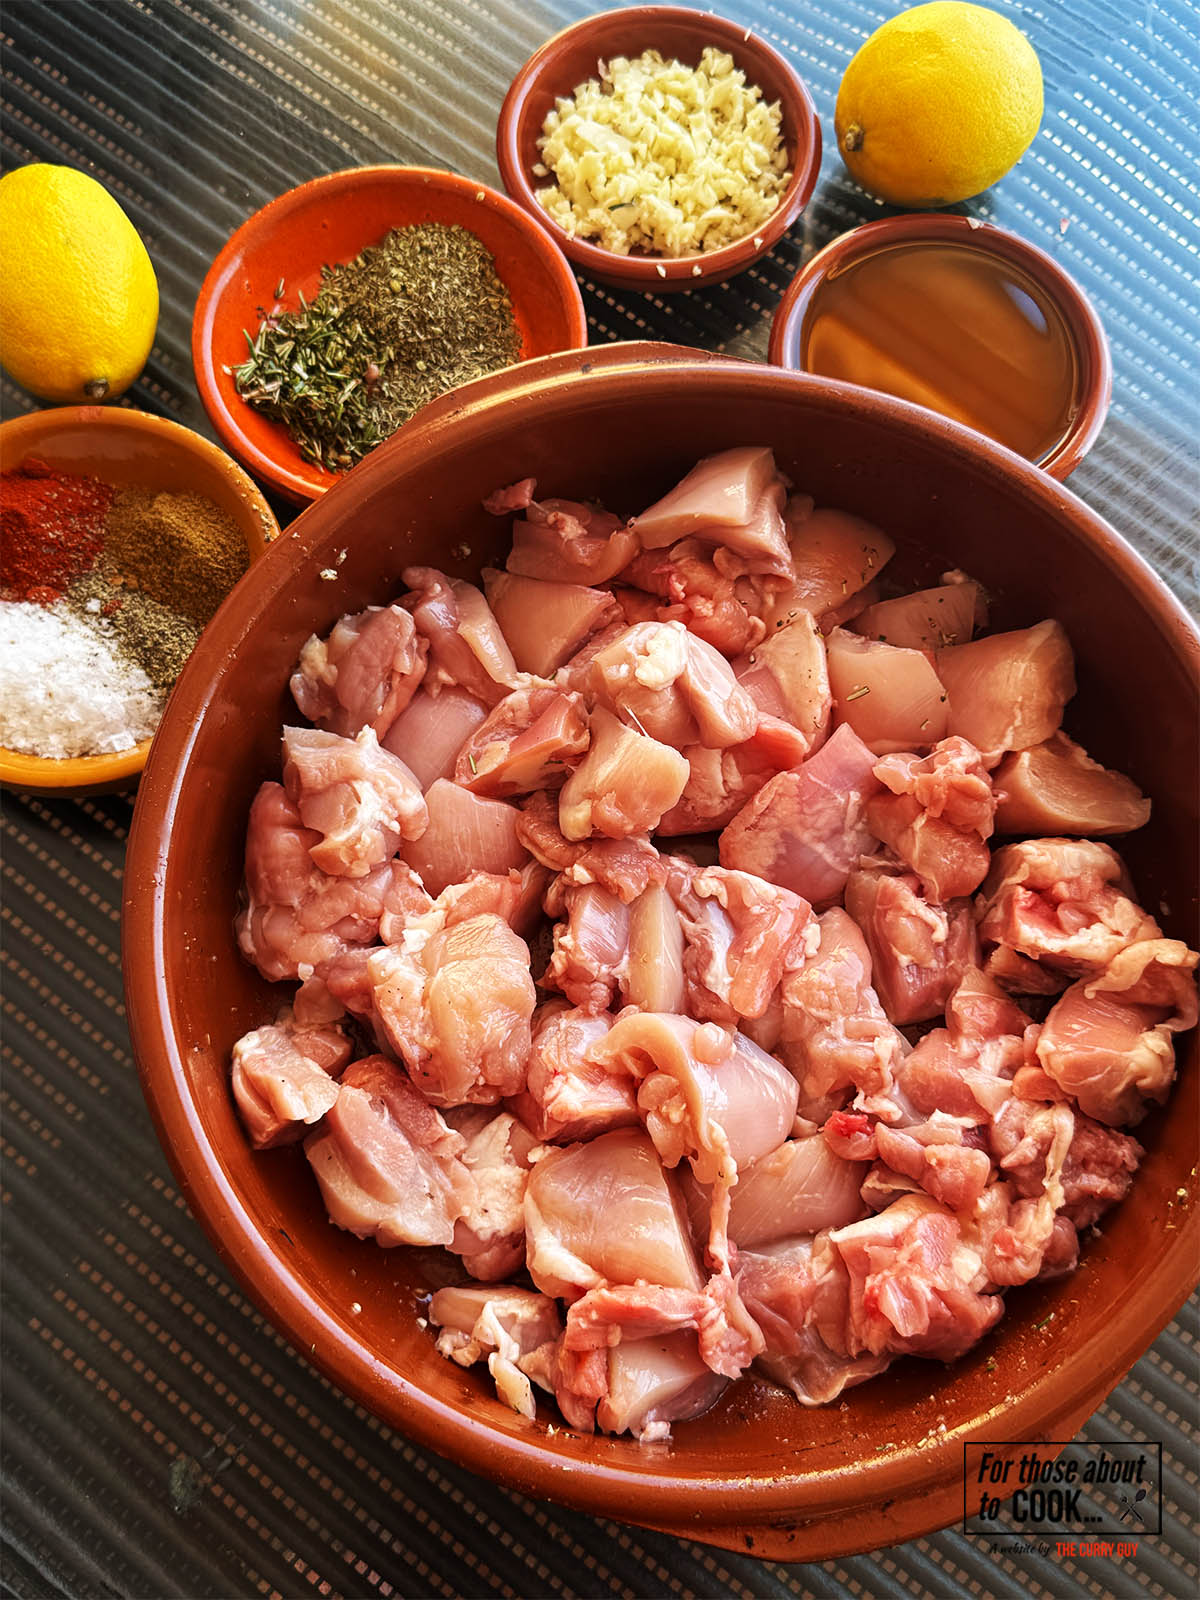
    Adding the marinade ingredients to the pork in a bowl.
    1. Step 1: Add the marinade ingredients to the pork in a bowl. If you would like to marinate the meat for longer than 4 hours (recommended) don’t stir in the lemon juice until 30 minutes to 4 hours before cooking.
    The pork coated with the marinade ingredients in a bowl.
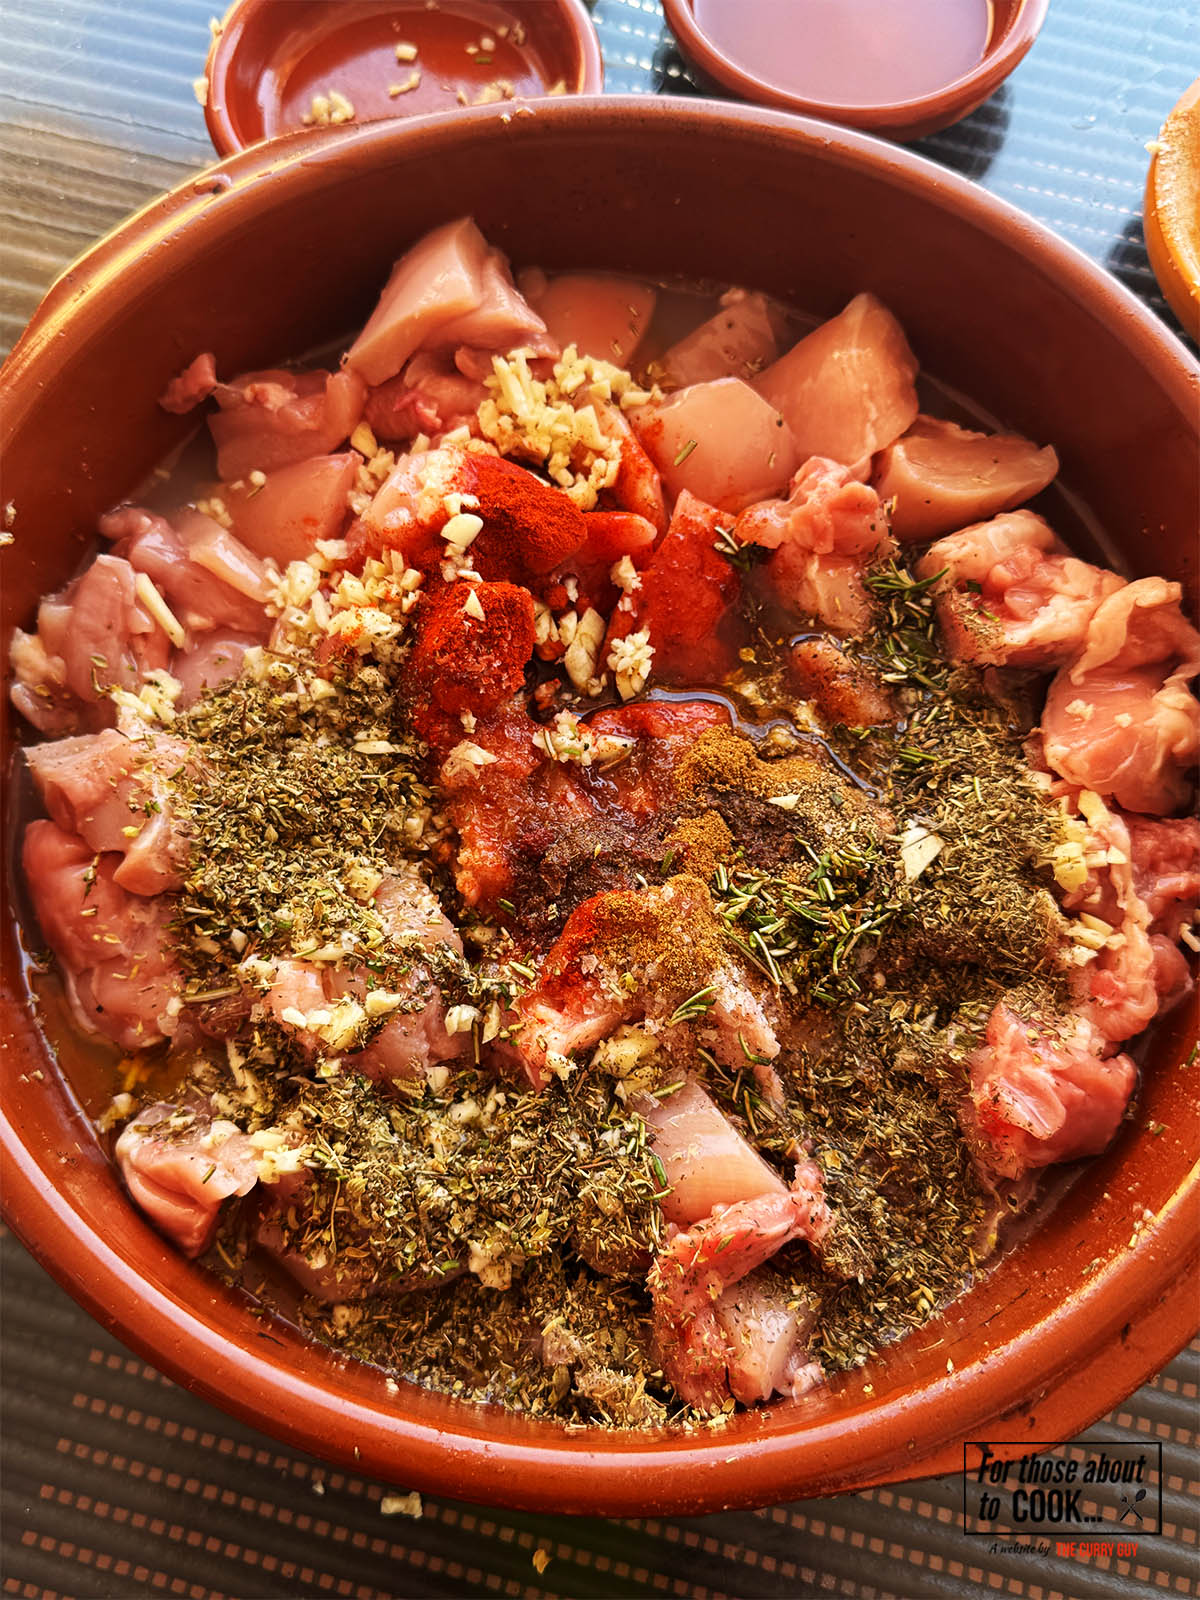
    1. Step 2: Rub this marinade right into the flesh of the pork. You can go straight to cooking if you like but I recommend marinating the meat for at least 4 hours or overnight.

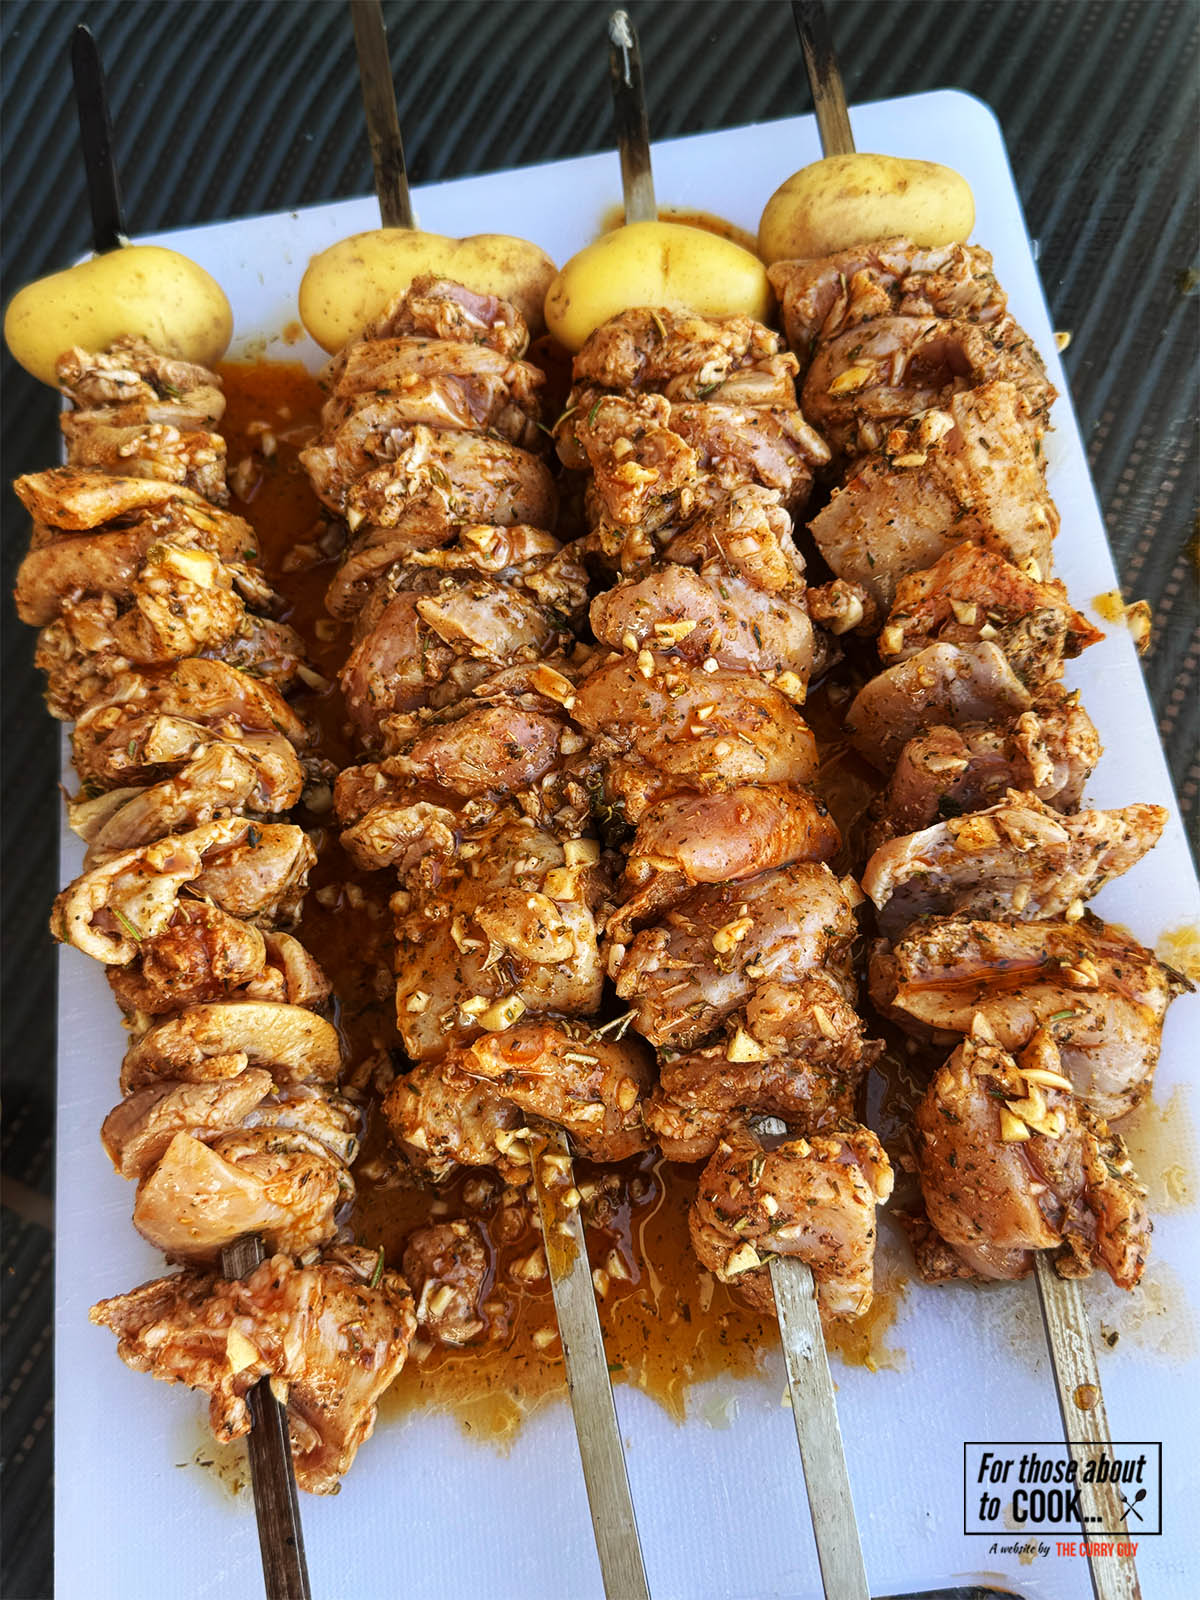
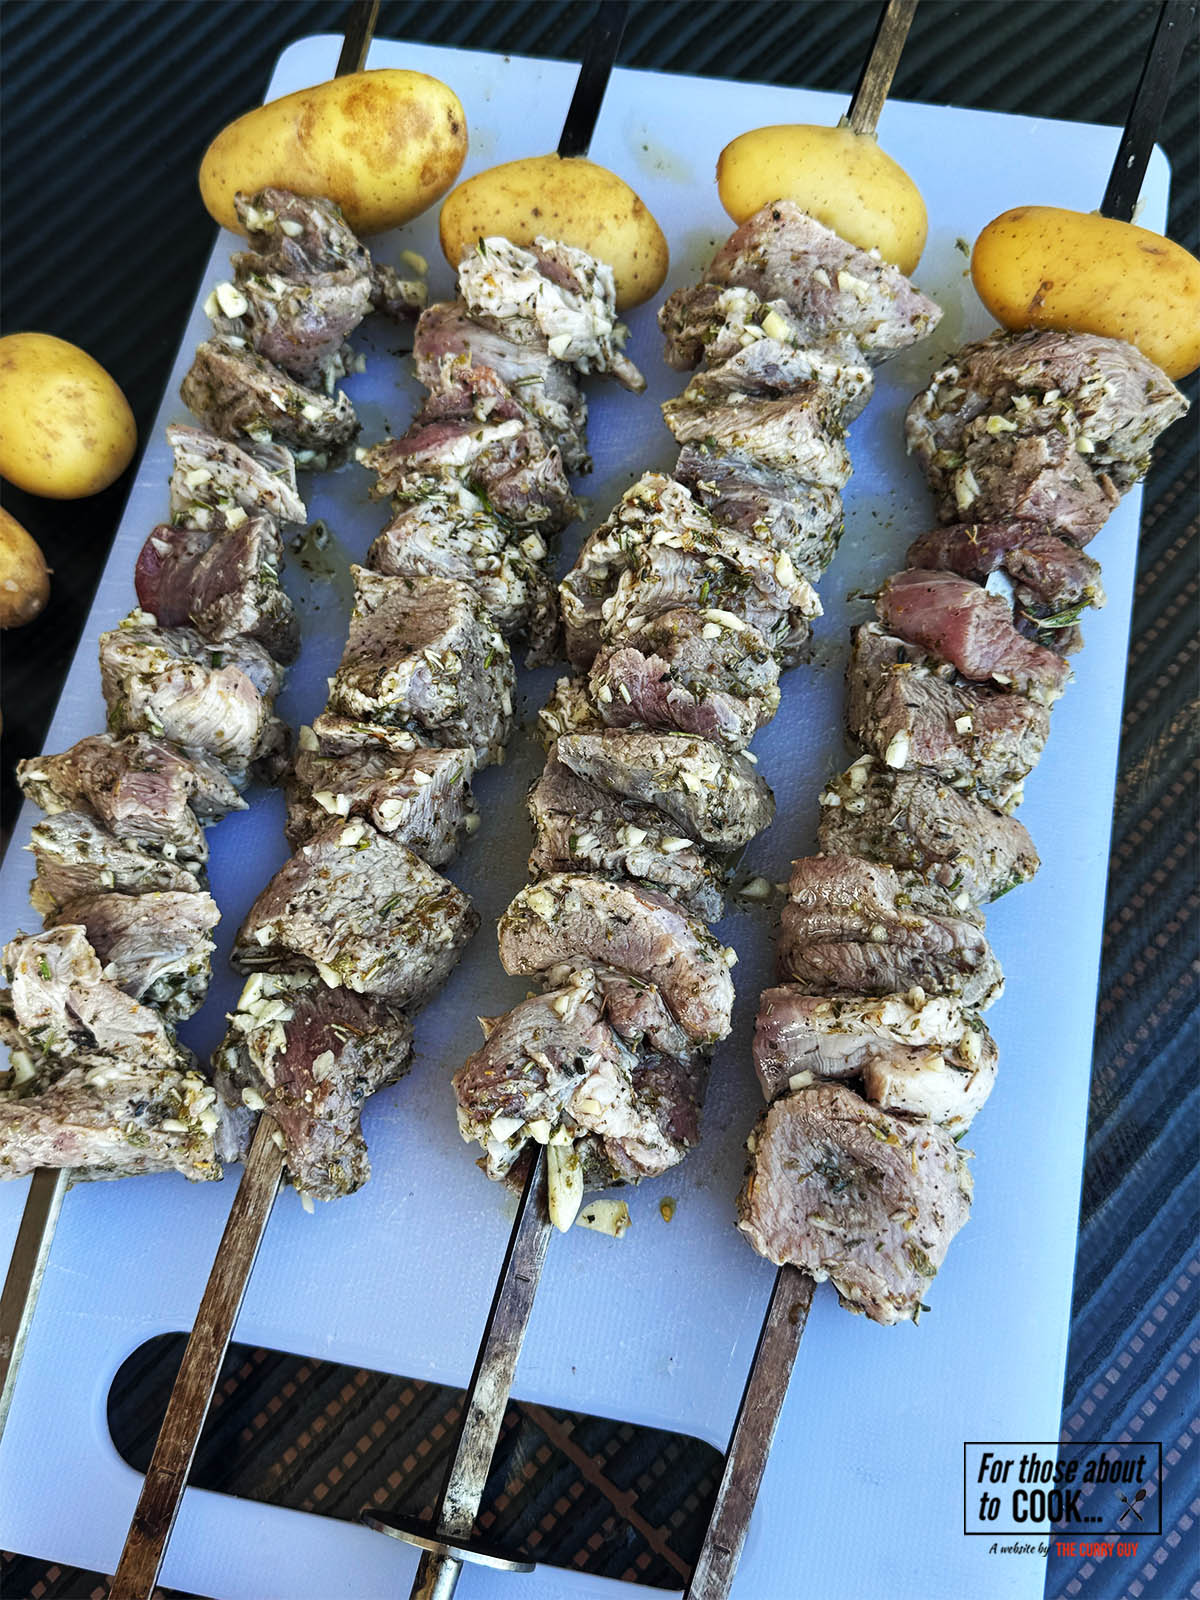
    The pork skewered and ready to start cooking.
    1. Step 3: When ready to cook, skewer the meat onto metal or wooden skewers. This recipe works very well in my Doori tandoor but you could go more authentic and cook it over a direct heat fire on your barbecue, turning and basting regularly with any leftover marinade until charred and cooked through.
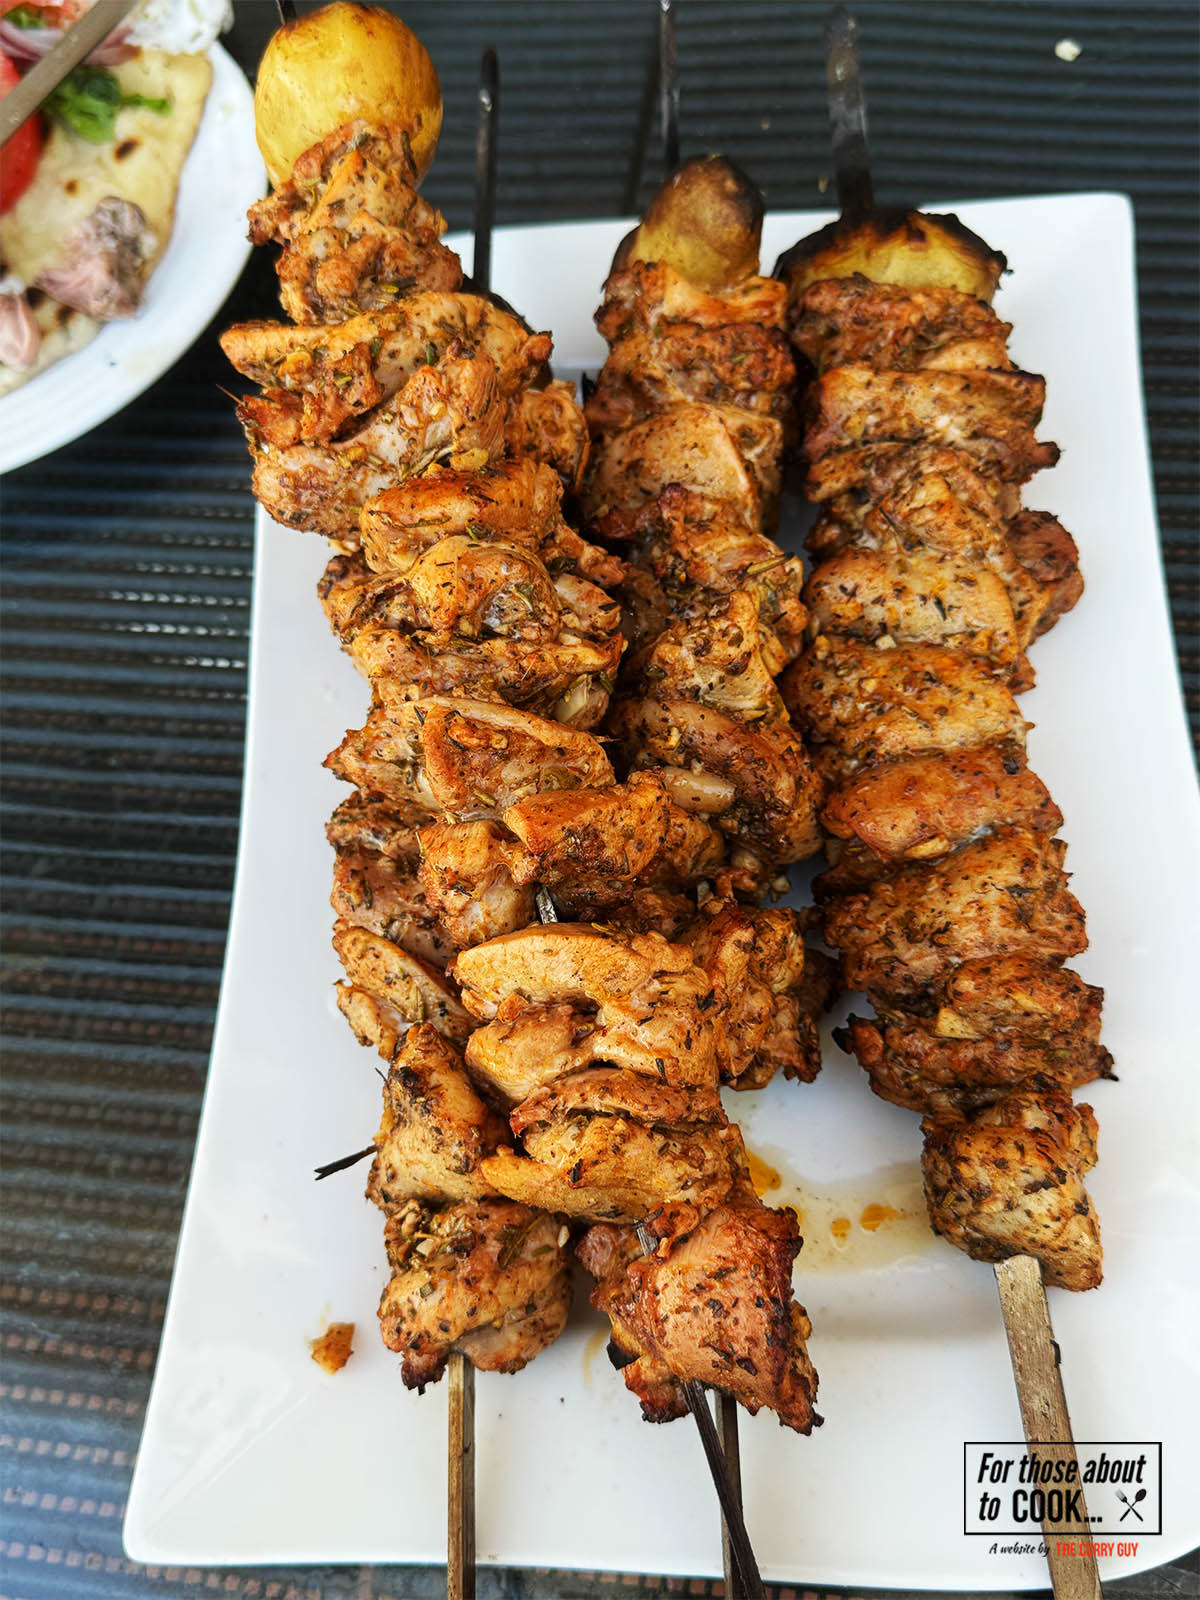
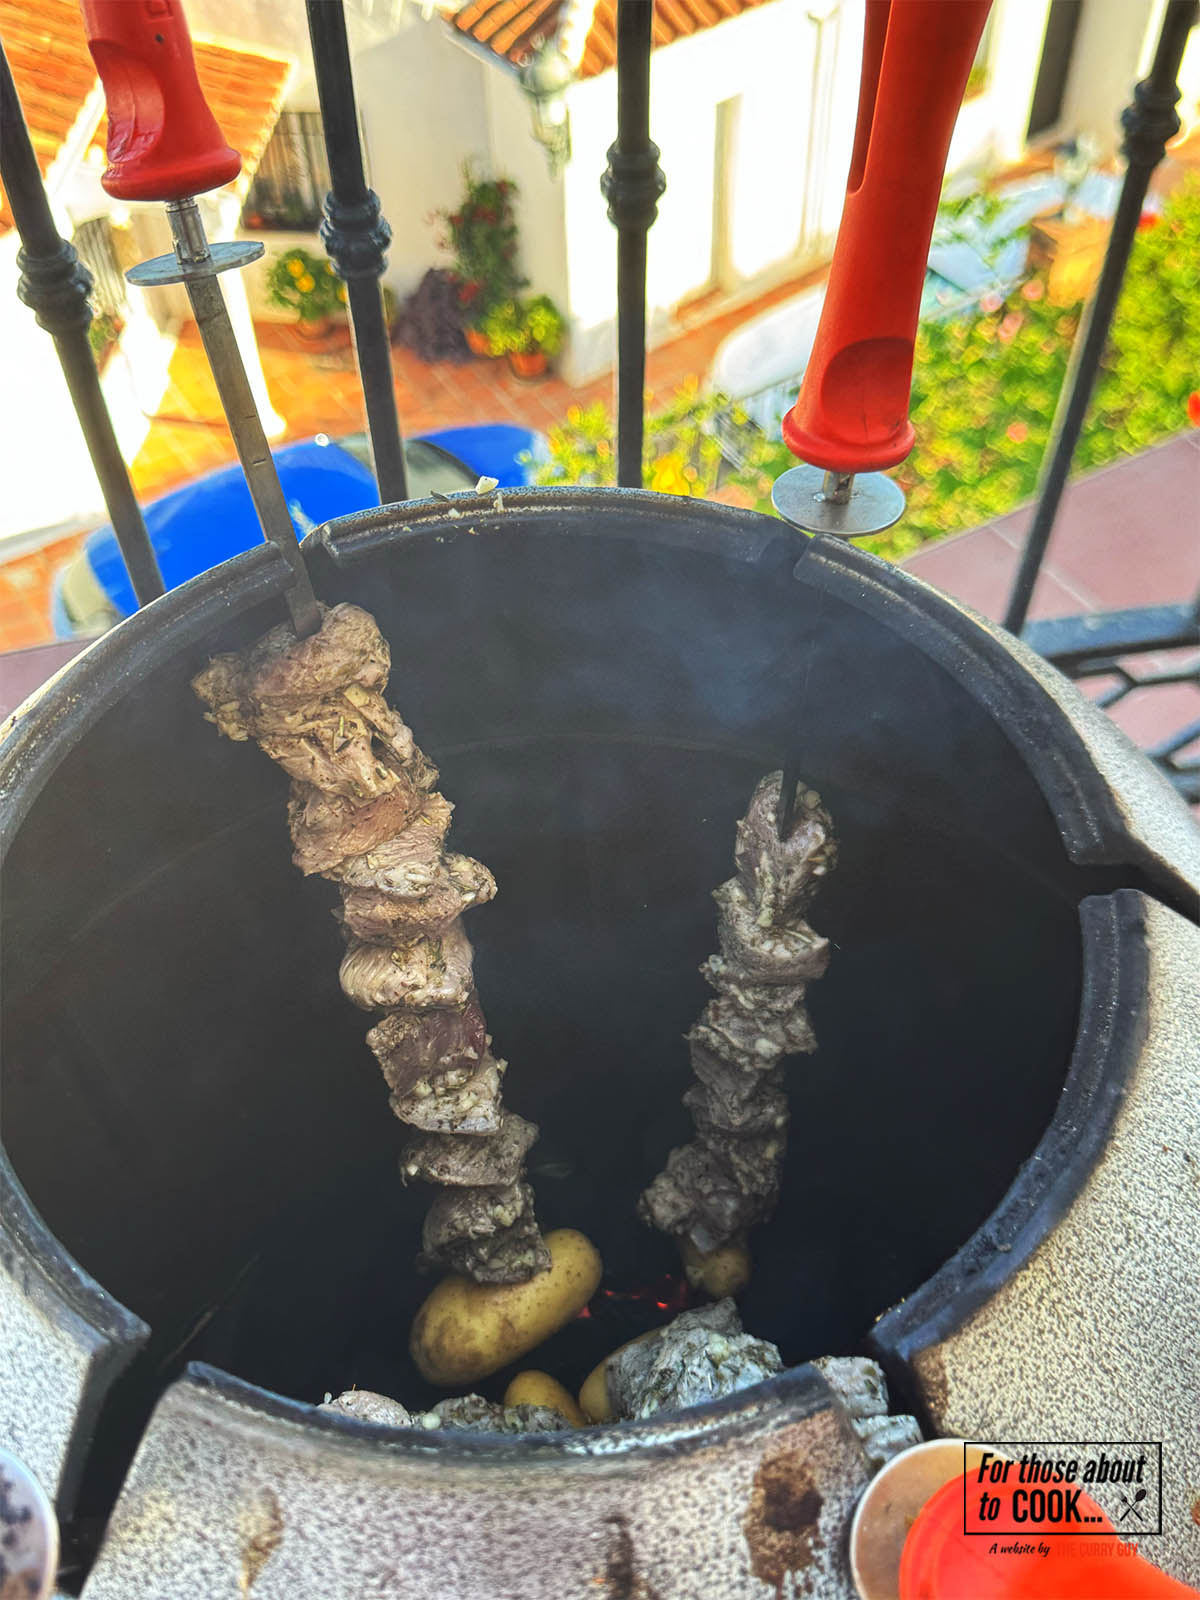
    Cooking the pork souvlaki in a tandoor oven.
    1. Step 4: Watch it carefully but the whole cooking process should take no more than about 15 minutes.

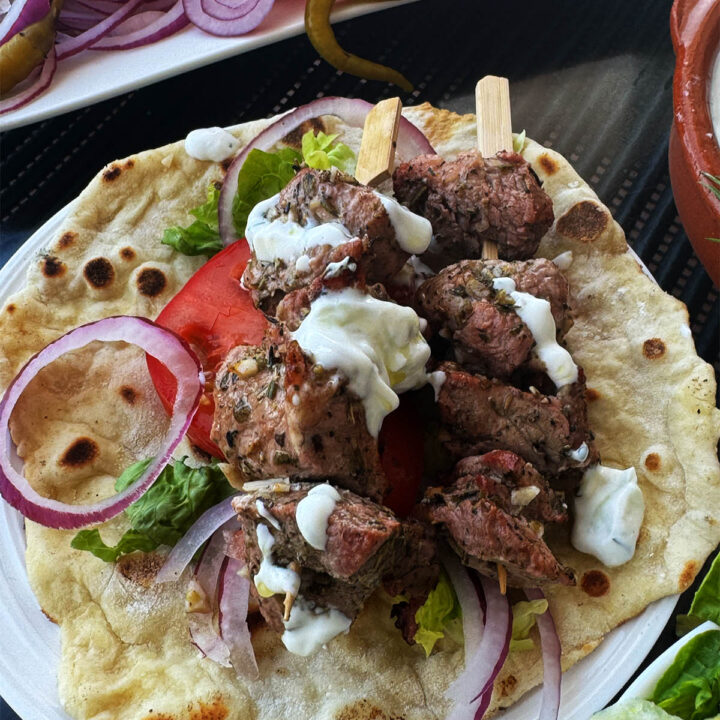
    Pork souvlaki on a pita with tzatziki and salad vegetables.
    1. Step 3: One of the most popular ways to serve pork souvlaki is on a pita topped with tzatziki and crisp salad vegges.
    Pork souvlaki rolled up in a pita with tzatziki and crisp salad veggies.
    1. Step 4: Roll it all up and enjoy some of the best Greek street food there is!

    What Is Souvlaki?

    Souvlaki (pronounced soov-LAH-kee) is the Greek term for small skewers of grilled meat, usually pork, although chicken, lamb, and beef versions exist. The word comes from souvla, meaning "spit" or "skewer." While it may look similar to kebabs or satay, souvlaki has its own distinctive identity rooted in Greek culinary tradition.

    In Greece, pork is the most traditional and popular choice, and it’s typically served:

    • On the skewer (as a snack or meze)
    • In a pita wrap with toppings
    • On a plate with fries, salad, and tzatziki

    The dish is beloved for its simplicity, flavor, and freshness and is one of the most popular Greek street foods.

    A Brief History of Souvlaki

    Souvlaki dates back thousands of years. In fact, archaeological evidence shows that the ancient Greeks were cooking meat on skewers over open flames as early as the 17th century BCE. The tradition continued through the Byzantine era into modern Greece, where it became a staple of urban street food in the 20th century.

    Today, souvlaki is found at every corner grill, beach tavern, and family barbecue. Each region — and even each cook — has their own variation of the marinade and toppings, but the core remains the same: quality meat, balanced seasoning, and the smoky char of fire.

    Equipment You’ll Need

    As you will see from my photos above, I used a Doori tandoor to cook my pork souvlaki. If using a barbecue, the following will come in handy.

    Meat thermometer: To ensure perfect doneness.

    Grill: Charcoal gives the most authentic flavor, but gas works well too. If using charcoal, be sure to use a good quality lump wood charcoal. I think of the charcoal as an ingredient as it does add amazing, smoky, grilled flavor.

    Skewers: Metal or soaked wooden skewers.

    Mixing bowls: For marinating and prepping toppings.

    Tongs: For flipping skewers safely.

    Storage and Reheating Instructions

    Storage

    • Cooked souvlaki can be stored in an airtight container in the fridge for up to 3 days.
    • Freeze uncooked, marinated pork for up to 2 months — just thaw and skewer when ready to grill.

    Reheating

    Avoid the microwave if possible, as it can dry out the meat.

    Reheat gently in a skillet with a splash of olive oil.

    Top Tip

    Marinate the meat overnight but don’t add the lemon juice until 30 minutes to 4 hours before you start cooking.

    Final Thoughts

    Authentic pork souvlaki is a dish that proves the power of simplicity. With just a handful of ingredients and a grill, you can recreate the magic of a Greek street-side taverna in your own backyard. Whether served on a skewer, wrapped in a warm pita, or plated with fresh sides and sauces, souvlaki is the kind of meal that brings people together.

    So fire up the grill, grab a lemon, and let the scent of sizzling pork and oregano transport you straight to the Mediterranean.

    FAQ

    Can you use chicken instead of pork?

    Yes! The souvlaki marinade goes well with many different meats such as lamb, beef and chicken. I tend to vary the marinade a little for different meats but not much. I just do it to keep things interesting.

    What is the difference between pork souvlaki and gyros?

    Souvlaki is grilled chunks of meat on skewers. Gyro is spit-roasted meat shaved off a vertical rotisserie. The seasoning and presentation are often but not always different, though the toppings and pita are similar.

    Can you make pork souvlaki in the oven?

    Yes. Place the pork skewers under a grill (broiler) and turn often until charred and cooked through.

    More Mediterranean Recipes? Try These…

    Looking for other recipes like this? Try these:
    • Black paella served in a paella pan
      Black Paella - Arroz Negre
    • Paella Valenciana in a paella pan.
      Paella Valenciana
    • Tzatziki in a serving bowl
      Tzatziki
    • Moules Mariniere on a serving plate.
      Moules Mariniere

    Recipe

    Pork souvlaki on a pita with tzatziki and salad vegetables.

    Pork Souvlaki

    Yield: 4 to 6
    Prep Time: 10 minutes
    Cook Time: 15 minutes
    Total Time: 25 minutes

    You are going to love the traditional recipe for pork souvlaki! It is easy to prepare and you don’t need a lot of difficult to find ingredients. It’s a recipe you need to try soon!

    No Ratings

    Ingredients

    • 2.2lbs (1 kg) pork loin, neck or shoulder, cut into bit sized pieces
    • ¼ cup (70ml) extra virgin olive oil
    • Juice of two large lemons
    • 6 garlic cloves, minced
    • 1 teaspoon dried thyme
    • 2 teaspoon dried oregano
    • 2 teaspoon rosemary, finely chopped
    • 2 teaspoon salt
    • 2 teaspoon black pepper

    Instructions

    1. Add the marinade ingredients to the pork in a bowl. If you would like to marinate the meat for longer than 4 hours (recommended) don’t stir in the lemon juice until 30 minutes to 4 hours before cooking.
    2. Rub this marinade right into the flesh of the pork. You can go straight to cooking if you like but I recommend marinating the meat for at least 4 hours or overnight.
    3. When ready to cook, skewer the meat onto metal or wooden skewers. This recipe works very well in my tandoor but you could go more authentic and cook it over a direct heat fire on your barbecue, turning and basting regularly with any leftover marinade until charred and cooked through.
    4. Watch it carefully but the cooking process should take no more than about 15 minutes.
    5. When cooked to your liking, transfer the skewers to a cutting board and let them rest for about five minutes. Then serve on pitas with tzatziki and crisp salad veggies.
    Nutrition Information:
    Yield: 6 Serving Size: 1
    Amount Per Serving: Calories: 364Total Fat: 15gSaturated Fat: 5gTrans Fat: 0gUnsaturated Fat: 8gCholesterol: 133mgSodium: 878mgCarbohydrates: 10gFiber: 2gSugar: 6gProtein: 45g
    © Dan
    Cuisine: Greek / Category: Greek Recipes

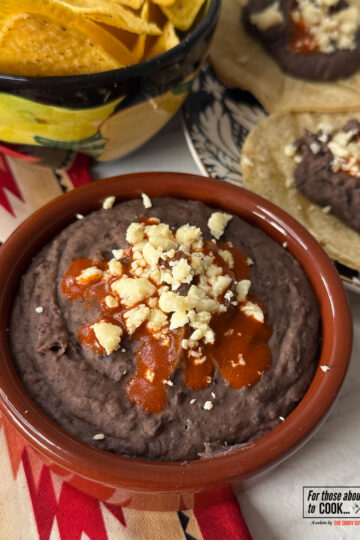
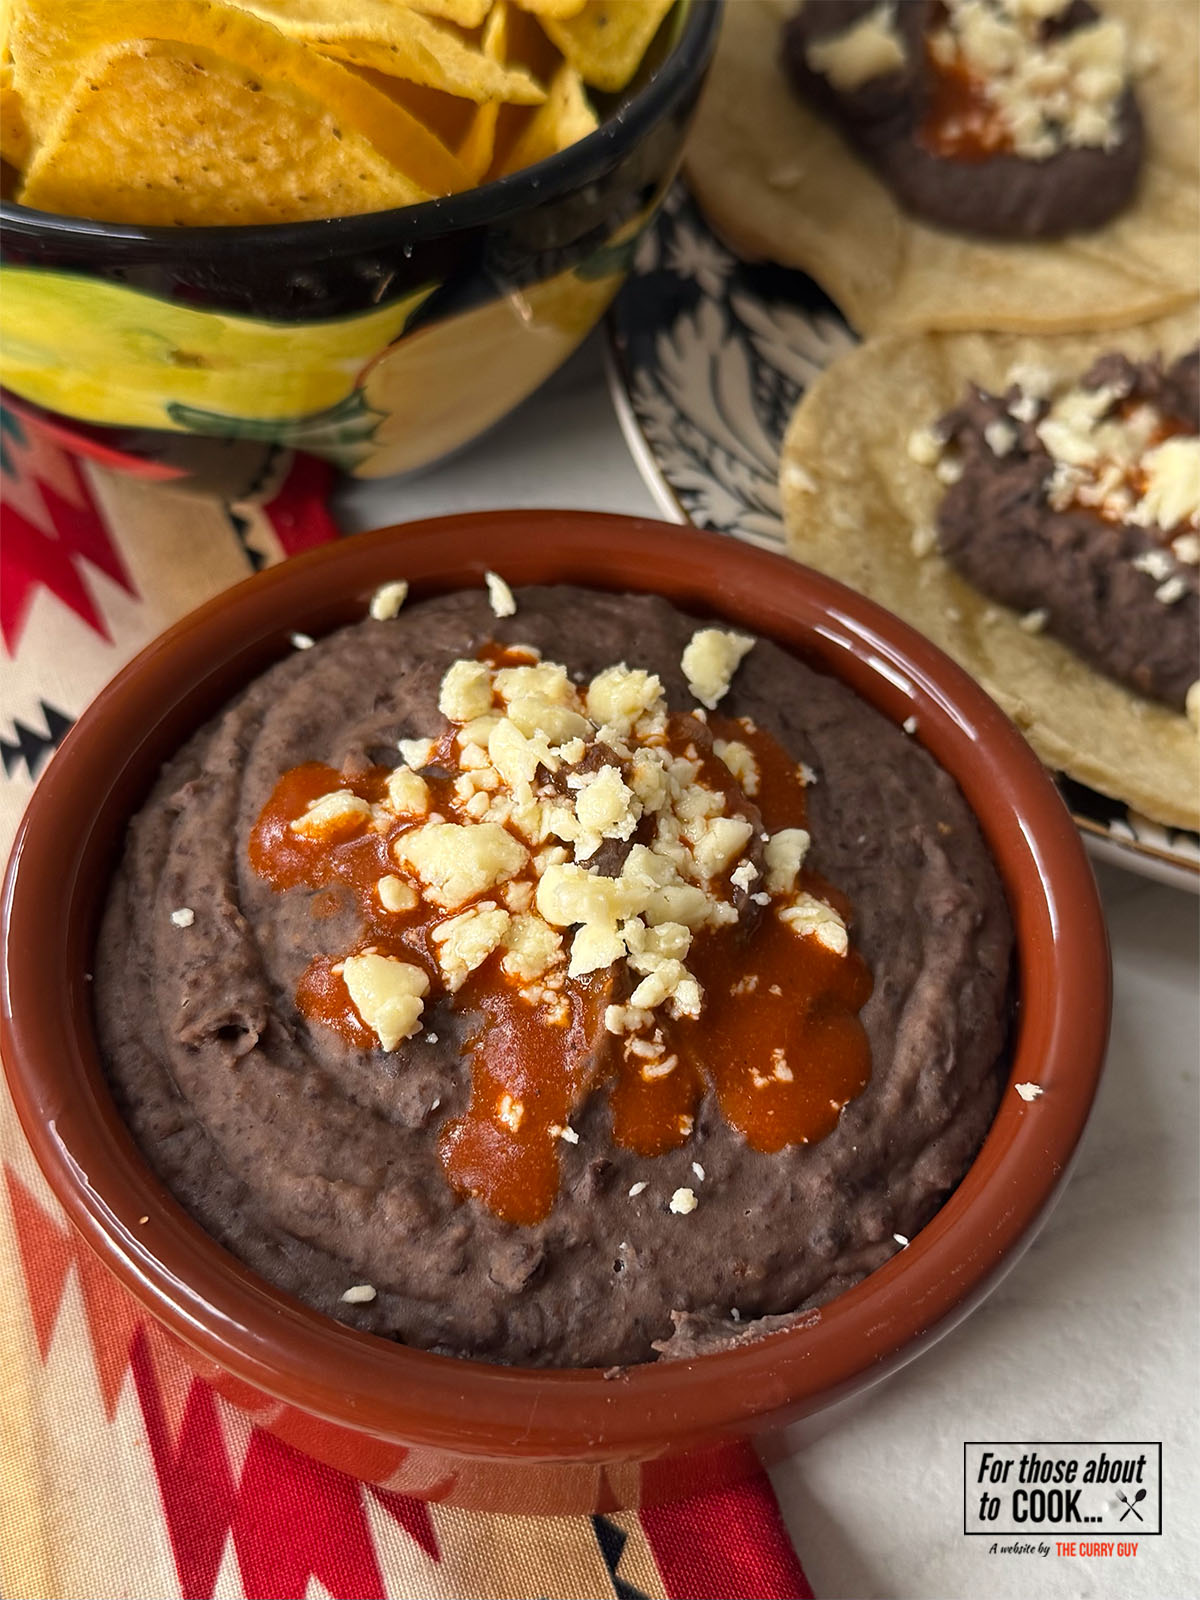
    Refried Black Beans

    July 18, 2025 By Joe

    Refried Black Beans

    Rich, delicious and oh so moreish! These Refried Black Beans are so easy to make and can be added to so many of your favorite Mexican recipes! You have to give these a try!

    Refried Black Beans

    About this recipe:

    Refried black beans are an immensely flavorful dish that can be made using ingredients you'll already have in your pantry! By simply mashing black beans with delicious Mexican spices, you'll have yourself the perfect dip for your homemade tortilla chips or the perfect topping for your tacos and tostadas! You have to give these Refried Black Beans a try!

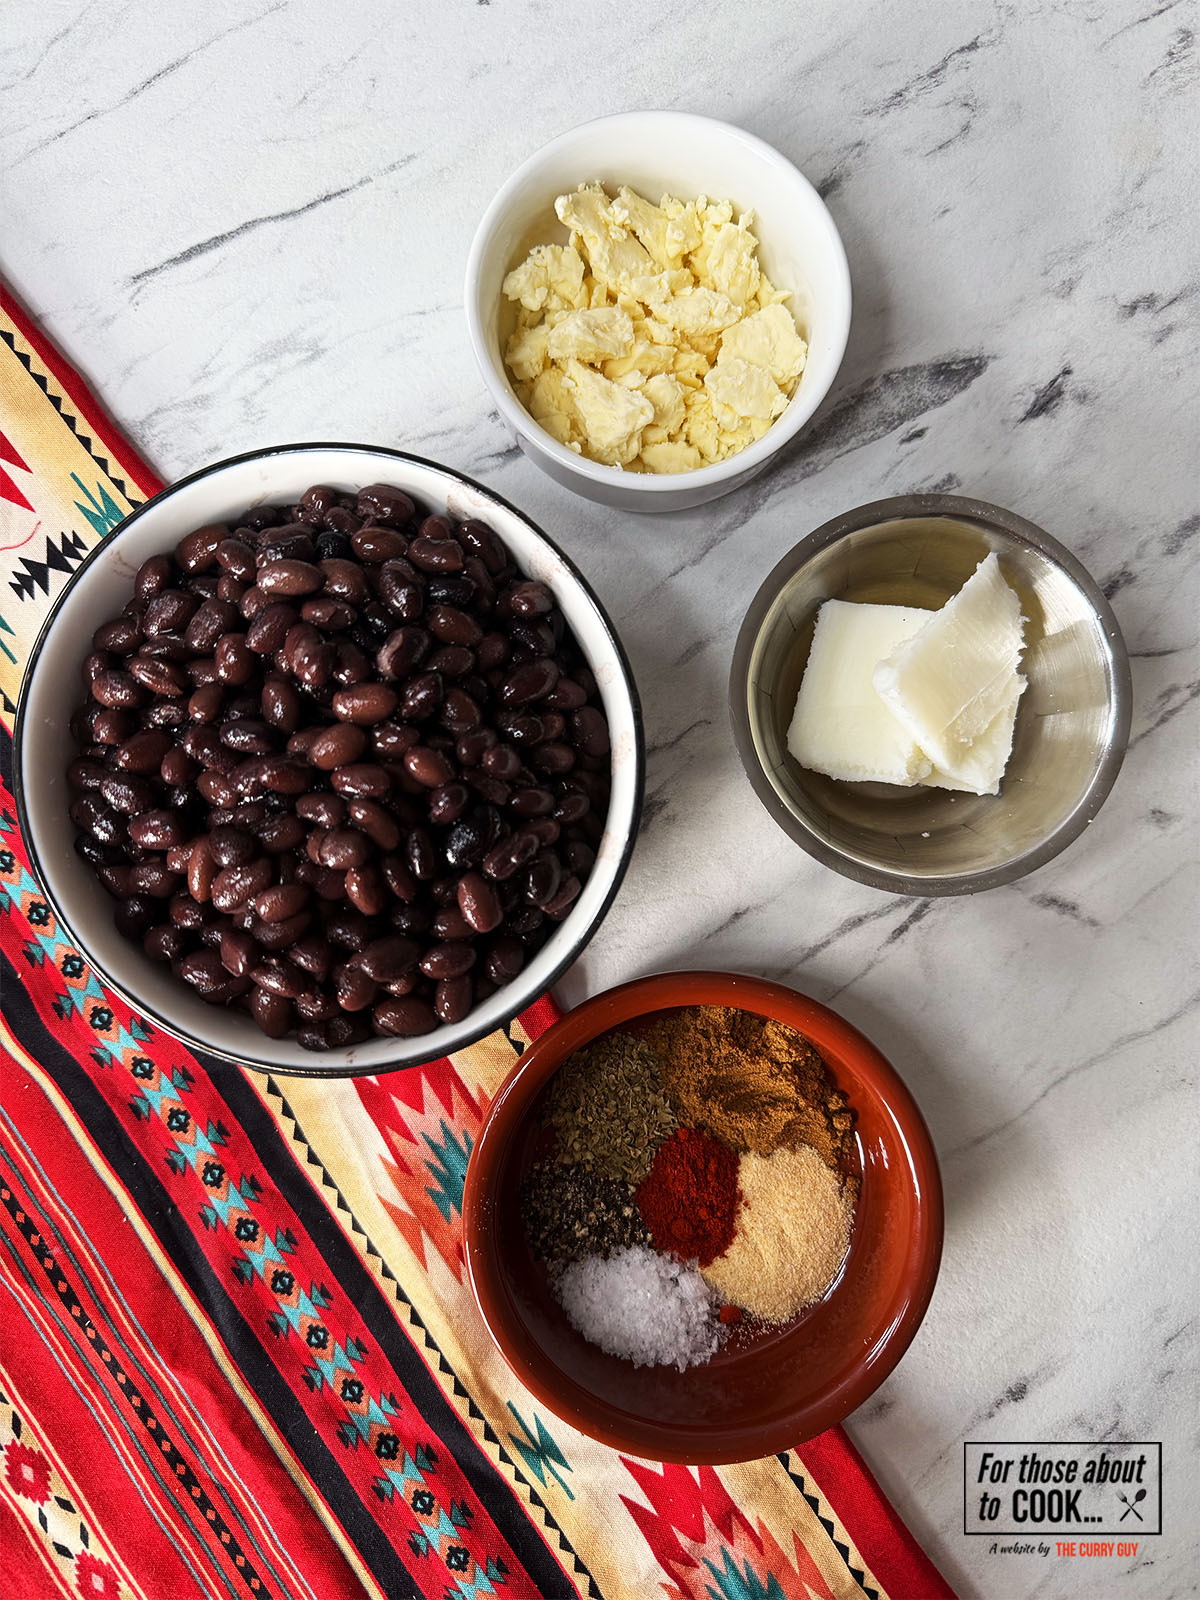
    Ingredients

    Ingredients for refried black beans
    • Tinned black beans
    • Lard or olive oil
    • Salt
    • Black pepper
    • Mexican oregano
    • Cumin
    • Cayenne chili pepper
    • Garlic powder
    • Queso Fresco (or any mild, crumbly cheese)

    See recipe card for quantities.

    Step by step photographs:

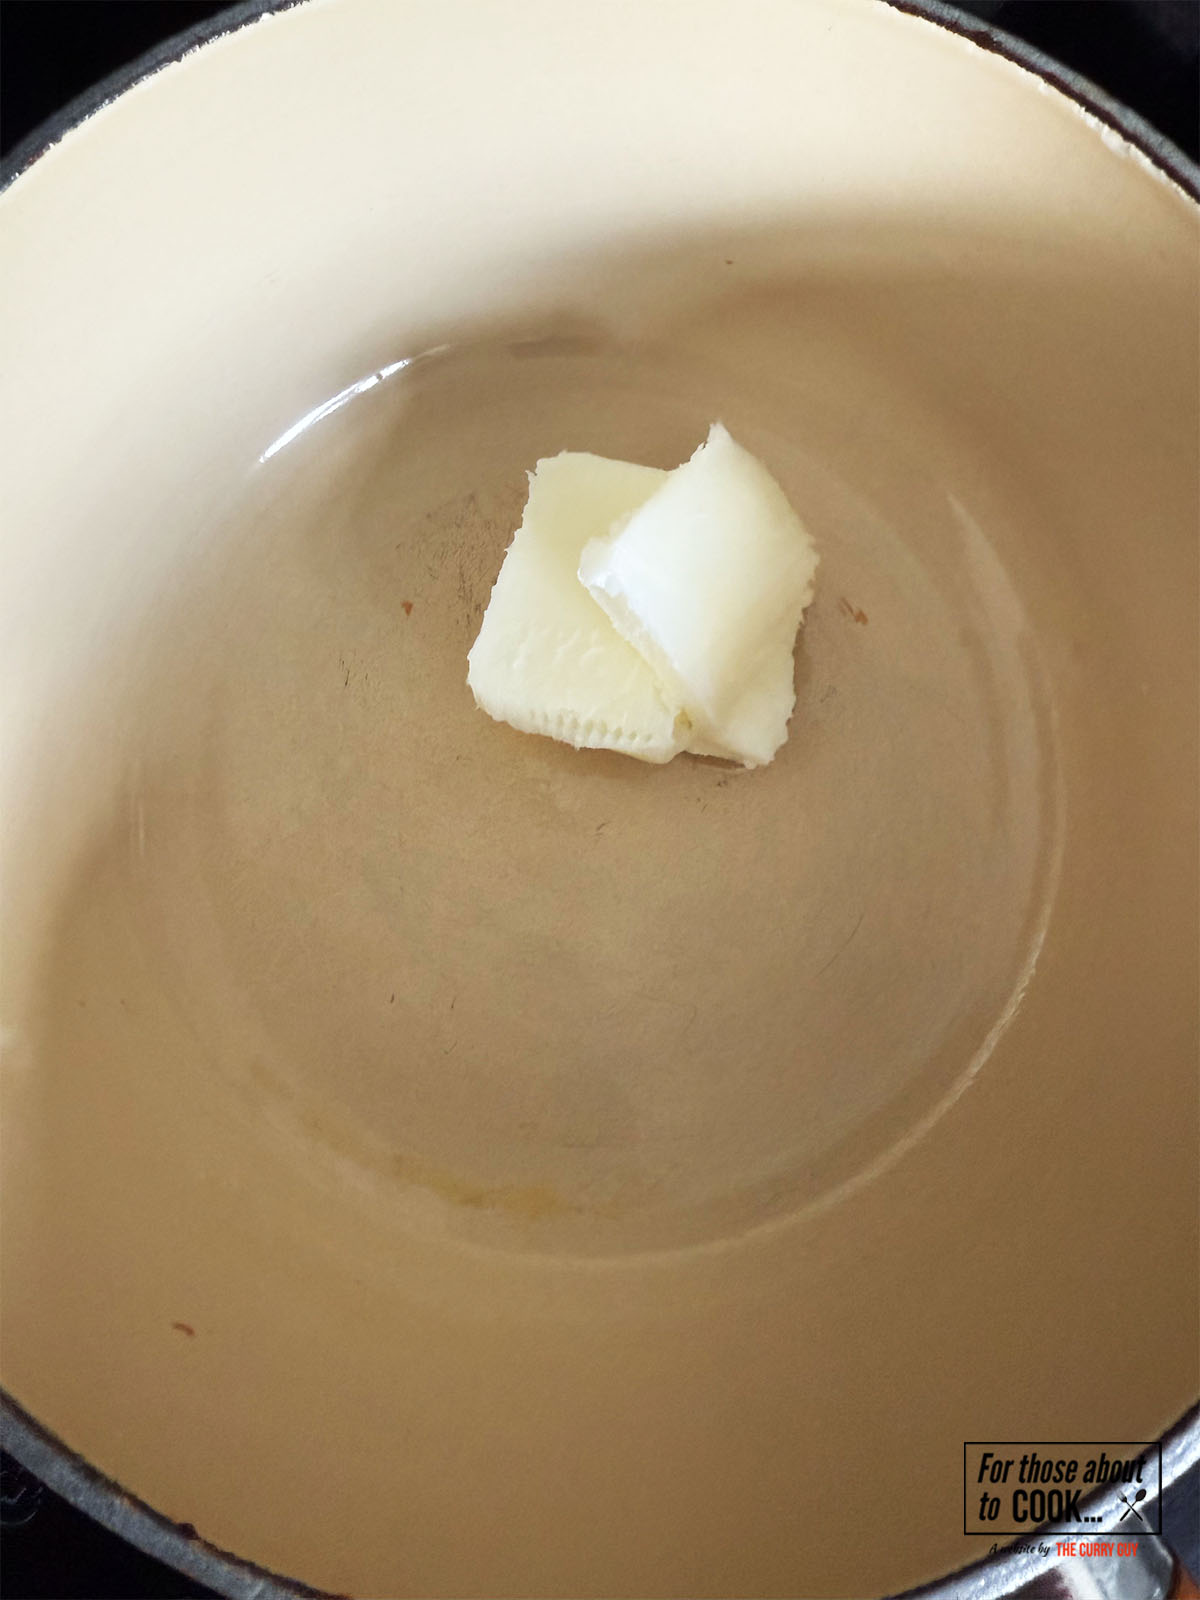
    melting lard in a pan
    1. Step 1: Over a medium low heat, in a saucepan, melt your lard or heat your olive oil.
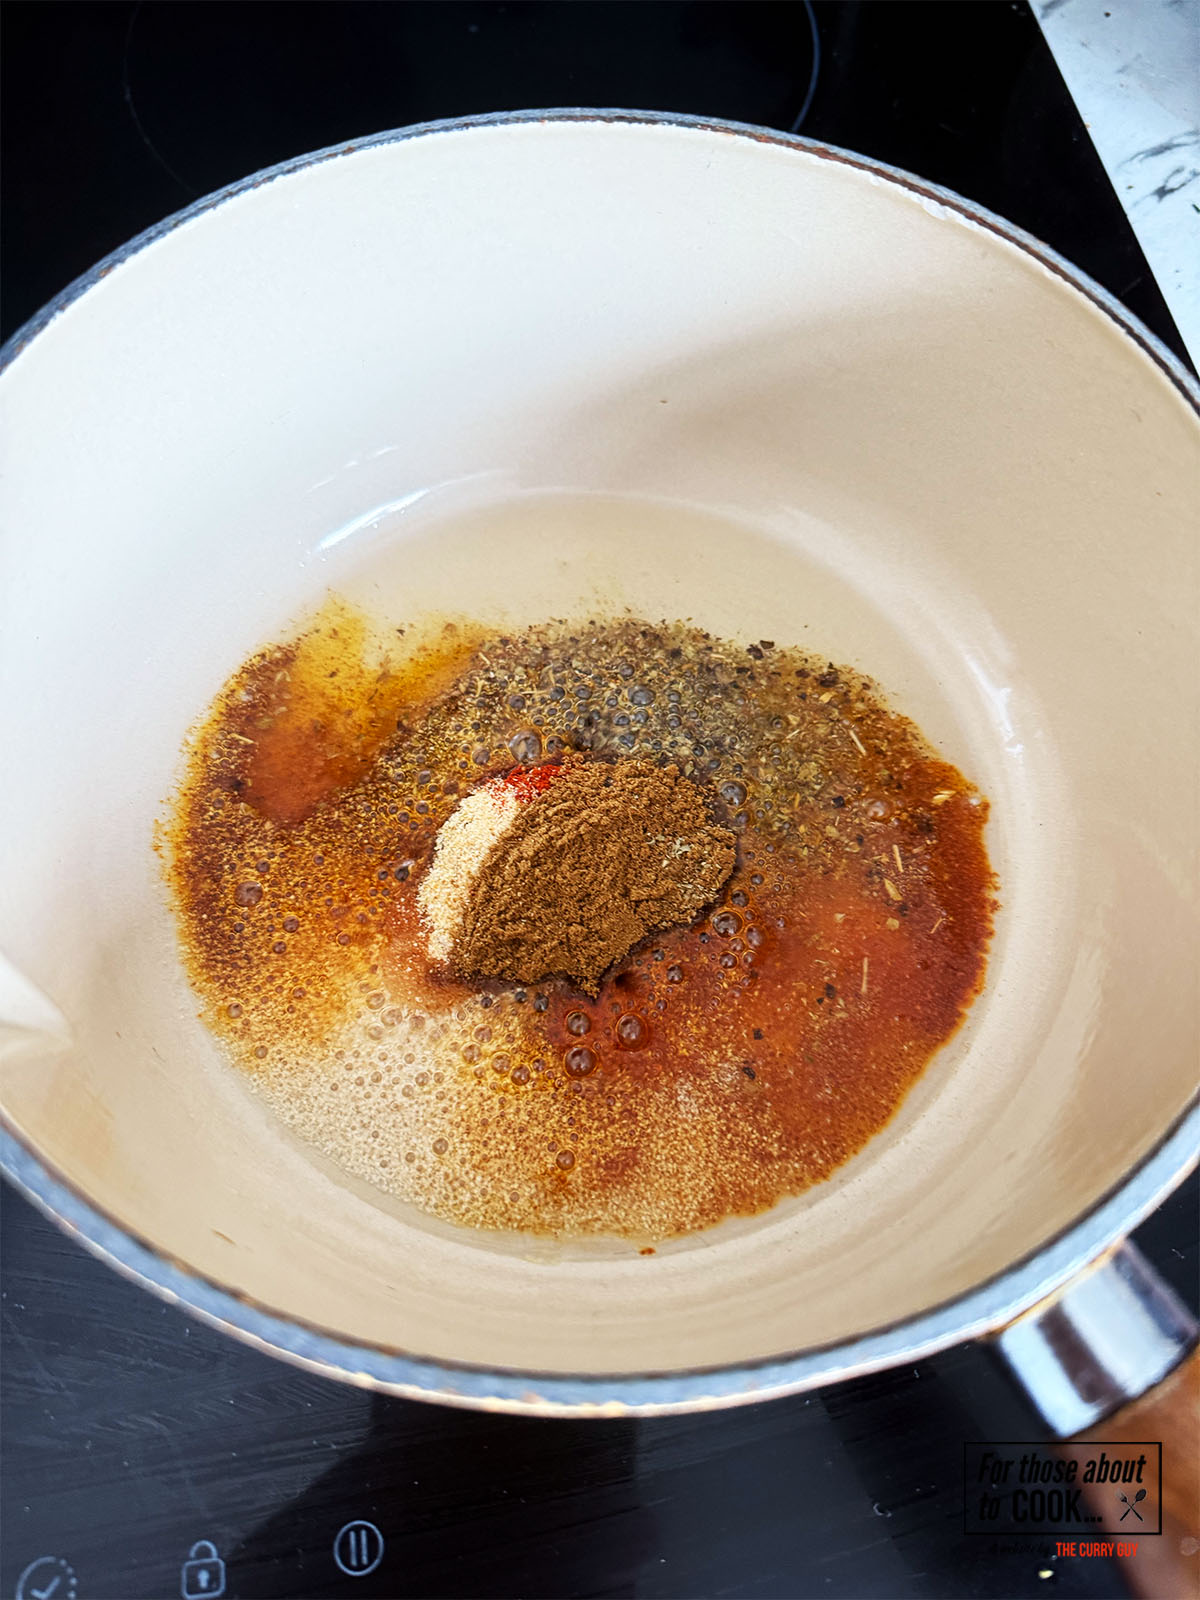
    spices added to the pan
    1. Step 2: Add the spices to the pan and stir together.
    adding  beans to the pan
    1. Step 3: Add the black beans and combine with the fat and the spices.
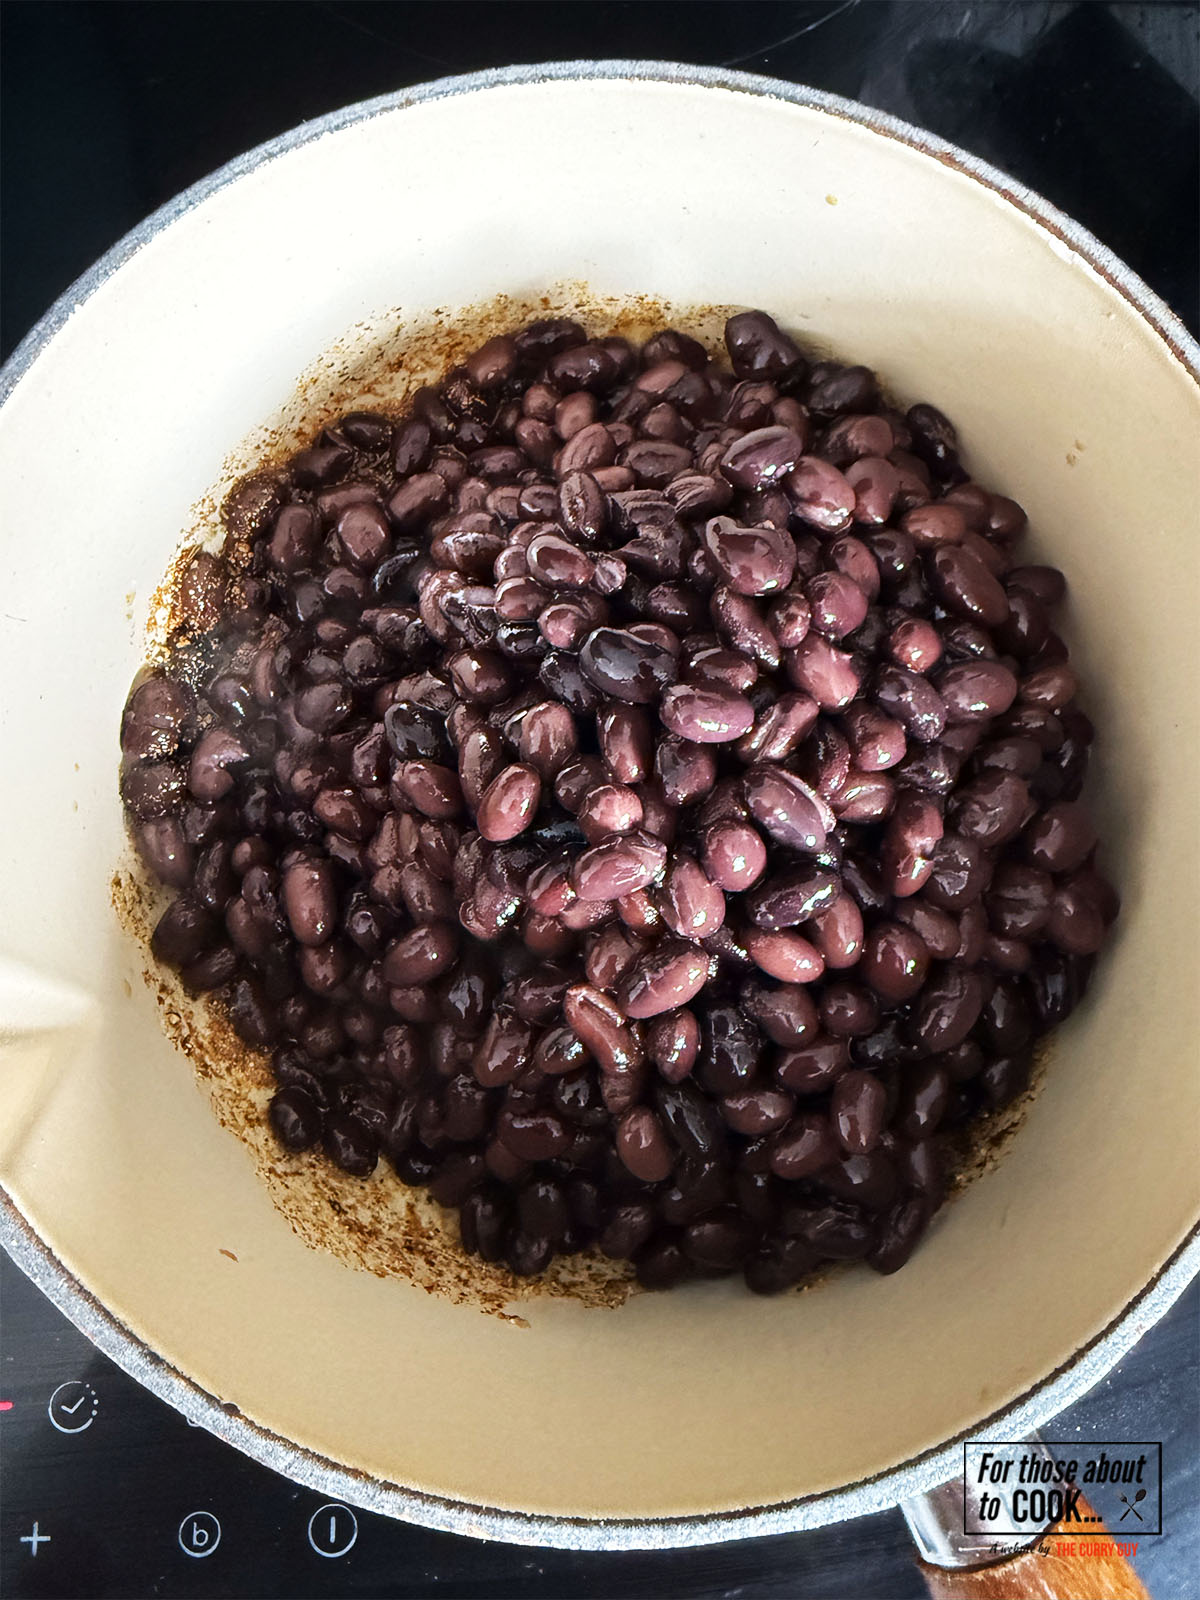
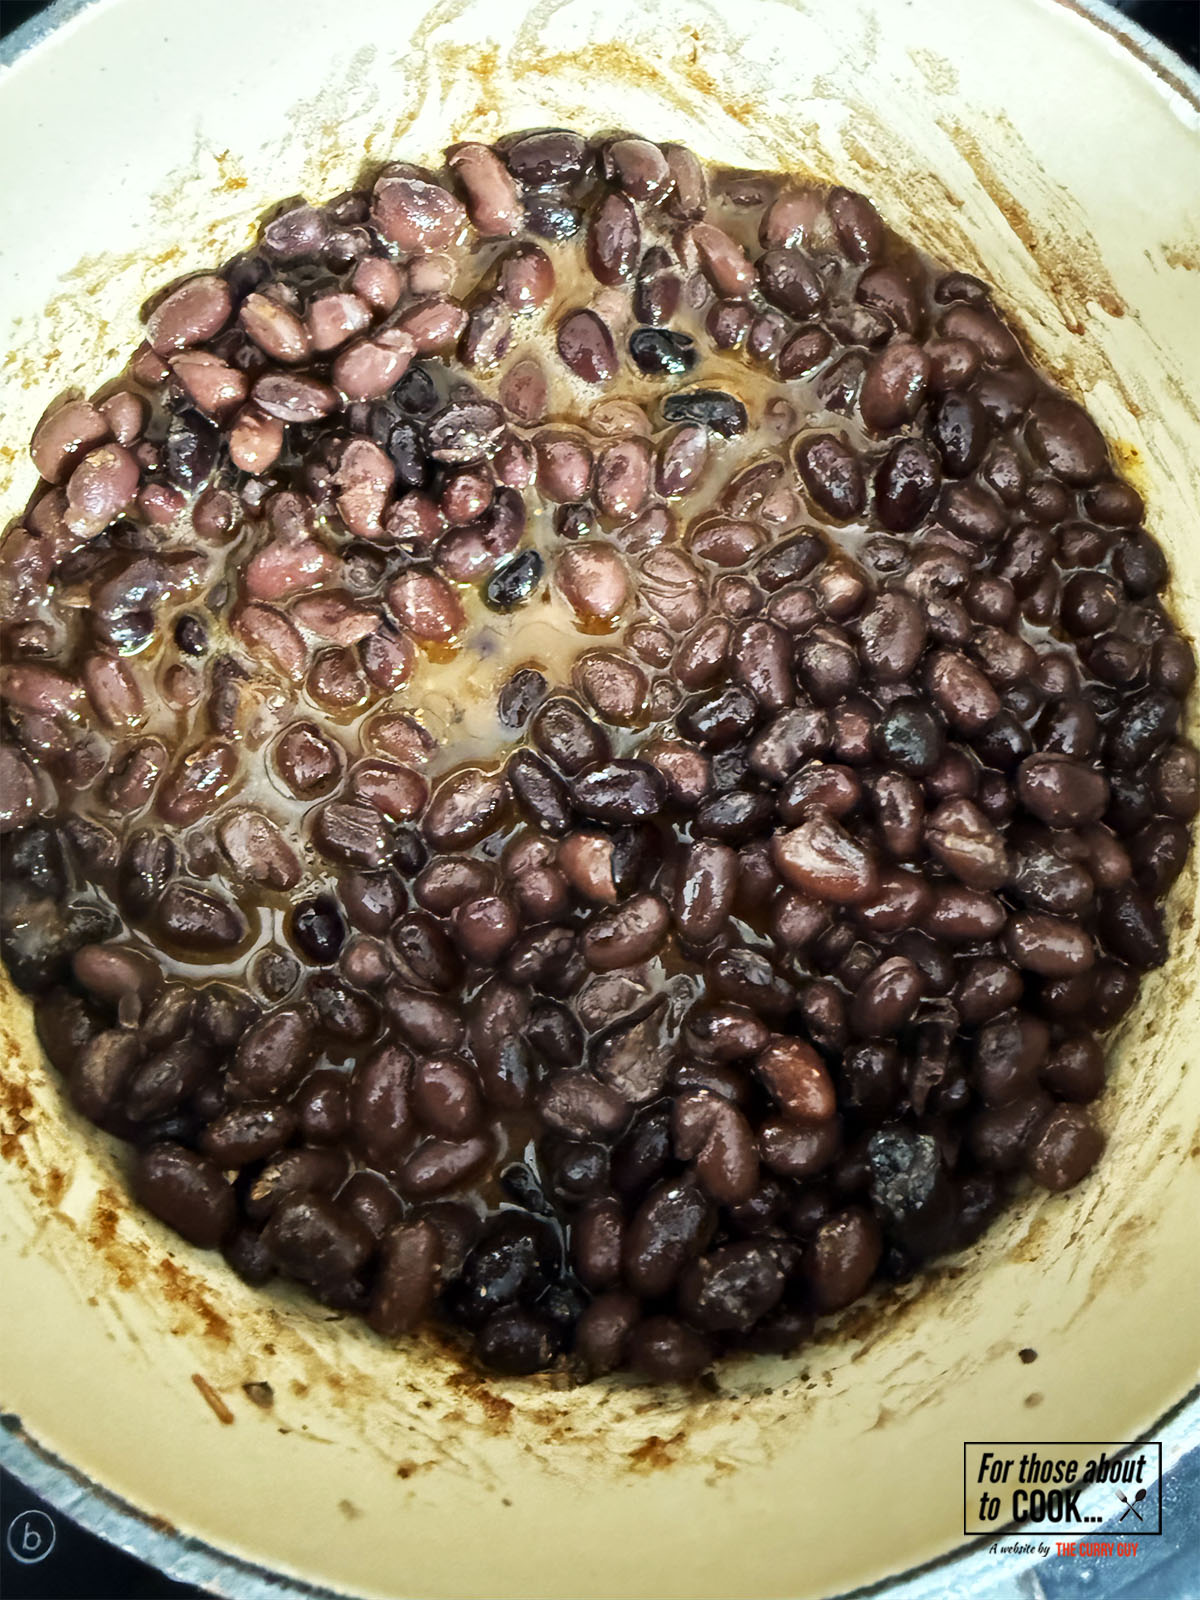
    cooking the beans
    1. Step 4: Add a touch of the retained liquid from the beans and allow to cook through and simmer for no longer than 5 minutes. This is just to heat up the beans.
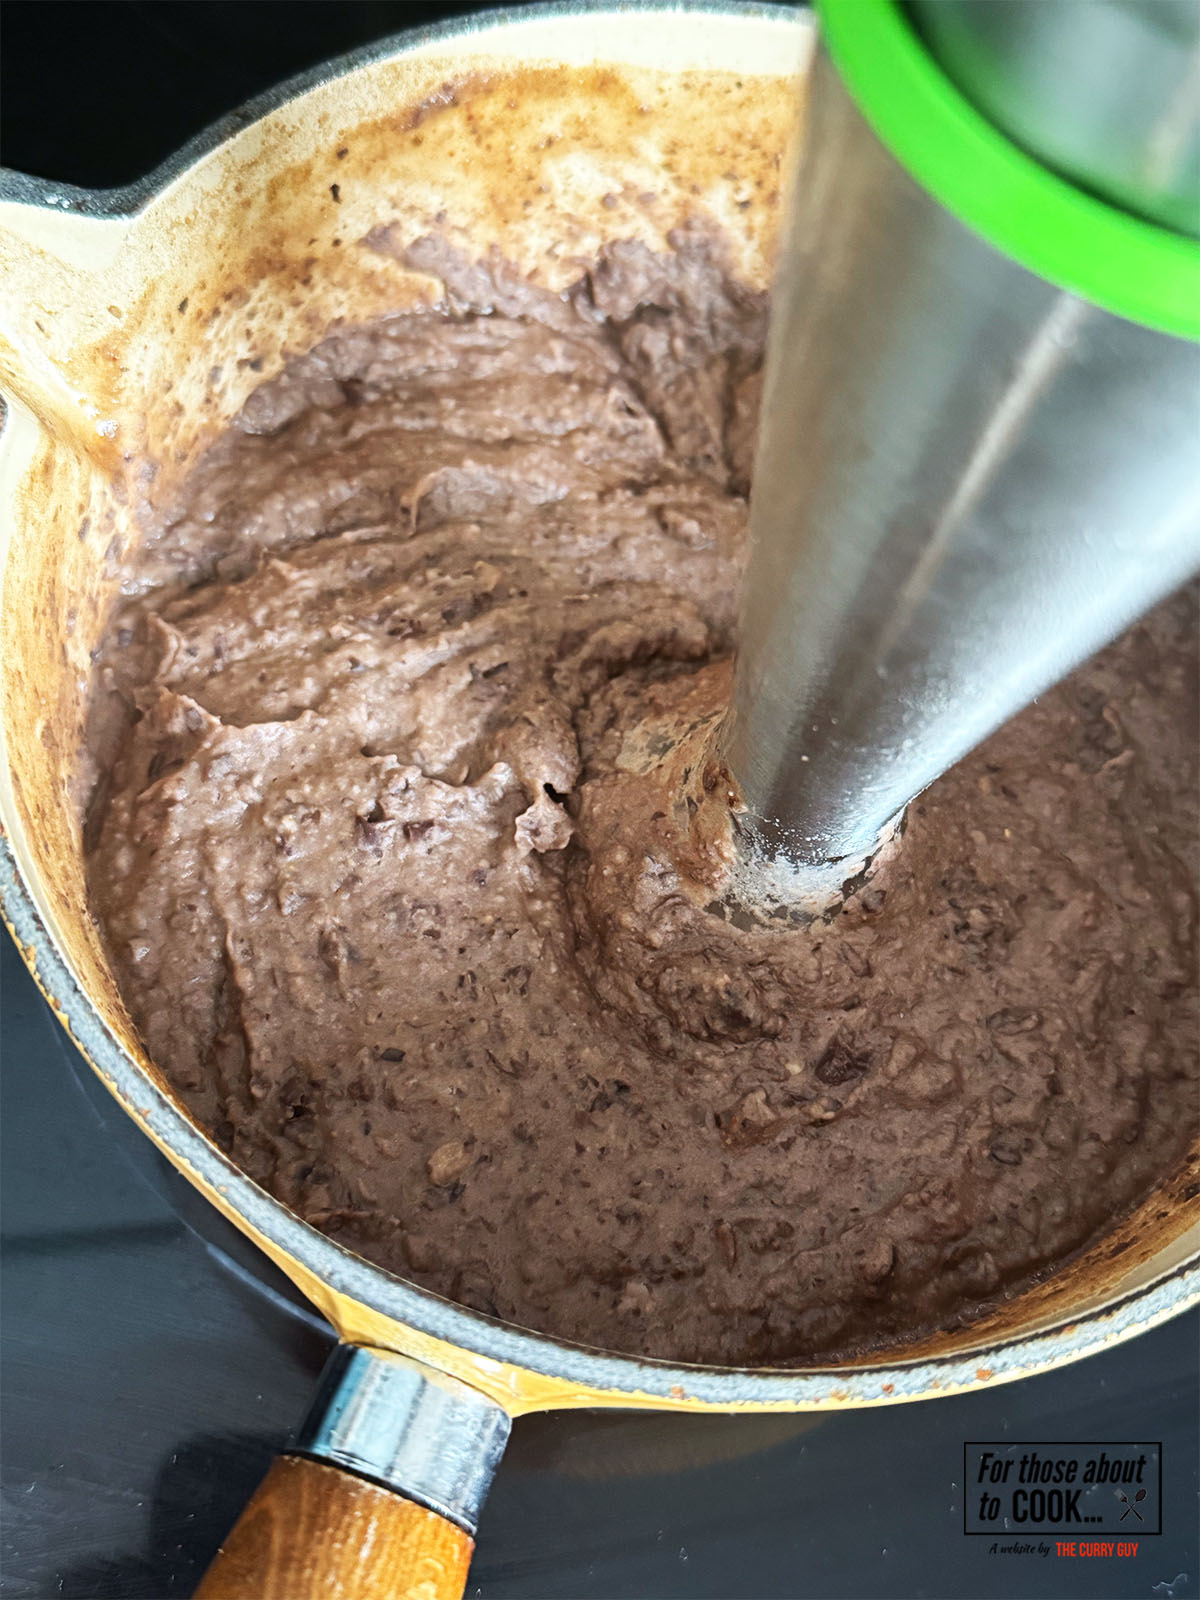
    blending the black beans
    1. Step 5: Using a handheld blender or masher, blend/mash/ the refried black beans to your desired consistency. Feel free to add a touch more of the retained liquid.
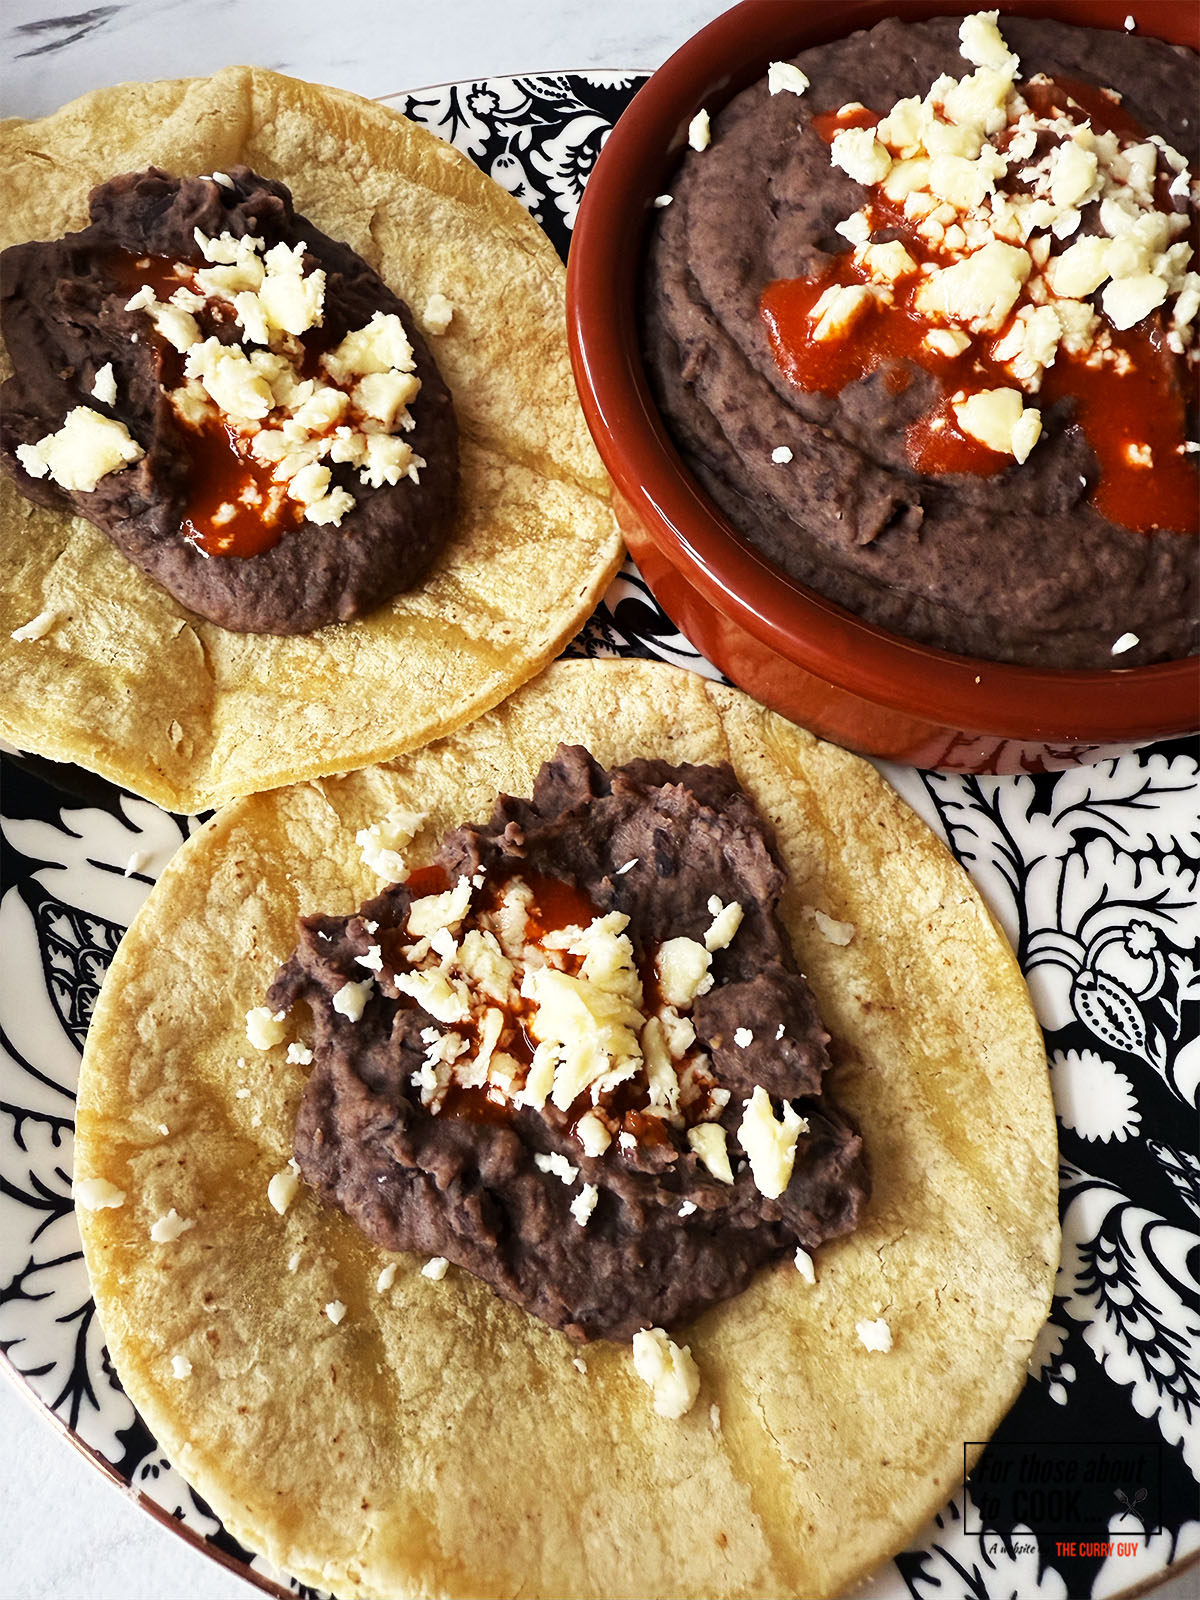
    Refried black bean tacos
    1. Step 6: Top with the cheese then serve as a dip for some tortilla chips or load up some tacos. The options are endless.

    Substitutions

    • Cheese - If you can source it, Queso Fresco cheese is an authentic cheese to use. Any mild, crumbly cheese will do however. From making plenty of Mexican recipes using ingredients that can be sourced in the UK, I've found that Wensleydale cheese works great. It crumbles beautifully and can be sprinkled on top of tacos without it melting.
    • Oregano - If you can source Mexican oregano you will end up with a more authentically flavored Refried Black Beans or you can use standard oregano. Mexican oregano has slightly bigger, more jagged leaves and provides a citrusy flavor that normal oregano doesn't provide.

    What can I serve these with?

    Refried Black Beans can be used as a delicious dip for corn chips or vegetable sticks or used to top so many Mexican recipes. Here are a few ideas:

    • Homemade tortilla chips - Why not use it to dip these homemade tortilla chips in?
    • Tacos - Drizzle a healthy amount on these Fish Tacos, Steak Tacos, Tacos al Pastor, Pork carnitas or even Smash burger Tacos!
    • Tostadas - Why not top these Beef Tostadas or Tostadas de Tinga with these delicious Refried Black Beans?

    Variations

    • Dried black beans - If you are using dried black beans, simply soak 1 and ½ cups in 3 inches of water overnight. Then, place in a pot and cover with water. Boil for 1 ½ to 2 hours or pressure cook for 30 minutes. Then follow the steps below to make your Refried Black Beans.
    • Tinned black beans - Tinned blacked beans are usually already cooked so only need to be drained and heated through before blending.

    Equipment

    To make these Refried Black Beans super silky and smooth I used a hand blender. You can blend the beans in batches using a standing blender instead. Alternatively, you can use a masher and mash them by hand!

    Storage

    Transfer the Refried Black Beans to an airtight container and place in the fridge. Good for up to 5 days.

    Top Tip

    Use a hand blender to easily blend large batches of Refried Black Beans.

    FAQ

    Are refried black beans actually fried twice?

    No! Despite what the name suggests, the beans are quickly fried once with the oil and seasonings!

    Related

    Looking for other recipes like this? Try these:
    • Pico de gallo in a serving bowl next to homemade corn chips.
      How to Make Pico de Gallo
    • Homemade Guacamole in a serving bowl next to corn chips.
      Guacamole Recipe
    • Fnished corn chips
      Corn Chips
    • Salsa de aguacate served in a bowl
      Salsa de Aguacate

    Pairing

    These are my favorite dishes to serve with Refried Black Beans:

    • Pork carnitas tacos
      Pork Carnitas Tacos
    • Tostadas de tinga drizzled with chipotle mayo and sprinkled with coriander
      Tostadas de Tinga
    • Finished tostadas topped with wensleydale cheese, coriander and salsa de aguacate
      Beef Tostada
    • Steak tacos on a plate.
      Steak Tacos

    Recipe

    Refried Black Beans

    Refried Black Beans

    Yield: 4
    Prep Time: 5 minutes
    Cook Time: 10 minutes
    Total Time: 15 minutes

    Rich, delicious and oh so moreish! These Refried Black Beans are so easy to make and can be added to so many of your favorite Mexican recipes!

    No Ratings

    Ingredients

    • x2 Tinned black beans
    • 1 tablespoon lard or olive oil
    • 1 teaspoon salt
    • ½ teaspoon black pepper
    • 1 teaspoon mexican oregano
    • 1 ½ teaspoons cumin
    • ½ teaspoon cayenne chili pepper
    • 1 teaspoon garlic powder
    • ¼ cup (40g) Queso Fresco (or any mild, crumbly cheese)

    Instructions

      1. Over a medium low heat, in a saucepan, melt your lard or heat your olive oil.
      2. Add the cumin, black pepper, Mexican oregano, cayenne chilli powder and garlic powder to the pan and fry until fragrant.
      3. Add the black beans and combine with the fat and the spices.
      4. Add a splash of the retained liquid from the tinned beans and allow to cook through and simmer for no longer than 5 minutes. This is just to heat up the beans.
      5. Using a handheld blender or masher, blend/mash/ the refried black beans to your desired consistency. Feel free to add a touch more of the retained liquid.
      6. Top with the cheese then serve as a dip for some tortilla chips or load up some tacos. The options are endless.
    Nutrition Information:
    Yield: 4 Serving Size: 1
    Amount Per Serving: Calories: 128Total Fat: 7gSaturated Fat: 2gTrans Fat: 0gUnsaturated Fat: 5gCholesterol: 3mgSodium: 532mgCarbohydrates: 13gFiber: 4gSugar: 1gProtein: 4g
    © Joe

    Chipotle Mayo

    July 18, 2025 By Shannon

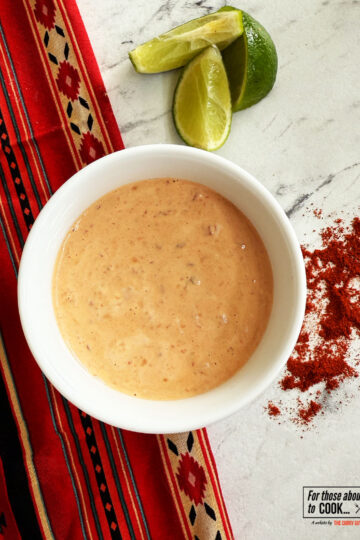
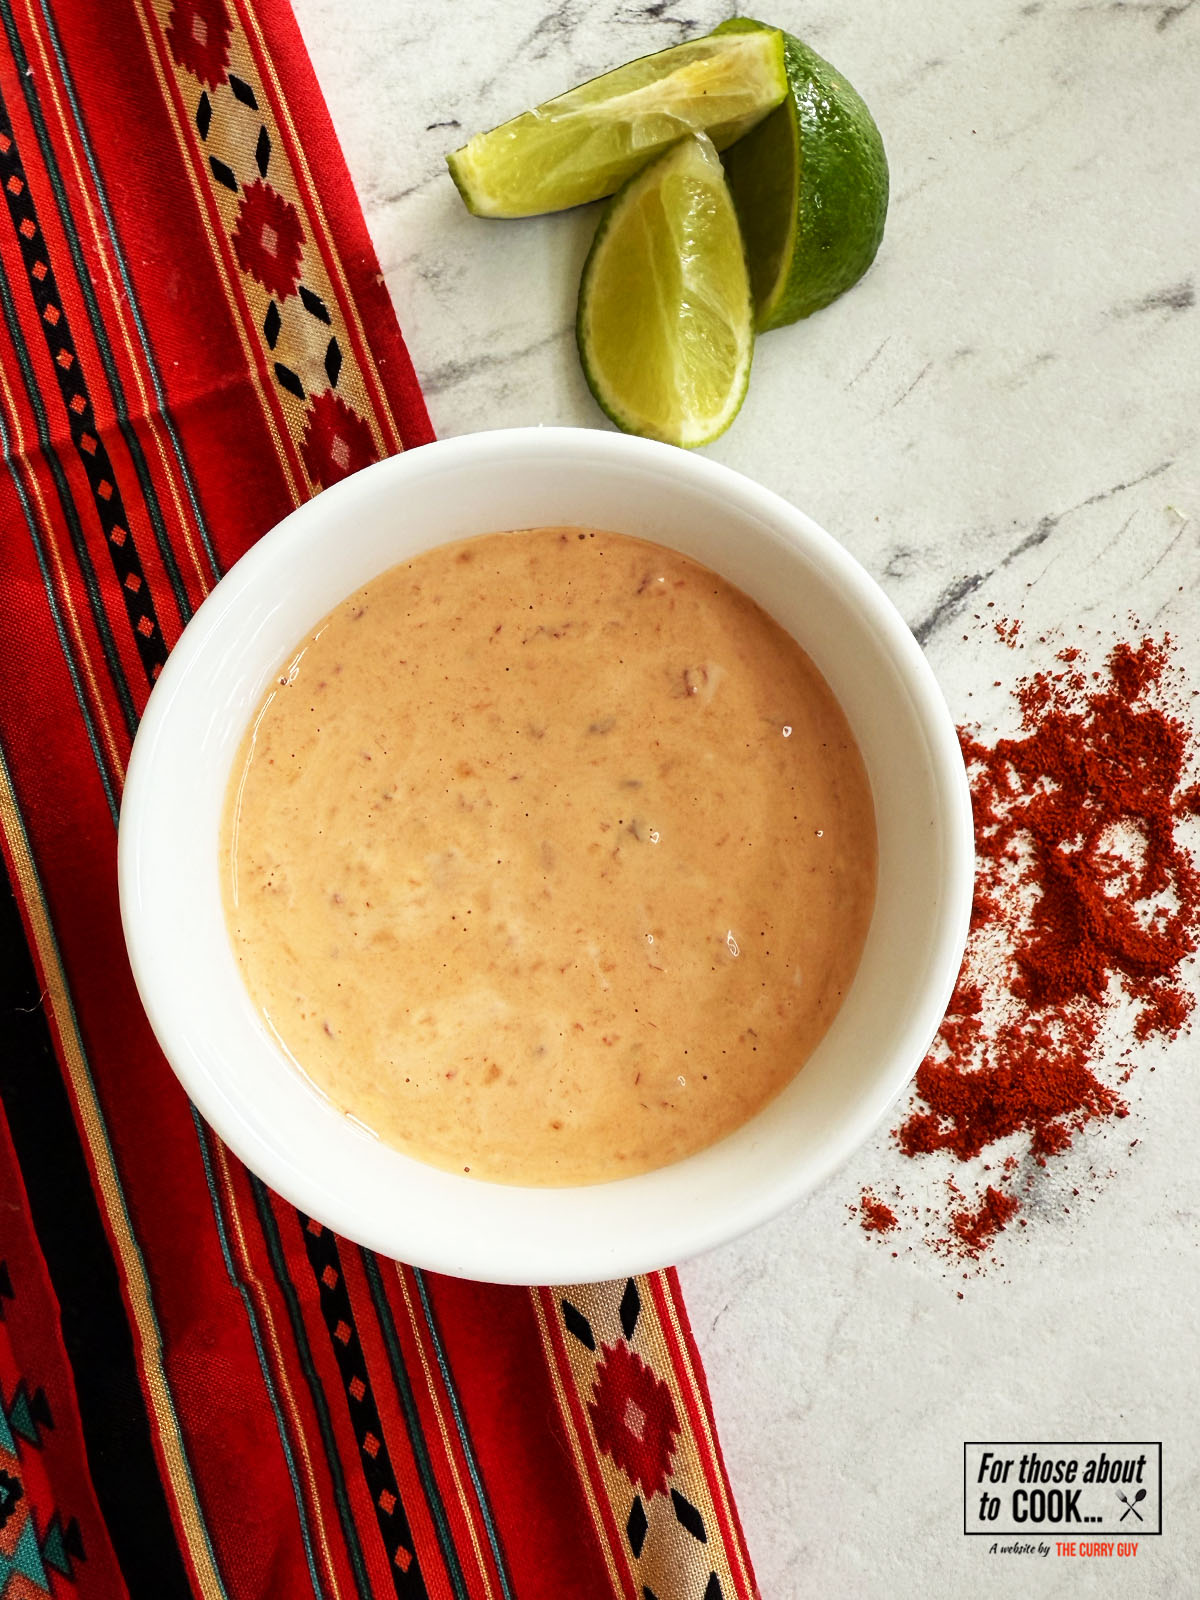
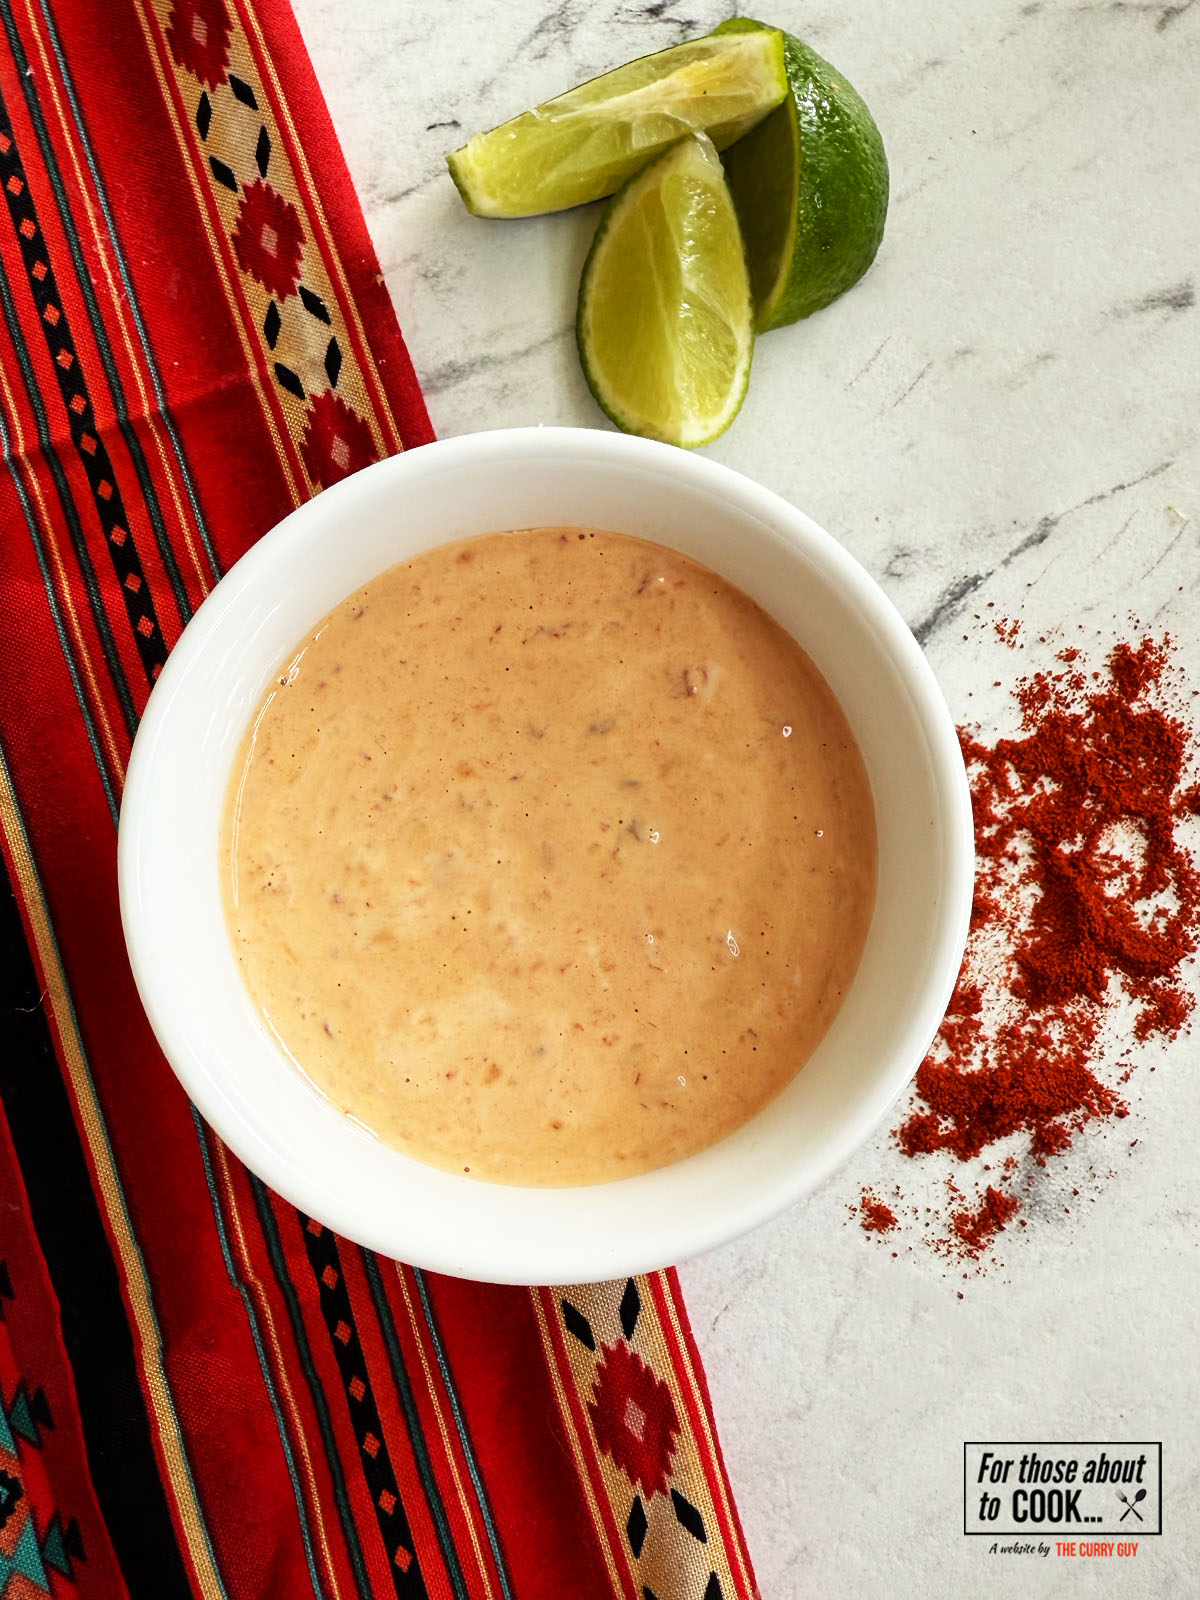
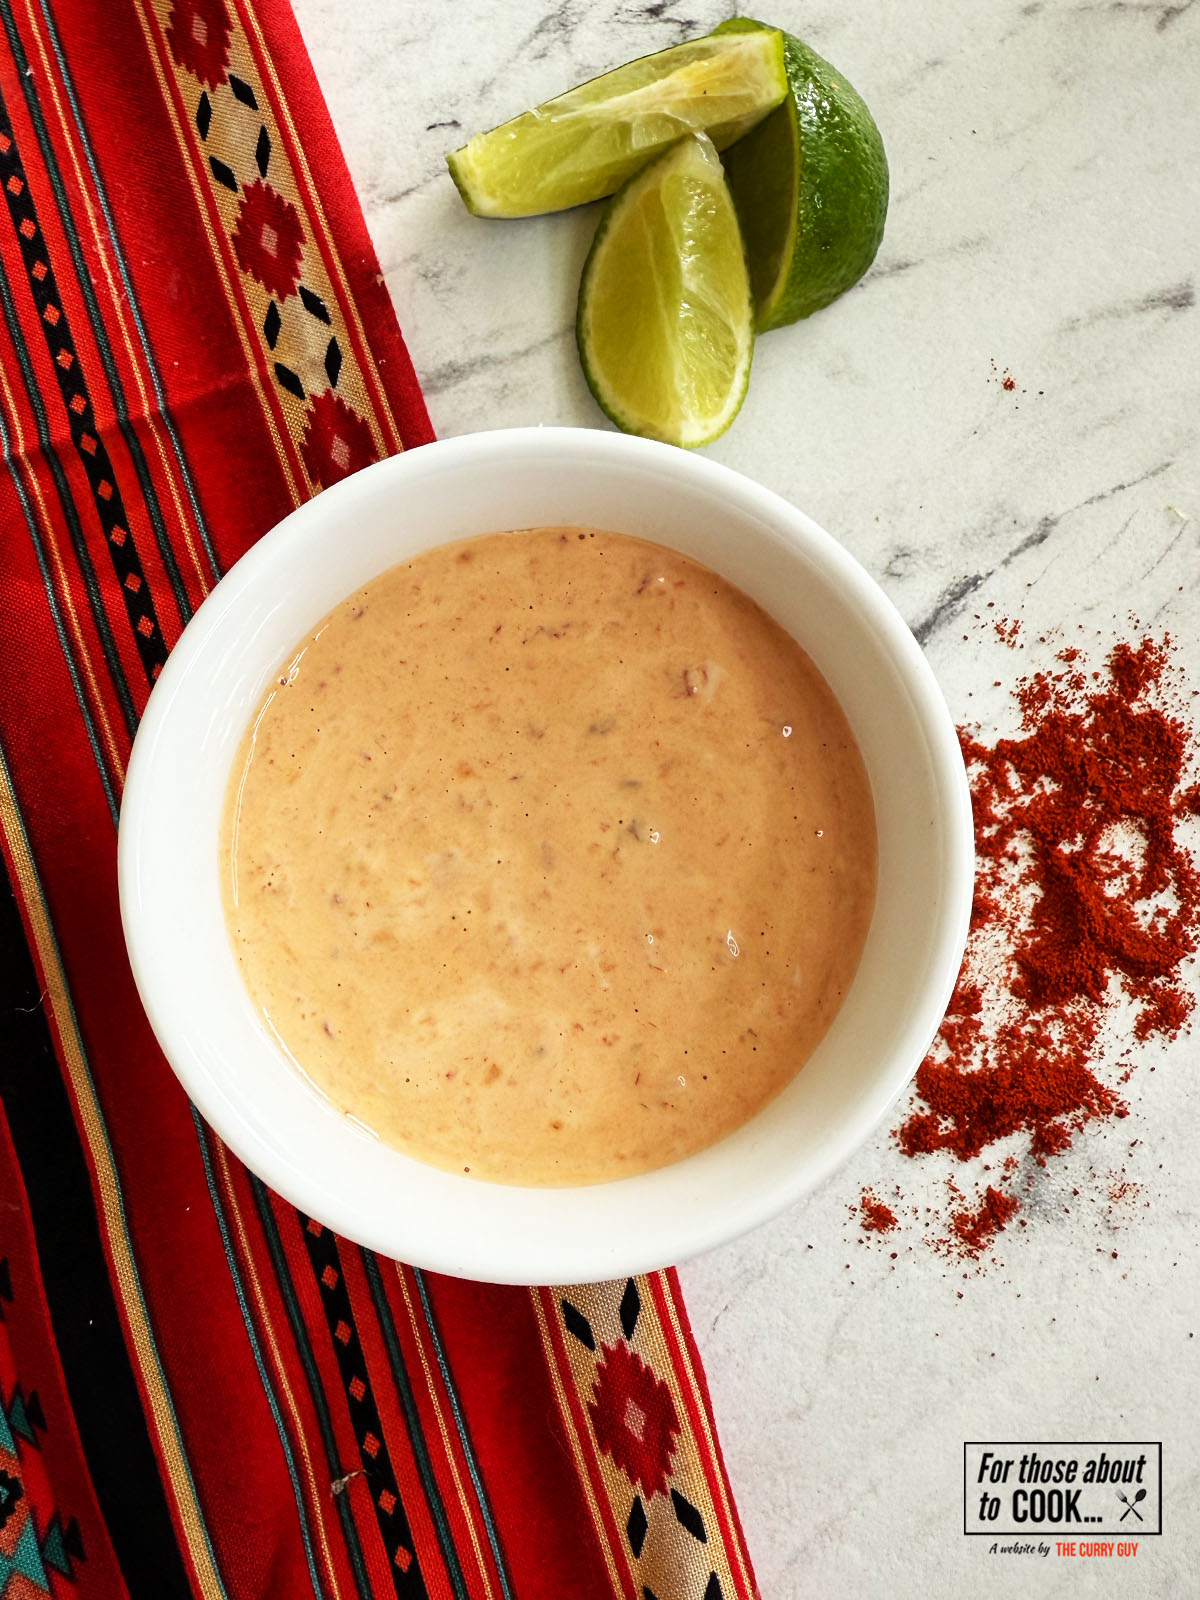
    Chipotle mayo served in a bowl

    Smoky, creamy and a kick of spice! This chipotle mayo is so easy to make and only requires 4 ingredients! Whether you're topping your tacos or using it as a delicious dip, this recipe is for you!

    Chipotle mayo served in a dish

    Ingredients

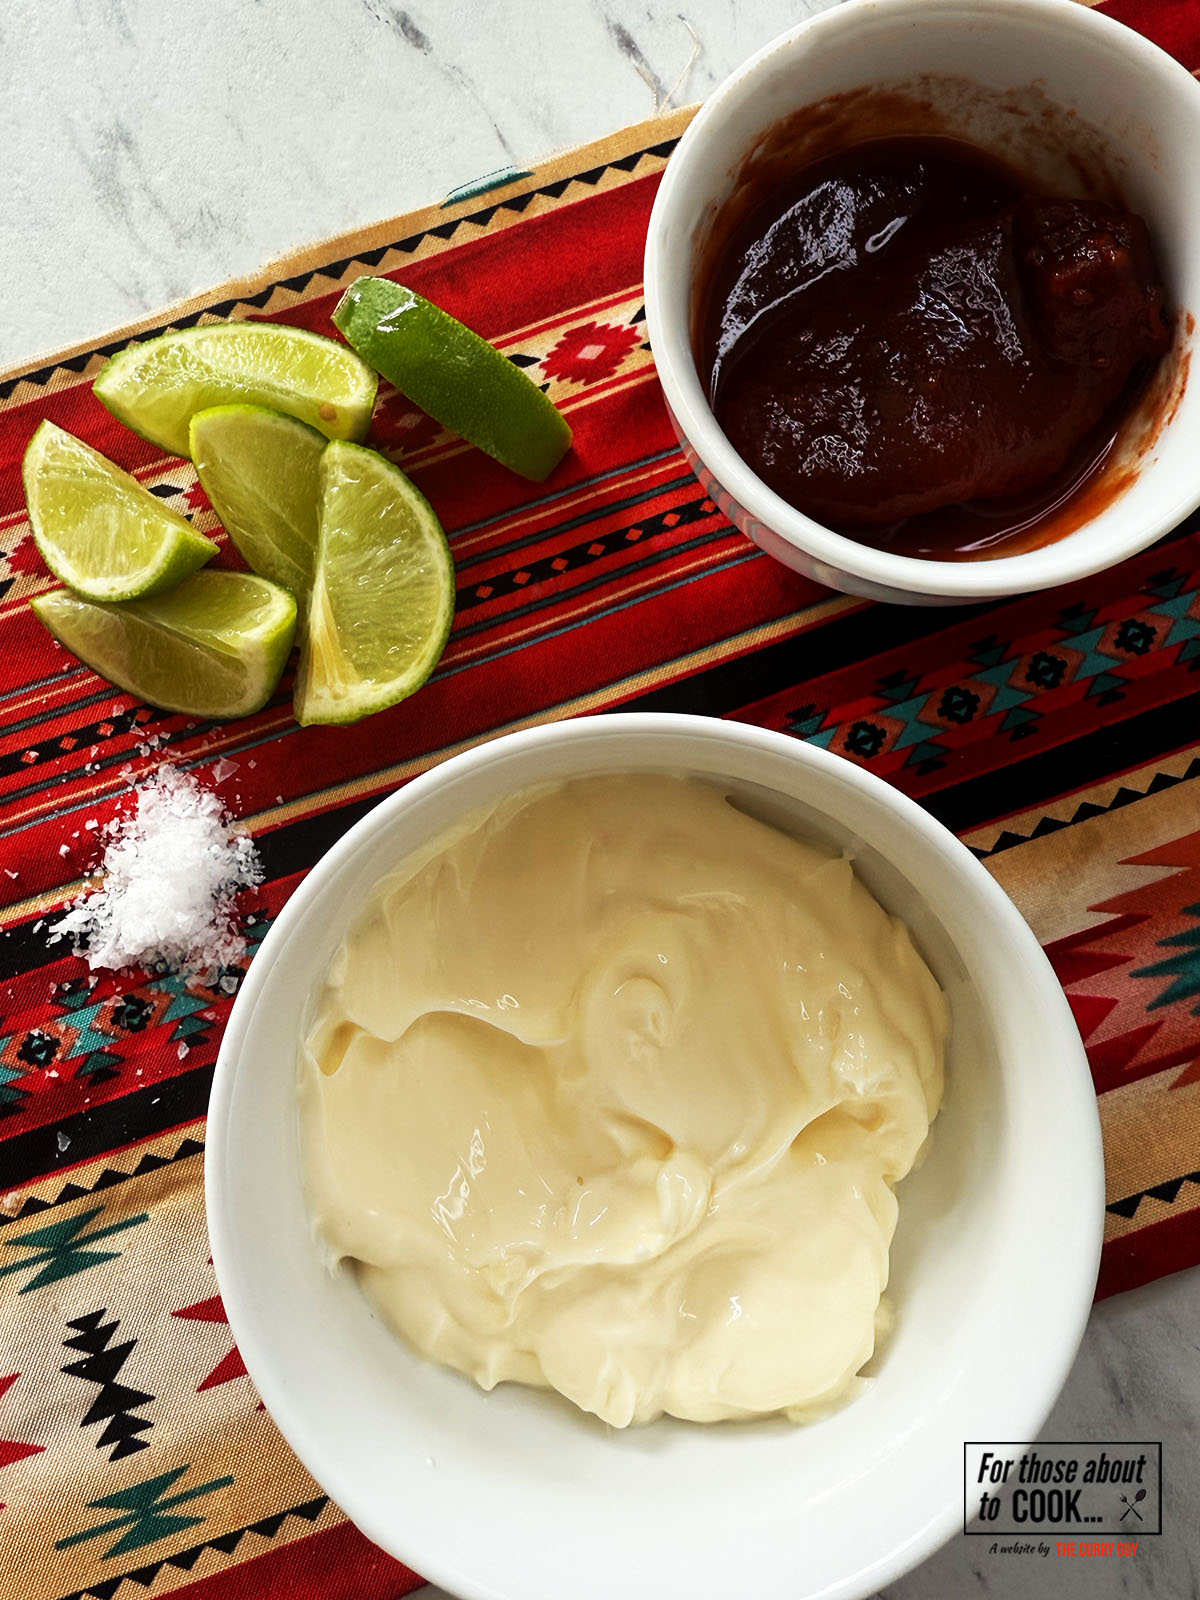
    Ingredients for chipotle mayo separated into dishes
    • Chipotle chillies in adobo sauce
    • Mayonnaise
    • Salt
    • Lime juice

    See recipe card for quantities.

    Step by step pictures:

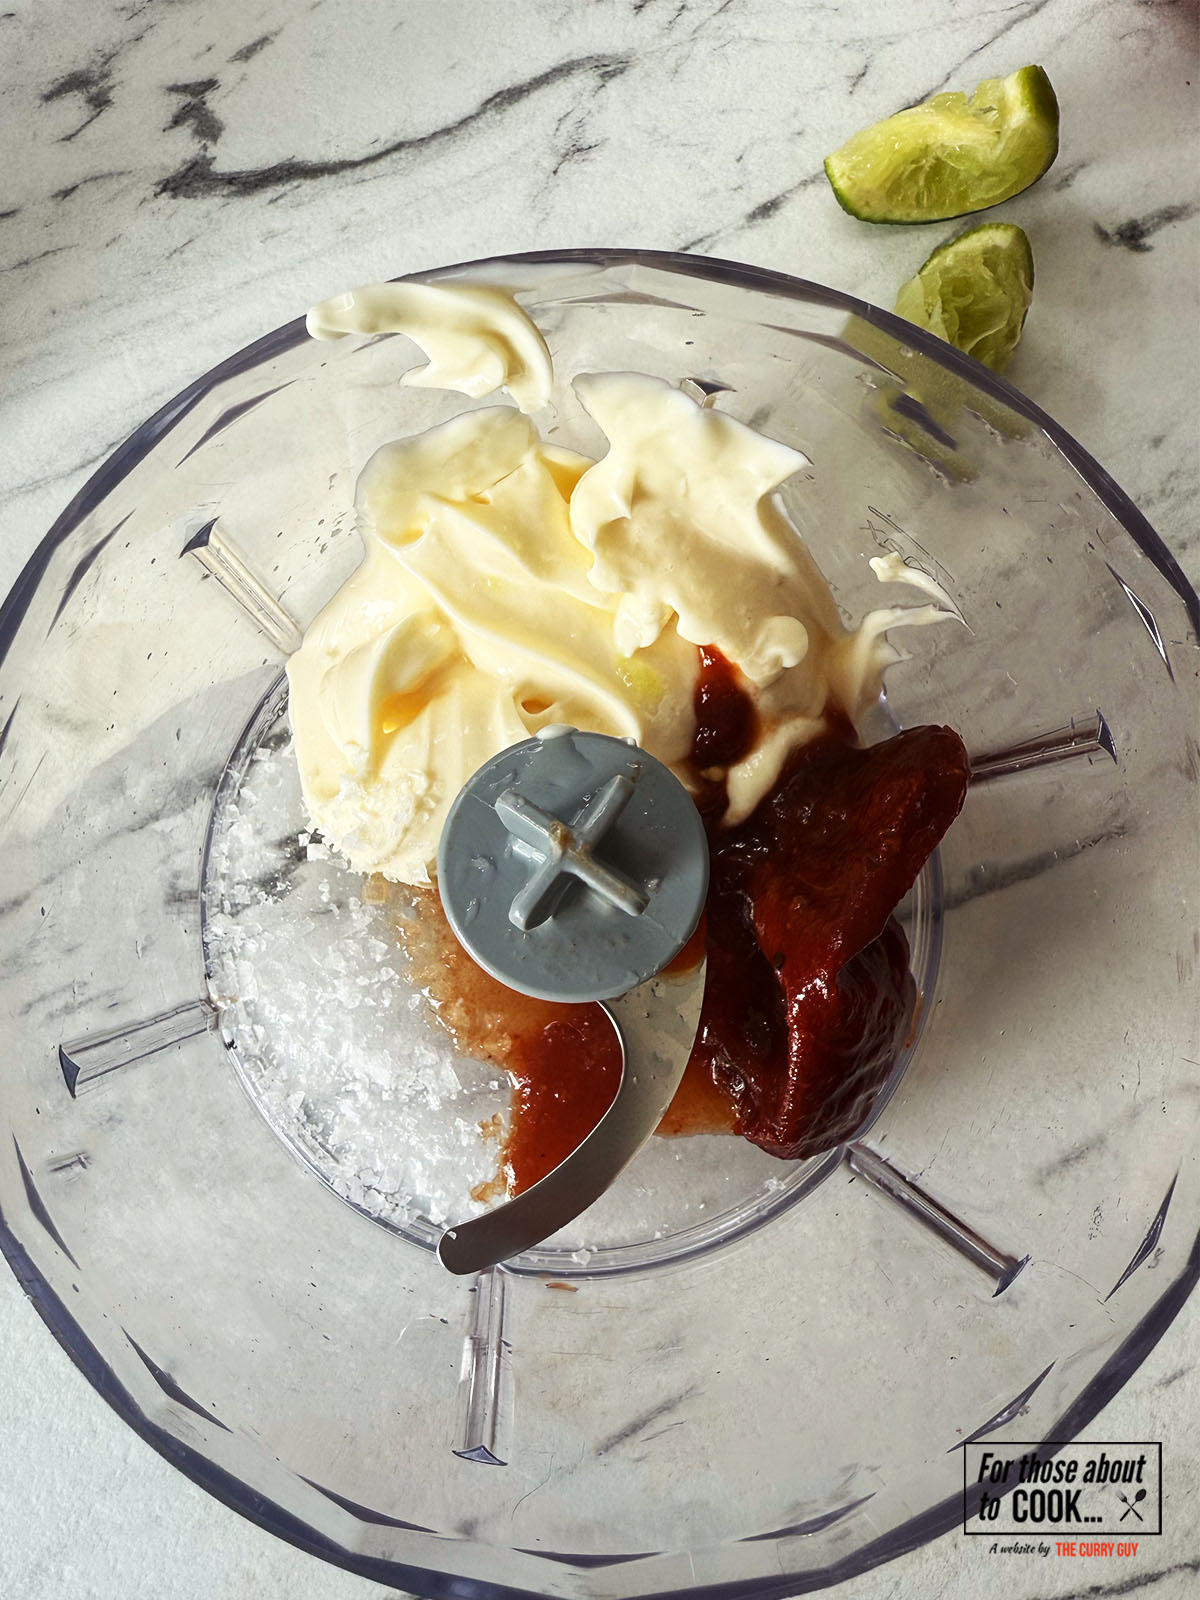
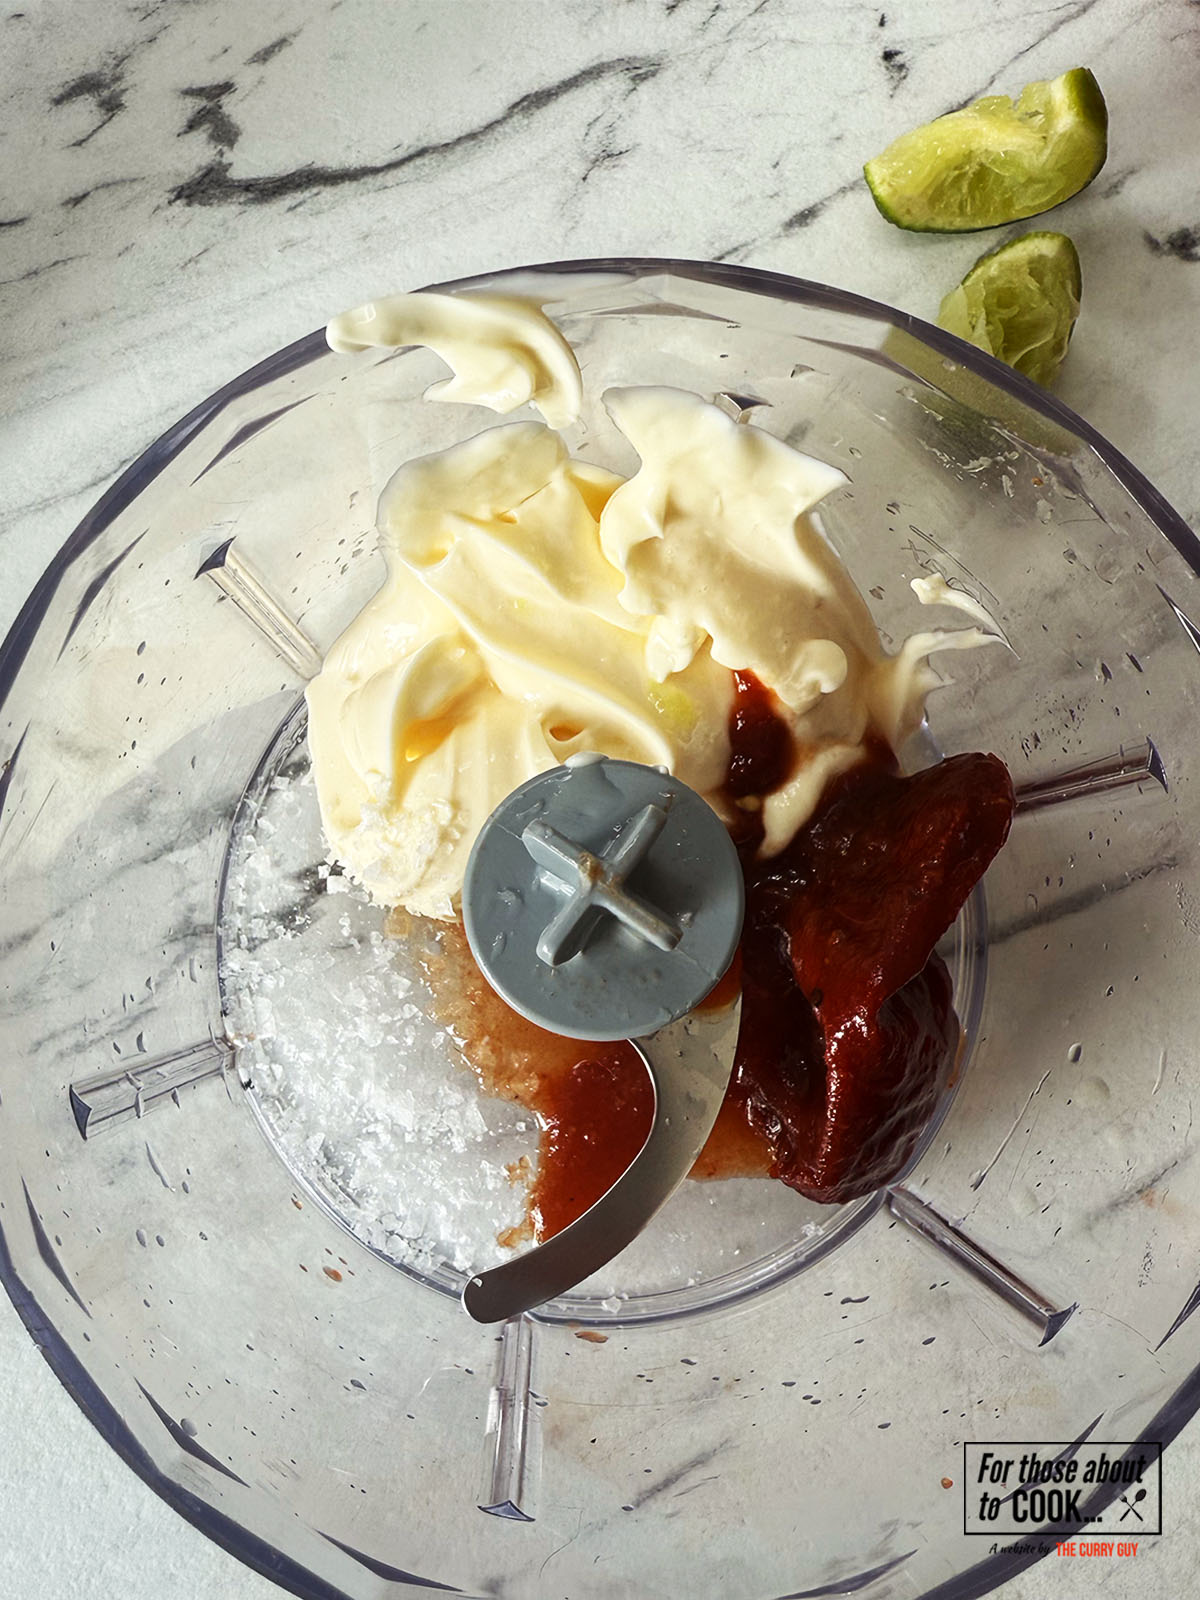
    Mayonnaise, chillies, salt and lime juice in a food processor
    1. Step 1: To a food processor, add your chipotle chillies, mayo, lime juice and salt.
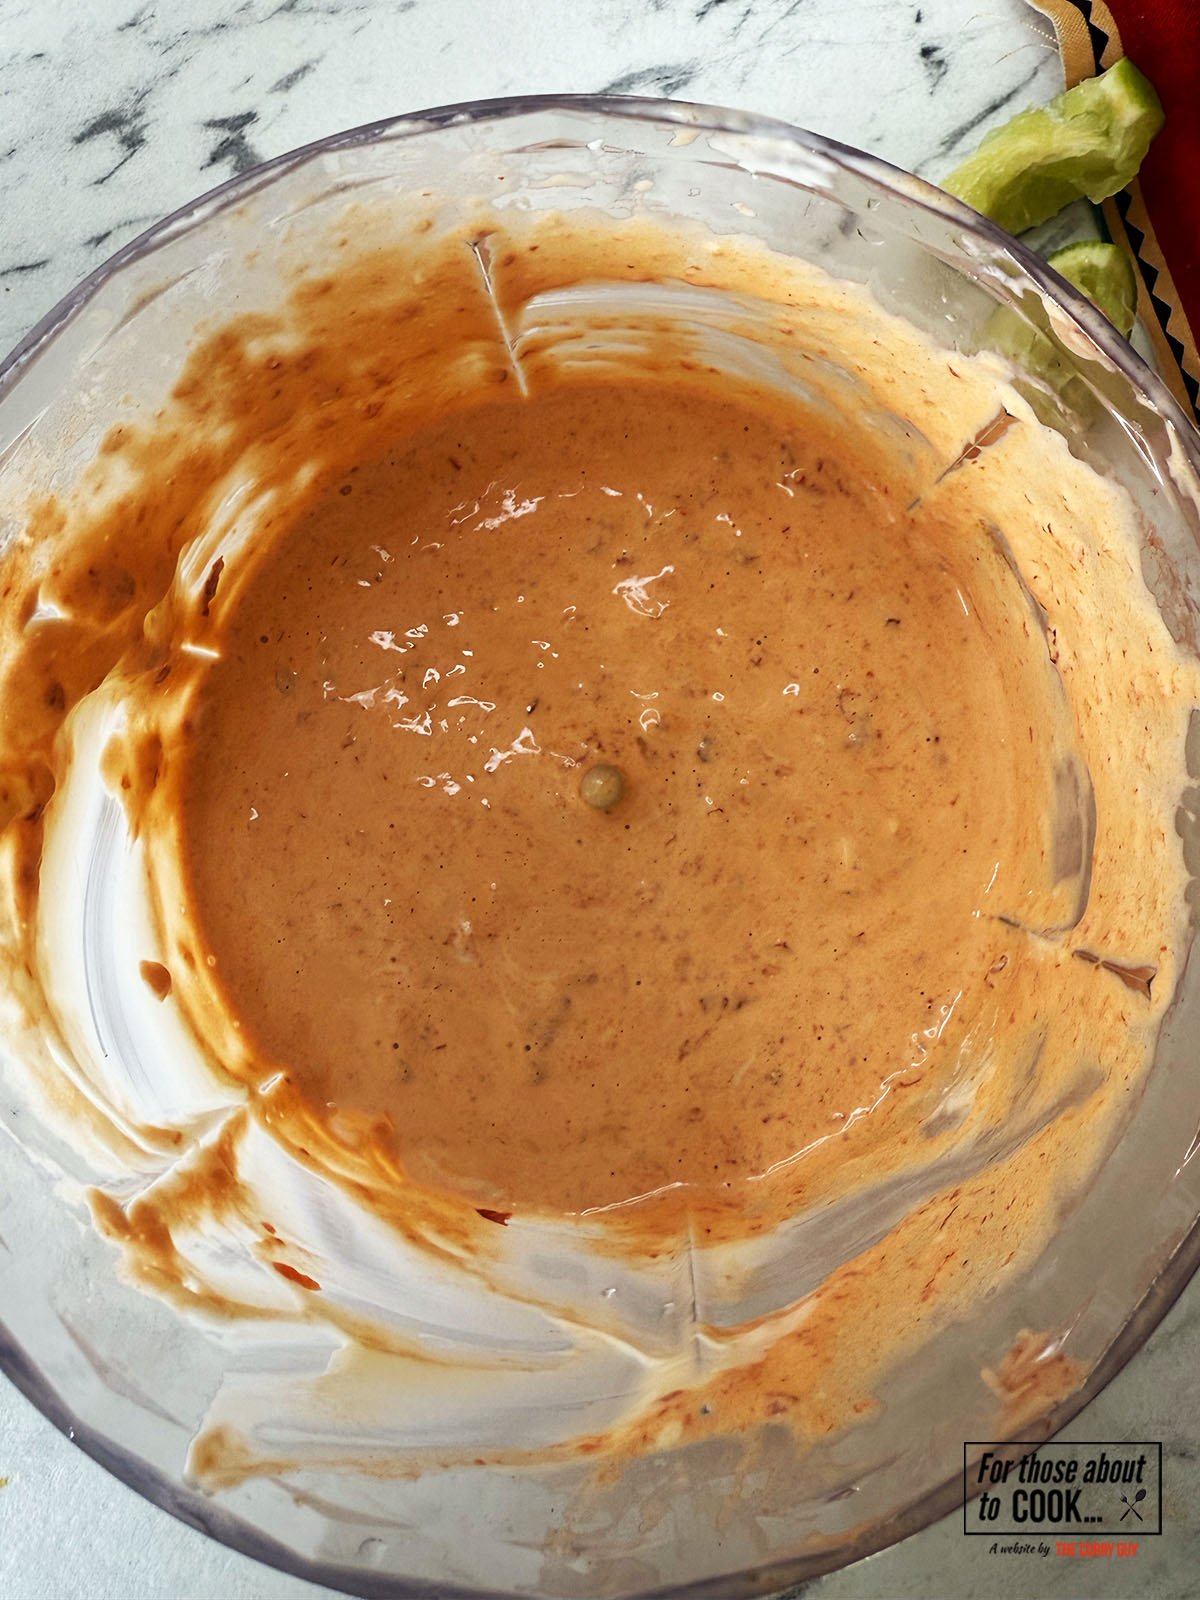
    Spicy mayonnaise blended together in a food processor
    1. Step 2: Blend together until smooth.
    Chipotle mayo served in a bowl
    1. Step 3: Transfer to a bowl.
    Tostadas covering in spicy mayonnaise
    1. Step 4: Drizzle on top of your favorite Mexican dishes!

    What about the chipotle chillies?

    Chipotle chillies in adobo sauce can usually be found at any good Mexican Grocer. However, if you do not have a Mexican Grocer near to you, they can easily be purchased online. This recipe calls for 2 chipotle chillies and a spoonful of the adobo sauce so one 200g can is all you need. I bought my chipotle chillies in adobo sauce from Amazon. Alternatively, Chipotle paste can very easily be sourced in most countries. Use 2 tablespoons of chipotle paste in your mayo to substitute the chillies and adobo sauce.

    How spicy is this chipotle mayo?

    The beauty of this dip is that the spice of the chipotle chillies is dulled slightly by the cool mayo, leaving a mildly spiced mayonnaise! If you would still like your mayo to be less spicy, simply deseed and devein your chipotle chillies! It's messy but worth it! Alternatively, if you want a spicier chipotle mayo simply add more chipotle chillies and an extra spoonful of the adobo sauce.

    What can I serve it with?

    Chipotle mayo can be used as a delicious dip for corn chips or vegetable sticks or used to top so many Mexican recipes. Here are a few ideas:

    • Homemade tortilla chips - Why not use it to dip these homemade tortilla chips in?
    • Tacos - Drizzle a healthy amount on these Fish Tacos, Steak Tacos, Tacos al Pastor, Pork carnitas or even Smash burger Tacos!
    • Tostadas - Why not top these Beef Tostadas or Tostadas de Tinga with this delicious chipotle mayo?

    Equipment

    To blend the mayo and chipotle chillies I used a food processor, alternatively you could use a blender.

    Storage

    Transfer to an airtight container or cover your dish tightly with plastic wrap (cling film). Store in the fridge for up to 1 week.

    Top Tip

    If you're after a slightly milder mayonnaise, simply deseed and devein your chillies!

    FAQ

    How long does it last in the fridge?

    If you've used store bought mayonnaise then it will last up to 1 week in the fridge. If you've made the mayonnaise from scratch then it will last 3-4 days!

    Related

    Looking for other recipes like this? Try these:
    • Pico de gallo in a serving bowl next to homemade corn chips.
      How to Make Pico de Gallo
    • Homemade Guacamole in a serving bowl next to corn chips.
      Guacamole Recipe
    • Fnished corn chips
      Corn Chips
    • Salsa de aguacate served in a bowl
      Salsa de Aguacate

    Pairing

    These are my favorite dishes to serve with Chipotle Mayo:

    • Pork carnitas tacos
      Pork Carnitas Tacos
    • Tacos al pastor on a serving plate
      Tacos al Pastor
    • Fried Fish Tacos
      Fried Fish Tacos
    • Steak tacos on a plate.
      Steak Tacos

    Recipe

    Chipotle mayo served in a bowl

    Chipotle Mayo

    Yield: 4
    Prep Time: 5 minutes
    Total Time: 5 minutes

    Smoky, creamy and a kick of spice! This chipotle mayo is so easy to make and only requires 4 ingredients!

    No Ratings

    Ingredients

    • 2 chipotle chillies in adobo sauce
    • ½ cup (120ml) mayonnaise
    • 1 teaspoon salt
    • 1 lime juiced

    Instructions

    1. Add your chipotle chillies, mayonnaise, lime juice and salt to a food processor or blender.
    2. Blend until smooth.
    Nutrition Information:
    Yield: 4 Serving Size: 1
    Amount Per Serving: Calories: 18Total Fat: 0gSaturated Fat: 0gTrans Fat: 0gUnsaturated Fat: 0gCholesterol: 0mgSodium: 550mgCarbohydrates: 4gFiber: 1gSugar: 2gProtein: 1g
    © Shannon
    Cuisine: Mexican / Category: Mexican Recipes

    Tostadas de Tinga

    July 18, 2025 By Shannon

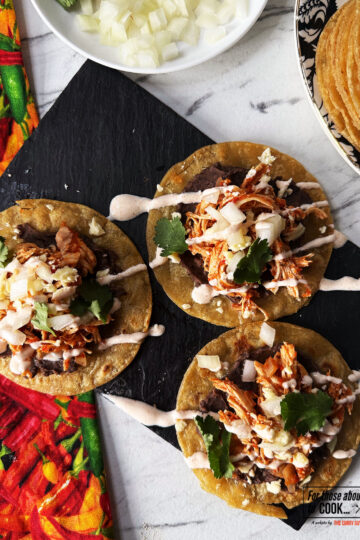
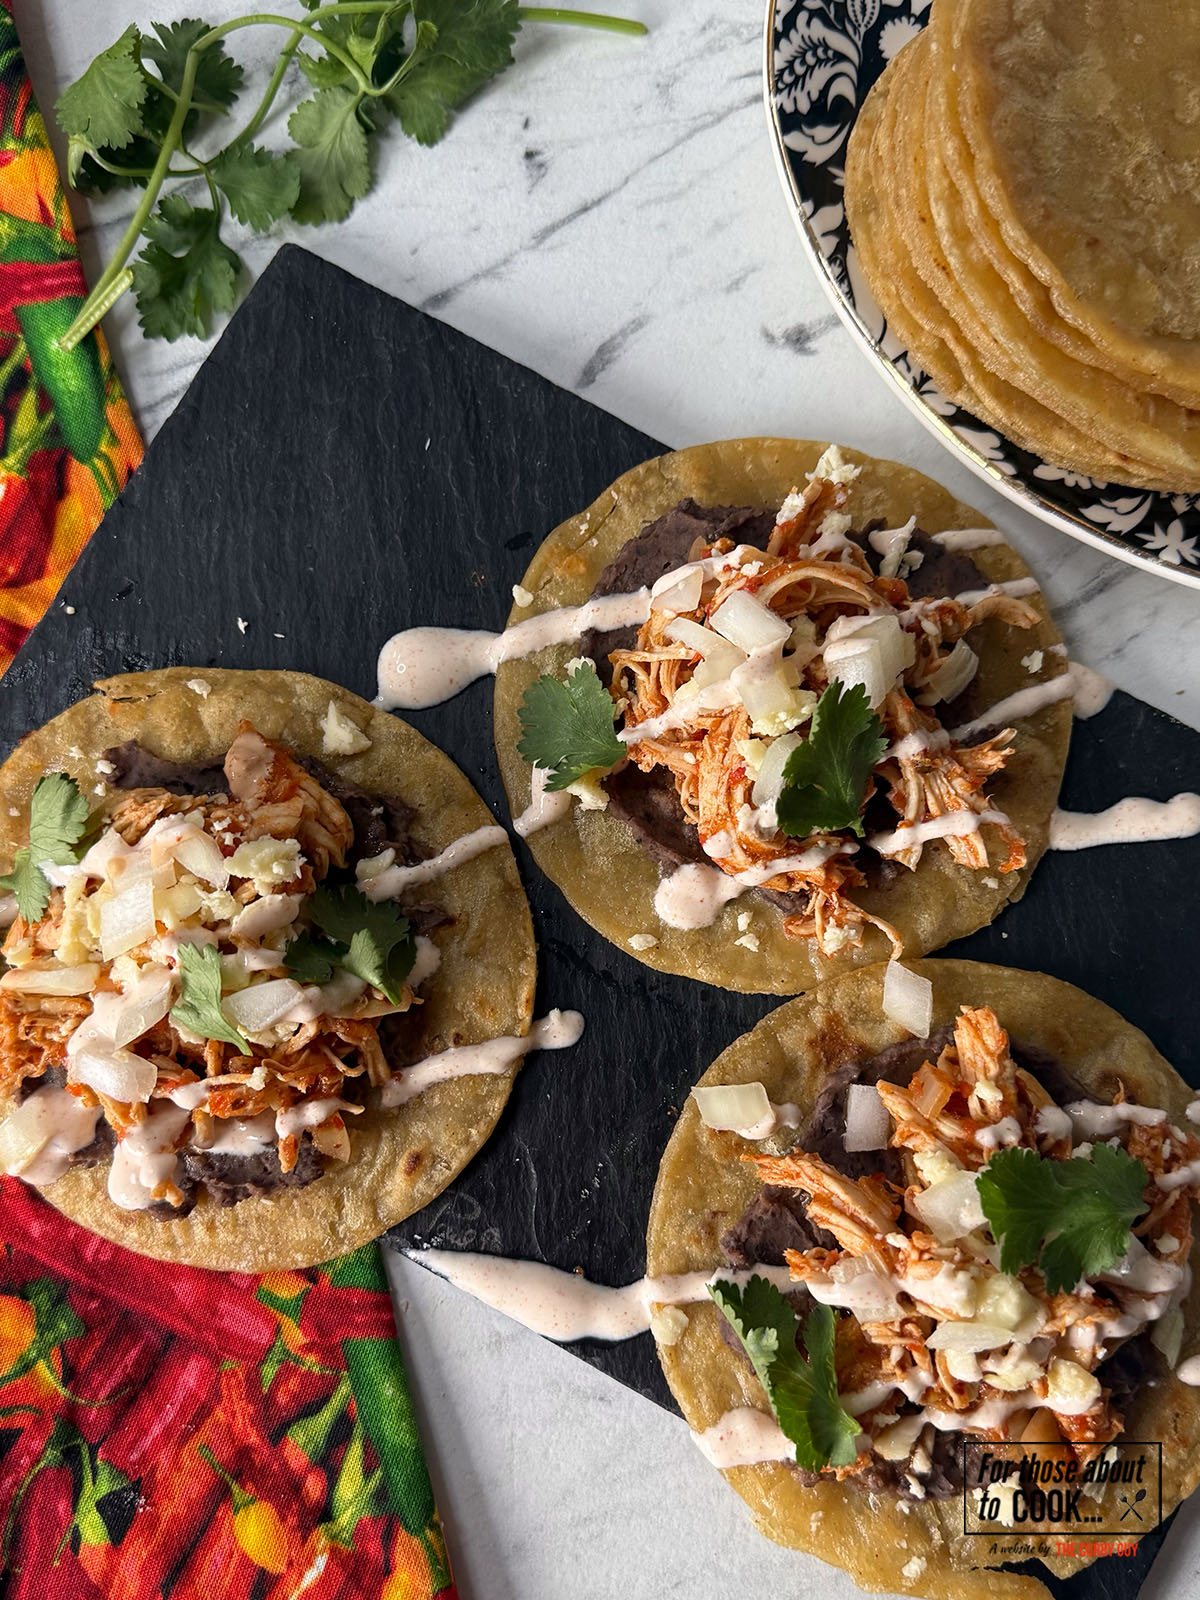
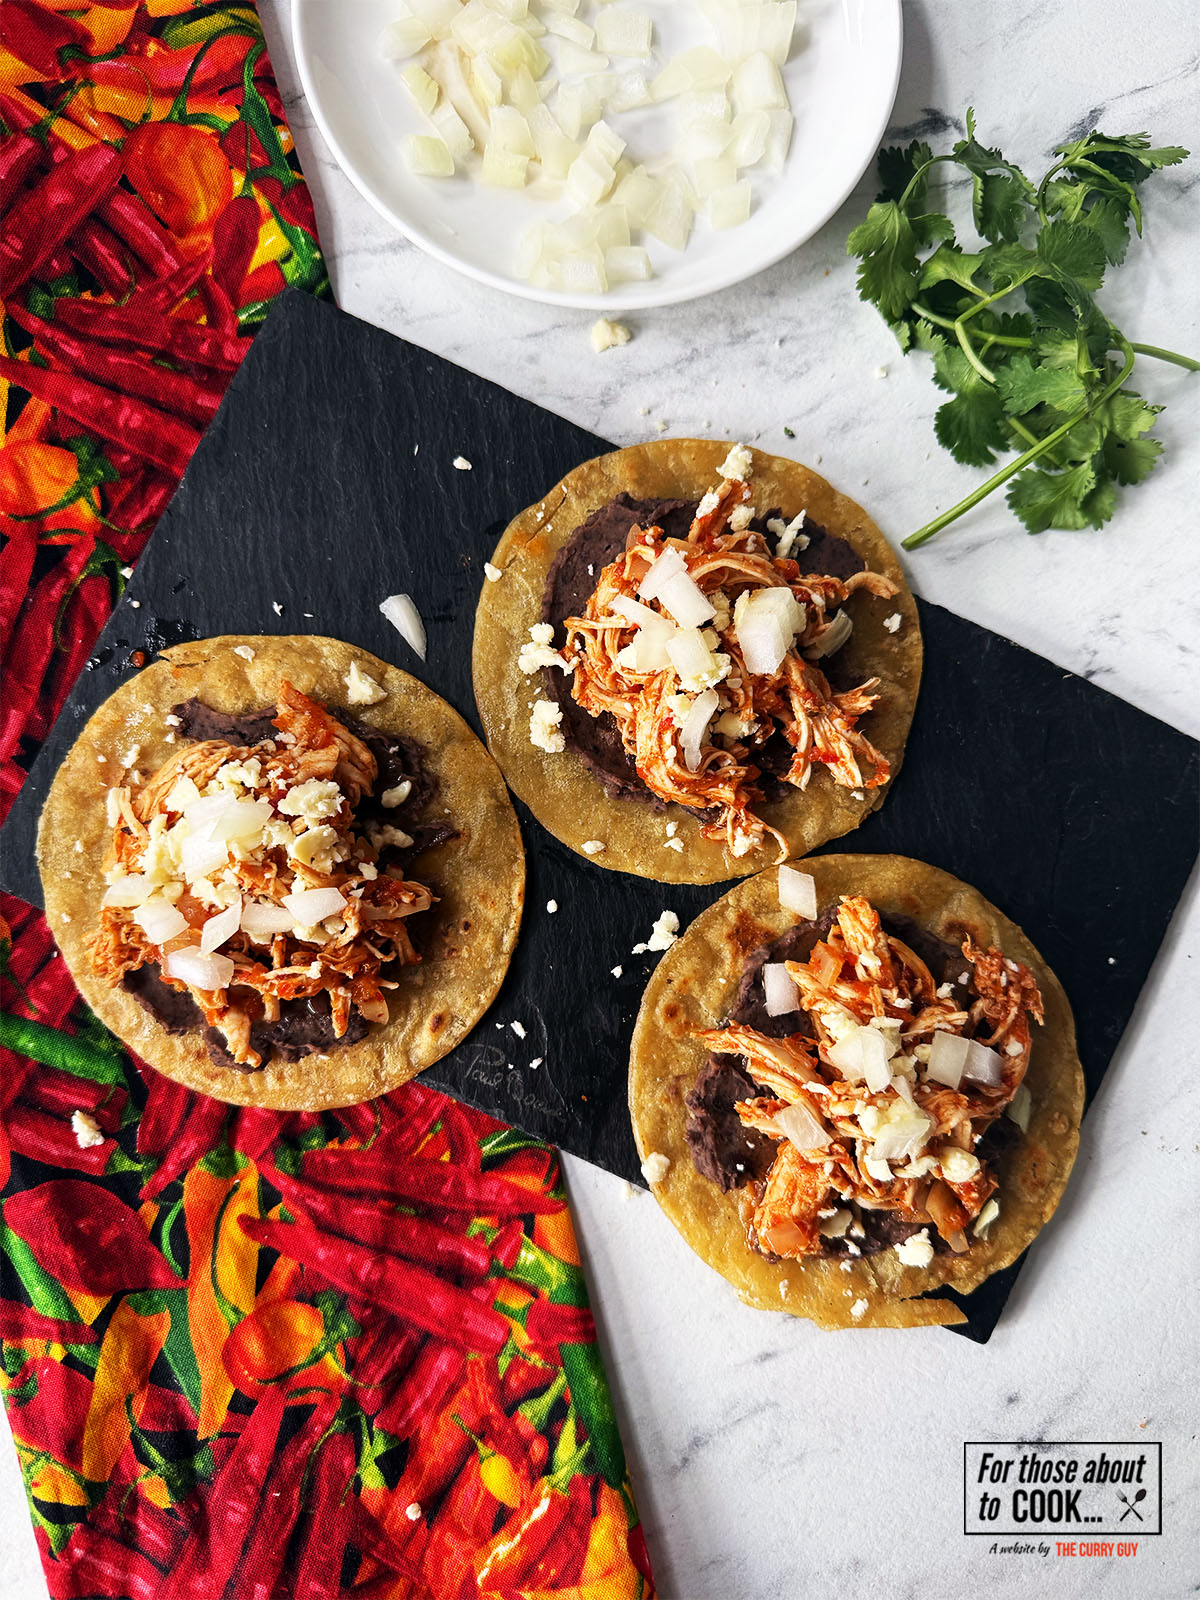
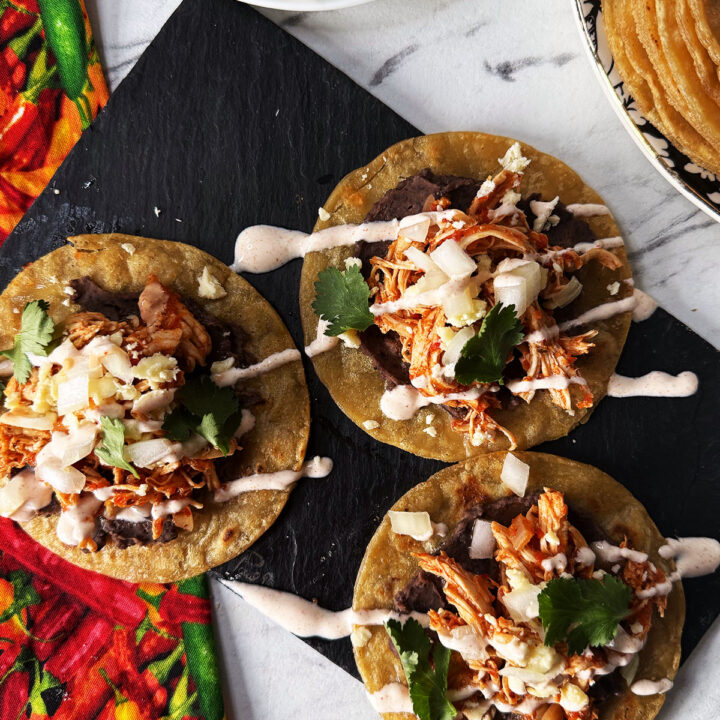
    Tostadas de tinga drizzled with chipotle mayo and sprinkled with coriander

    Spicy, crispy and packed full of flavor! These Tostadas de Tinga are so simple to make; perfectly crispy corn tortillas topped with Tinga de Pollo, refried black beans and a spicy chipotle mayo. You have to try these!

    Tostadas de tinga served with chipotle mayo and queso fresco cheese

    About this recipe:

    Tostada simply means 'toasted' in Spanish and all tostada recipes require crispy corn tortillas that can either be fried or baked. It's basically one giant tortilla chip! When it comes to the toppings, that's really up to you! This recipe shows you how top your tostadas with Tinga and pairs it with a deliciously spicy chipotle mayo and refried black beans. These tostadas are so versatile and I give you plenty of different variations and combinations of toppings below! Give these Tostadas de Tinga a go!

    Ingredients

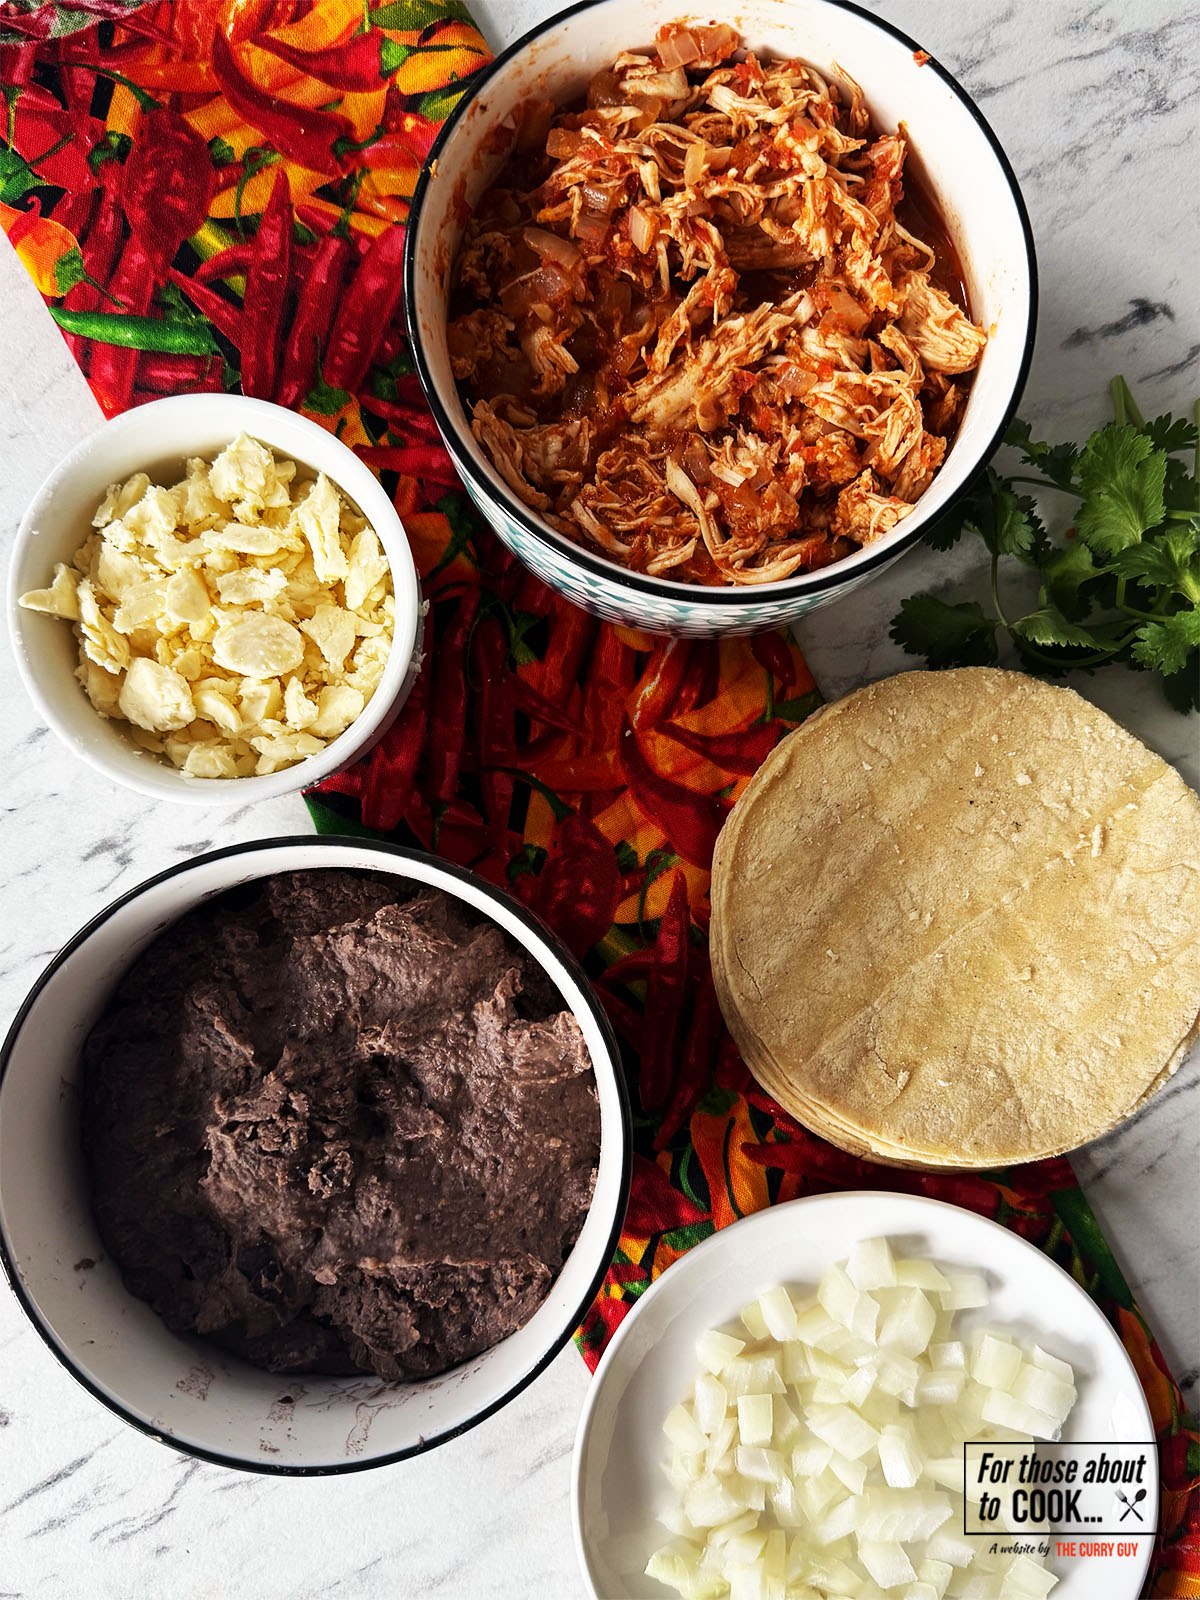
    Ingredients for tostadas de tinga separated into a bowl
    • For the Tinga:
    • Tomatoes
    • Canned chipotle peppers
    • Onion
    • Garlic
    • Tomato puree
    • Chicken Breast
    • Mexican Oregano
    • For the Tostadas:
    • Refried black beans
    • Corn tortillas
    • Queso Fresco cheese (any mild, crumbly cheese)
    • Cilantro (Coriander)
    • White onion diced
    • Chipotle Mayonnaise (optional)

    See recipe card for quantities.

    Step by step pictures:

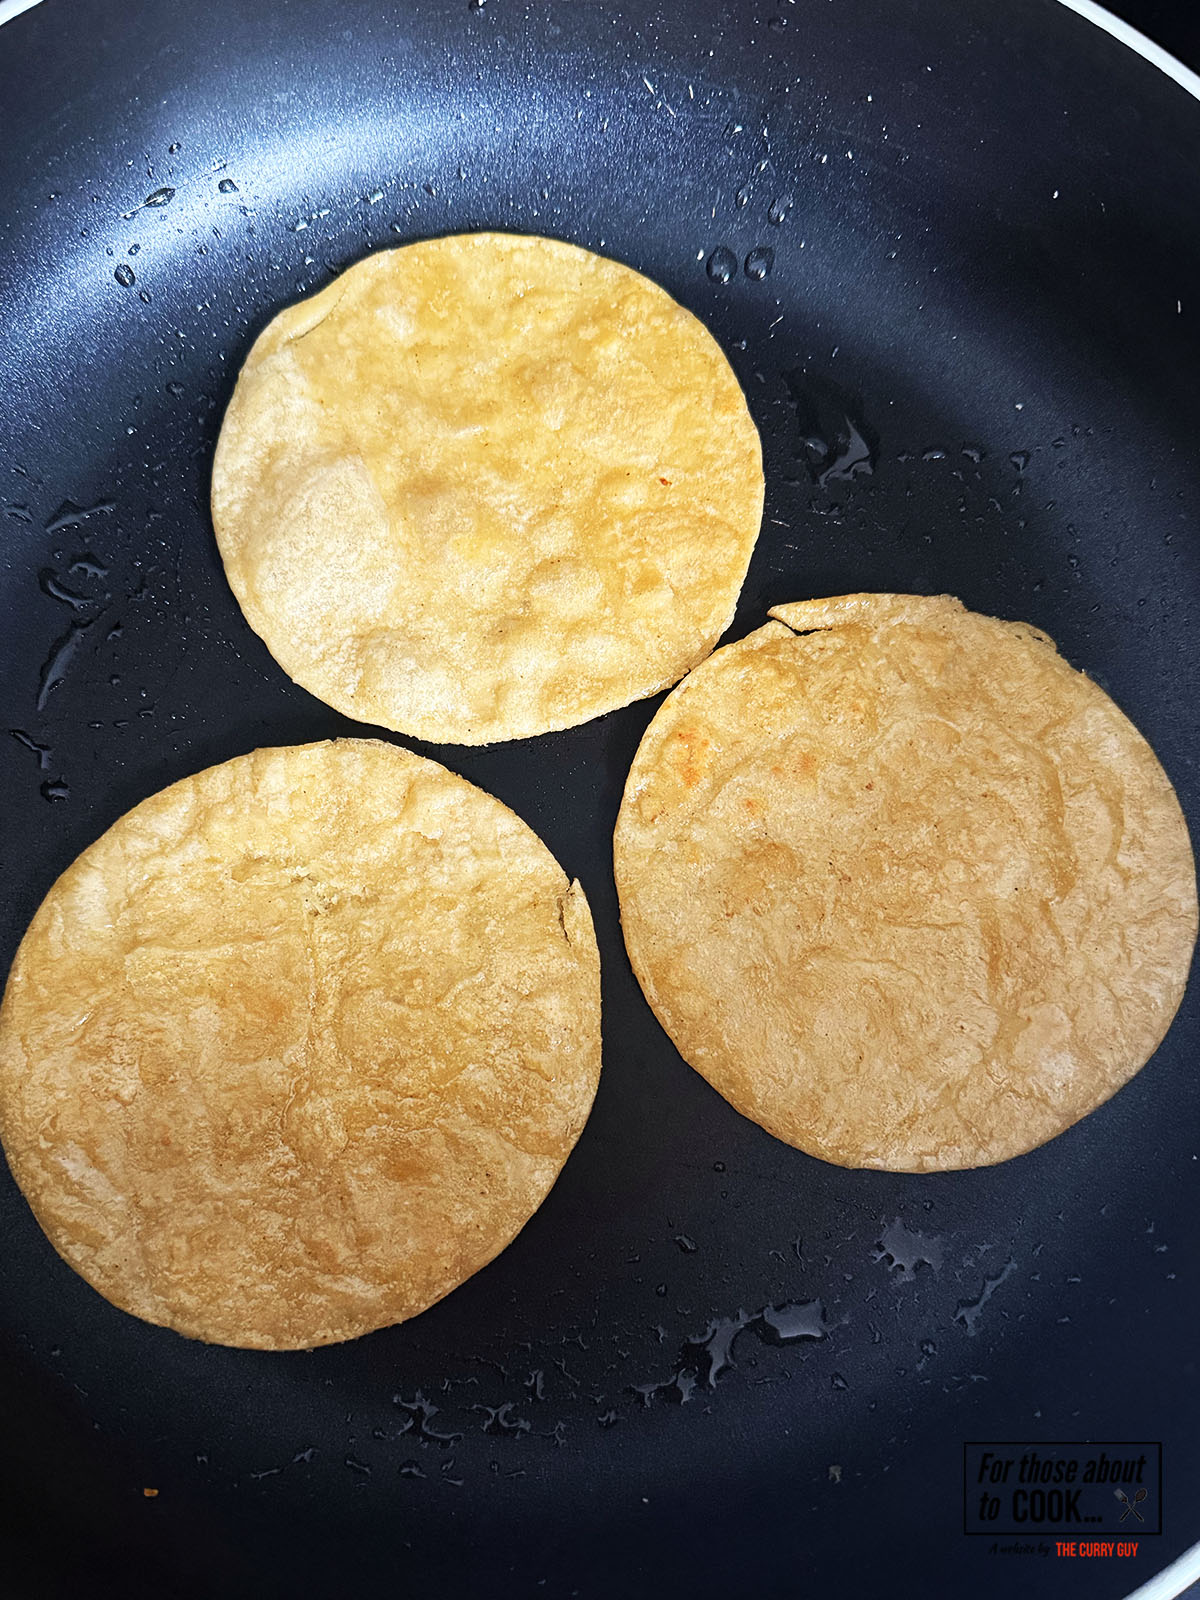
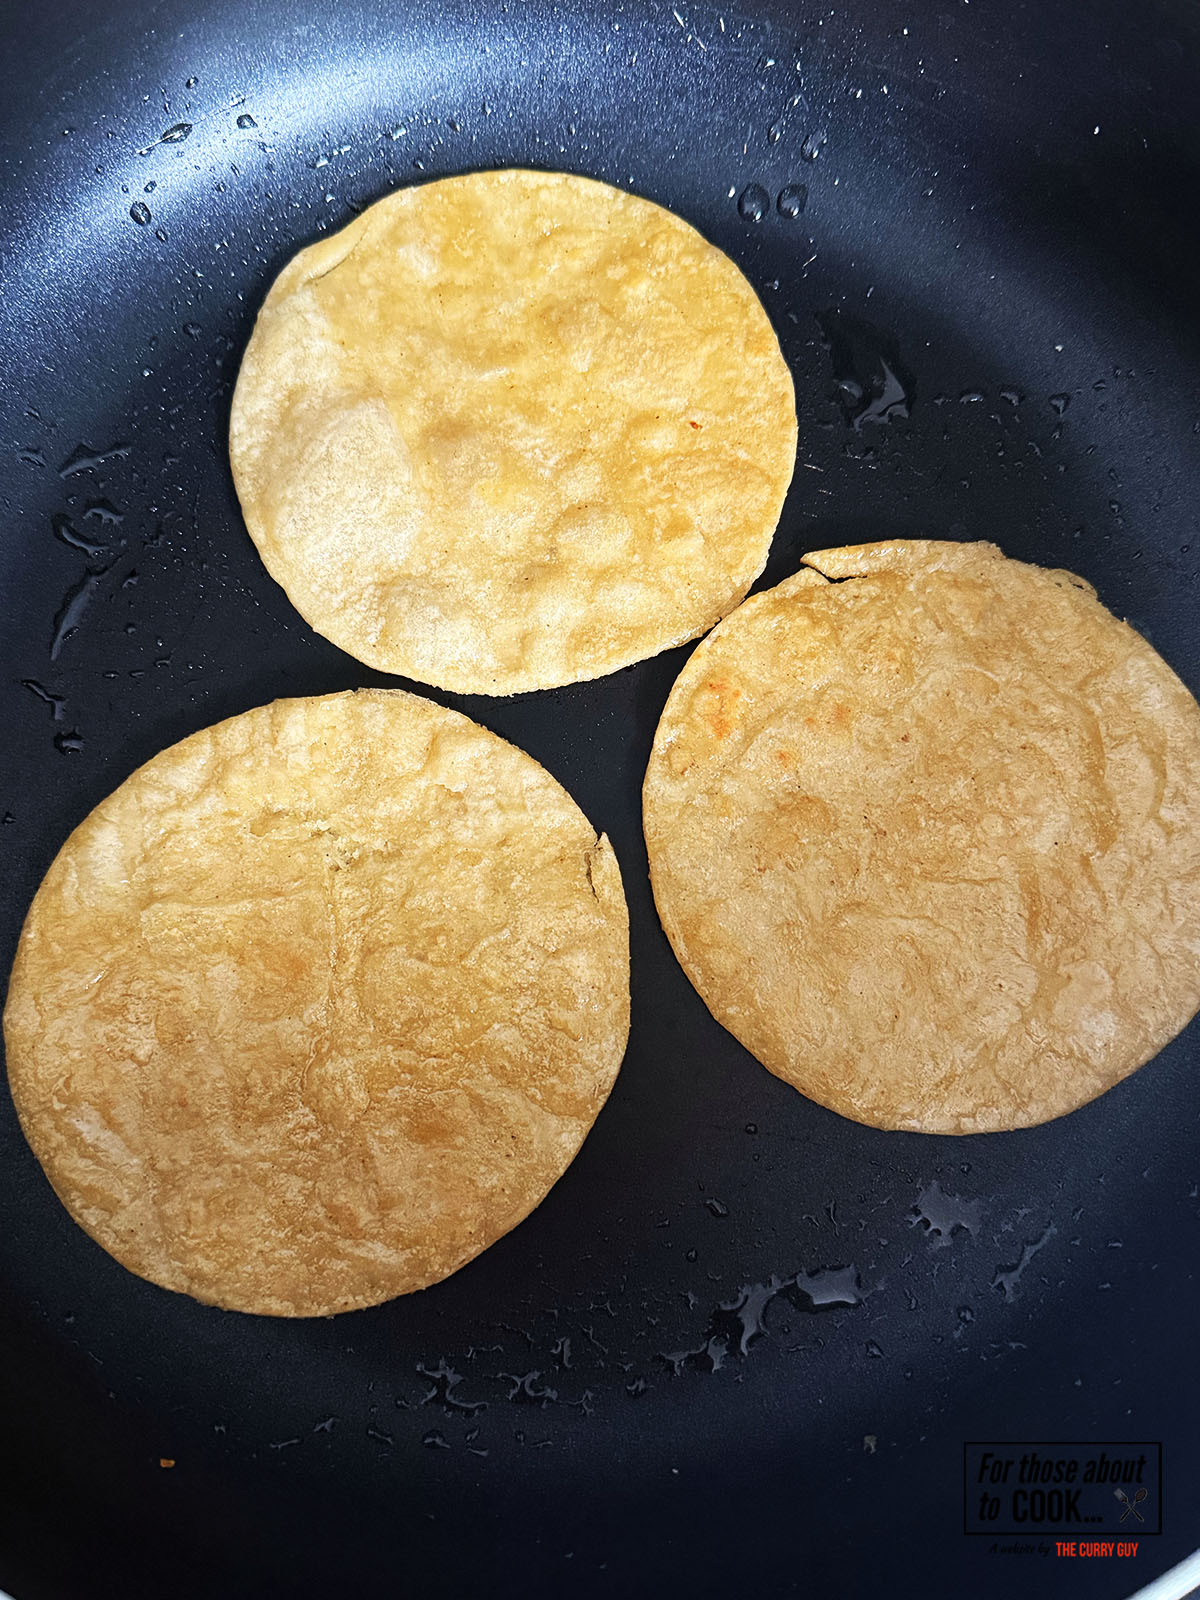
    Corn tortillas frying in a pan until crispy
    1. Step 1: First, add a splash of oil to a pan and fry your tortillas on a medium-high heat. Fry for about 5 minutes on each side until they have browned slightly and crisped.
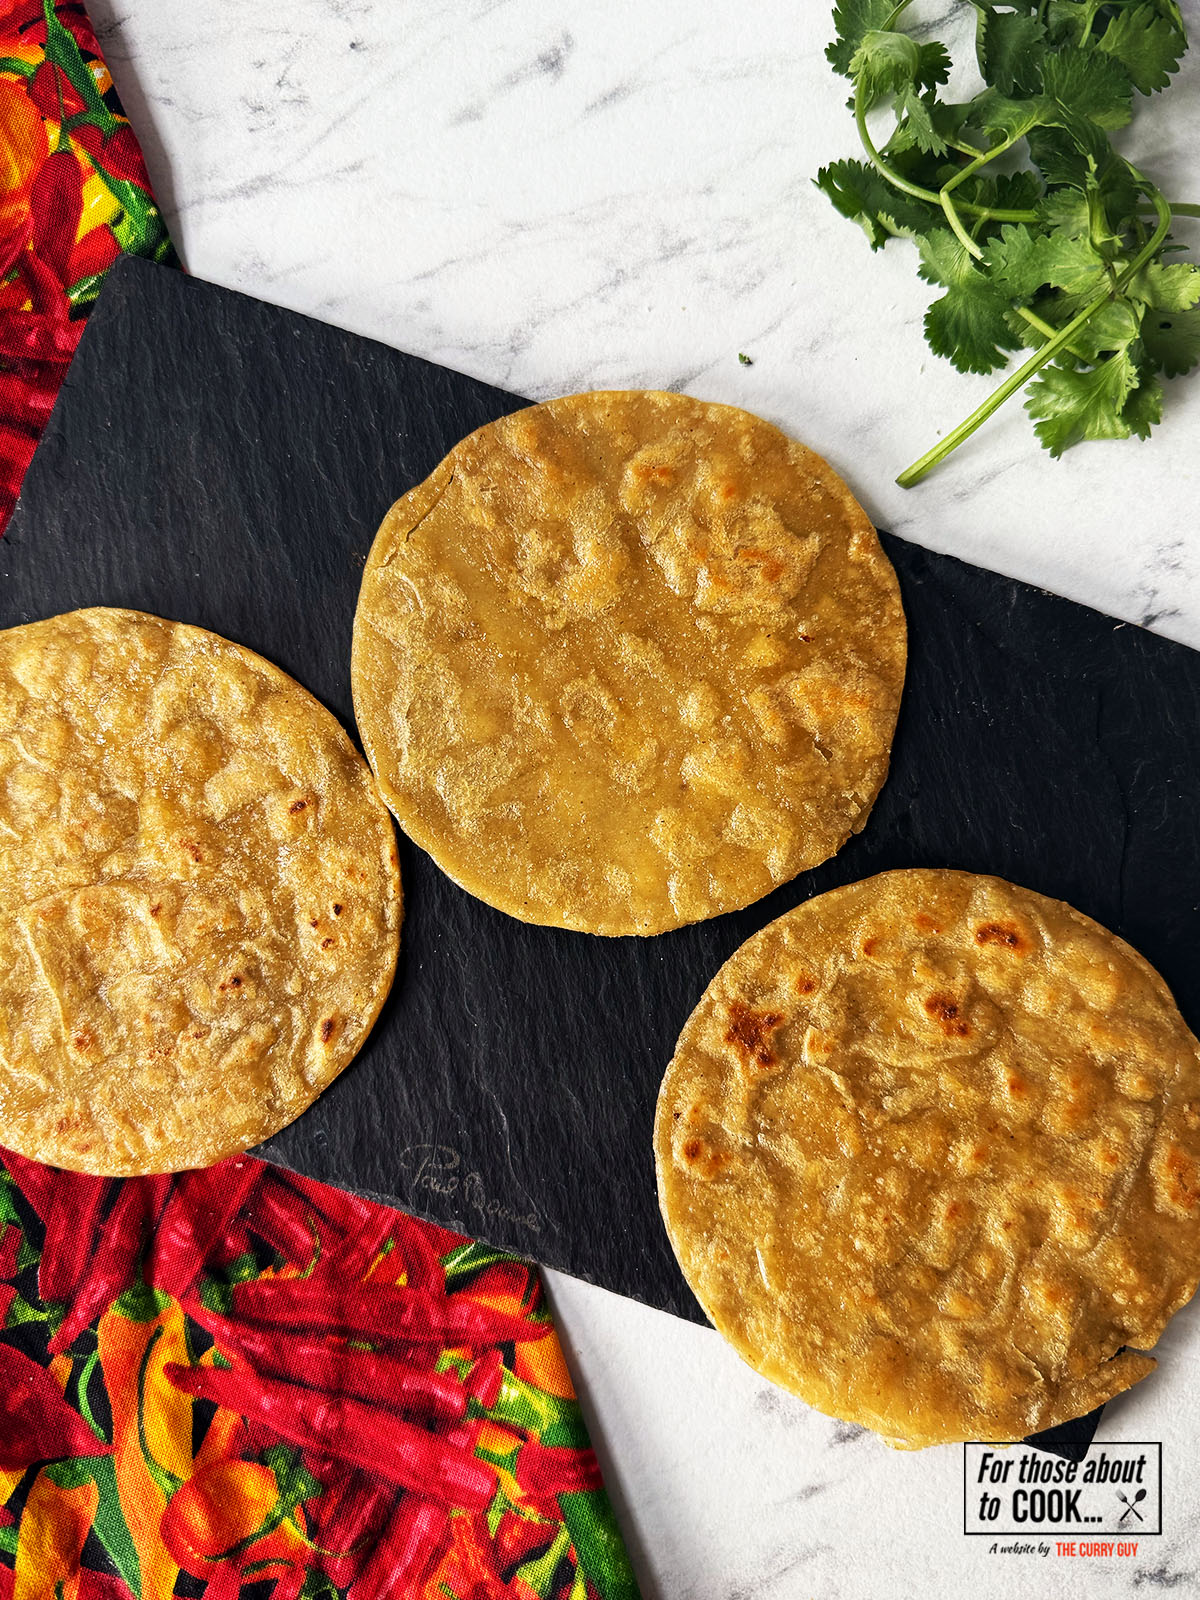
    Crispy tortillas displayed on a slate
    1. Step 2: Remove your crispy tostada shells and place them on a plate.
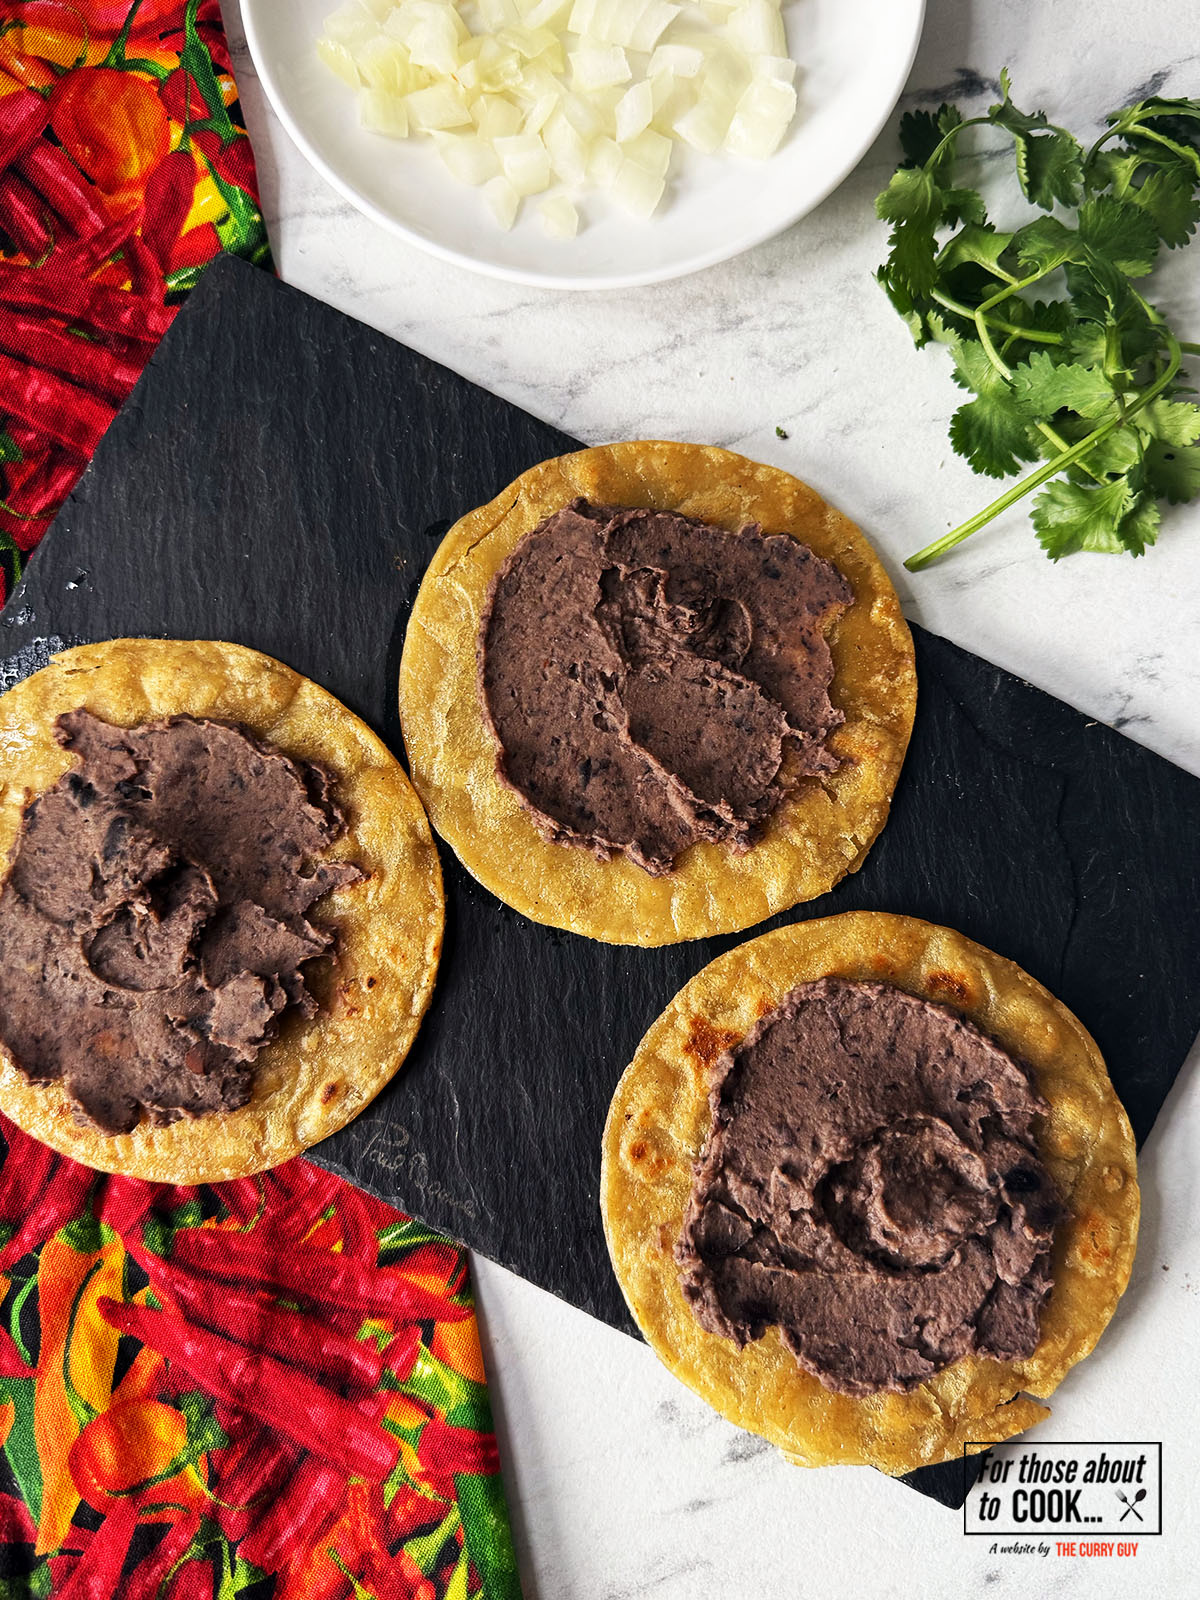
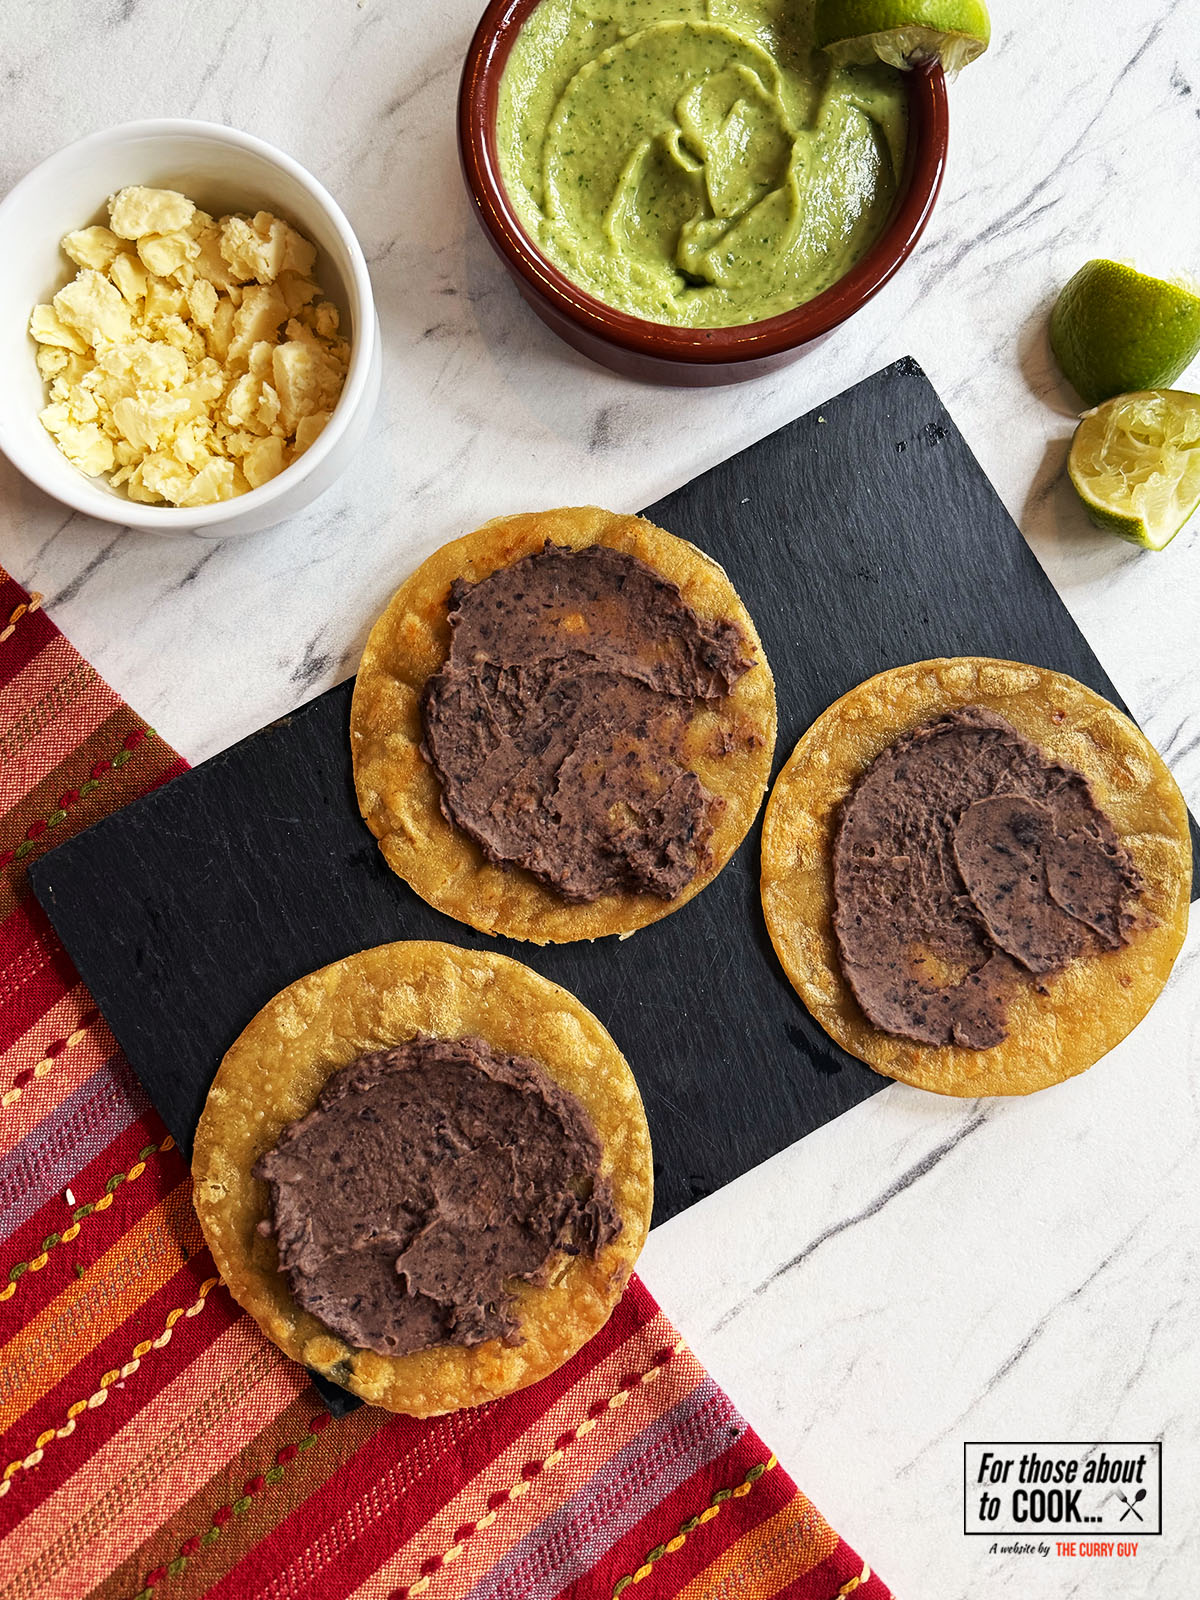
    Refried black beans spooned onto fried corn tortillas
    1. Step 3: Scoop a generous helping of your refried black beans onto your tostada and spread it around using the back of a spoon.
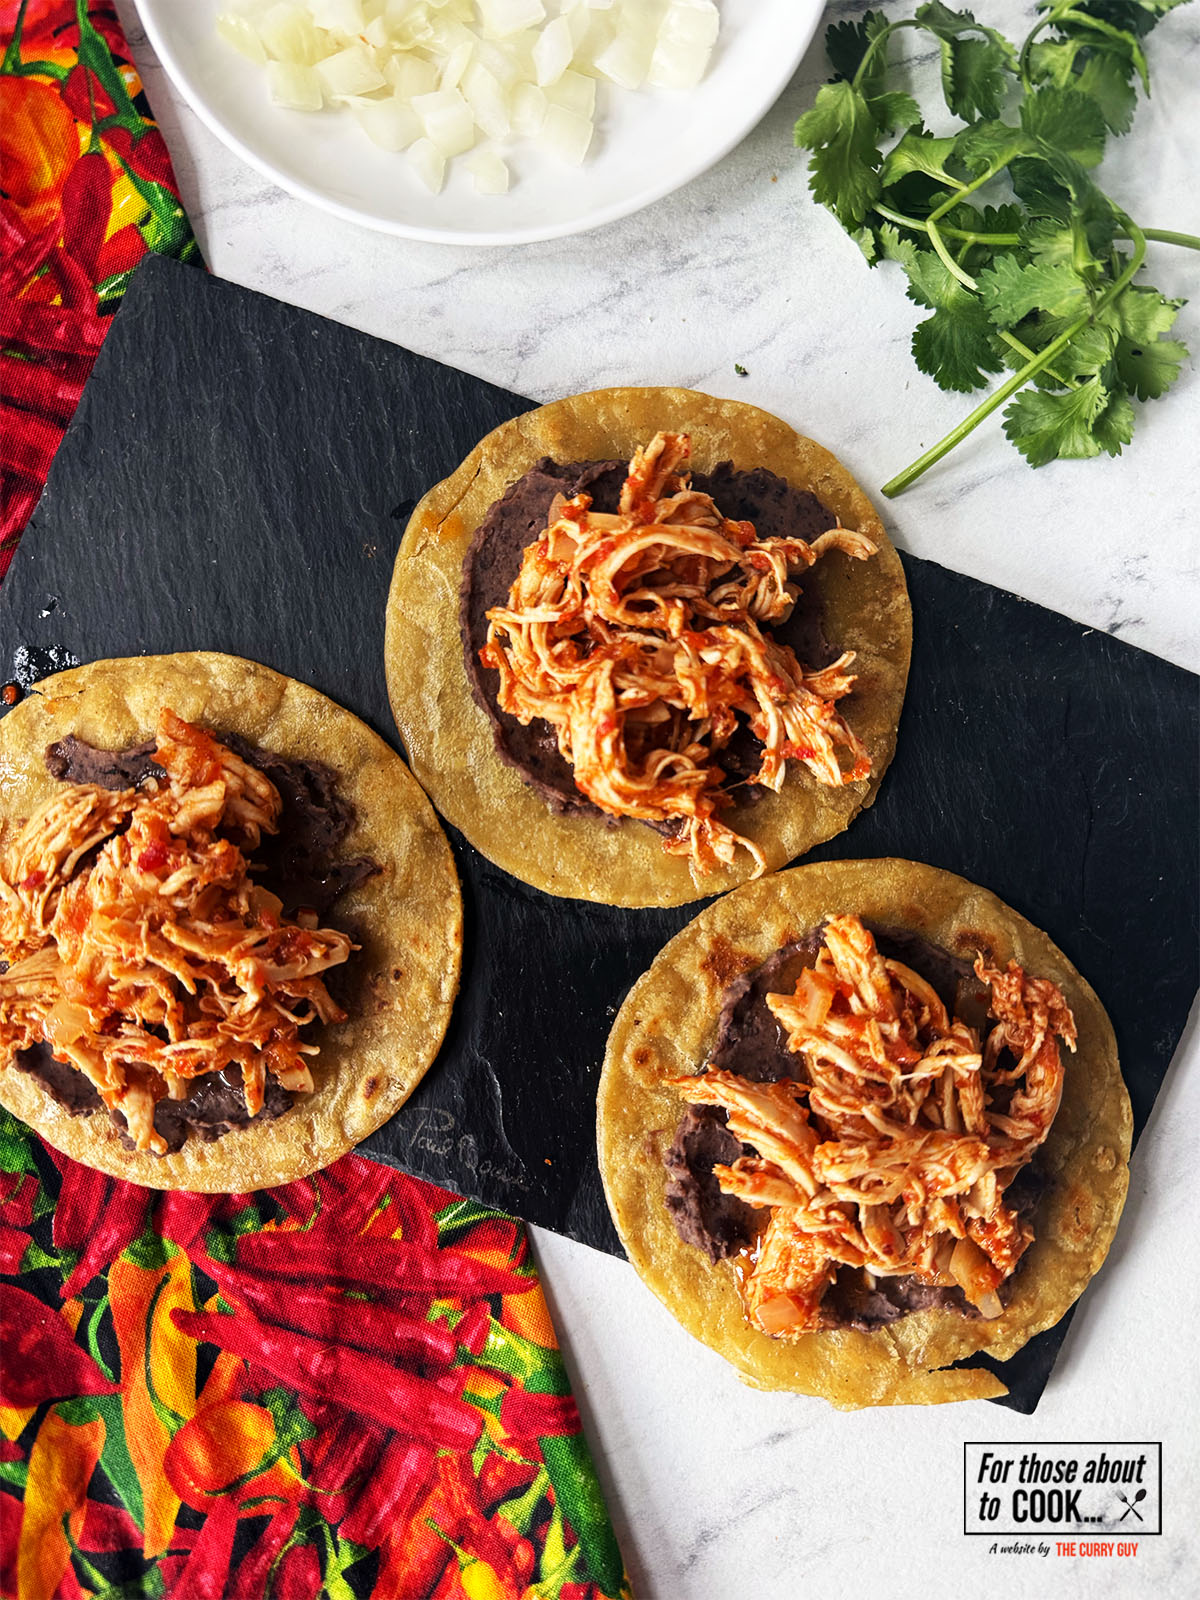
    Tinga added on top of black beans on corn tortillas
    1. Step 4: Add a few tablespoons of your heated tinga de pollo on top.
    Queso Fresco cheese and white onion toppings on the corn tortillas
    1. Step 5: Sprinkle with Queso Fresco cheese and some diced white onion.
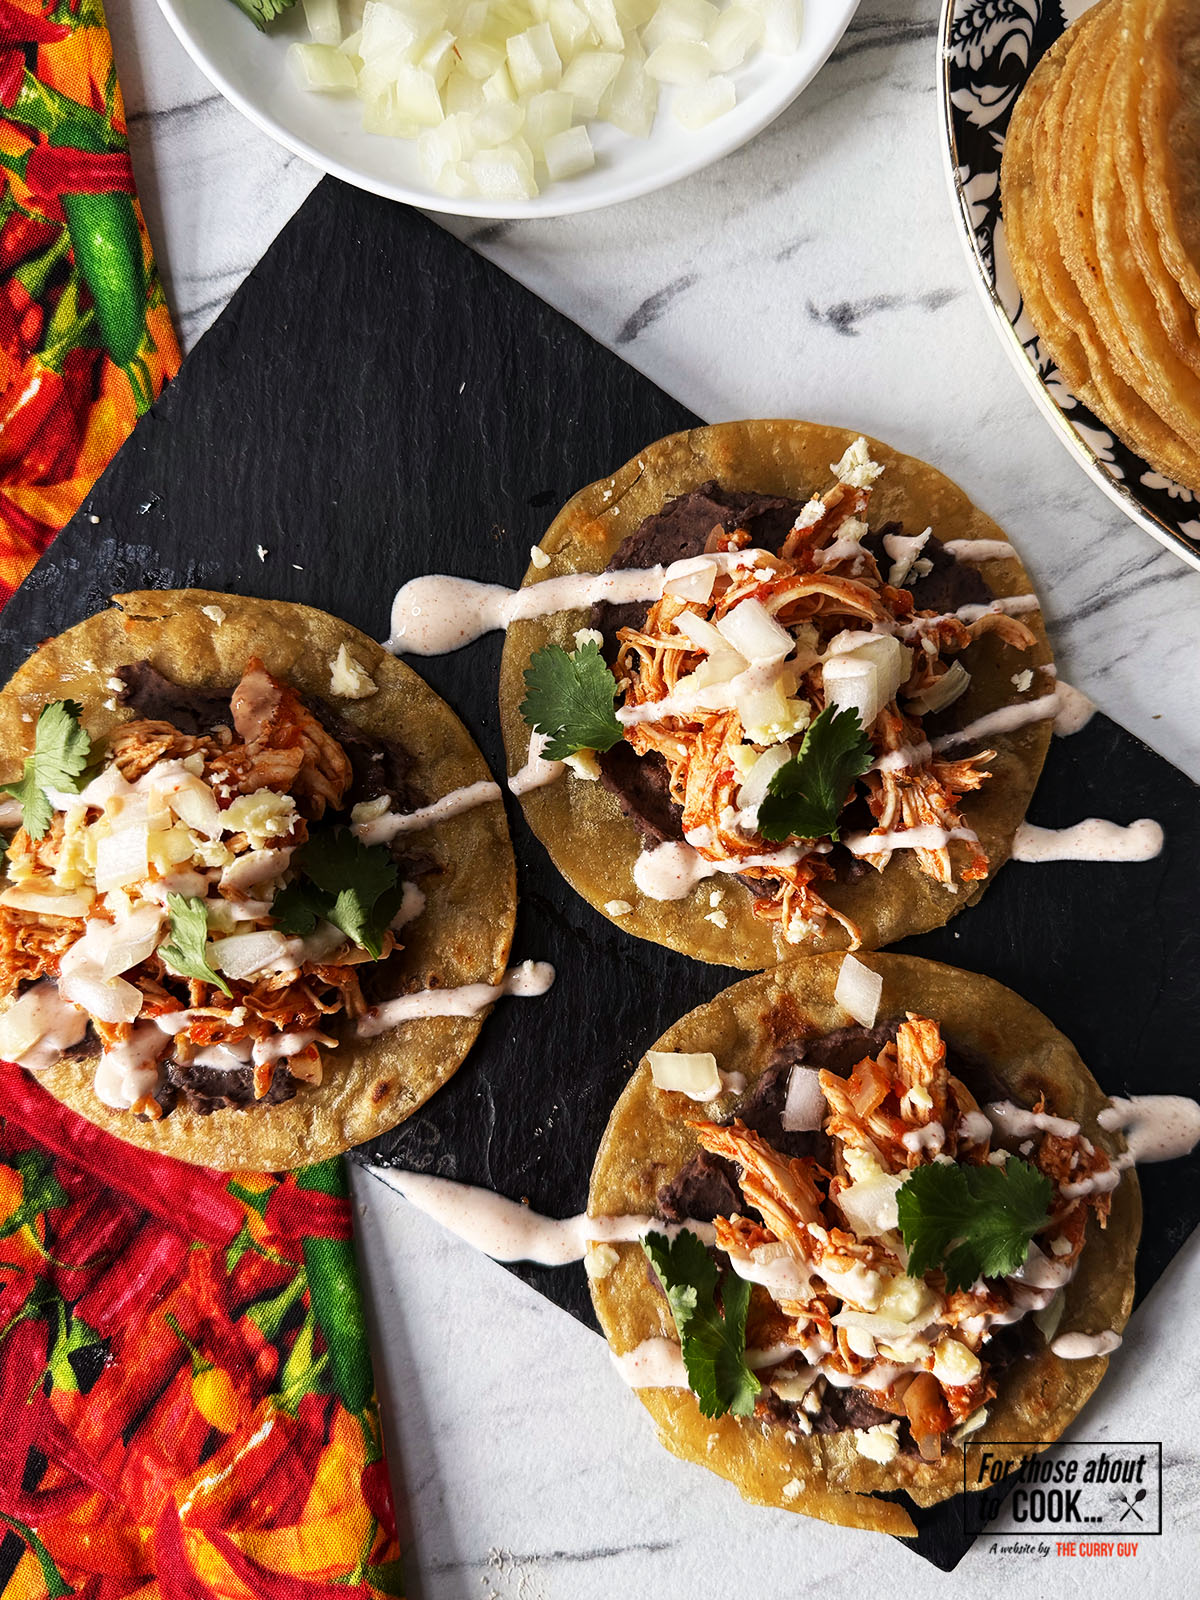
    Tostadas de tinga drizzled with chipotle mayo and sprinkled with coriander
    1. Step 6: Finally, top with your chipotle mayo and a few coriander leaves. Dig in!

    What about the chipotle mayo?

    I've paired these Tostadas de Tinga with a spicy and tangy chipotle mayo. You can find the full recipe here. Here's the simple version of how to make it:

    Ingredients:

    • 2 chipotle chillies
    • ½ cup (120ml) mayonnaise
    • 1 teaspoon salt
    • 1 lime juiced
    Ingredients for chipotle mayo in a food processor
    1. Step 1: Add your chipotle chillies, mayo, salt and lime juice to a food processor.
    Chipotle mayo in a bowl
    1. Step 2: Blend until smooth.

    What about the chipotle chillies?

    Chipotle chillies in adobo sauce can usually be found at any good Mexican Grocer. However, if you do not have a Mexican Grocer near to you, they can easily be purchased online. This tinga recipe calls for 3 chipotle chillies and 3 tablespoons of the adobo sauce so one 200g can is all you need. I bought my chipotle chillies in adobo sauce from Amazon. Alternatively, Chipotle paste can very easily be sourced in most countries. Use 5 tablespoons of chipotle paste in your tinga to substitute the chillies and adobo sauce.

    How spicy is Tinga De Pollo?

    You can find our Tinga de pollo recipe here. Like all the spicy recipes you'll find on this site, it's completely up to you how spicy you want your Tinga De Pollo to be! If you make it as instructed then you will have a medium level of spice, but there are lots of ways to adjust this. To make it less spicy, deseed and devein the chipotle pepper. It's a messy job but well worth it if you're wanting a milder Tinga. If you're using chipotle paste then add 3 tablespoons instead of 5 and add a splash of chicken stock or water to your food processor to thin out the sauce.

    Substitutions

    • Tortillas - I used corn tortillas for these tostadas de tinga as they crisp up perfectly, just like a corn tortilla chip. However, if you're finding it hard to source them then you can use flour tortillas. I find that they don't crisp up very well when frying them so I recommend brushing them with oil and baking them at 400F/200C for 5-6 minutes. Make homemade flour tortillas  here.
    • Cheese - If you can source it, Queso Fresco cheese is an authentic cheese to use. Any mild, crumbly cheese will do however. From making plenty of Mexican recipes using ingredients that can be sourced in the UK, I've found that Wensleydale cheese works great. It crumbles beautifully and can be sprinkled on top of tacos without it melting.

    Variations

    I've paired these Tostadas de Tinga with a spicy chipotle mayo, however there are plenty of toppings you could use. Here are a few ideas:

    • Pico de Gallo - Looking for another fresh salsa? Why not try this Pico de Gallo recipe.
    • Guacamole - Looking for a different topping that still uses up your avocado? Try this homemade Guacamole recipe!

    Equipment

    All you will need to make your Tinga sauce and Chipotle Mayo is either a food processor or a blender. I prefer to use a food processor as it leaves the sauce with a slightly chunky consistency whereas a blender will make the sauce very smooth. It's all down to your own personal preference! If you are wanting to make your Tinga sauce the truly traditional way then you can use a large pestle and mortar.

    Storage

    Refrigeration - Separate the tinga from the tostada toppings. Allow your Tinga De Pollo to cool completely. Add to an airtight container and store in the fridge for up to 4 days. To reheat, add to a pan with a splash of chicken stock and heat though.

    Freezing - Allow your Tinga De Pollo to cool completely. Add to an airtight container or a freezer bag and store in the freezer for up to 3 months. To reheat, allow to defrost in the fridge completely, add to a pan with a splash of chicken stock and heat though.

    Top Tip

    Fry your tortillas in a generous amount of oil. You want to shallow fry them to get them as crispy as possible. A true tostada shouldn't fold like a taco!

    FAQ

    How do I keep the shells crispy?

    The key here is to add a layer of refried black beans to the tostadas before adding your ground beef and toppings. It creates the perfect barrier to keep your shells crispy.

    Related

    Looking for other recipes like this? Try these:

    • Pork carnitas tacos
      Pork Carnitas Tacos
    • Tacos al pastor on a serving plate
      Tacos al Pastor
    • Fried Fish Tacos
      Fried Fish Tacos
    • Steak tacos on a plate.
      Steak Tacos

    Pairing

    These are my favorite dishes to serve with [this recipe]:
    • Pico de gallo in a serving bowl next to homemade corn chips.
      How to Make Pico de Gallo
    • Homemade Guacamole in a serving bowl next to corn chips.
      Guacamole Recipe
    • Fnished corn chips
      Corn Chips
    • Homemade Flour Tortillas

    Recipe

    Tostadas de tinga drizzled with chipotle mayo and sprinkled with coriander

    Tostadas de Tinga

    Yield: 6
    Prep Time: 20 minutes
    Cook Time: 10 minutes
    Total Time: 30 minutes

    Spicy, crispy and packed full of flavor! These Tostadas de Tinga are so simple to make; perfectly crispy corn tortillas topped with Tinga de Pollo, refried black beans and a spicy chipotle mayo.

    No Ratings

    Ingredients

    • 17oz (500g) cooked Tinga de Pollo
    • 6 small corn tortillas
    • 50ml neutral oil
    • 1 cup (250g) refried black beans
    • ⅓ cup (50g) crumbled Queso Fresco cheese
    • ½ cup (120ml) Chipotle Mayo (see notes)
    • Handful fresh coriander

    Instructions

      1. First, add a splash of oil to a pan and fry your tortillas on a medium-high heat. Fry for about 5 minutes on each side until they have browned slightly and crisped.
      2. Remove your crispy tostada shells and place them on a plate.
      3. Scoop a generous helping of your refried black beans onto your tostada and spread it around using the back of a spoon.
      4. Add a few tablespoons of your heated Tinga de Pollo on top.
      5. Sprinkle with Queso Fresco cheese and some diced white onion.
      6. Finally, top with your chipotle mayo and a few coriander leaves. Dig in!

    Notes

    See above for chipotle mayo recipe.

    Nutrition Information:
    Yield: 2 Serving Size: 1
    Amount Per Serving: Calories: 747Total Fat: 45gSaturated Fat: 8gTrans Fat: 1gUnsaturated Fat: 33gCholesterol: 61mgSodium: 451mgCarbohydrates: 58gFiber: 14gSugar: 4gProtein: 32g
    © Shannon
    Cuisine: Mexican / Category: Mexican Recipes

    Beef Tostada

    July 16, 2025 By Shannon

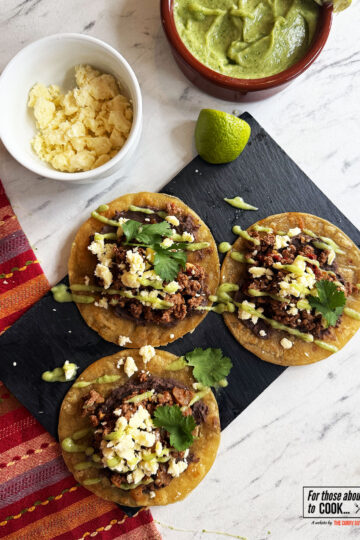
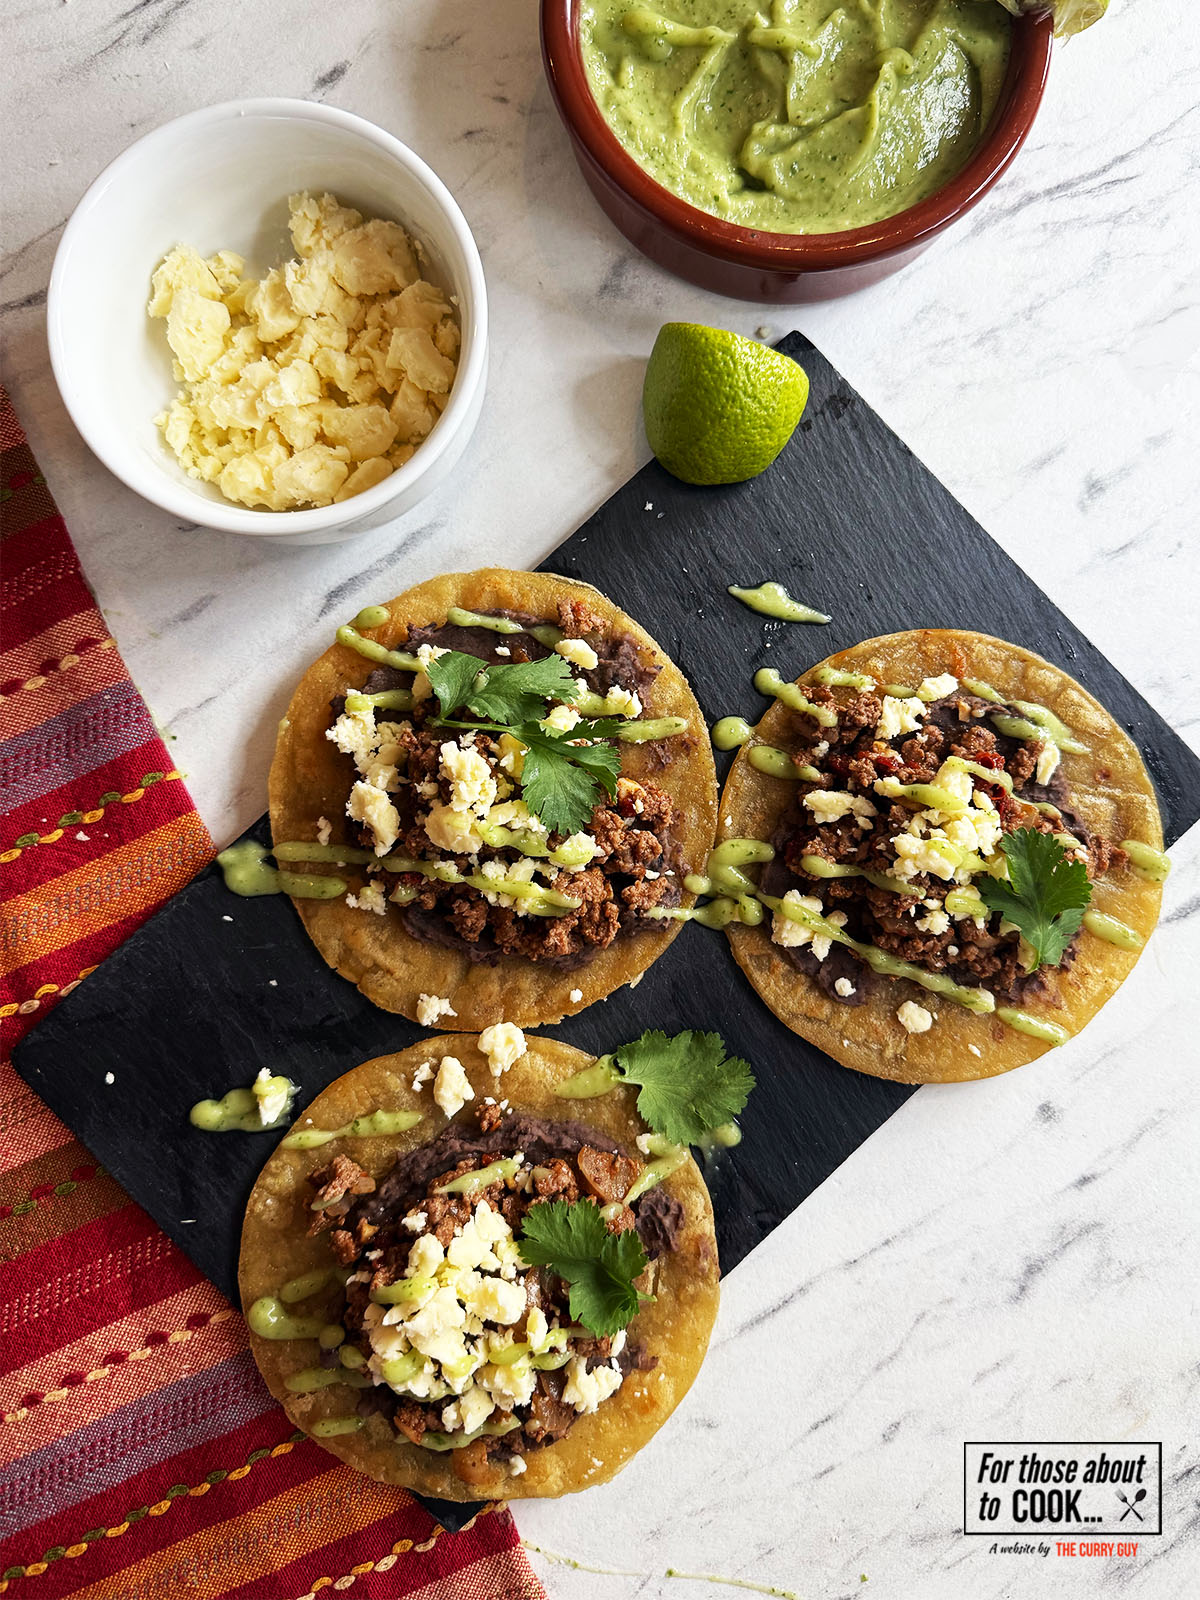
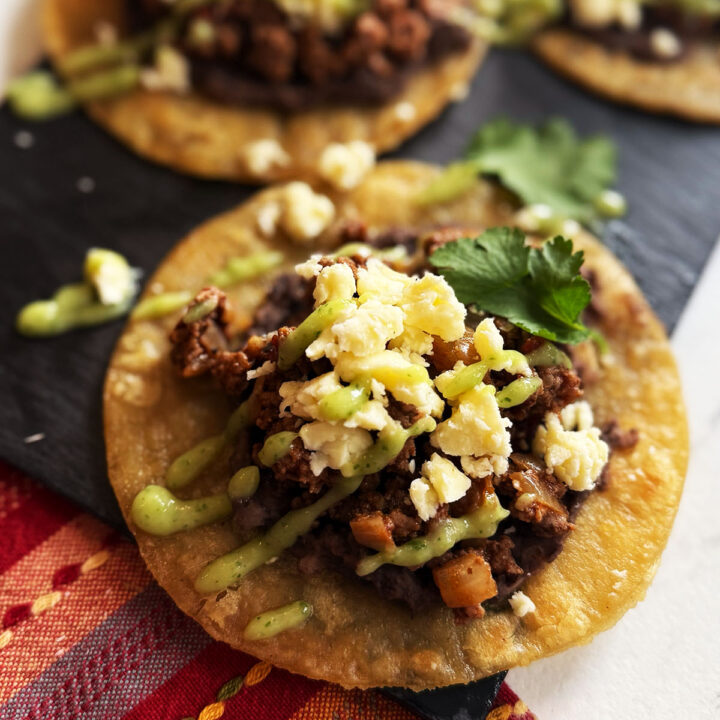
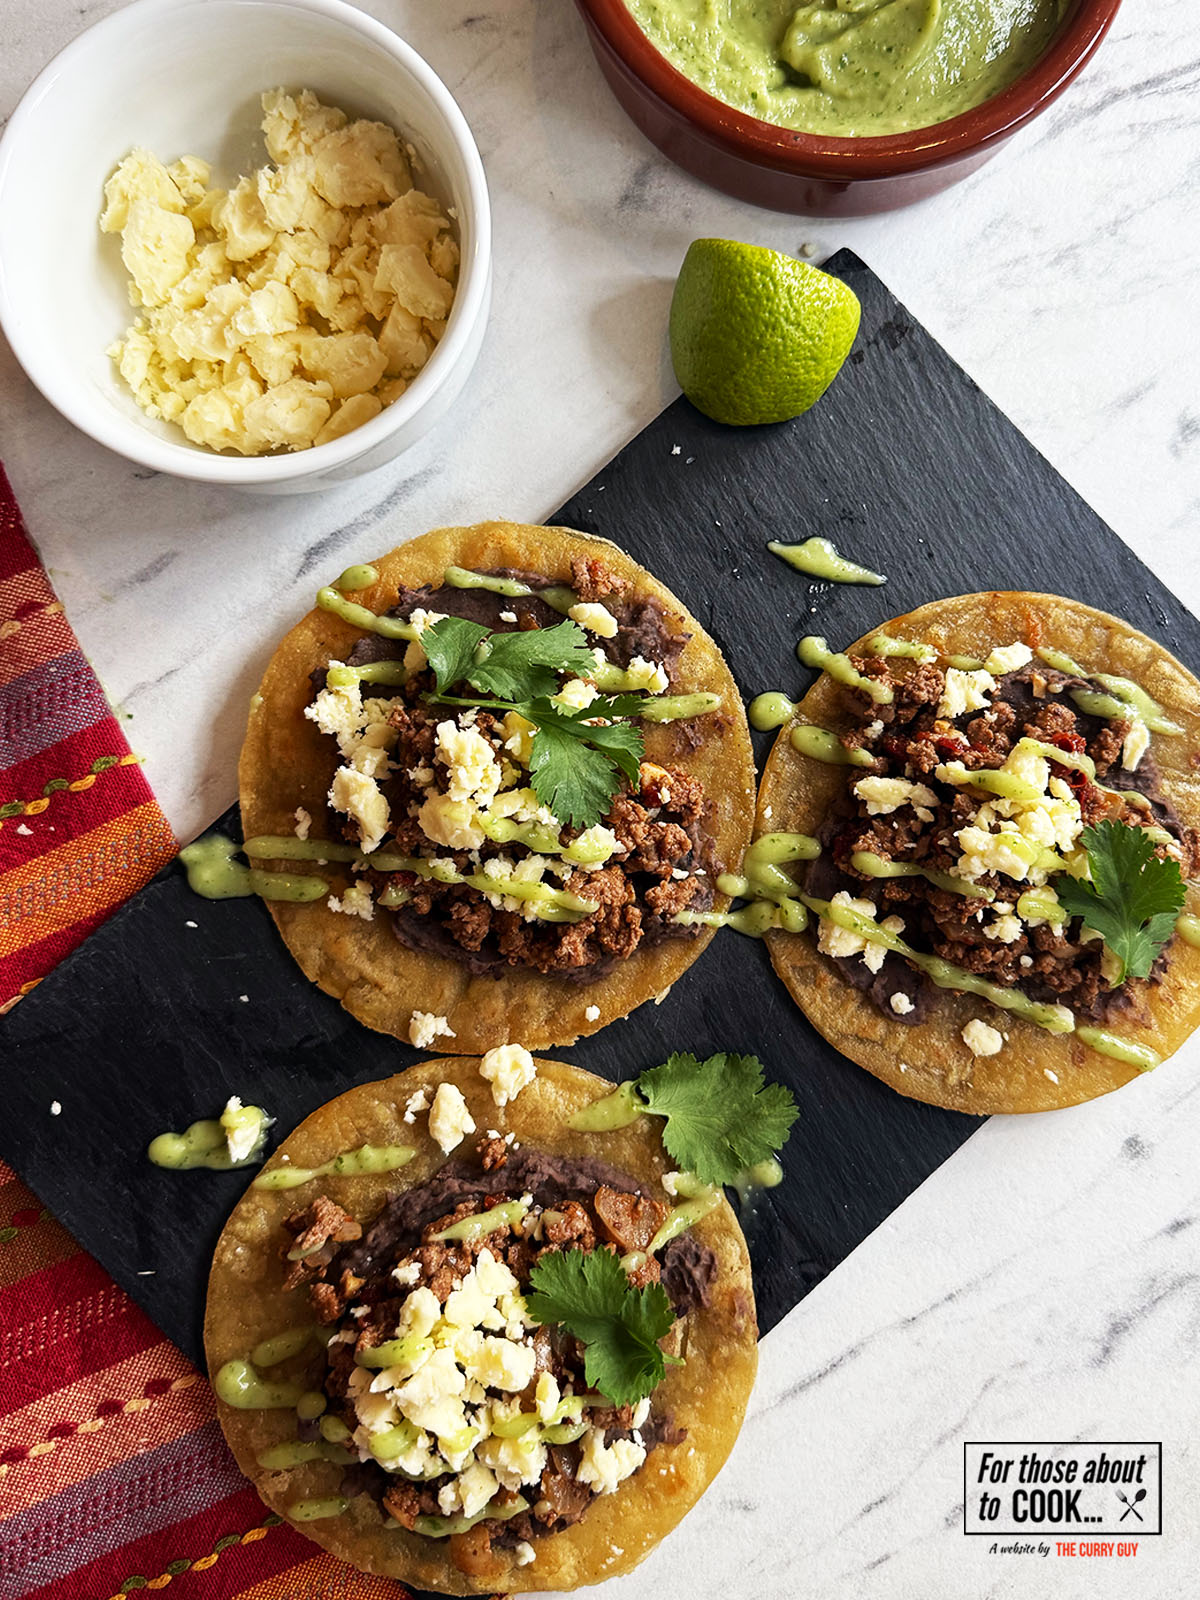
    Finished tostadas topped with wensleydale cheese, coriander and salsa de aguacate

    Crispy, fresh and packed full of flavor! These Ground Beef Tostadas are so simple to make and are a great way to use up any left over ingredients you might have. Make your evening meal more interesting and give these a go!

    Beef tostadas topped with cheese and green sauce

    About this recipe:

    Tostada simply means 'toasted' in Spanish and all tostada recipes require crispy corn tortillas that can either be fried or baked. It's basically one giant tortilla chip! When it comes to the toppings, that's really up to you! This recipe shows you how to make a quick chipotle chili beef and pairs it with a deliciously fresh Salsa de Aguacate (Avocado Salsa) and refried black beans. These tostadas are so versatile and I give you plenty of different variations and combinations of toppings below! Give these Beef Tostadas a go!

    Ingredients

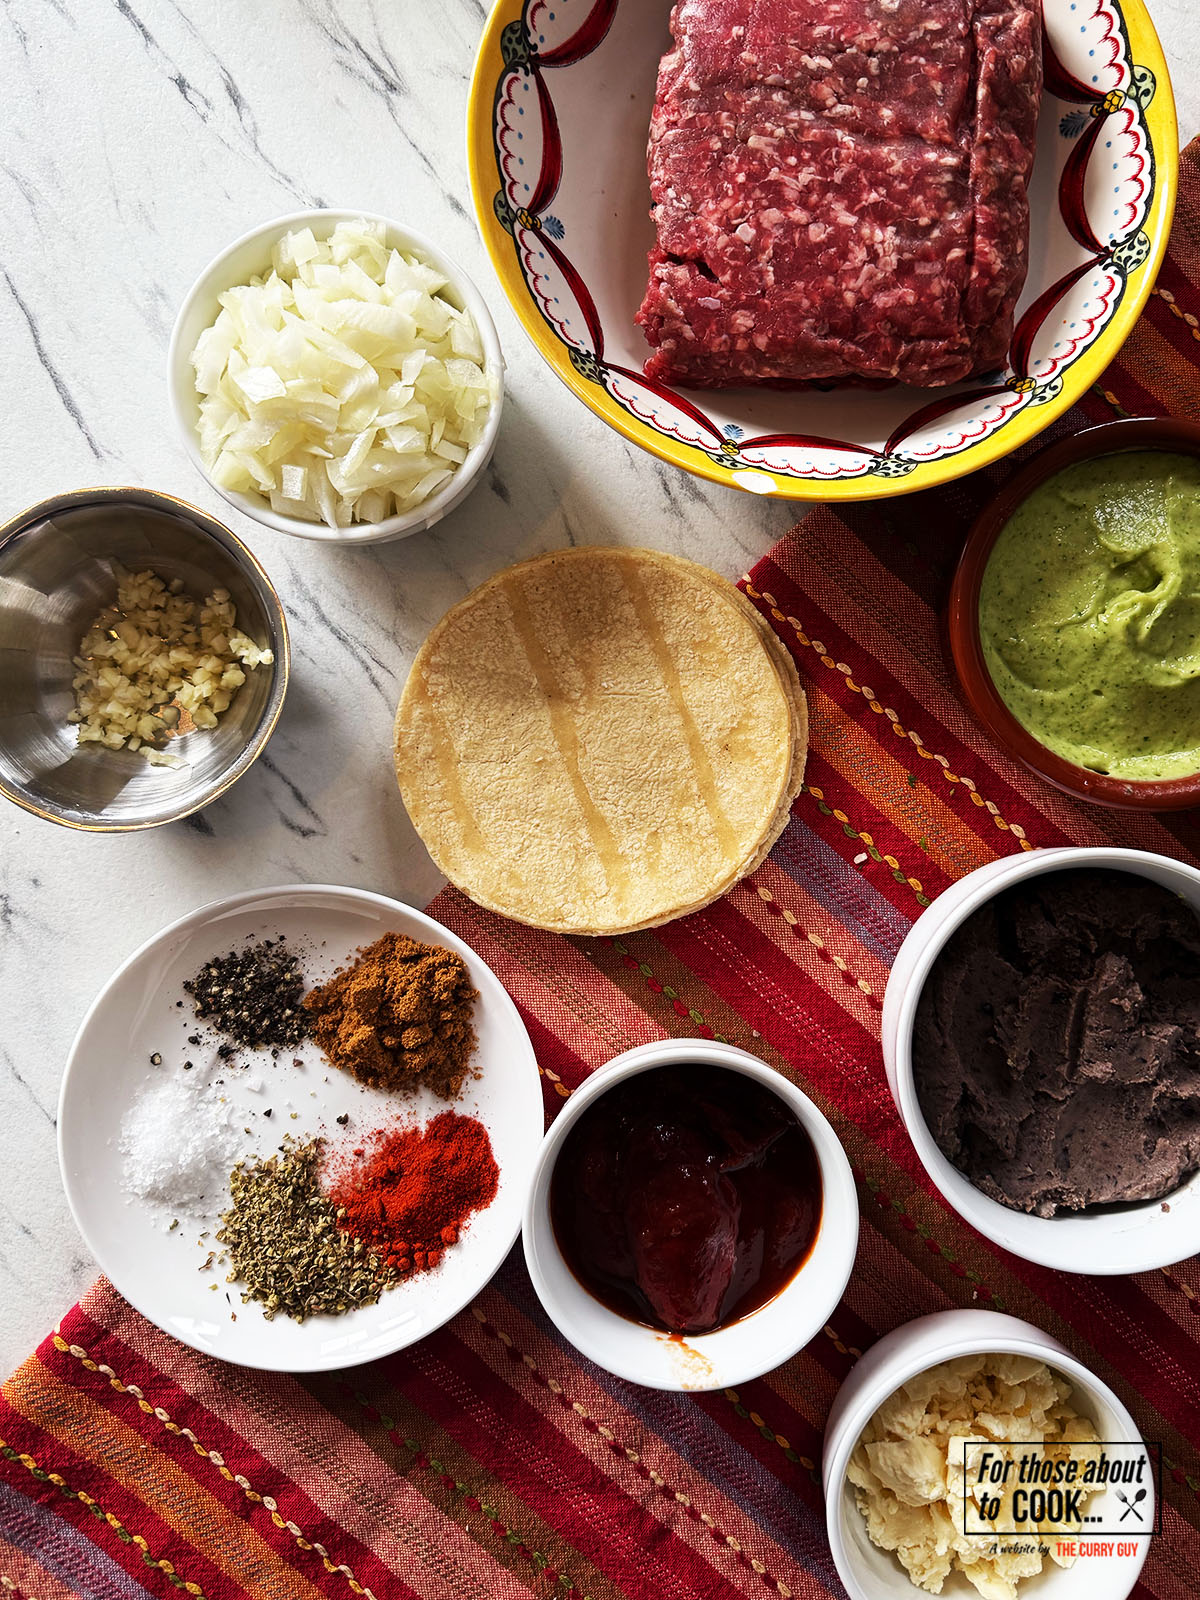
    Ingredients for beef tostadas in bowls
    • For the ground beef:
    • Ground beef
    • Chipotle chillies in adobo sauce (blended)
    • Onion
    • Garlic
    • Cumin
    • Paprika
    • Oregano
    • Salt and pepper
    • For the tostadas:
    • Corn tortillas
    • Neutral oil
    • Refried black beans
    • Queso Fresco (or any mild crumbly cheese)
    • Salsa de aguacate (Avocado salsa)

    See recipe card for quantities.
    Step by step photographs:

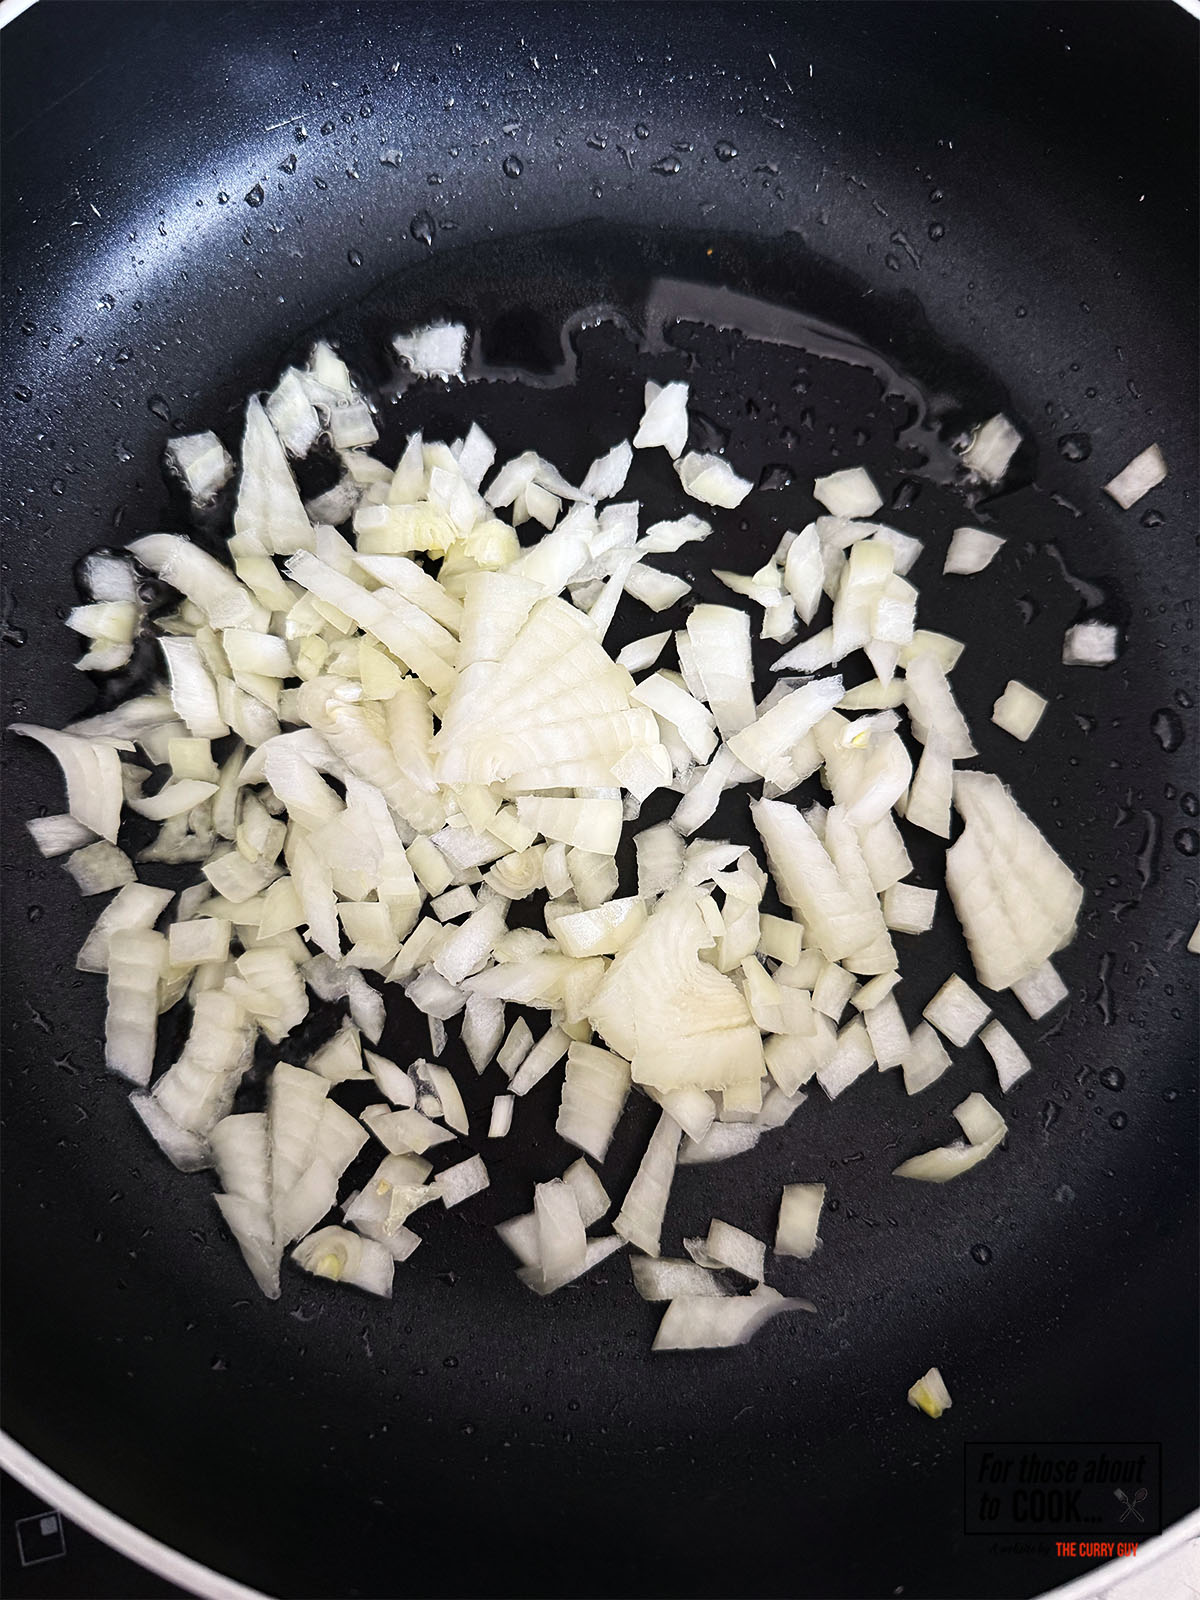
    Onions frying in a pan
    1. Step 1: In a pan, on a medium heat, add a splash of oil and fry your onions until translucent.
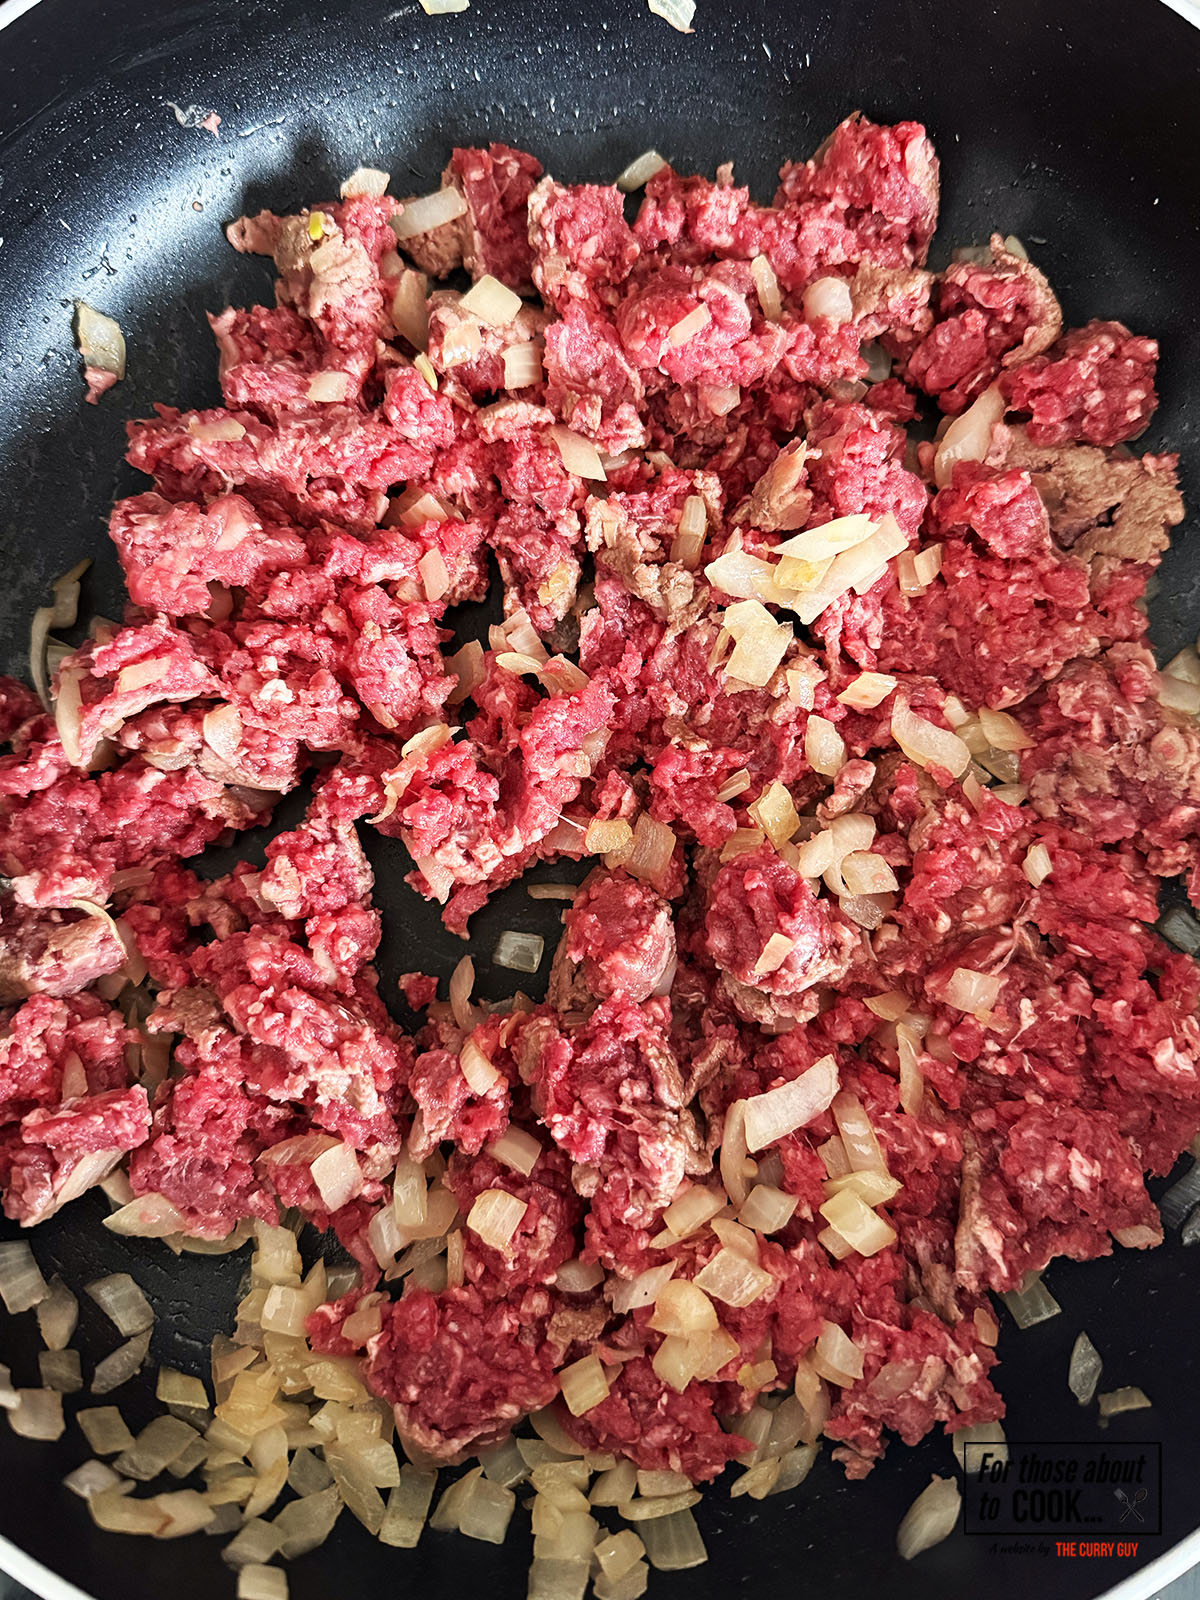
    Beef frying with the onions in the pan
    1. Step 2: Next, add your ground beef and break it up using a spoon. Fry until browned.
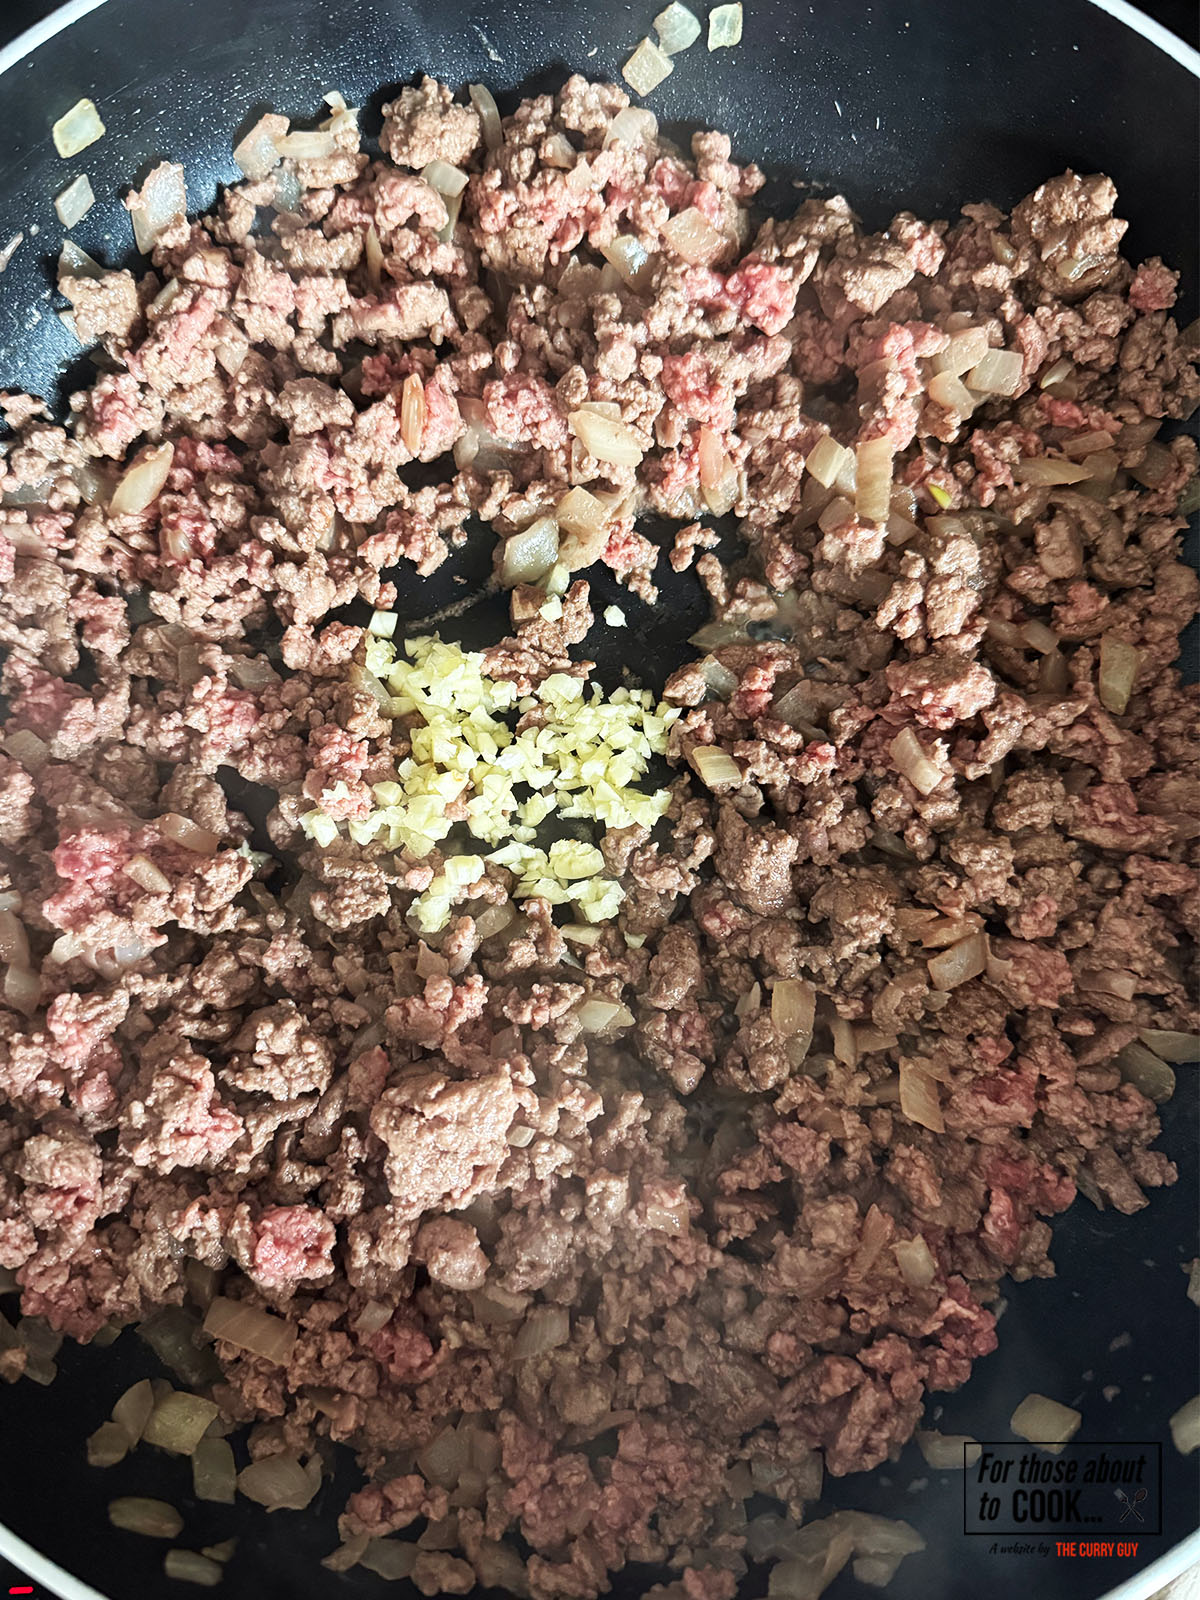
    Garlic added to the pan
    1. Step 3: When your beef has browned, add your minced garlic and fry for 1 minute.
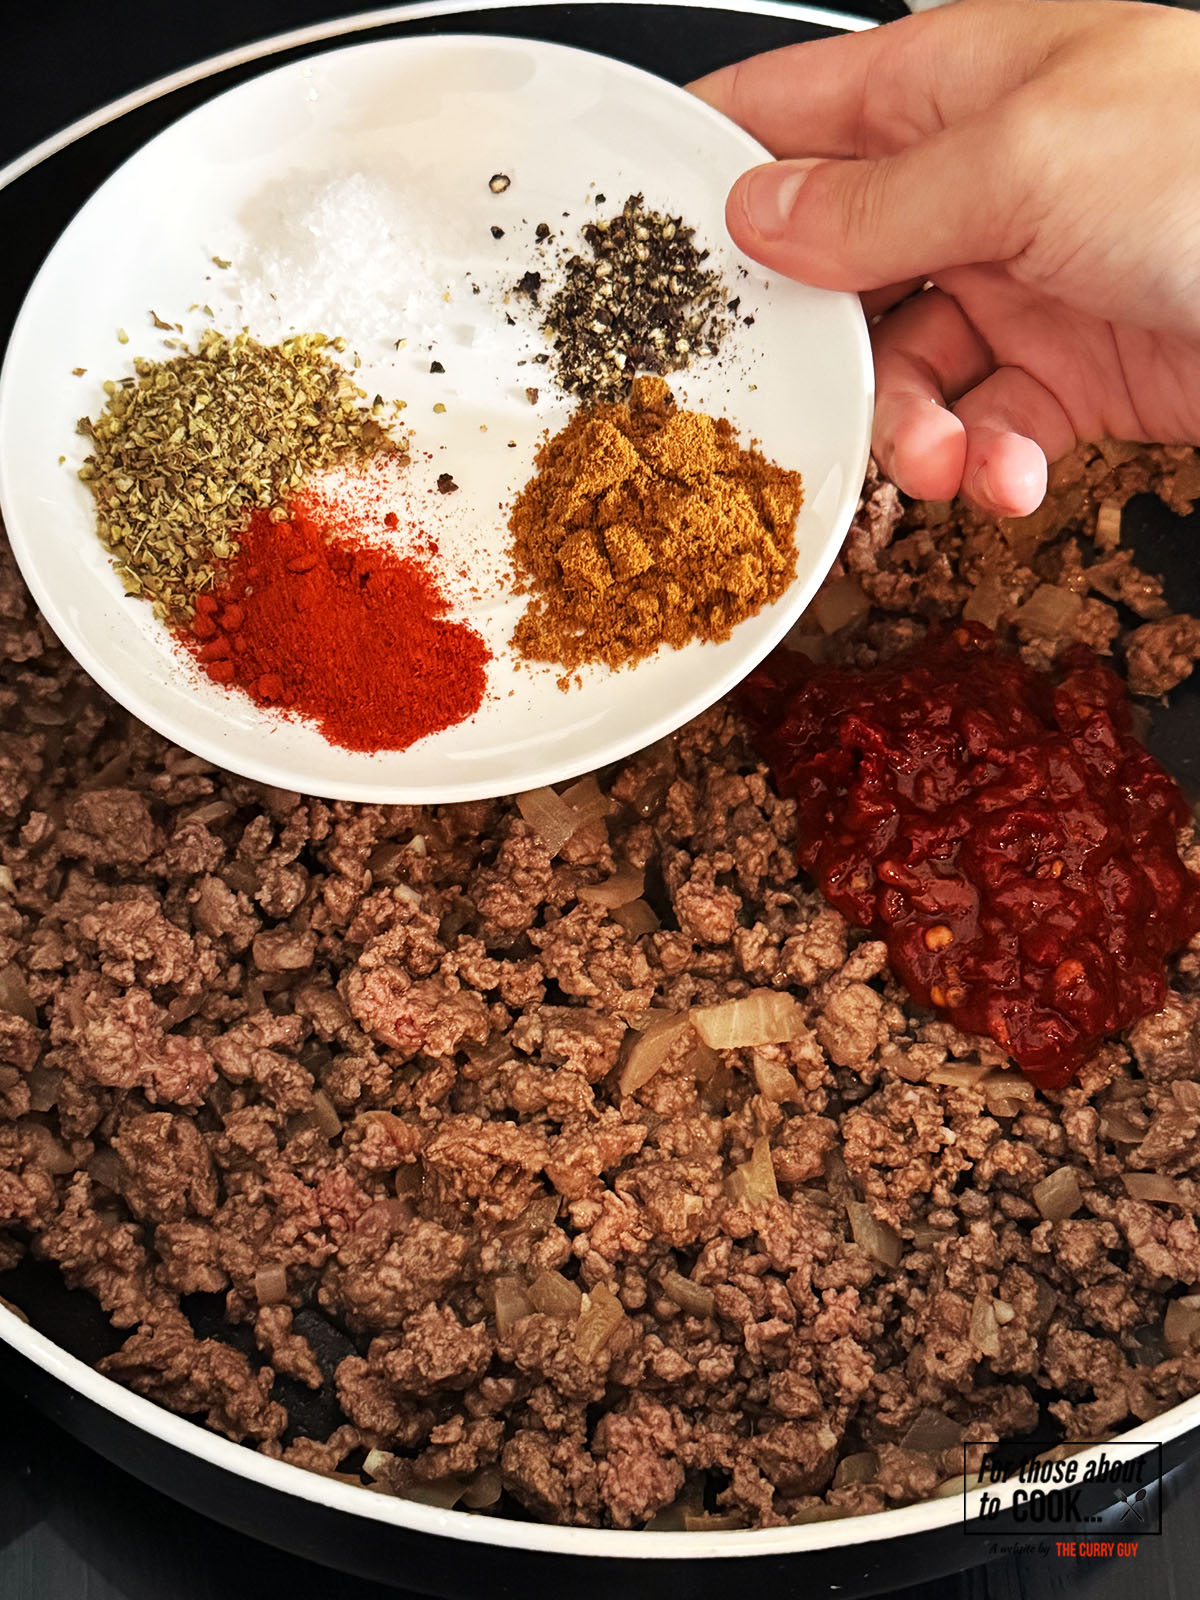
    Blended chipotle chillies in adobo sauce and spices added to the pan
    1. Step 4: Then, add your blended chipotle chillies in adobo sauce and your spices. Give it a good mix and cook for 5 minutes.
    Corn tortillas crisping in a pan
    1. Step 5: Meanwhile, add a splash of oil to a pan and fry your tortillas on a medium-high heat. Fry for about 5 minutes on each side until they have browned slightly and crisped.
    Black beans added to corn tortillas
    1. Step 6: Next, add a healthy dollop of your refried black beans to your fried tortillas.
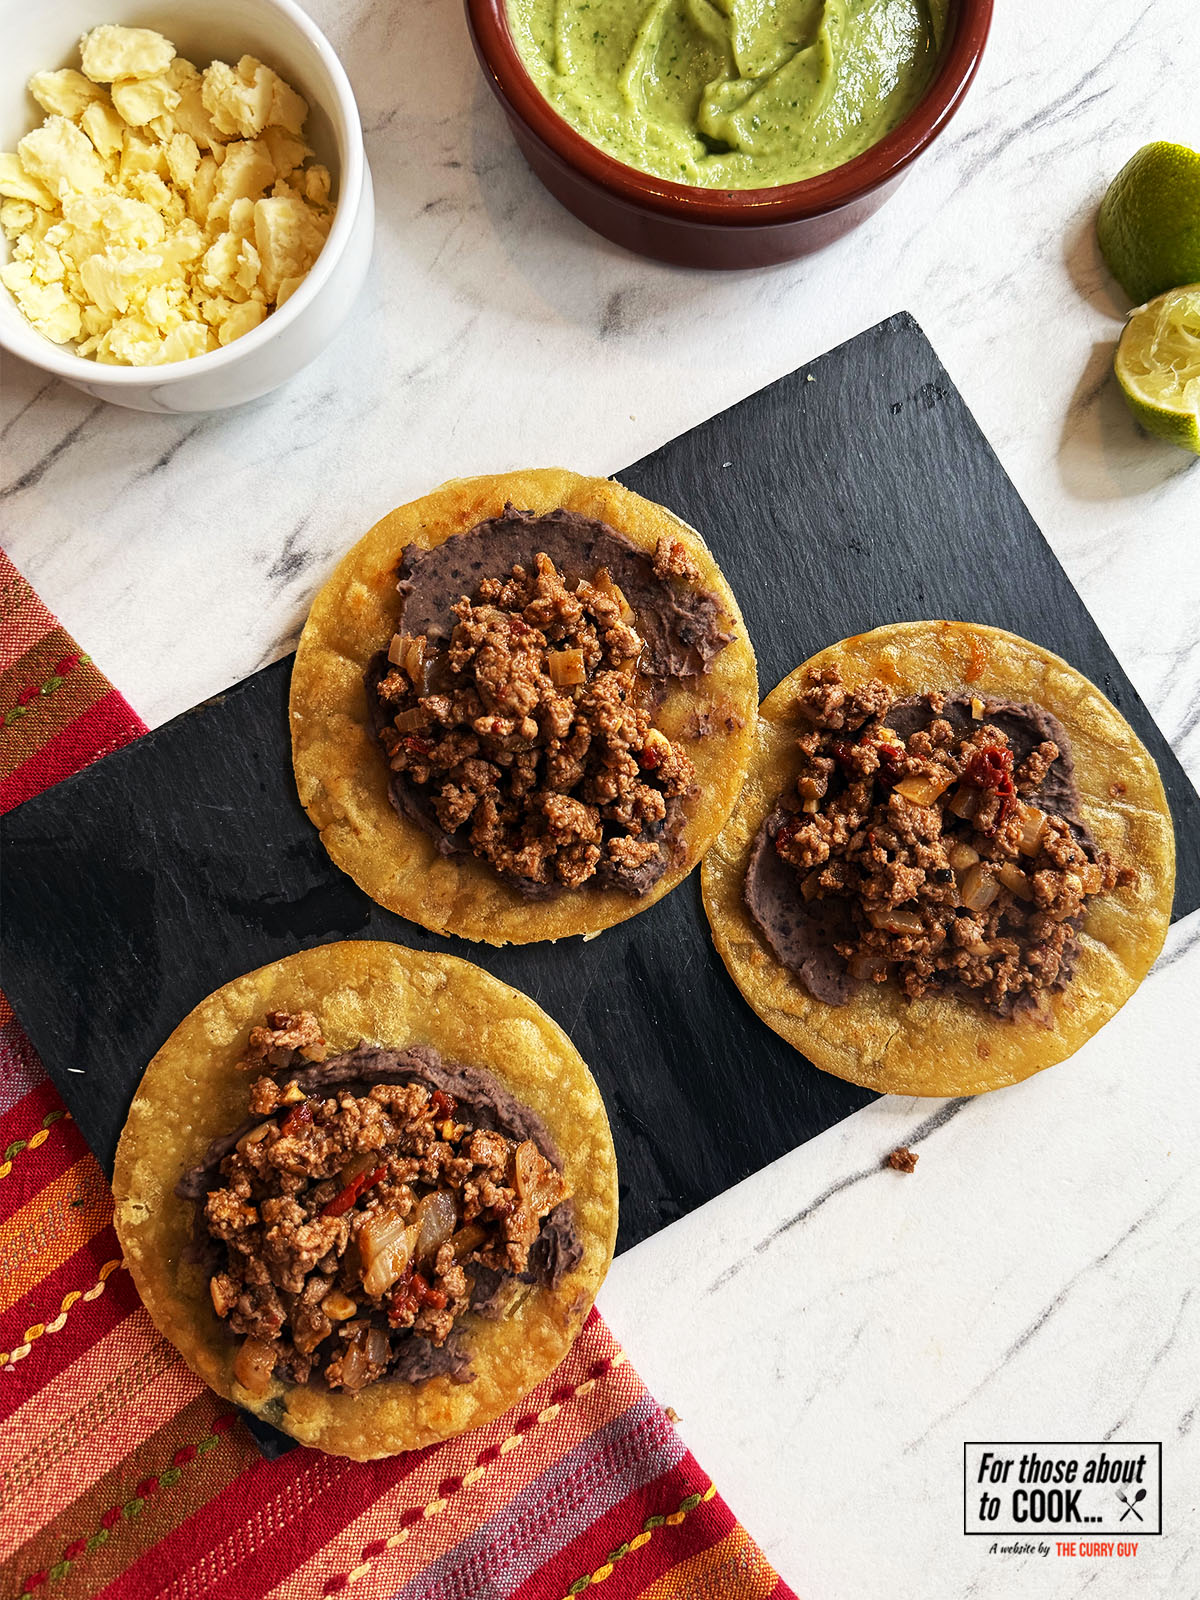
    Tostadas topped with ground beef
    1. Step 7: Then, add a generous spoonful of your chipotle ground beef.
    Finished tostadas topped with wensleydale cheese, coriander and salsa de aguacate
    1. Step 8: Top with Queso Fresco cheese, salsa de aguacate and coriander. Dig in!

    What about the Salsa de Aguacate?

    Salsa de Aguacate is a fresh and zesty avocado salsa that can be whipped up in no time! Here's the quick recipe below or find the full recipe here.

    Ingredients:

    • 1 Avocado
    • ½ Jalapeño
    • 1 clove garlic
    • 1 lime juiced
    • 1 handful coriander
    • ½ teaspoon salt
    • ¼ cup(60ml) water
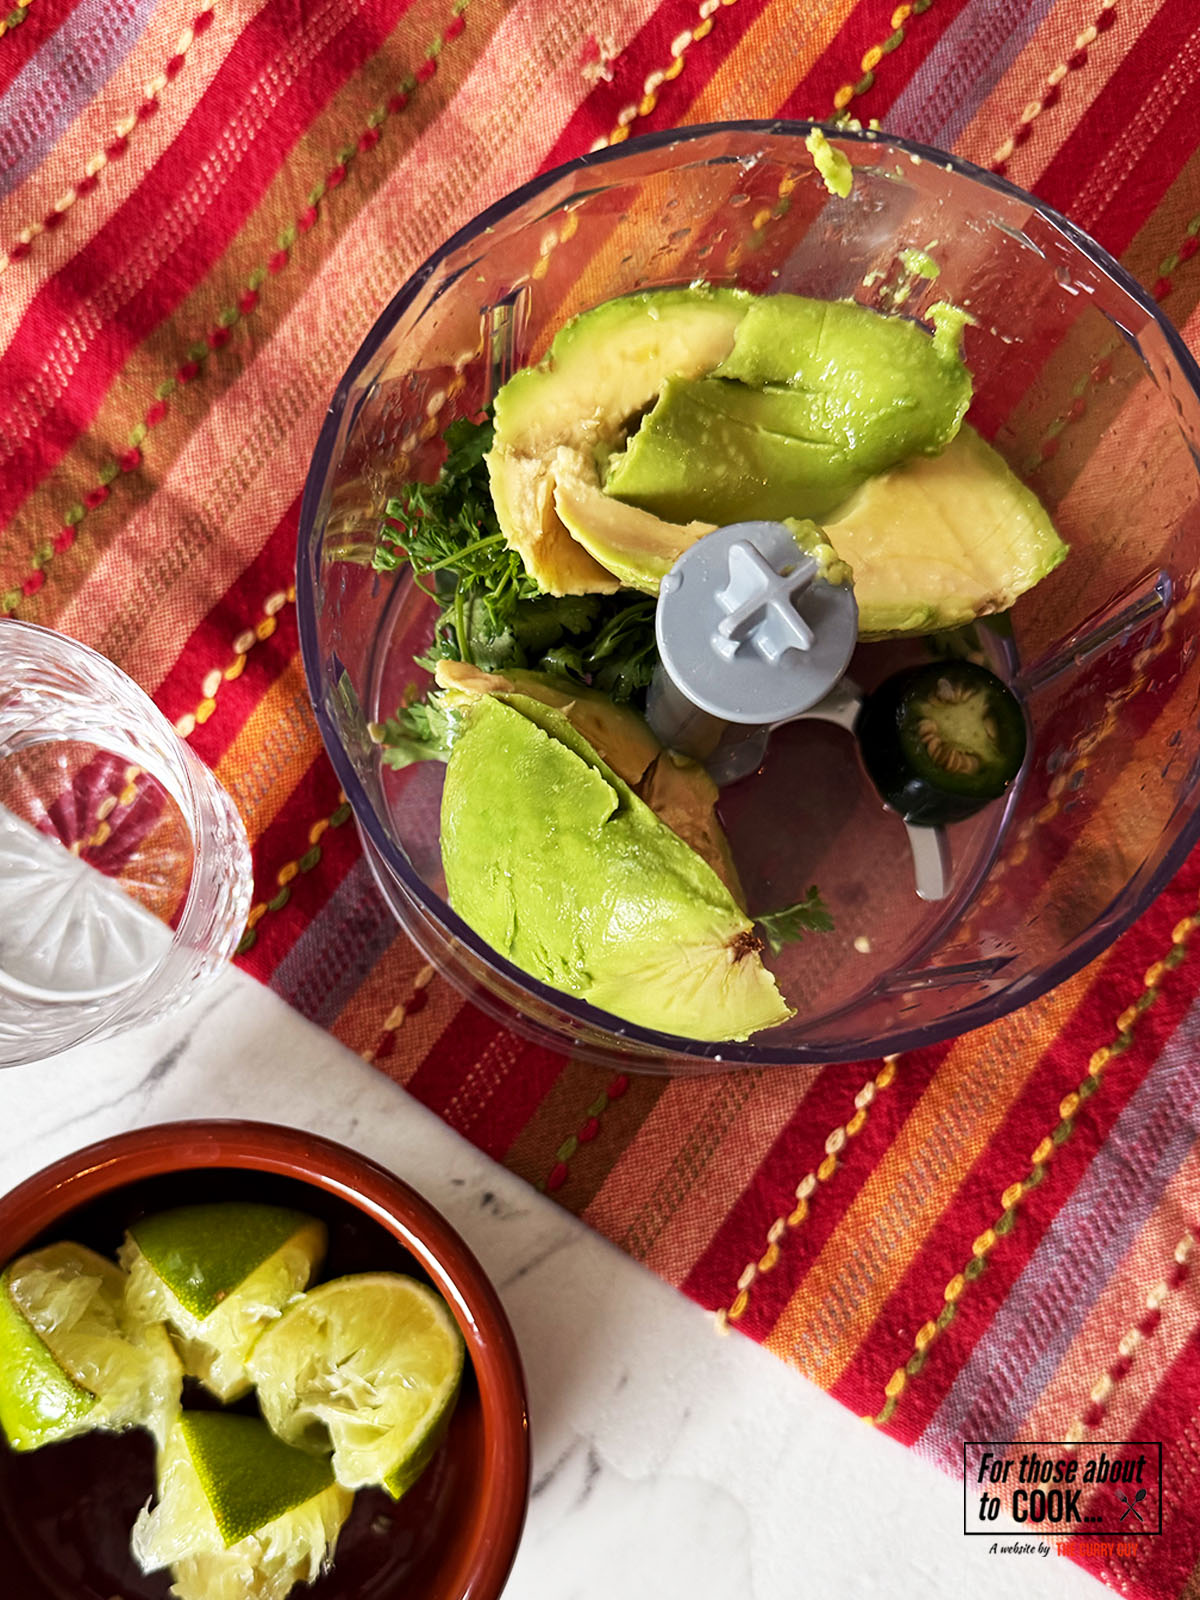
    salsa de aguacate ingredients in a food processor
    1. Step 1: Add avocado, coriander, jalapeño, lime juice, garlic, salt and water to a food processor or blender.
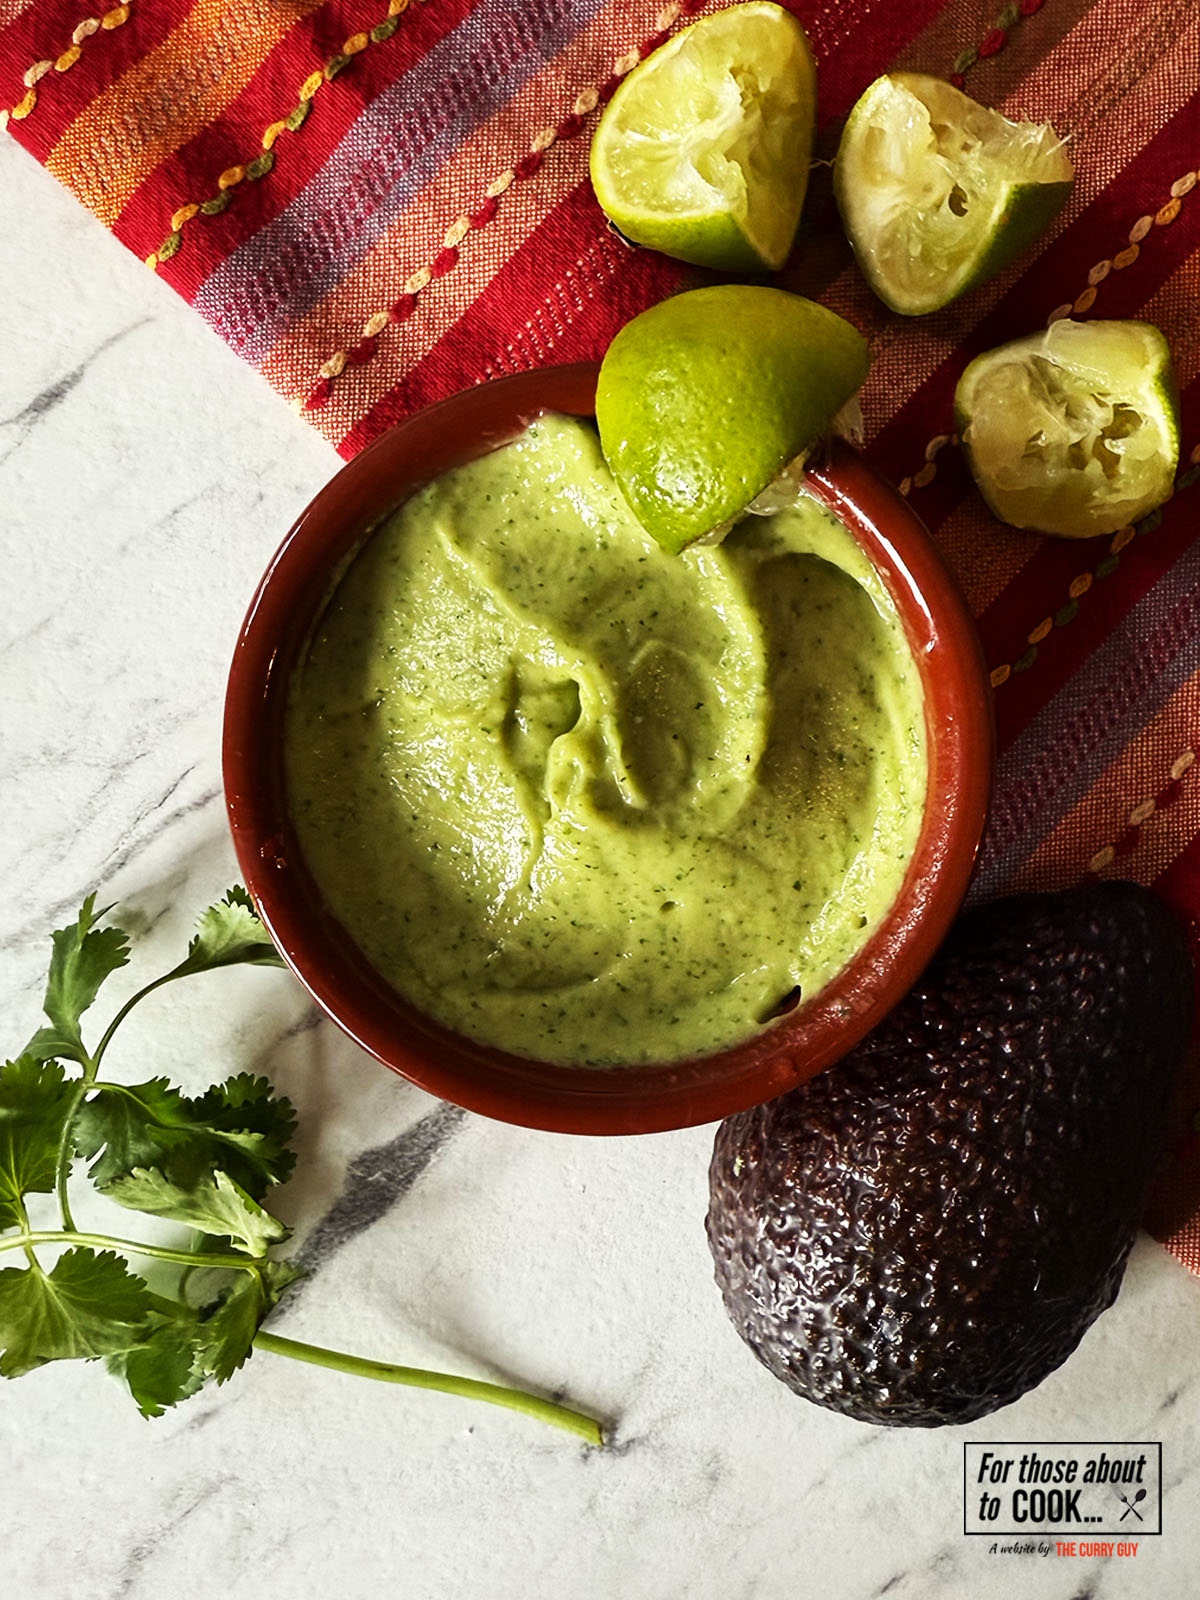
    Blended salsa de aguacate in a bowl
    1. Step 2: Blend until smooth.

    What about the chipotle chillies?

    Chipotle chillies in adobo sauce can usually be found at any good Mexican Grocer. However, if you do not have a Mexican Grocer near to you, they can easily be purchased online. This recipe calls for 2 chipotle chillies and 2 tablespoons of the adobo sauce so one 200g can is all you need. I bought my chipotle chillies in adobo sauce from Amazon. Alternatively, Chipotle paste can very easily be sourced in most countries. Use 4 tablespoons of chipotle paste in your beef tostadas to substitute the chillies and adobo sauce.
    How spicy is the chipotle beef?

    Like all the spicy recipes you'll find on this site, it's completely up to you how spicy you want your chipotle beef to be! If you make it as instructed below then you will have a medium level of spice, but there are lots of ways to adjust this. To make it less spicy, deseed and devein the chipotle pepper. It's a messy job but well worth it if you're wanting a milder beef!

    Substitutions

    • Oregano - If you can source Mexican oregano you will end up with a more authentically flavored Chipotle beef. Mexican oregano has slighlty bigger, more jagged leaves and provides a citrusy flavor that normal oregano doesn't provide.
    • Tortillas - I used corn tortillas for this recipe as they crisp up perfectly, just like a corn tortilla chip. However, if you're finding it hard to source them then you can use flour tortillas. I find that they don't crisp up very well when frying them so I recommend brushing them with oil and baking them at 400F/200C for 5-6 minutes. Make homemade flour tortillas  here.
    • Cheese - If you can source it, Queso Fresco cheese is an authentic cheese to use. Any mild, crumbly cheese will do however. From making plenty of Mexican recipes using ingredients that can be sourced in the UK, I've found that Wensleydale cheese works great. It crumbles beautifully and can be sprinkled on top of tacos without it melting.

    Variations

    I've paired these beef tostadas with a fresh Salsa de Aguacate , however there are plenty of toppings you could use. Here are a few ideas:

    • Pico de Gallo - Looking for another fresh salsa? Why not try this Pico de Gallo recipe.
    • Guacamole - Looking for a different topping that still uses up your avocado? Try this homemade Guacamole recipe!

    Equipment

    All you will need to blend your chipotle chillies and adobo sauce is either a food processor or a blender. If you are wanting to make your chipotle sauce the truly traditional way then you can use a pestle and mortar.

    Storage

    Refrigeration - store the cooked ground beef and the toppings separately. Allow the ground beef to cool completely, transfer to an airtight container and store in the fridge for up to 3 days. To reheat, heat through in a pan with a splash of water.
    Freezing - Allow your beef to cool completely, transfer to an airtight container and store in the freezer for up to 3 months. To reheat, defrost in the fridge and heat through in a pan with a splash of water.

    Top Tip

    Fry your tortillas in a generous amount of oil. You want to shallow fry them to get them as crispy as possible. A true tostada shouldn't fold like a taco!

    FAQ

    What type of beef should I use?

    The best beef to use would be a lean ground beef as it has enough fat to add flavor without being too greasy.

    How do I keep the shells crispy?

    The key here is to add a layer of refried black beans to the tostadas before adding your ground beef and toppings. It creates the perfect barrier to keep your shells crispy.

    Related

    Looking for other recipes like this? Try these:

    • Pork carnitas tacos
      Pork Carnitas Tacos
    • Tacos al pastor on a serving plate
      Tacos al Pastor
    • Fried Fish Tacos
      Fried Fish Tacos
    • Steak tacos on a plate.
      Steak Tacos

    Pairing

    These are my favorite dishes to serve with Beef Tostadas:

    • Pico de gallo in a serving bowl next to homemade corn chips.
      How to Make Pico de Gallo
    • Homemade Guacamole in a serving bowl next to corn chips.
      Guacamole Recipe
    • Fnished corn chips
      Corn Chips
    • Homemade Flour Tortillas

    Recipe

    Beef tostadas topped with cheese and salsa de aguacate

    Beef Tostada

    Yield: 6
    Prep Time: 5 minutes
    Cook Time: 20 minutes
    Total Time: 25 minutes

    Crispy, fresh and packed full of flavor! These Ground Beef Tostadas are so simple to make and are a great way to use up any left over ingredients you might have.

    5.0 Stars (1 Review)

    Ingredients

    • For the beef:
    • 17oz (500g) lean ground beef
    • 3 chipotle chillies and 3 tablespoons adobo sauce blended
    • 1 white onion
    • 2 cloves garlic minced
    • ½ tablespoon cumin
    • ½ tablespoon paprika
    • ½ tablespoon oregano
    • 1 teaspoon salt and pepper
    • For the tostadas:
    • 6 small corn tortillas
    • 50ml neutral oil
    • 1 cup (250g) refried black beans
    • ⅓ cup (50g) crumbled Queso Fresco cheese
    • ½ cup (120ml) Salsa de Aguacate (see notes)
    • Handful fresh coriander

    Instructions

      1. In a pan, on a medium heat, add a splash of olive oil and fry your onions until translucent.
      2. Next, add your ground beef and break it up using a spoon. Fry for 8-10 minutes until browned.
      3. When your beef has browned, add your minced garlic and fry for 1 minute.
      4. Then, add your blended chipotle chillies in adobo sauce and your spices. Give it a good mix and cook for a further 5 minutes. Add a splash of water if it's looking very dry.
      5. Meanwhile, add a splash of oil to a pan and fry your tortillas on a medium-high heat. Fry for about 5 minutes on each side until they have browned slightly and crisped.
      6. Next, add a healthy dollop of your refried black beans to your fried tortillas. Then, add a generous spoonful of your chipotle ground beef.
      7. Top with Queso Fresco cheese, salsa de aguacate and coriander. Dig in!

    Notes

    This recipe gives you a simplified version of Salsa de Aguacate above.

    Nutrition Information:
    Yield: 2 Serving Size: 1
    Amount Per Serving: Calories: 836Total Fat: 48gSaturated Fat: 8gTrans Fat: 1gUnsaturated Fat: 36gCholesterol: 55mgSodium: 843mgCarbohydrates: 76gFiber: 21gSugar: 9gProtein: 33g
    © Shannon
    Cuisine: Mexican / Category: Mexican Recipes

    Salsa de Aguacate

    July 16, 2025 By Shannon

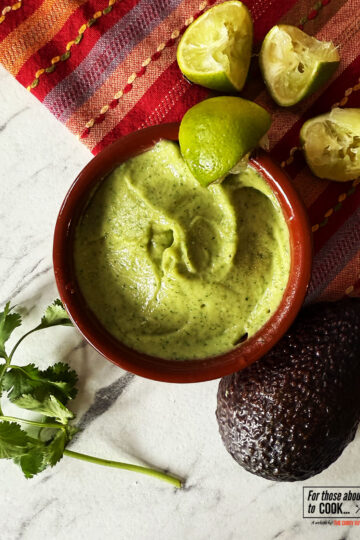
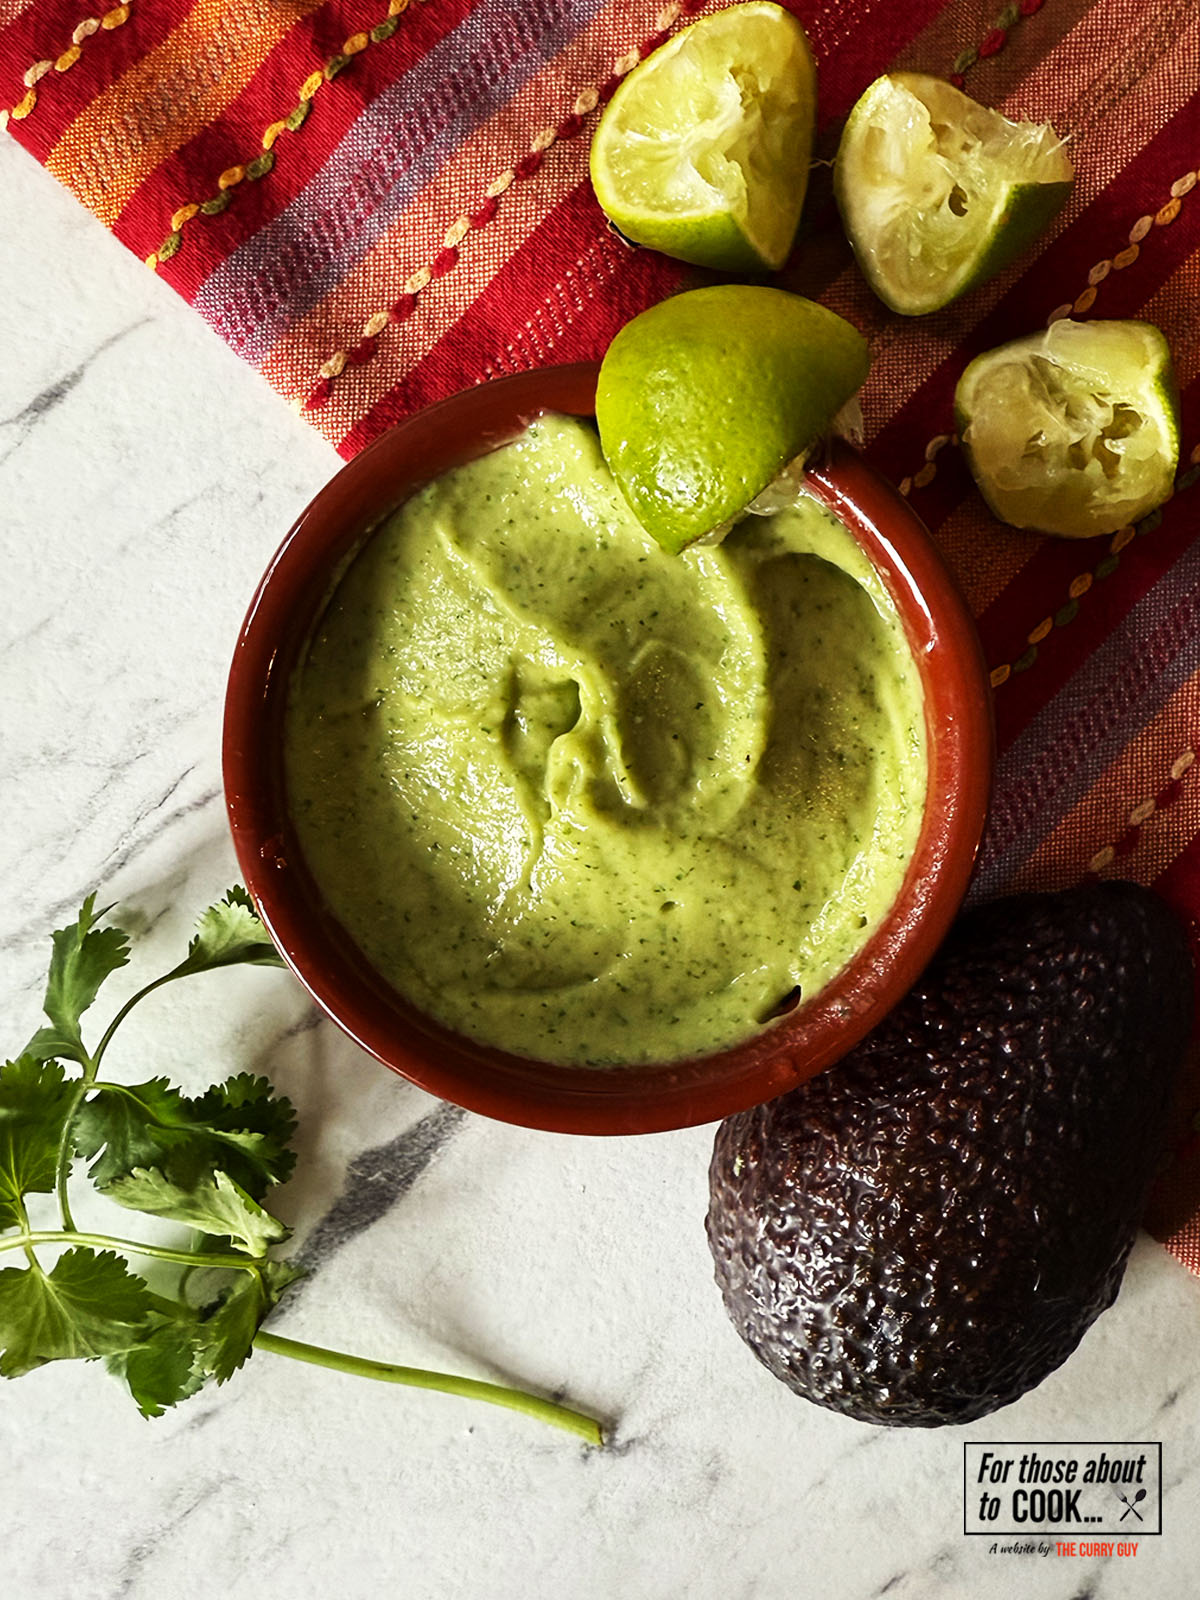
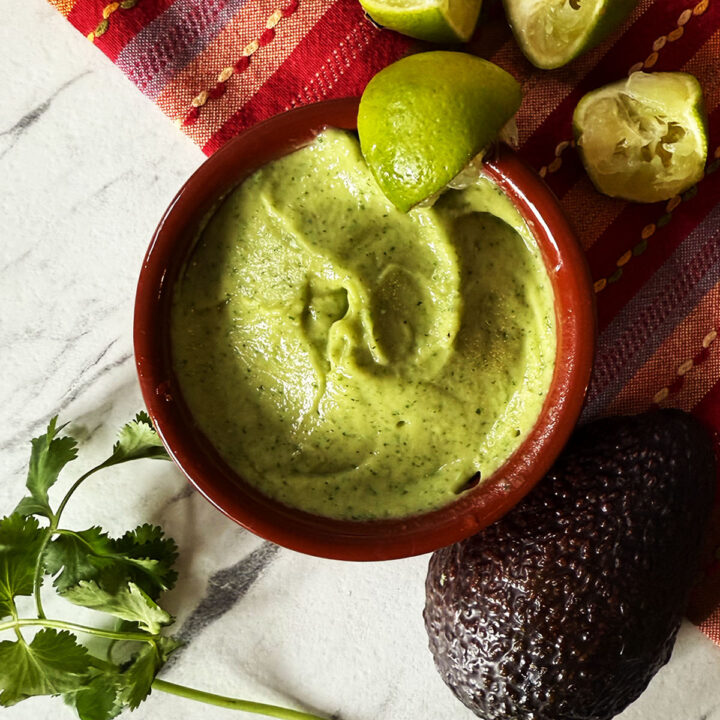
    Salsa de aguacate served in a bowl

    Fresh, vibrant and delicious! This Salsa de Aguacate can be used as the perfect dip for your tortilla chips or drizzled all over your favorite tacos! You just have to give this recipe a try!

    Salsa de aguacate served in a bowl

    About this recipe:

    Salsa de Aguacate is a smooth avocado based salsa that can be used for dipping your homemade tortilla chips in or simply drizzling over your favorite tacos! It's fresh, zesty and has a slight kick of spice. I show you how easy it is to make and how to modify it for your own personal taste.

    [feast_advanced_jump_to]

    Ingredients

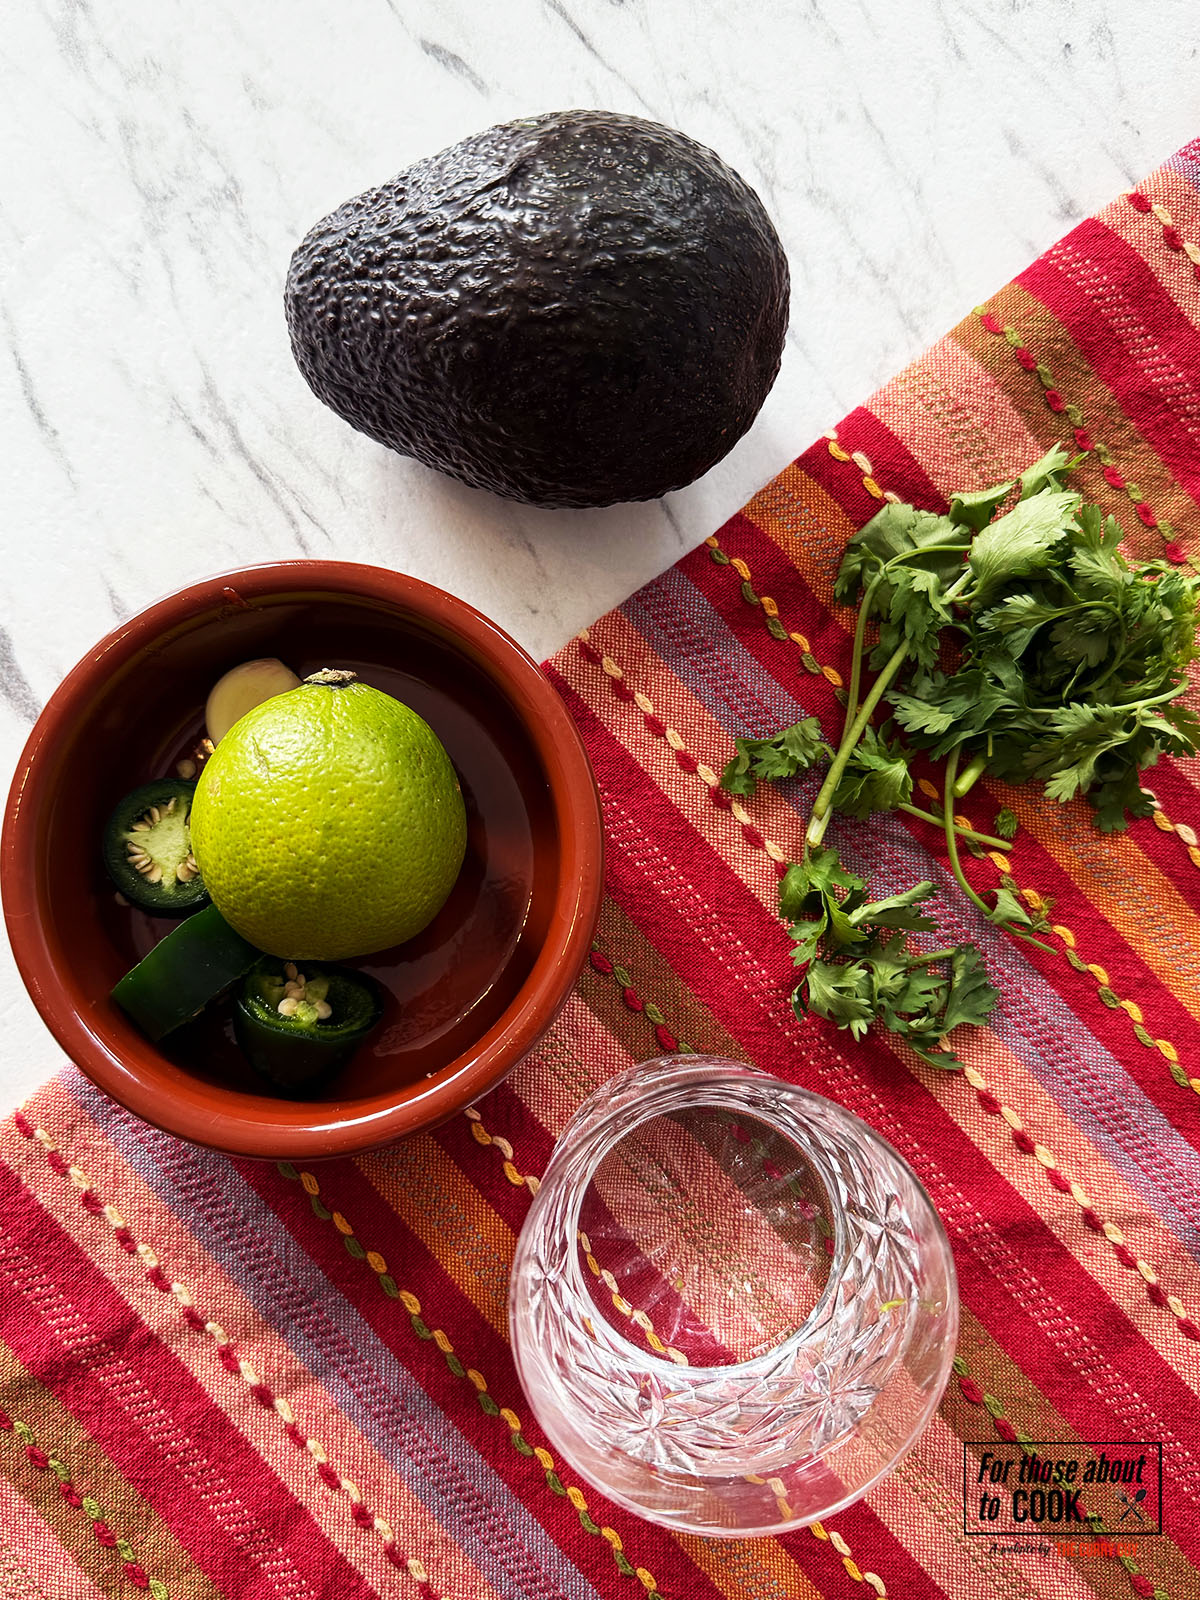
    Avocado, coriander, garlic, lime juice and coriander separated into bowls.
    • Avocado
    • Jalapeño
    • Garlic
    • Lime juiced
    • Coriander
    • Salt
    • Water

    See recipe card for quantities.

    Step by step photographs:

    Avocado, jalapeños, garlic and lime juice in a blender
    1. Step 1: Add avocado, coriander, jalapeño, lime juice, garlic, salt and water to a food processor or blender.
    Salsa de aguacate blended and served in a bowl
    1. Step 2: Blend until smooth.

    What can I serve Salsa de Aguacate with?

    Salsa de Aguacate can be used straight away as a fresh dip to serve with tortilla chips. It is also a great topping for so many tacos, Steak Tacos, Pork Carnitas, Tacos Al Pastor and Beef Tostadas.

    Variations

    The beauty of this recipe is that it is so flavorful yet so simple, here are a few ideas for how you could modify it for your own personal taste:

    • Spicy - Increase the spice level by adding a whole Jalapeño instead of just half!
    • Milder - If you're just wanting a fresh avocado salsa that doesn't have a kick of spice then leave out the jalapeño.
    • Garlic - If you're not a fan of raw garlic in your dips, swap it out for one green onion (spring onion).

    Equipment

    All you will need to make your Salsa de Aguacate is either a food processor or a blender. I prefer to use a blender as it leaves the salsa with a smooth consistency whereas a food processor will make it slightly chunky. It's all down to your own personal preference! If you are wanting to make your Salsa de Aguacate the truly traditional way then you can use a large pestle and mortar.

    Storage

    Transfer your salsa to a small container, cover in a layer of lime juice and cover with clingfilm. Place in the fridge, good for up to 3 days.

    Top Tip

    To store your Salsa de Aguacate in the fridge, cover it in a squeeze of lime juice. This will stop the avocado from browning and keep that vibrant green color!

    FAQ

    Is Salsa de Aguacate the same as guacamole?

    No! Although they both have an avocado base, guacamole is slightly chunkier and can include tomatoes and onion!

    Related

    Looking for other recipes like this? Try these:

    • Pico de gallo in a serving bowl next to homemade corn chips.
      How to Make Pico de Gallo
    • Homemade Guacamole in a serving bowl next to corn chips.
      Guacamole Recipe
    • Fnished corn chips
      Corn Chips
    • Salsa Verde served in a bowl with tortilla chips
      Salsa Verde

    Pairing

    These are my favorite dishes to serve with Salsa de Aguacate:

    • Pork carnitas tacos
      Pork Carnitas Tacos
    • Tacos al pastor on a serving plate
      Tacos al Pastor
    • Fried Fish Tacos
      Fried Fish Tacos
    • Steak tacos on a plate.
      Steak Tacos

    Recipe

    Salsa de aguacate served in a bowl

    Salsa de Aguacate

    Yield: 4
    Prep Time: 5 minutes
    Total Time: 5 minutes

    Fresh, vibrant and delicious! This Salsa de Aguacate can be used as the perfect dip for your tortilla chips or drizzled all over your favorite tacos! You just have to give this recipe a try!

    No Ratings

    Ingredients

    • 1 Avocado
    • ½ Jalapeño
    • 1 clove garlic
    • 1 lime juiced
    • 1 handful coriander
    • ½ teaspoon salt
    • ¼ cup(60ml) water

    Instructions

      1. Add avocado, coriander, jalapeño, lime juice, garlic, salt and water to a food processor or blender.
      2. Blend until smooth.
    Nutrition Information:
    Yield: 4 Serving Size: 1
    Amount Per Serving: Calories: 123Total Fat: 8gSaturated Fat: 1gTrans Fat: 0gUnsaturated Fat: 6gCholesterol: 0mgSodium: 298mgCarbohydrates: 13gFiber: 5gSugar: 2gProtein: 4g
    © Shannon
    Cuisine: Mexican / Category: Mexican Recipes

    Easy Samosa Recipe

    July 14, 2025 By Dan

    Hand reaching for one of the easy Keema Samosas

    I think you’re going to love this easy samosa recipe. Perhaps even more than other more complicated recipes for samosas. My personal favourite samosas are Punjabi samosas that are slowly fried in hot but not crazy hot oil for 8 minutes before turning up the heat to high to brown and crisp them. That is really what you are going to get here. In this post, I’m going to show you my little cheat that cuts out the hard work without any loss of deliciousness!

    Hand reaching for one of the easy Keema Samosas

    About this easy samosa recipe

    This was a bit of an experiment after making countless samosas over the years. Instead of purchasing samosa wrappers which aren’t great and are also a bit fussy to fold, I used frozen parathas. The parathas are prepared in a similar way to the pastry you use to make authentic Punjabi samosas so needless to say, the experiment worked!

    As I love Punjabi style samosas, I have made pastry for them many times. I posted a couple of recipes for them on my other blog including this beef samosa recipe, if you would like to try making the pastry. When you make this easy samosa recipe, you will cut out all that pastry work and you really won’t notice any difference.

    For this recipe, I filled the samosas with my 30 Minute Keema but you could also make them veggie or try any filling you like.

    Ingredients

    Although this is an easy samosa recipe using beef keema, you would fill these samosas with your filling of choice. You could try a chicken samosa or a vegetarian samosa filling if you like.

    Ingredients for the recipe laid out on a countertop.
    • Keema curry
    • Parathas
    • Flour
    • Vegetable oil

    See recipe card for quantities.

    Instructions

    Although I have used homemade beef keema for this easy keema samosas recipe, you can use the filling of your choice. If it sounds good, do it. The exact ingredients and link to the keema recipe are in the recipe card at the bottom of the page.

    Slicing a frozen paratha in half and dusting it with flour.
    1. Step 1: Let the paratha rounds defrost a little for about 10 minutes. Then take one of the parathas and slice it in half. Dust all of the parathas with a little flour so that they don’t stick when defrosting.
    Making the samosa into a pocket and filling with the meat mixture.
    1. Step 2: Pick one of the halves up and bring the two corners together. Press them to seal and the seal the seam with your fingers to form a small pocket. Fill this pocket with a few tablespoons of the keema.
    Showing a filled samosa before closing it shut.
    1. Step 3: You can add as much filling as you like. Just be sure there is a little room at the top so that you can press the samosas shut.
    Using a fork to seal the samosa shut.
    1. Step 4: Ensure the middle seam of each samosa is tightly pressed together and then close the samosa using a fork to press the end seam together. Repeat with all the remaining parathas and keema.
    Adding the samosas to medium hot oil to fry for 8 minutes.
    1. Step 5: Heat a few inches of oil in a pan. You don’t want the oil to be really hot but simply bubbling. Add as many samosas as you can to the bubbling oil and let them cook for about 8 minutes.
    The samosas starting to brown in the medium hot oil.
    1. Step 6: As the samosas cook in the medium hot oil, they will begin to brown some. It takes about 8 minutes. Now turn the heat up to high and continue frying for another couple of minutes or until the samosas are turning crispy.
    The finished samosas in the hot oil ready to transfer to a paper towel.
    1. Step 7: When the samosas have cooked to your liking, transfer the to a paper towel.
    Samosas on a paper towel.
    1. Step 8: Let the excess oil soak into the paper towel for a couple of minutes before serving.
    Easy Keema samosas on a serving platter.
    1. Step 9: Serve hot with your favourite hot sauce or dip.

    Variations

    If you are making this recipe as written, you will be using my 30 minute beef keema recipe. That recipe can be tailored to taste.

    • Spicy - Add more chillies or chilli powder for a bit more kick.
    • Deluxe - Introduce other ingredients such as small cubes of paneer, potatoes or peas. I like mine just with the meat mixture though.
    • Kid friendly - Leave out the spices. The keema will still taste great and everyone can enjoy them.

    Equipment

    A large pot or high-sided pan: All you need is a pan or pot large enough to hold all the samosas you made. They are all cooked together.

    A slotted spoon or spatula: For transferring the cooked samosas to a paper towel to soak up the excess oil.

    Storage

    You can store any leftover, cooked samosas you have in the fridge for 3 to 4 days. Just be sure to cover them tightly so that they don’t dry out.

    You can also freeze leftovers for up to 6 months. Store them in an airtight container or freezer bag and let them defrost for about an hour before reheating.

    To reheat: Reheat your samosas in hot oil until heated through or in an air fryer or oven set to 180°C/375°F for about 10 minutes or until heated through.

    Top Tip

    Double or Triple The Recipe: These samosas are great to have on hand for that last minute curry feast. Freeze those you aren’t serving immediately before frying. Yes, raw on as baking tray until frozen. Then transfer to a freezer bag or airtight container and take them out to fry as needed.

    FAQ

    Where to you purchase frozen parathas?

    You will find frozen parathas and almost every Indian grocer. If you live somewhere where you can’t get them, try using frozen flour tortillas or chapatis.

    Is this recipe difficult?

    Not at all. Hence the name. You might find the first one or two a bit of a fuss to make but once you get the hang of it, you will find it very easy.

    Can you batch cook these samosas?

    Yes but I do recommend preparing them all and freezing them raw. You can then simply take them out of the freezer to defrost for about 30 minutes and follow the recipe. I do this all the time.

    Can you air fry these samosas instead of frying?

    You bet! Spray your air fryer basket with oil and also spray the samosas with oil. Air fry at about 200°C/400°F for about 12 minutes. They won’t be quite the same as the fried version but they will still be awesome!

    Related

    You will love these easy samosas with any of these curries:

    • Chicken chilli garlic curry in a serving bowl next to rice and naans.
      30 Minute Chicken Chilli Garlic Curry
    • finished lamb rogan josh served with naan
      30 Minute Lamb Rogan Josh
    • Butter chicken topped with cream
      30 minute Butter Chicken
    • Finished chicken tikka masala sreved with rice and naan
      30 Minute Chicken Tikka Masala

    Easy Samosa Recipe

    Recipe

    Easy Keema samosas on a serving platter.

    Easy Samosa Recipe

    Yield: 4 to 6
    Prep Time: 20 minutes
    Cook Time: 10 minutes
    Total Time: 30 minutes

    This easy samosa recipe is more a process than a recipe. You can fill these samosas samosas with whatever you like. Just be sure to fold and cook them as explained in the recipe and you are in for a real treat!

    No Ratings

    Ingredients

    • ½ batch keema curry, cooked until quite dry
    • 6 frozen parathas
    • Flour for dusting
    • Oil for frying

    Instructions

    1. Let the paratha rounds defrost a little for about 10 minutes. Then take one of the parathas and slice it in half. Dust all of the parathas with a little flour so that they don’t stick when defrosting.
    2. Pick one of the halves up and bring the two corners together. Press them to seal and the seal the seam with your fingers to form a small pocket. Fill this pocket with a few tablespoons of the keema.
    3. You can add as much filling as you like. Just be sure there is a little room at the top so that you can press the samosas shut.
    4. Ensure the middle seam of each samosa is tightly pressed together and then close the samosa using a fork to press the end seam together. Repeat with all the remaining parathas and keema.
    5. Heat a few inches of oil in a pan. You don’t want the oil to be really hot but simply bubbling. Add as many samosas as you can to the bubbling oil and let them cook for about 8 minutes. 
    6. As the samosas cook in the medium hot oil, they will begin to brown some. It takes about 8 minutes. Now turn the heat up to high and continue frying for another couple of minutes or until the samosas are turning crispy.
    7. When the samosas have cooked to your liking, transfer the to a paper towel.
    8. Let the excess oil soak into the paper towel for a couple of minutes before serving.Let the paratha rounds defrost a little for about 10 minutes. Then take one of the parathas and slice it in half. Dust all of the parathas with a little flour so that they don’t stick when defrosting.
    9. Pick one of the halves up and bring the two corners together. Press them to seal and the seal the seam with your fingers to form a small pocket. Fill this pocket with a few tablespoons of the keema.
    10. You can add as much filling as you like. Just be sure there is a little room at the top so that you can press the samosas shut.
    11. Ensure the middle seam of each samosa is tightly pressed together and then close the samosa using a fork to press the end seam together. Repeat with all the remaining parathas and keema.
    12. Heat a few inches of oil in a pan. You don’t want the oil to be really hot but simply bubbling. Add as many samosas as you can to the bubbling oil and let them cook for about 8 minutes. 
    13. As the samosas cook in the medium hot oil, they will begin to brown some. It takes about 8 minutes. Now turn the heat up to high and continue frying for another couple of minutes or until the samosas are turning crispy.
    14. When the samosas have cooked to your liking, transfer the to a paper towel.
    15. Let the excess oil soak into the paper towel for a couple of minutes before serving.
    Nutrition Information:
    Yield: 6 Serving Size: 1
    Amount Per Serving: Calories: 394Total Fat: 14gSaturated Fat: 5gTrans Fat: 0gUnsaturated Fat: 7gCholesterol: 17mgSodium: 382mgCarbohydrates: 54gFiber: 9gSugar: 4gProtein: 13g
    © Dan
    Cuisine: Indian / Category: Indian
    • « Previous Page
    • 1
    • …
    • 4
    • 5
    • 6
    • 7
    • 8
    • …
    • 25
    • Next Page »
    For Those About To Cook

    Welcome To For Those About To Cook

    We're a family-run food blog sharing brand-new recipes every week. From easy weeknight staples to indulgent weekend favorites. We're a team of five: Dan (The Curry Guy), Caroline, Joe, Shannon, and Jennifer, bringing you a wide variety of dishes inspired by Europe, the Mediterranean, the Americas, and more.

    This site focuses on Western-inspired recipes, while Eastern flavors are covered in depth over at greatcurryrecipes.net Between the two, you'll find everything you need to cook up something amazing so don't forget to subscribe!

    Subscribe

    Footer

    Contact Privacy Policy

    Subscribe for weekly updates!

    Subscribe
    ↑ back to top

    Copyright © 2024 For Those About to Cook